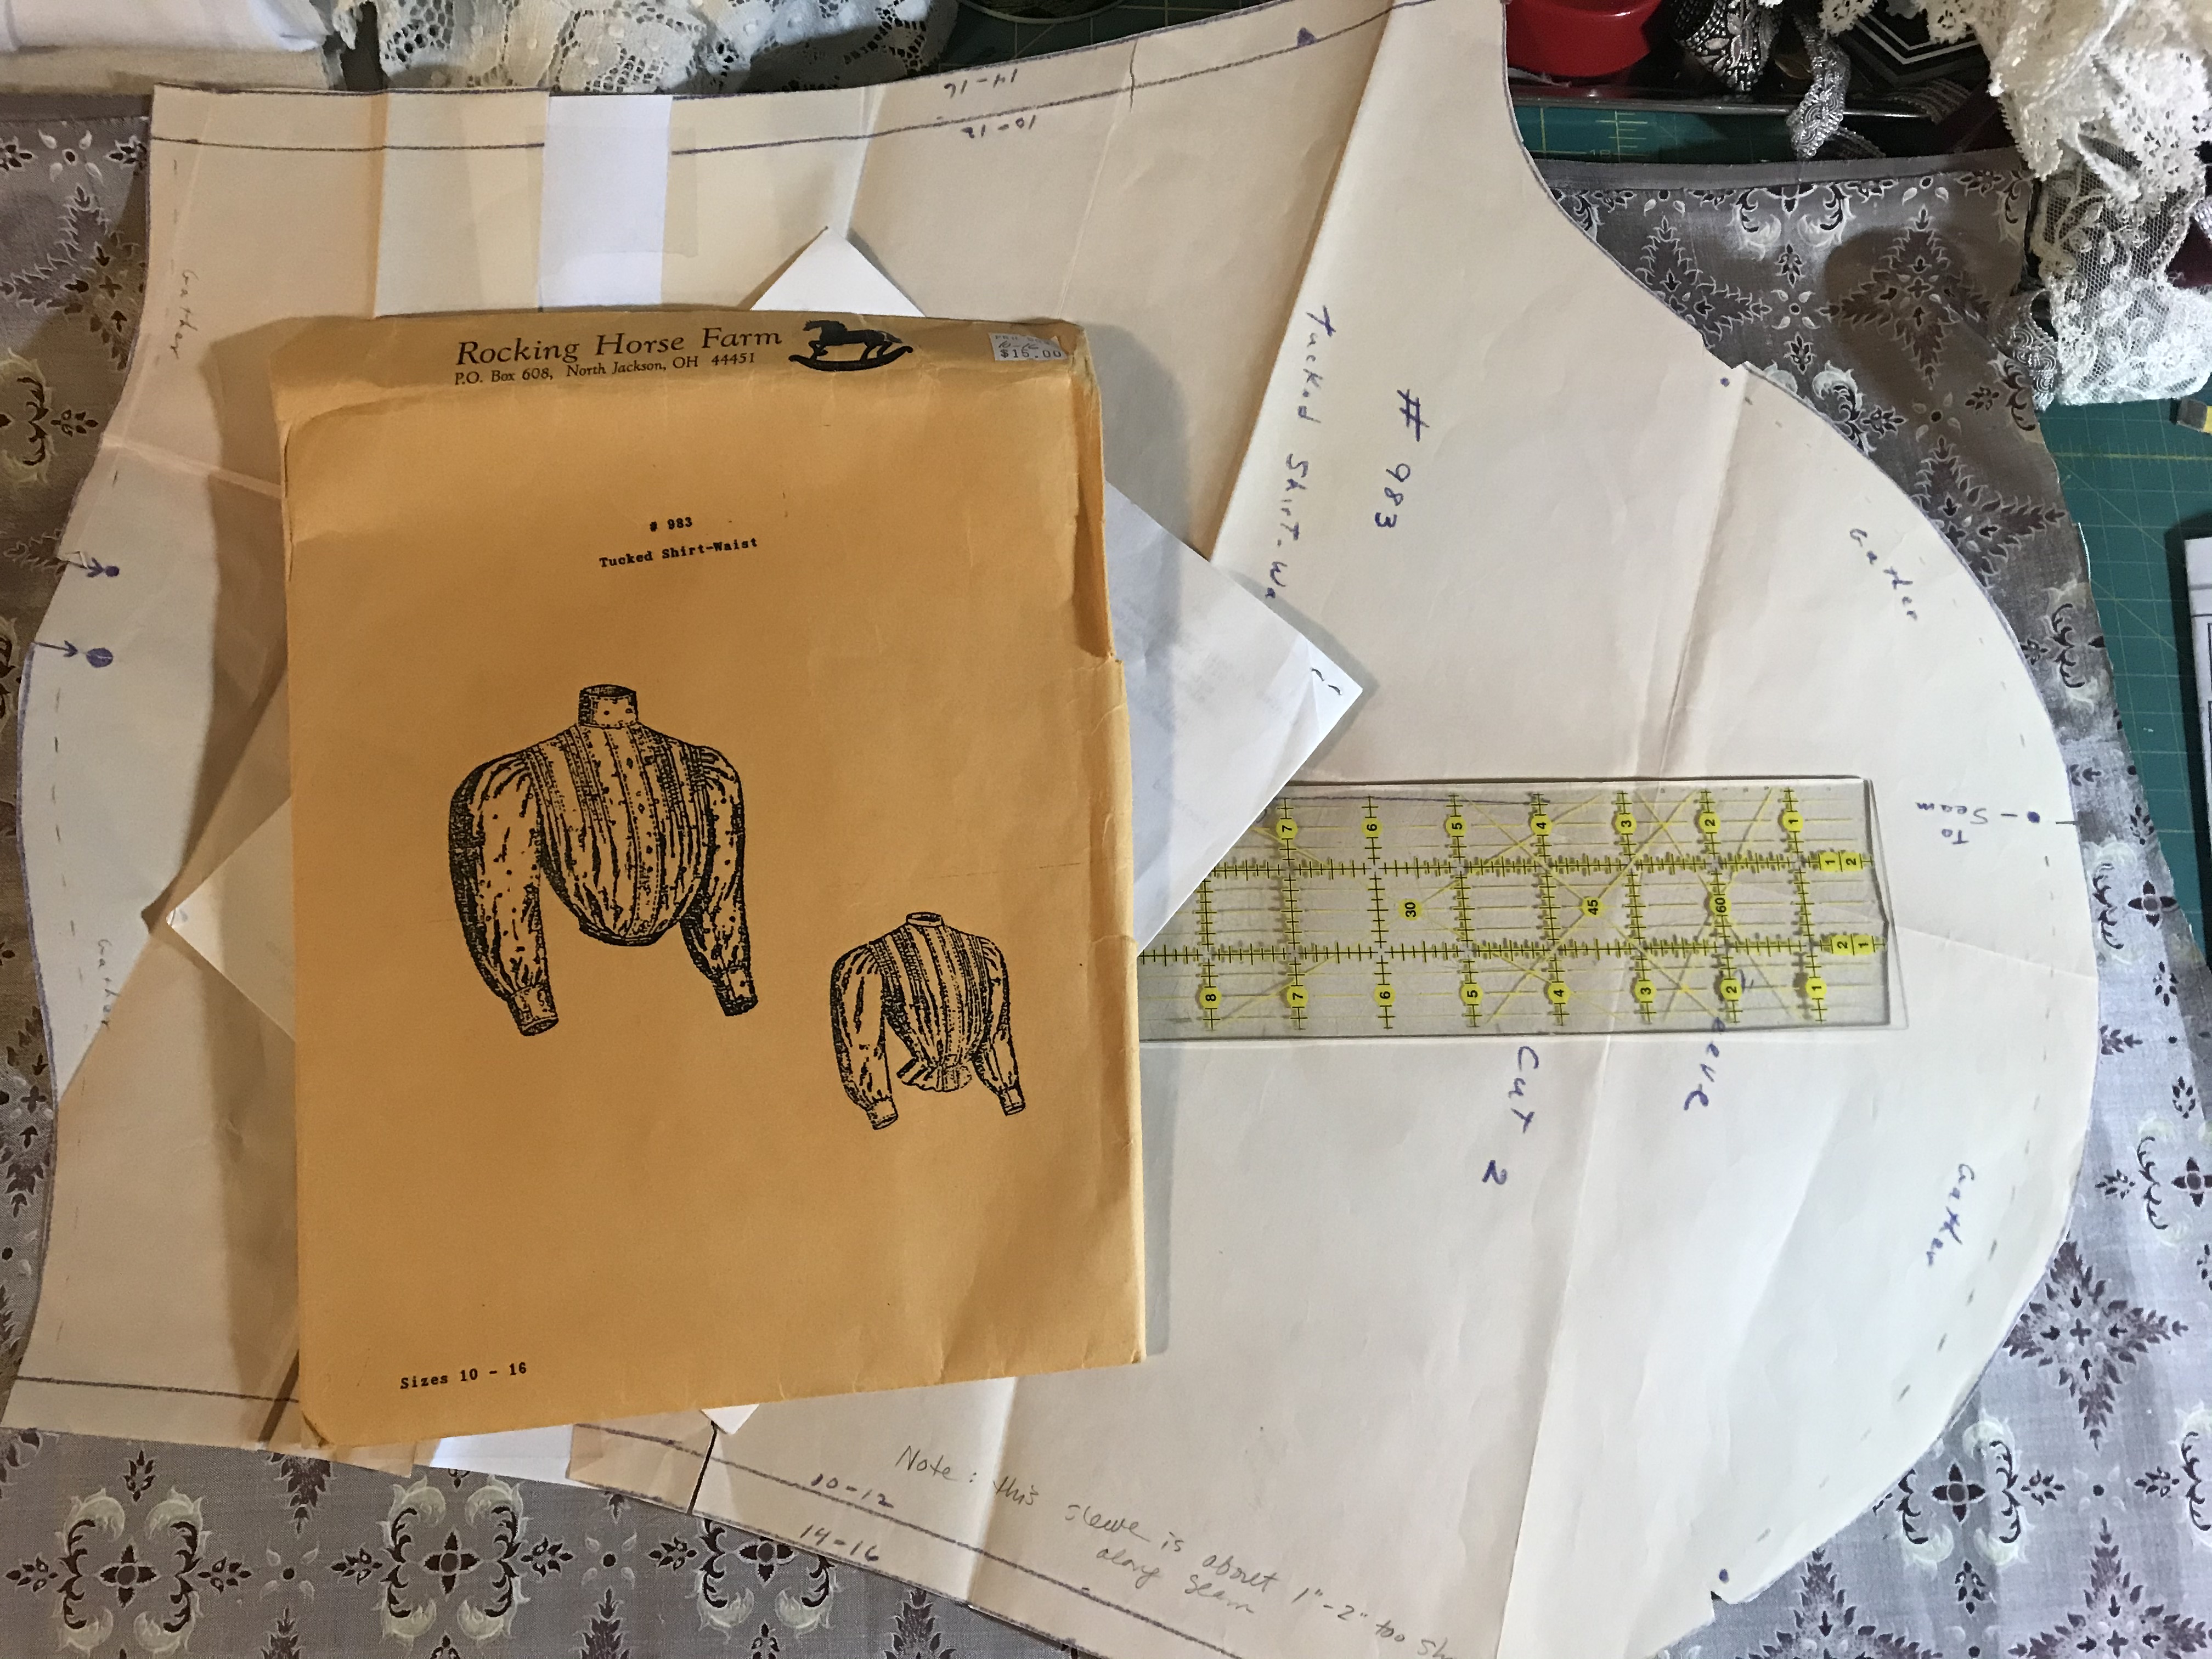
I loved Lucy Ward Montgomery’s short story, “Penelope’s New Waist”. Of course, as a fashion historian, I was curious about the style. What sort of a blouse (our name for the waist) could Doris make in three evenings? After all, she worked all day long as a “typewriter” in an office uptown. She only had a few hours for this fancy waist.
The story was published in 1904, so I looked at fashion plates from 1904 and slightly earlier to get a sense of the style. This was an age of excess! Some of these gowns and waists featured elaborate combinations of both black and white lace with colored silk fabrics. It seems that lavish trims were preferable to restraint or good taste.
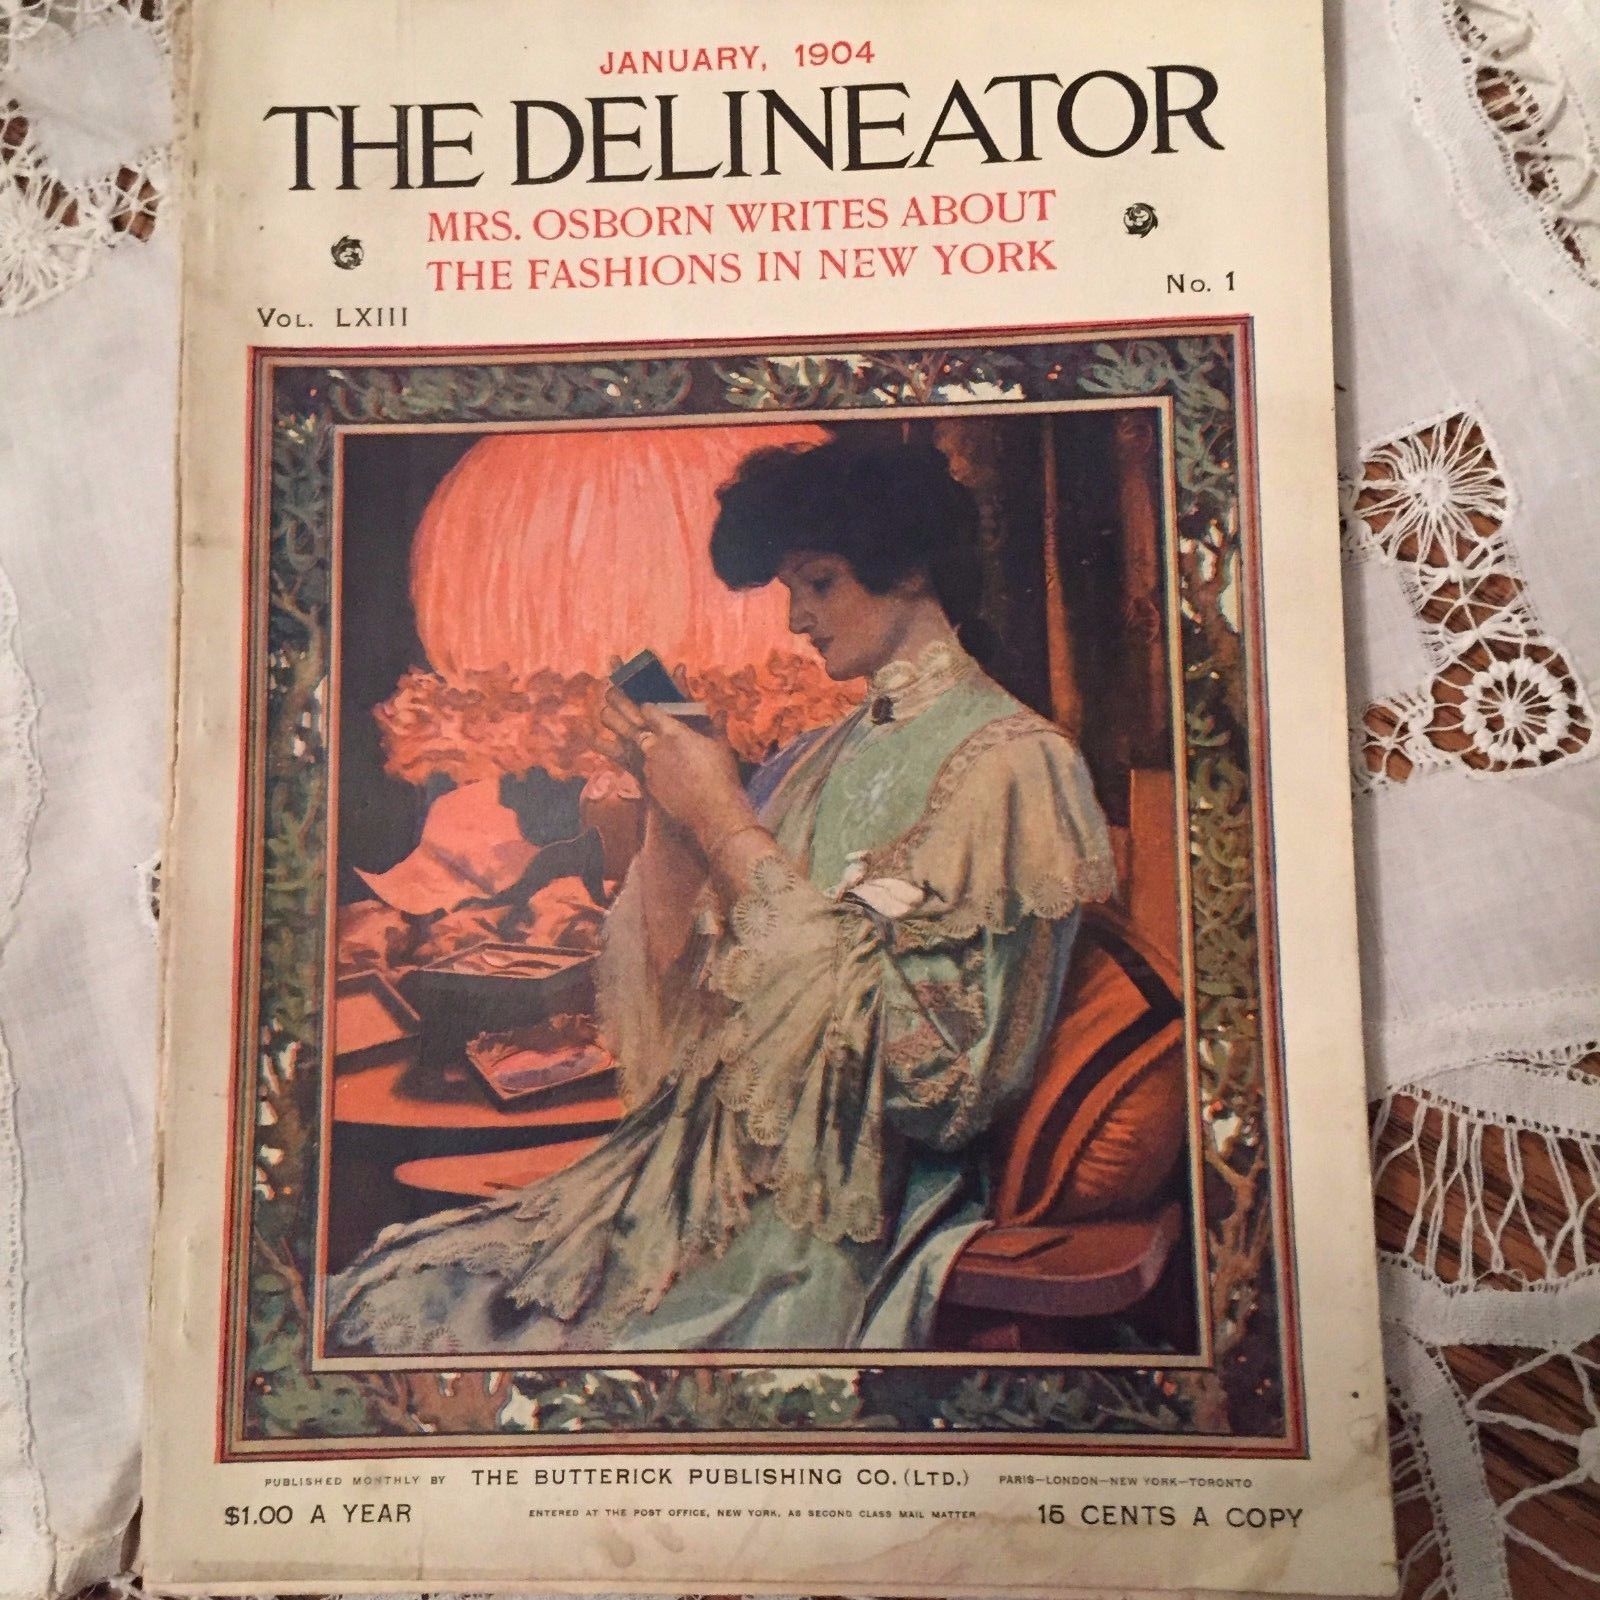
Lovely place to research: January, 1904 Delineator magazine

1904 Day Dress from the Galleria del Costume di Palazzo Pitti, Europeana Fashion

1906 November McCall’s; The Stylish Jumper Waist
Designing the Waist
I knew that I didn’t want to buy new fabric for this project; after all, I have been collecting fabric treasures for years. I also had some antique velvet ribbons in a lovely mulberry color; somehow, I wanted to use these in my new party waist. I gathered several fabrics and trims that I thought would work, and I pondered my choices overnight.
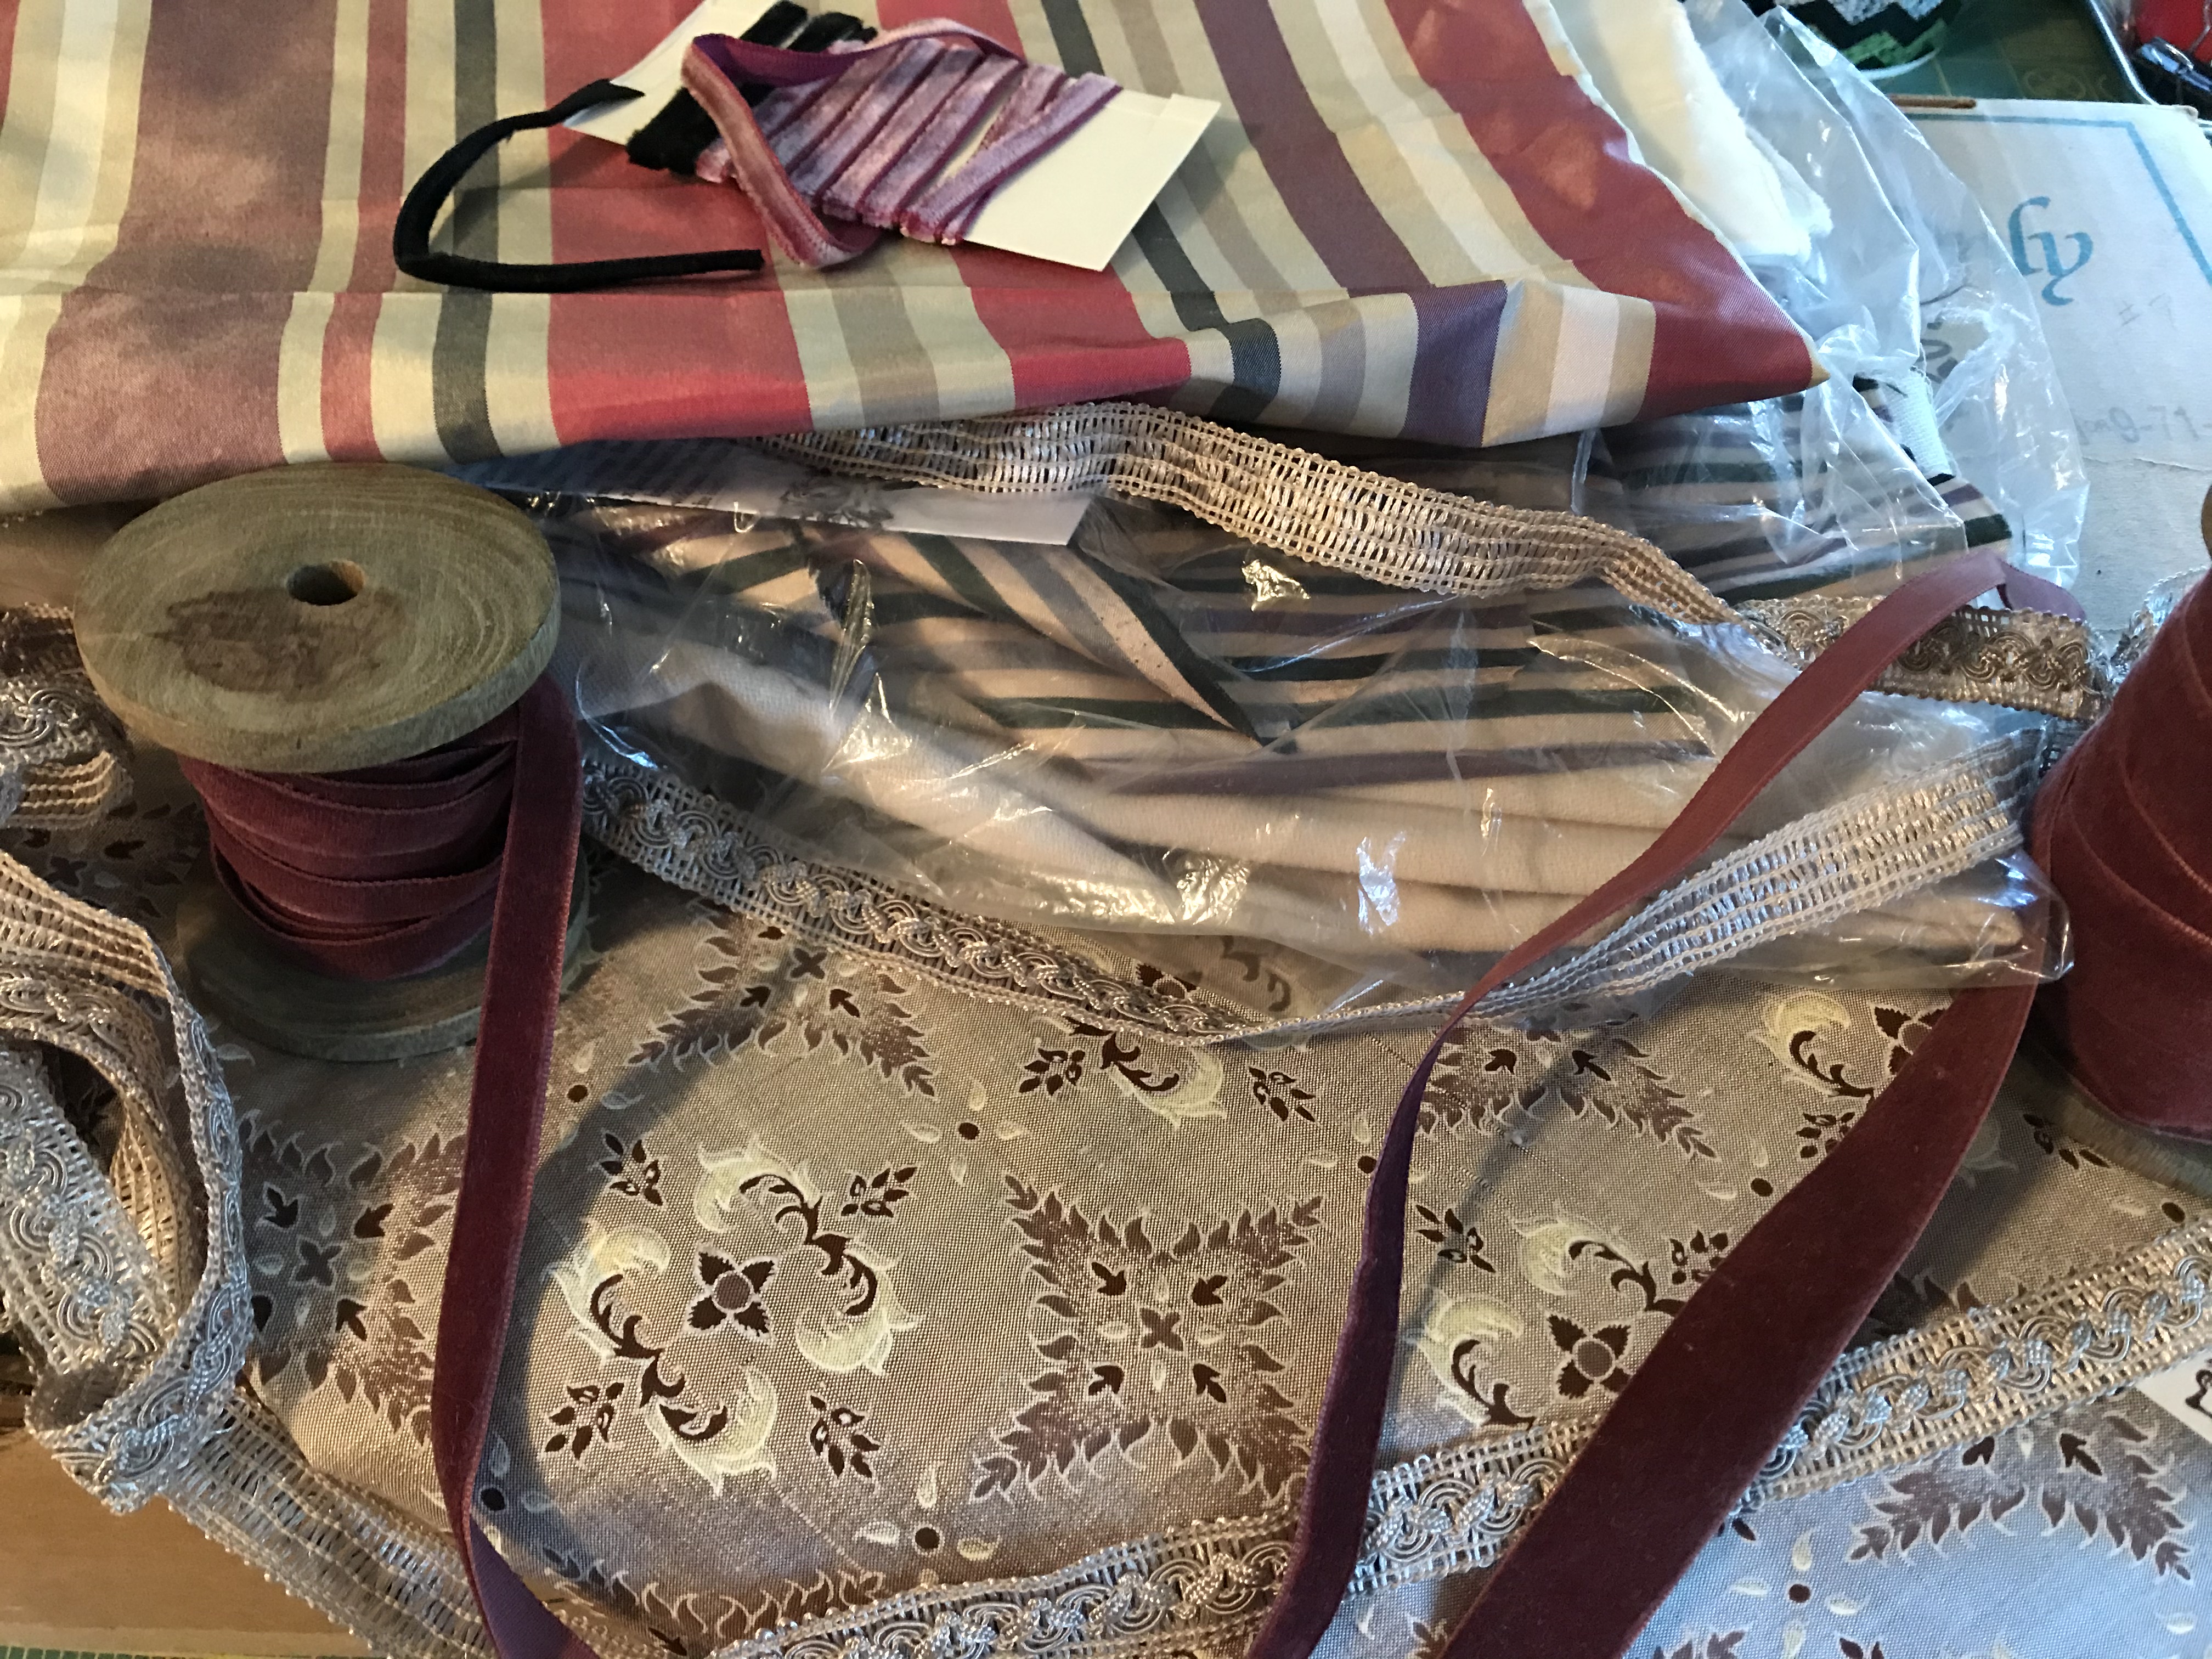
I decided that the crisp printed silk looked best with the velvet ribbons. I had a mauve iridescent silk that harmonized well, so I decided to use it as an accent. Then it was time to choose the style.
Since my velvet ribbons were fairly stiff, they wouldn’t work for curved details. I decided on the square necked, asymmetrical style shown in a December 1905 McCall’s magazine. The general shape and the pleats were similar to tailored waist patterns I have used before, so I would be able to adapt them.
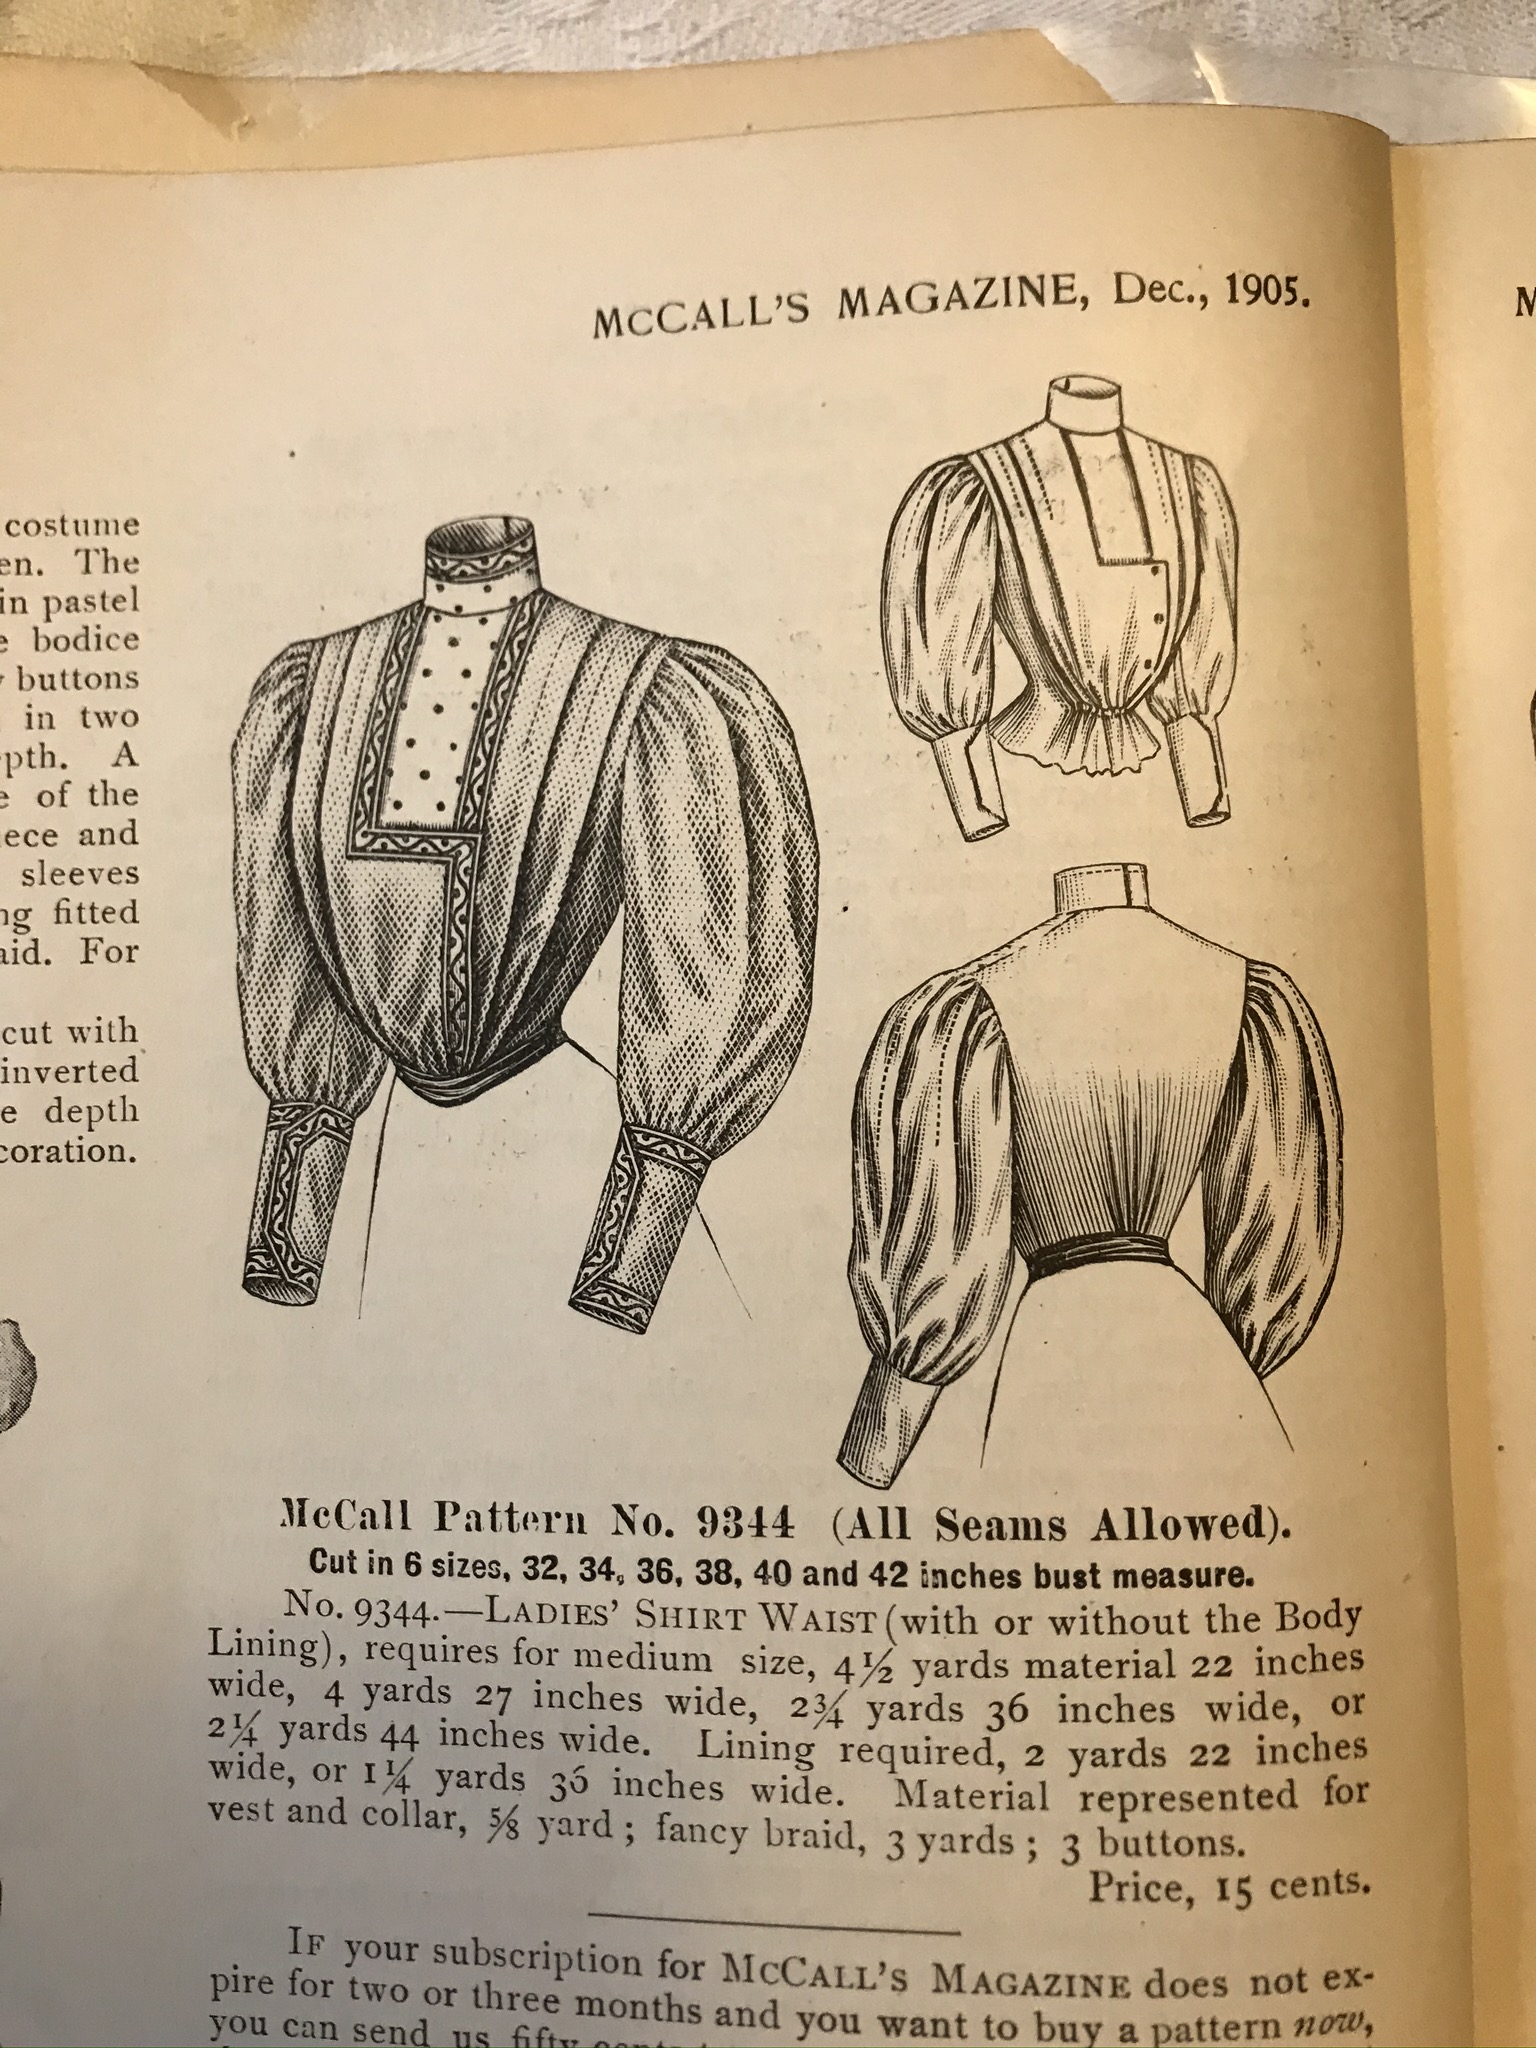
December 1905 McCall’s Magazine

A rough sketch of the Party Waist design
Sewing the waist
When I am sewing Edwardian styles, I try to follow the methods they would have used. I am fortunate to have a library of sewing books, including this one:
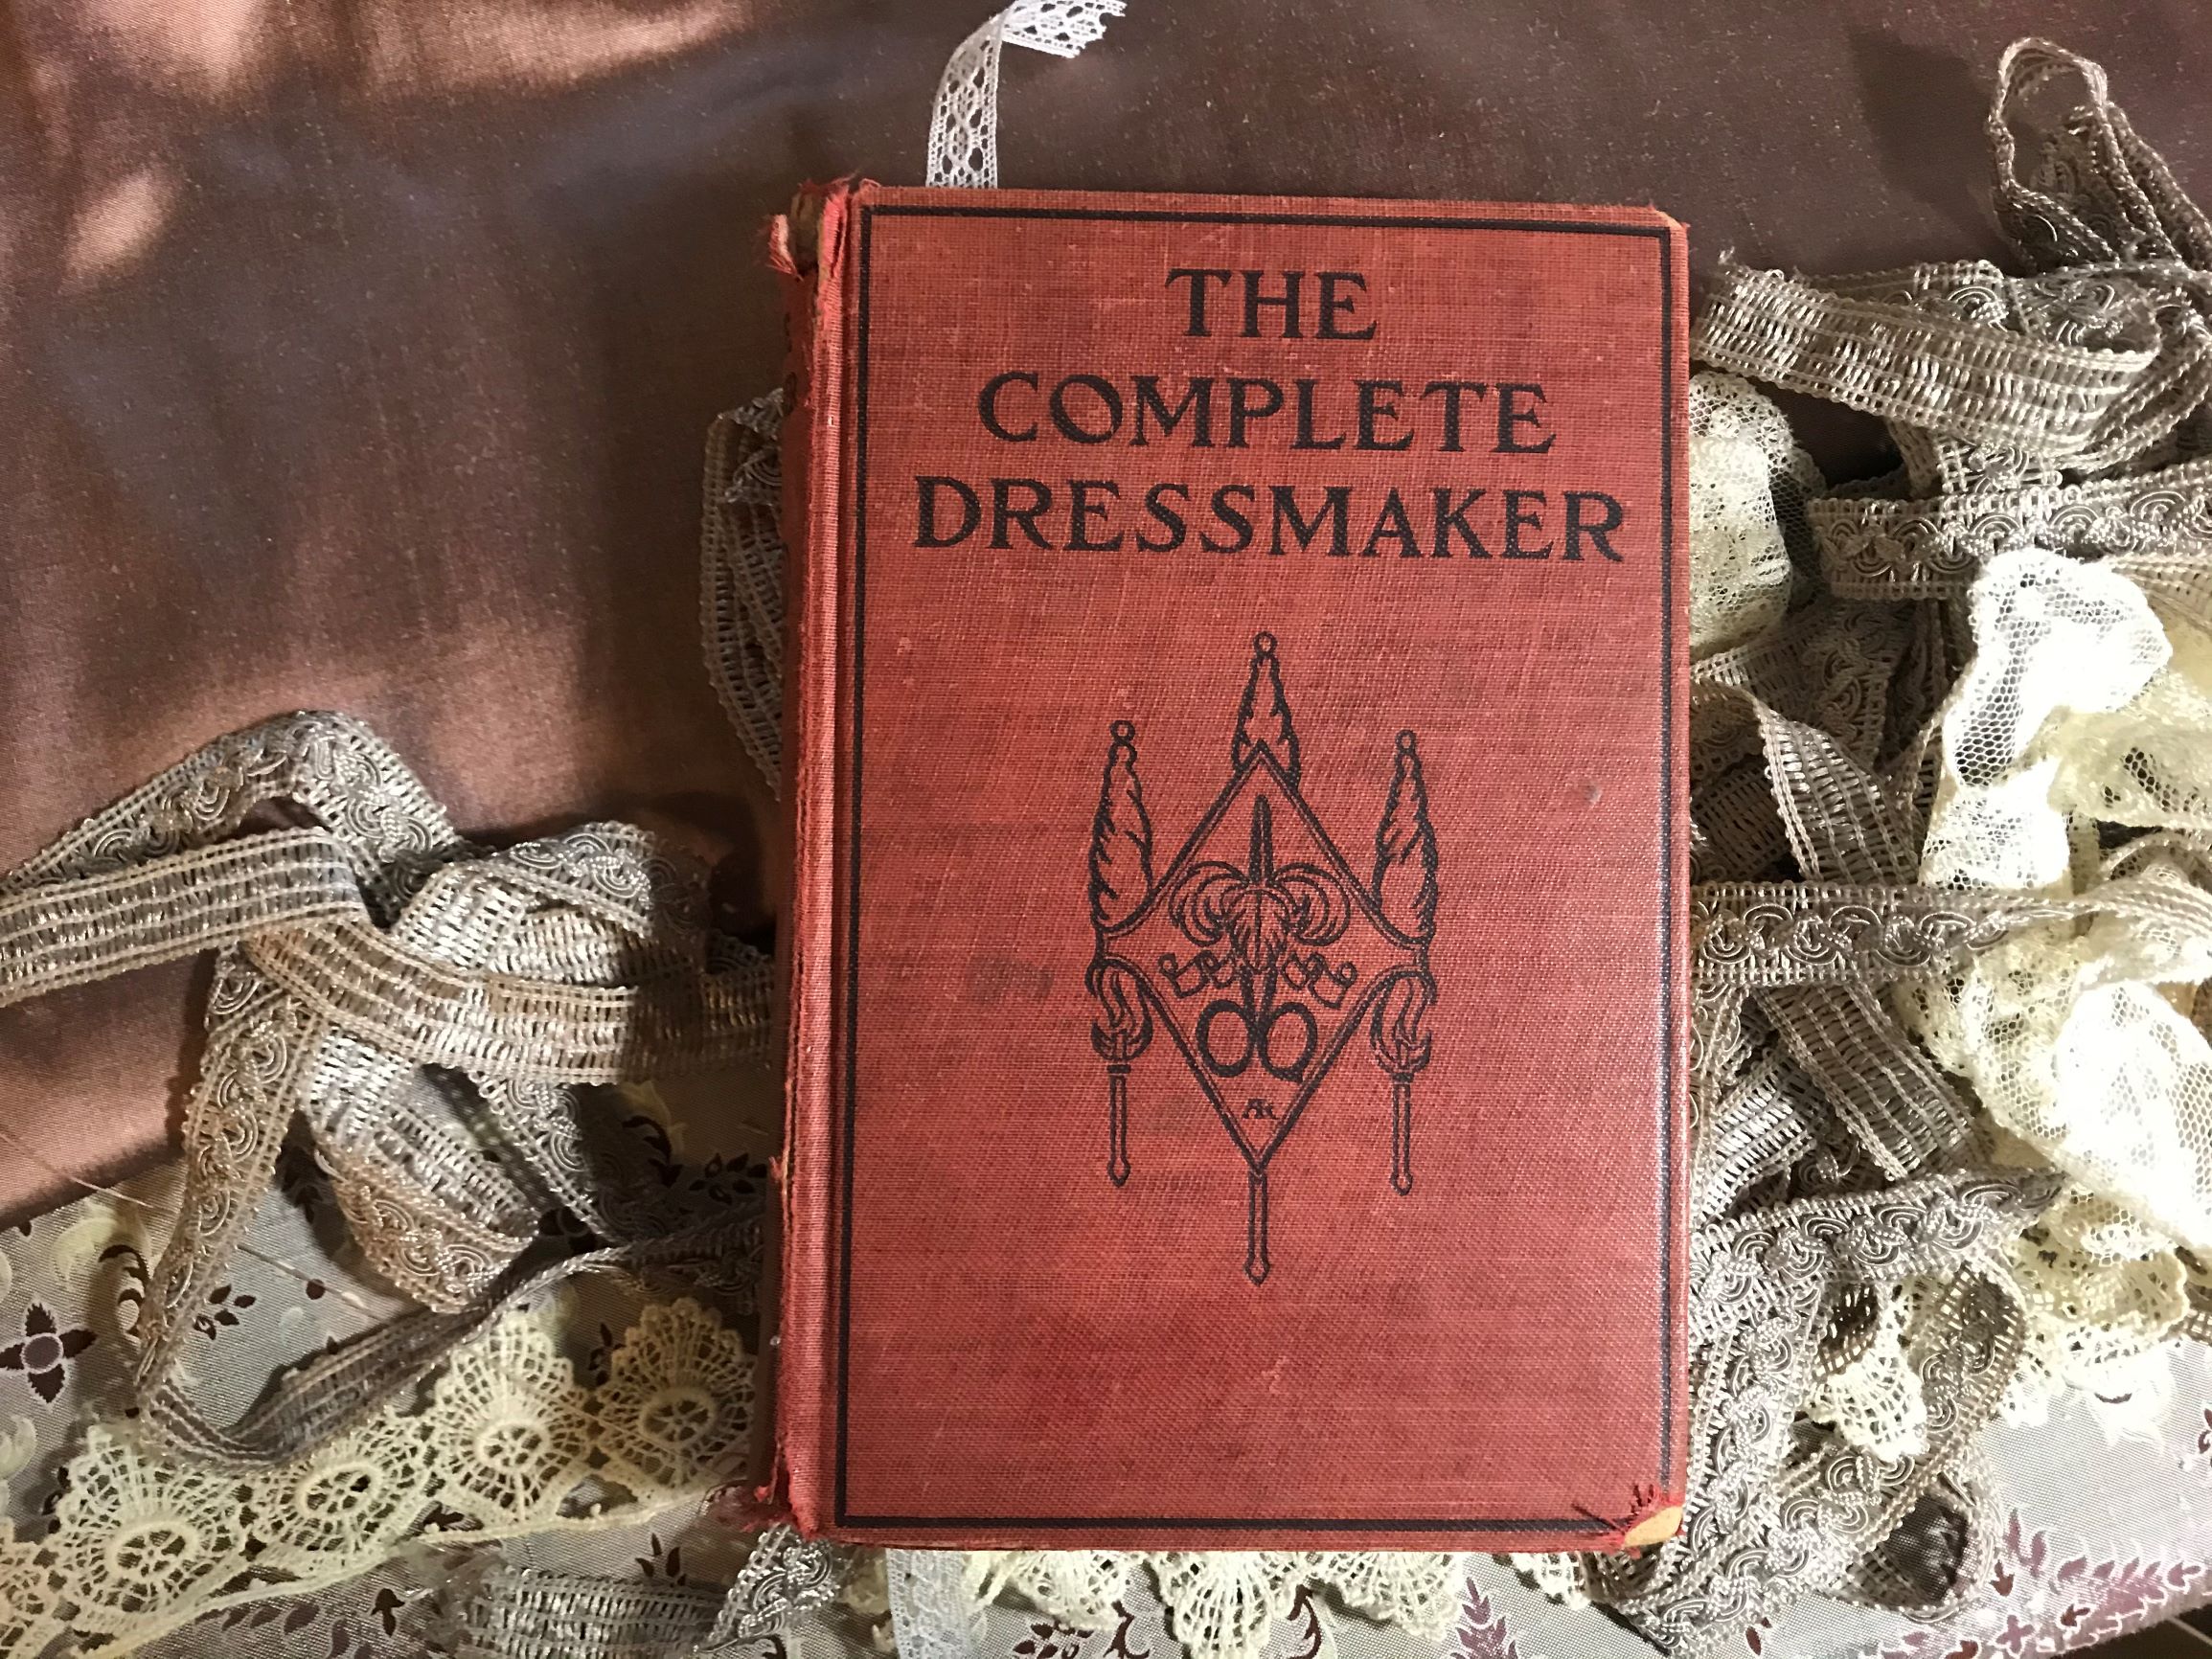
The Complete Dressmaker, 1916 edition; first published in 1907
I started with the lining, using a sloper pattern already adapted to my measurements. I used an antique mannequin that has measurements very similar to mine, plus the fashionable Edwardian figure. I fitted my lining on her.
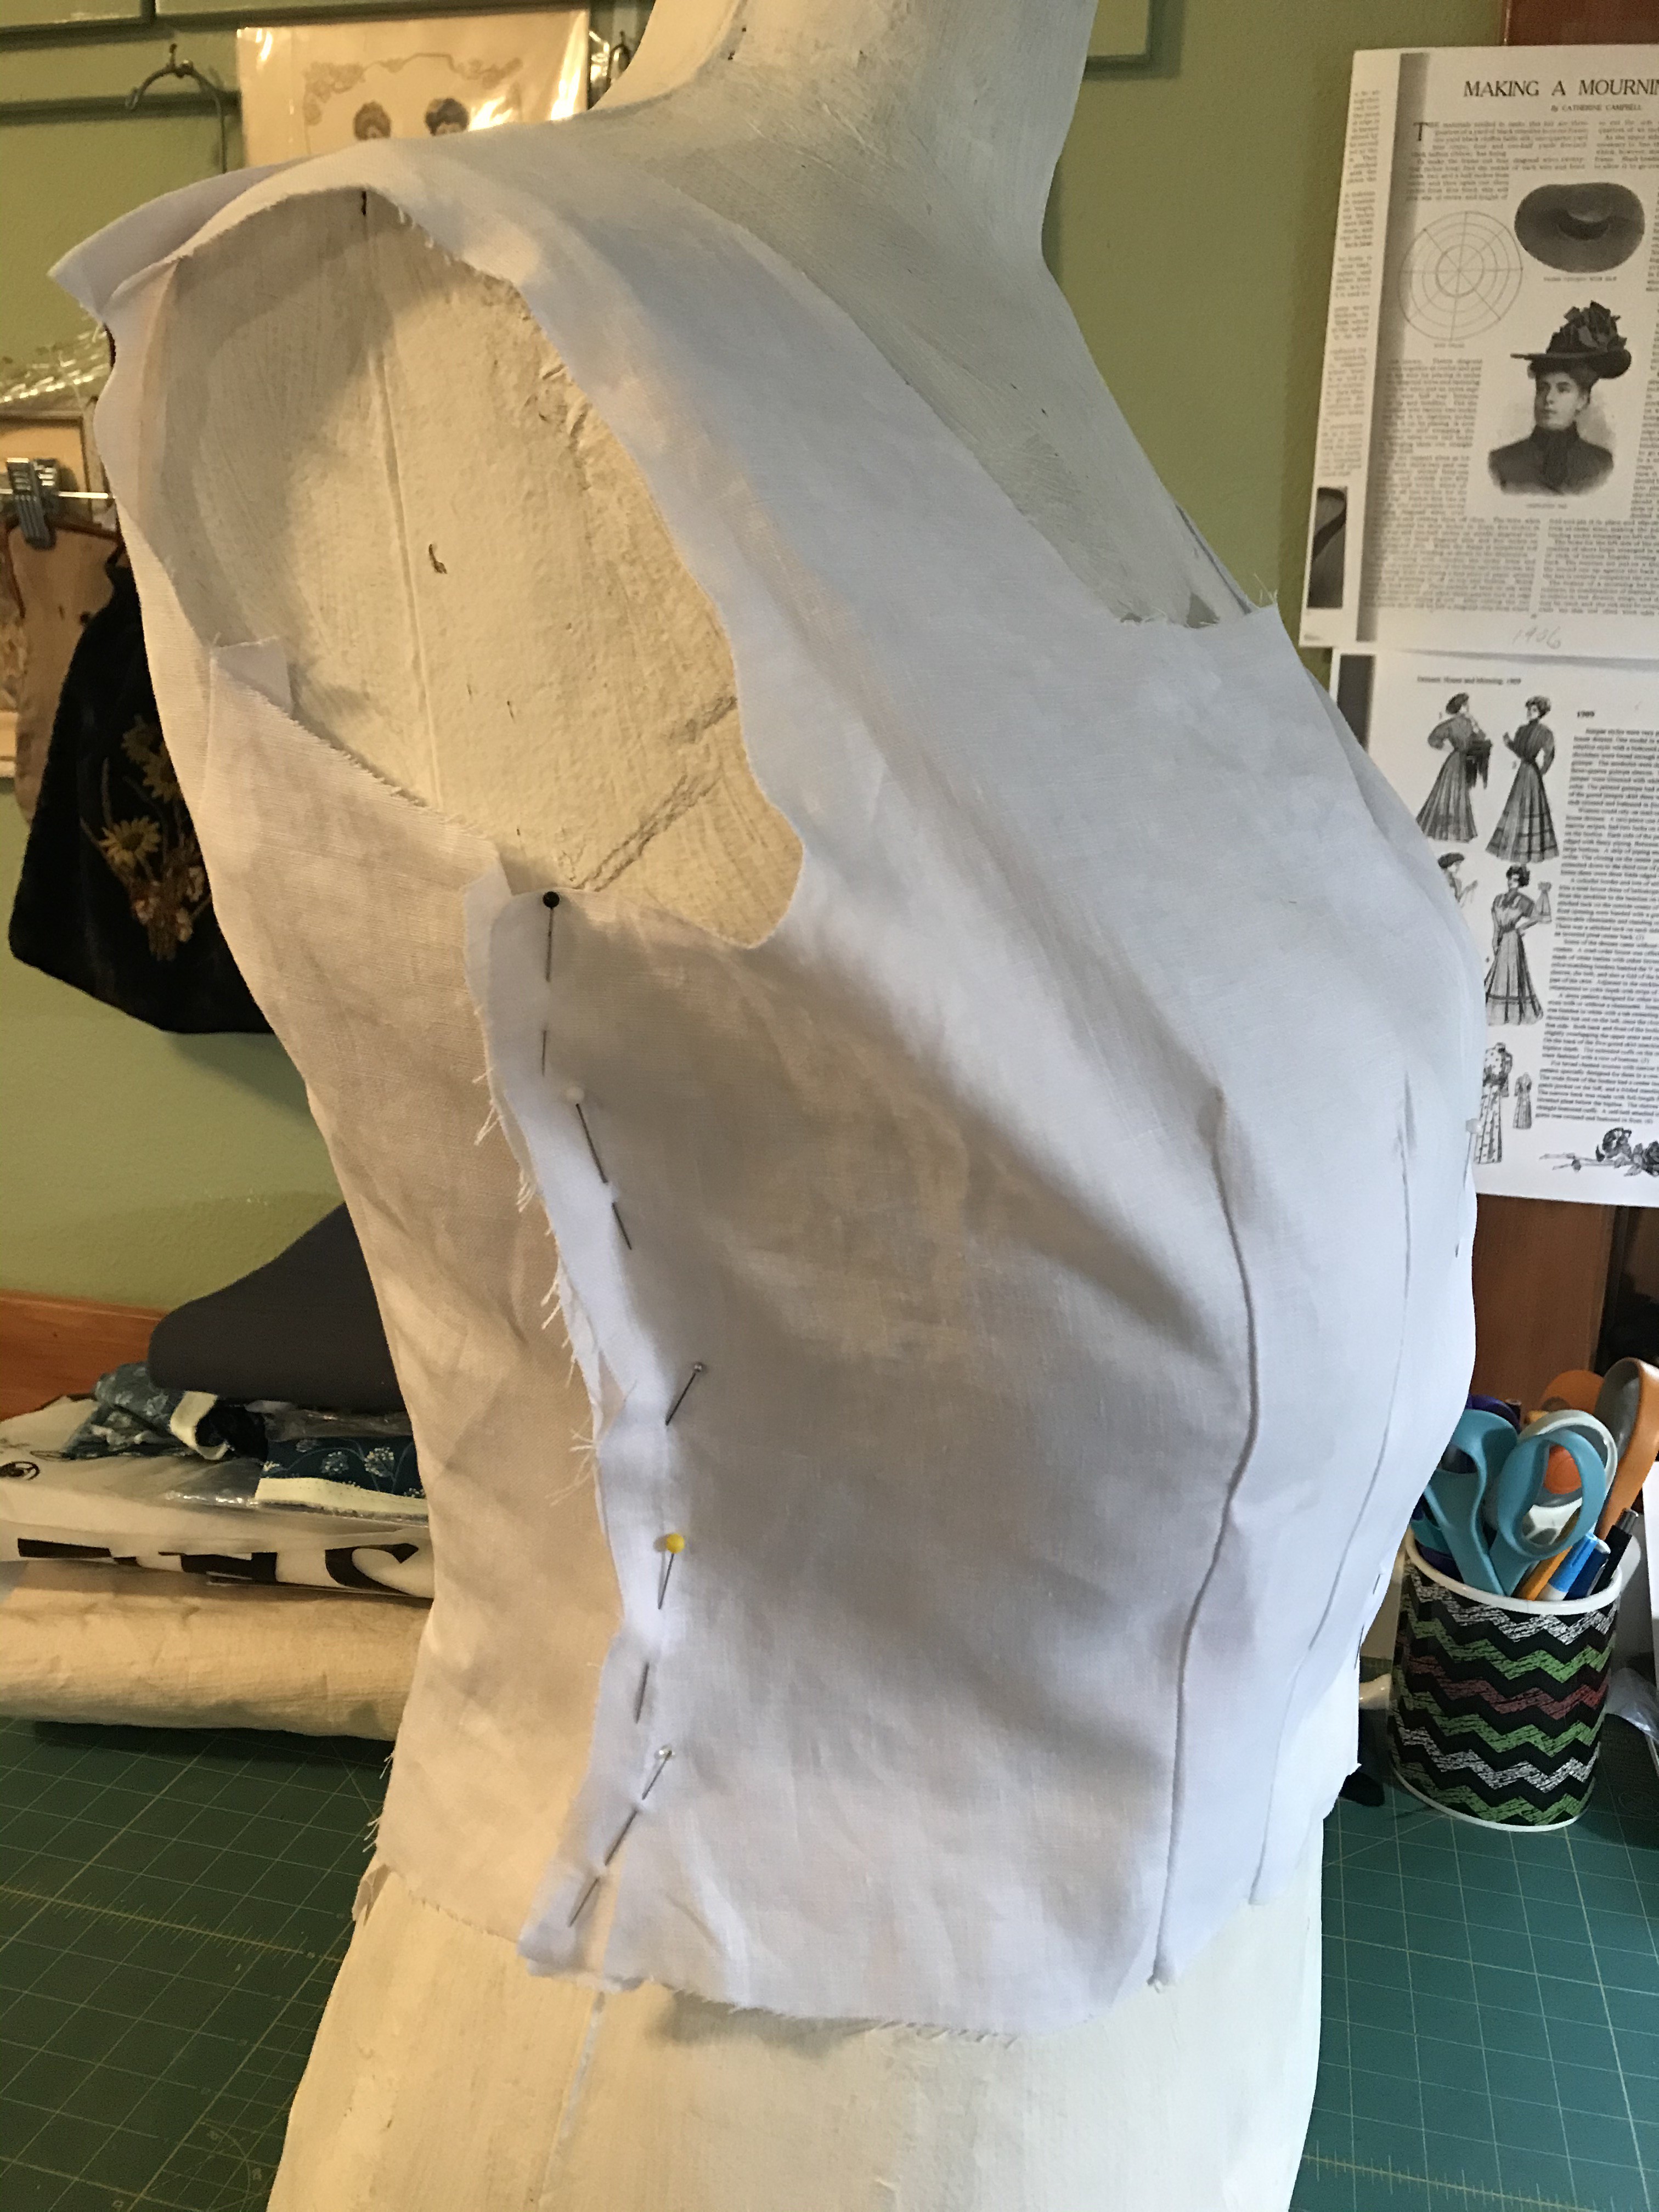
First fitting; note the pulling at the bust and the gaping at the armscye
I wasn’t happy with the fit, especially the gaping armscye. I experimented with lowering my dart points to give it more room across the bust. I also tweaked the shape of the back section.

Much better fit when the bust darts were lowered
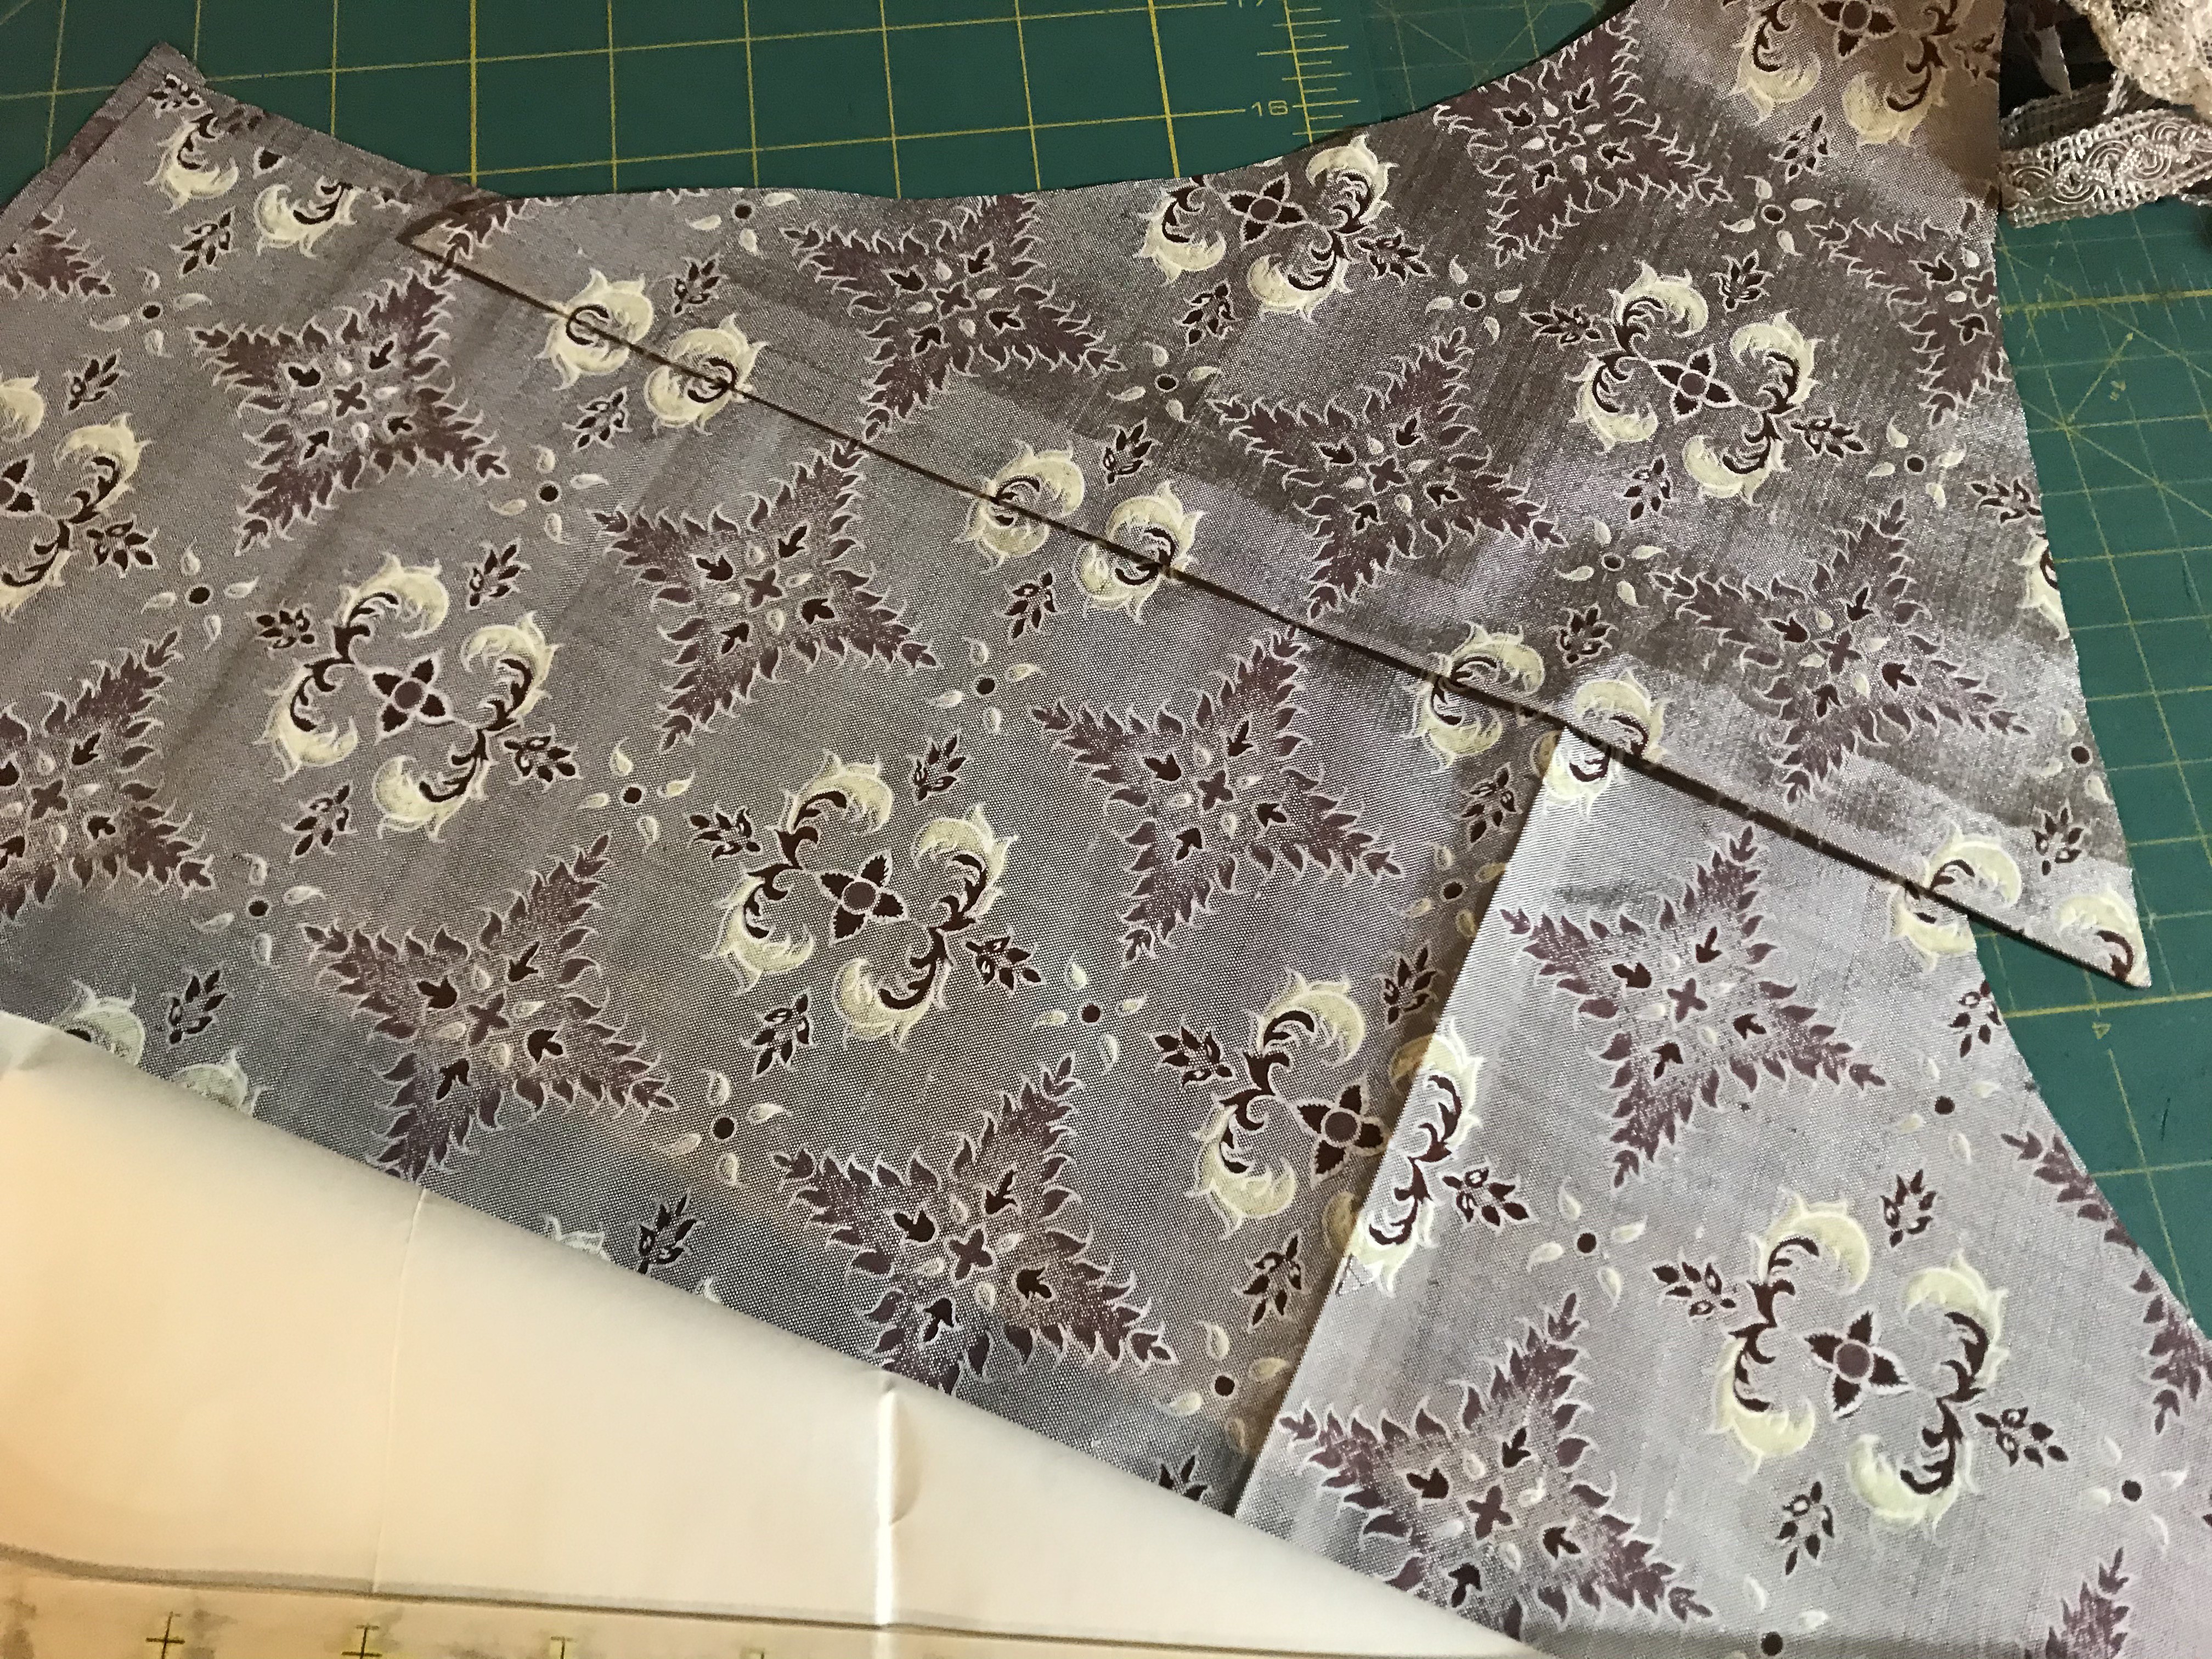
Once I had the lining fitted properly, I was ready to cut out the fashion fabric. My silk was a mystery, discovered at a thrift shop some years ago. It was narrower than most modern fabrics, and of course I couldn’t buy more of it if I made a mistake! Fortunately, I have experience with the styles of this era, so I knew where I would want fullness and how it would drape. I did not use the draping method shown in my antique book, although I could have.
Illustration: draping fashion fabric on the mannequin
Instead, I used my lining as the base pattern and calculated the pleats on the cutting table. (If you are not comfortable with this type of free-hand cutting, then you should follow the wise advice of making a muslin first out of scrap fabric.) But I was in a hurry, trying to make this waist in three days! And I trusted my measurements and my knowledge of the style.
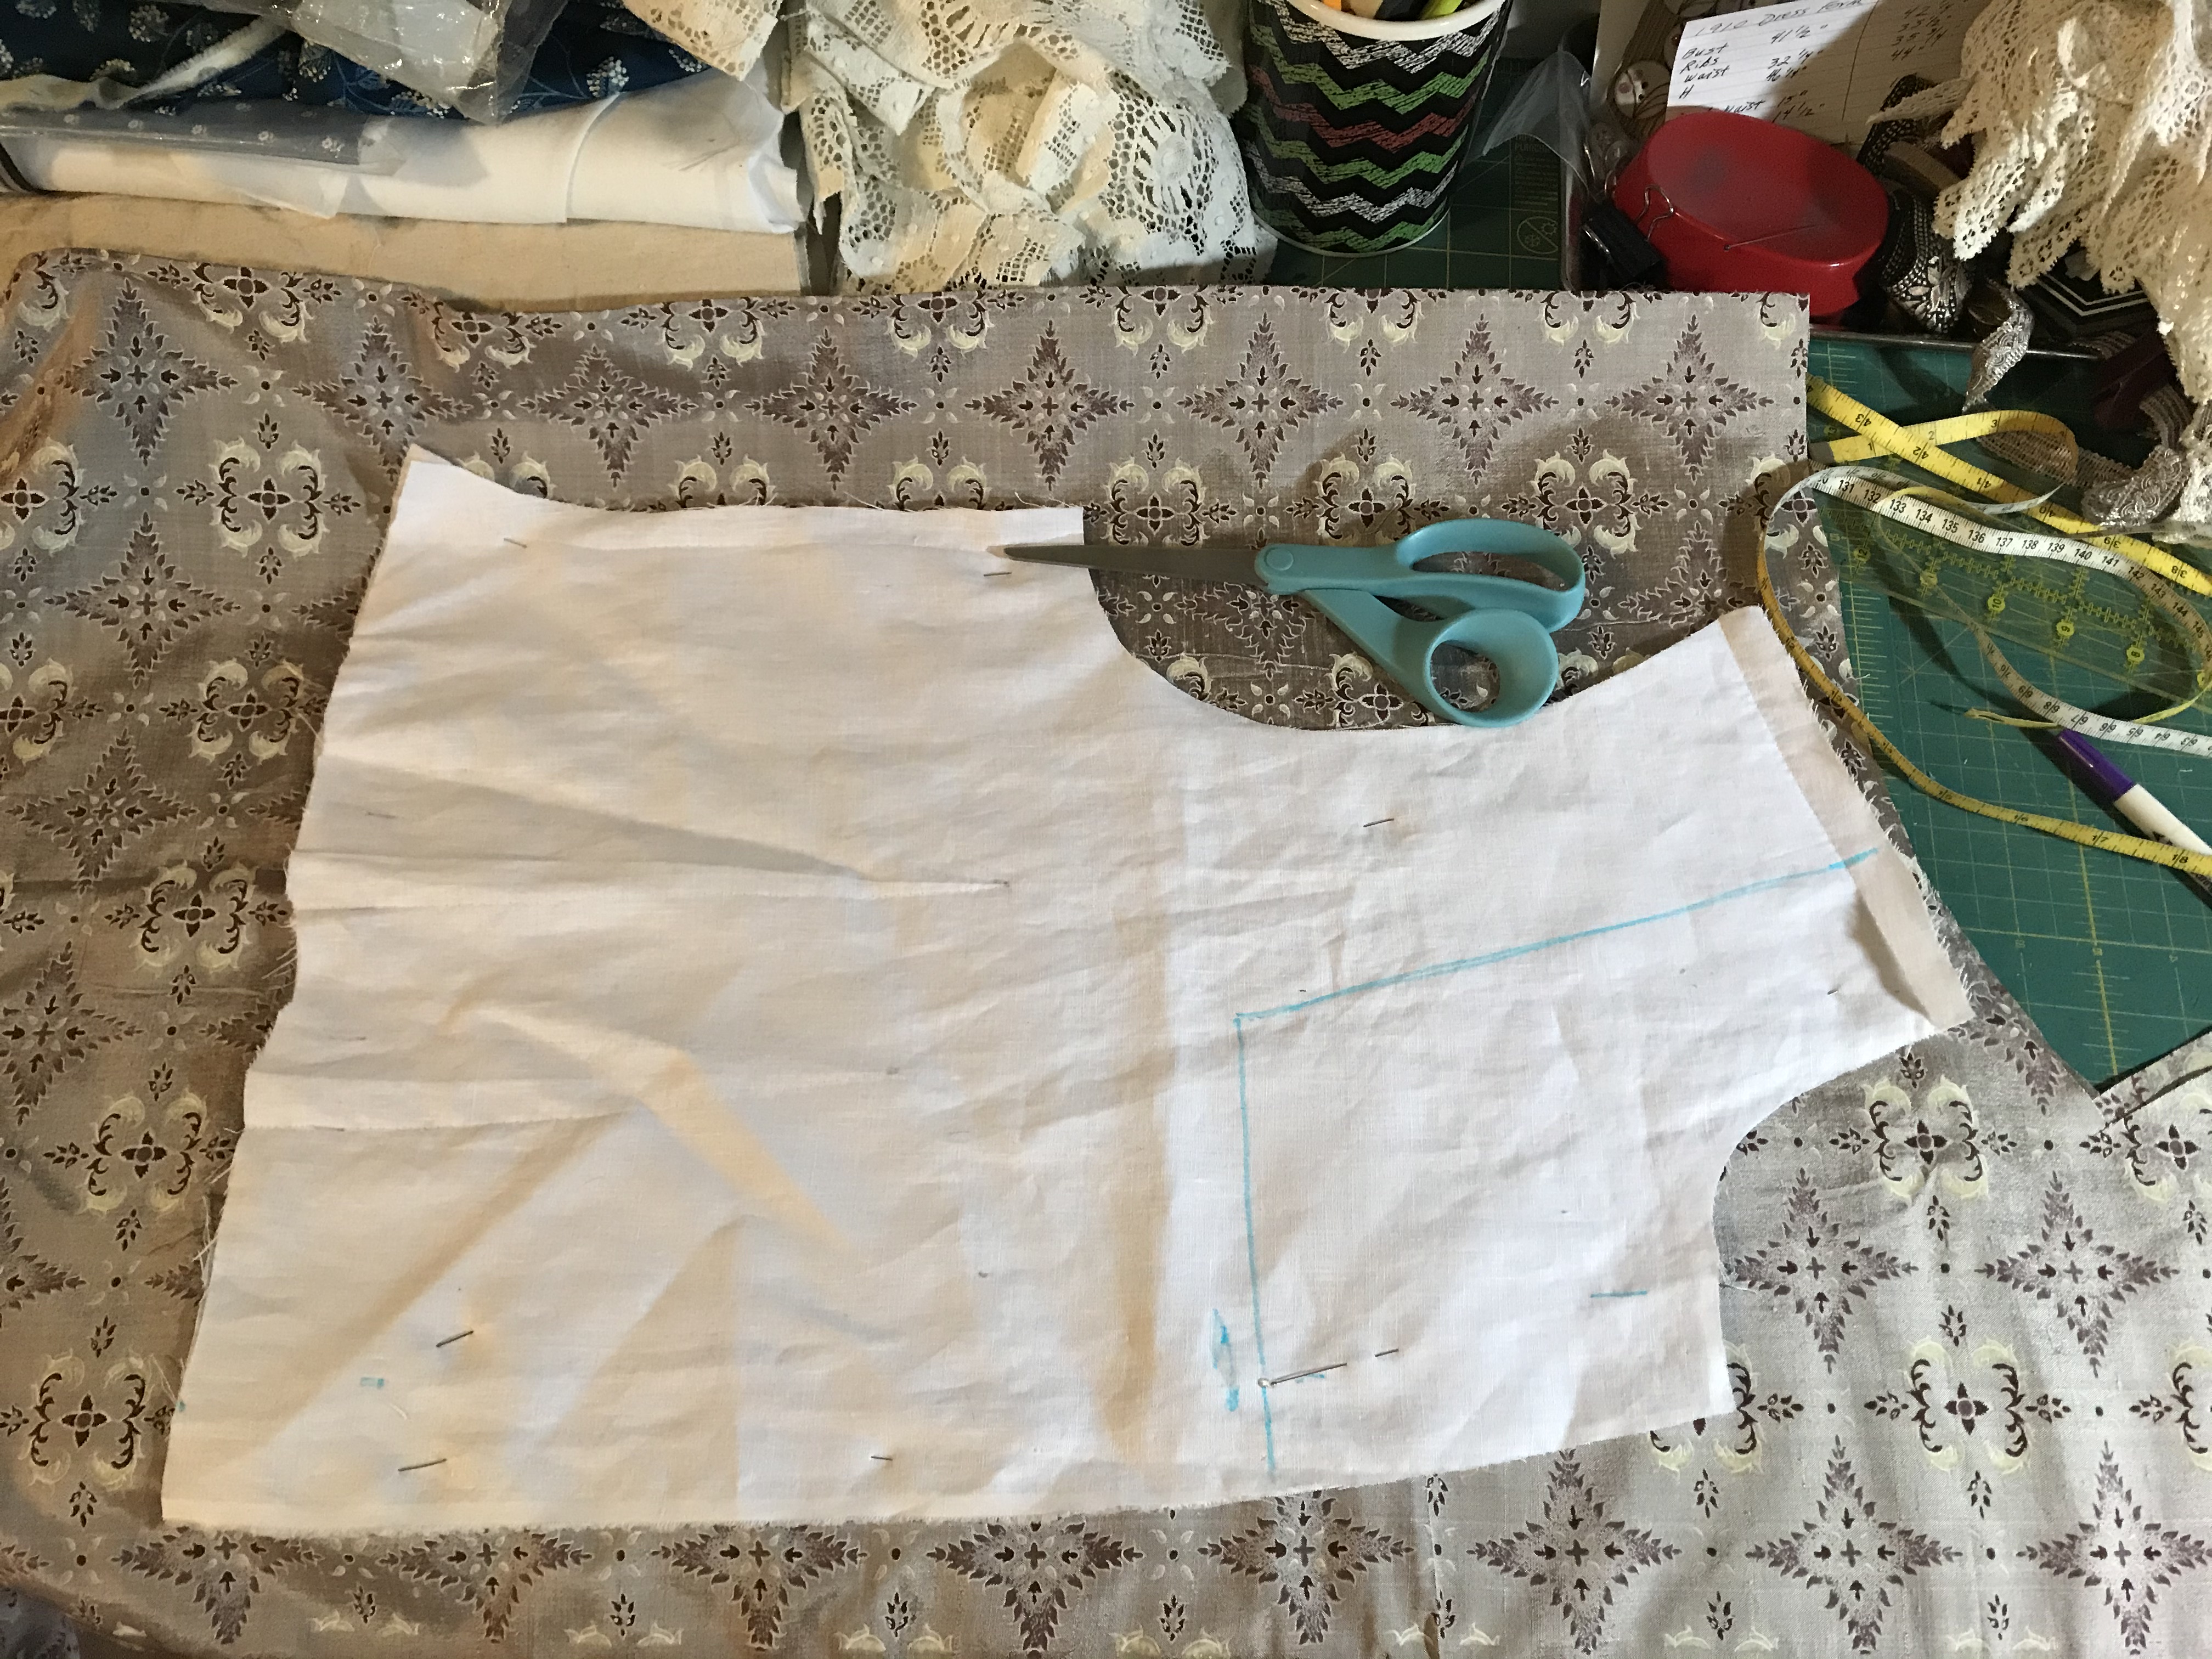
Laying out the lining on the fashion fabric
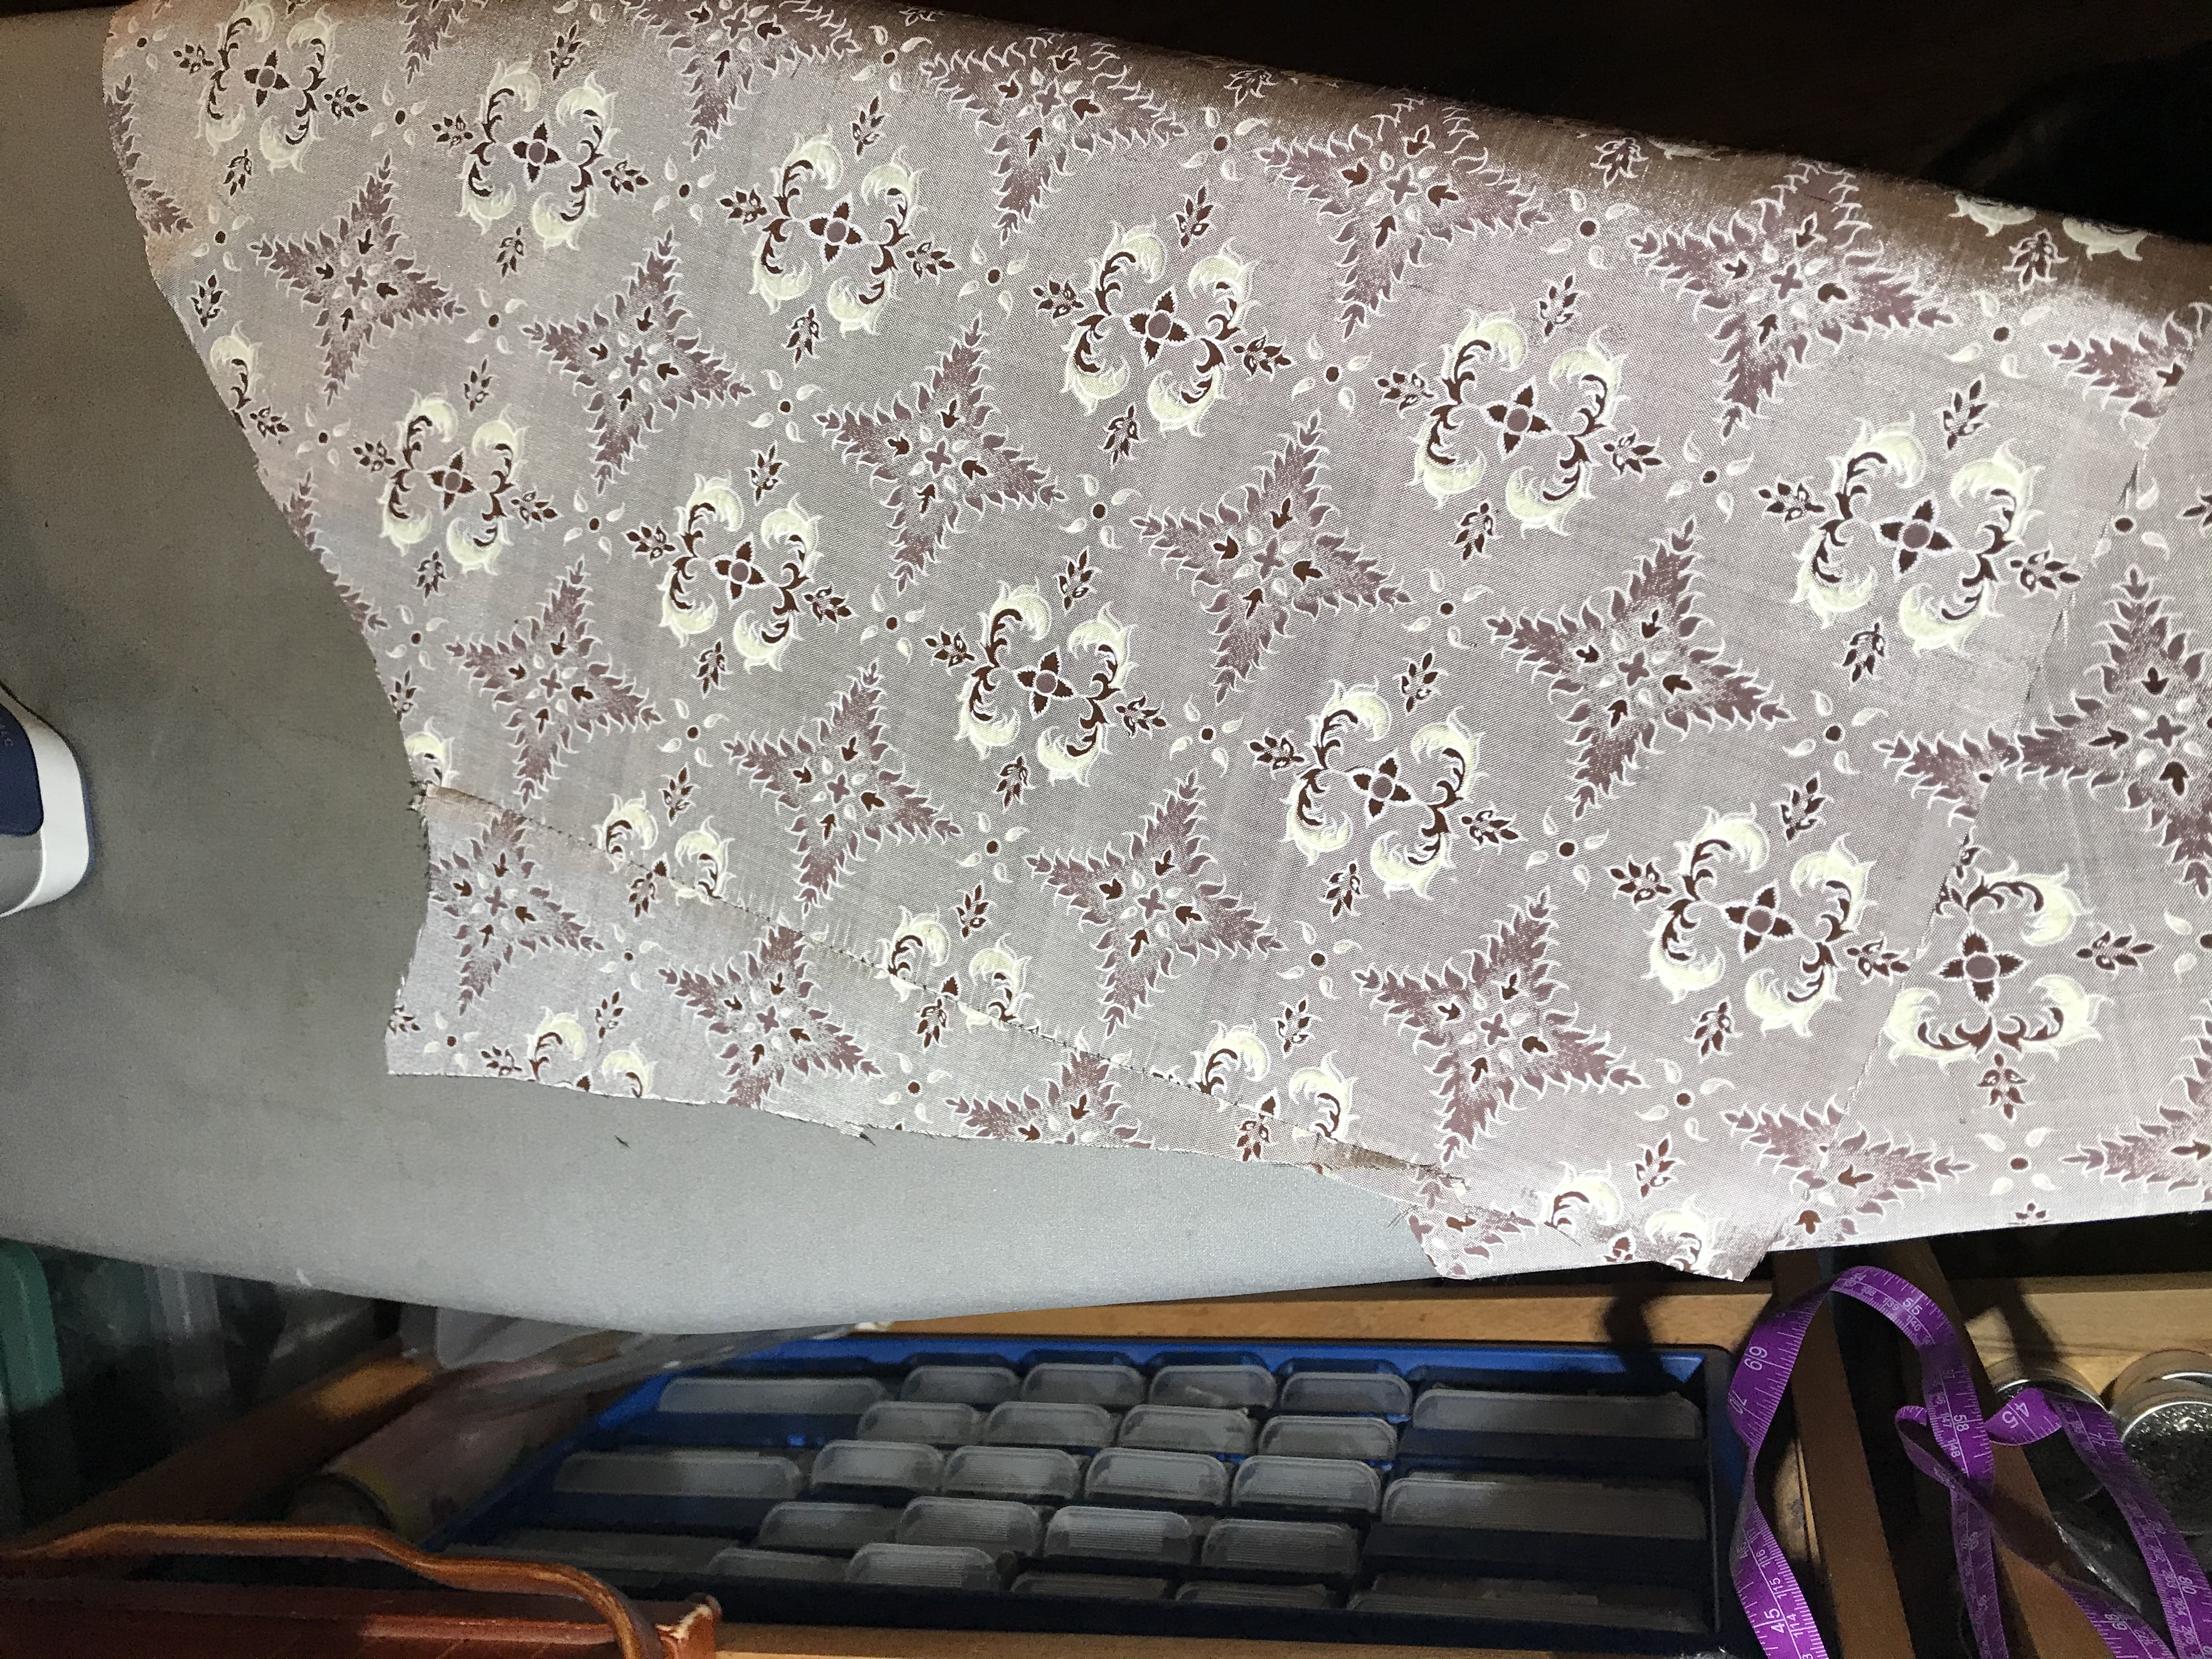
For my sleeves, I did use a paper pattern. I have made up this waist pattern before, and I knew that I liked the shape. Of course, for my Party Waist (and with limited fabric) I would be making a three-quarter sleeve instead of the full length, so there were still modifications to make.
Sleeve pattern on narrow silk fabric
Given the fullness of the sleeves and the narrow width of my silk, I needed to piece the fabric. This is an absolutely period-correct approach, but I still didn’t want the seam to show. I laid the pattern on my fabric so that the pieced section would be under the arm in back. Then I made sure that the new section would line up with the motif in my print. I didn’t have enough fabric to match every element of the design, so I had to be content with piecing it along the horizontal pattern.
Matching the fabric pattern for piecing
The piecing, sewn and pressed
Trimming the waist
Finally, the waist was assembled! Now it was time for the fun part: adding my trims. I cut bias strips of the mauve silk (about two inches wide) and then pieced, folded, and pressed them for a continuous length.
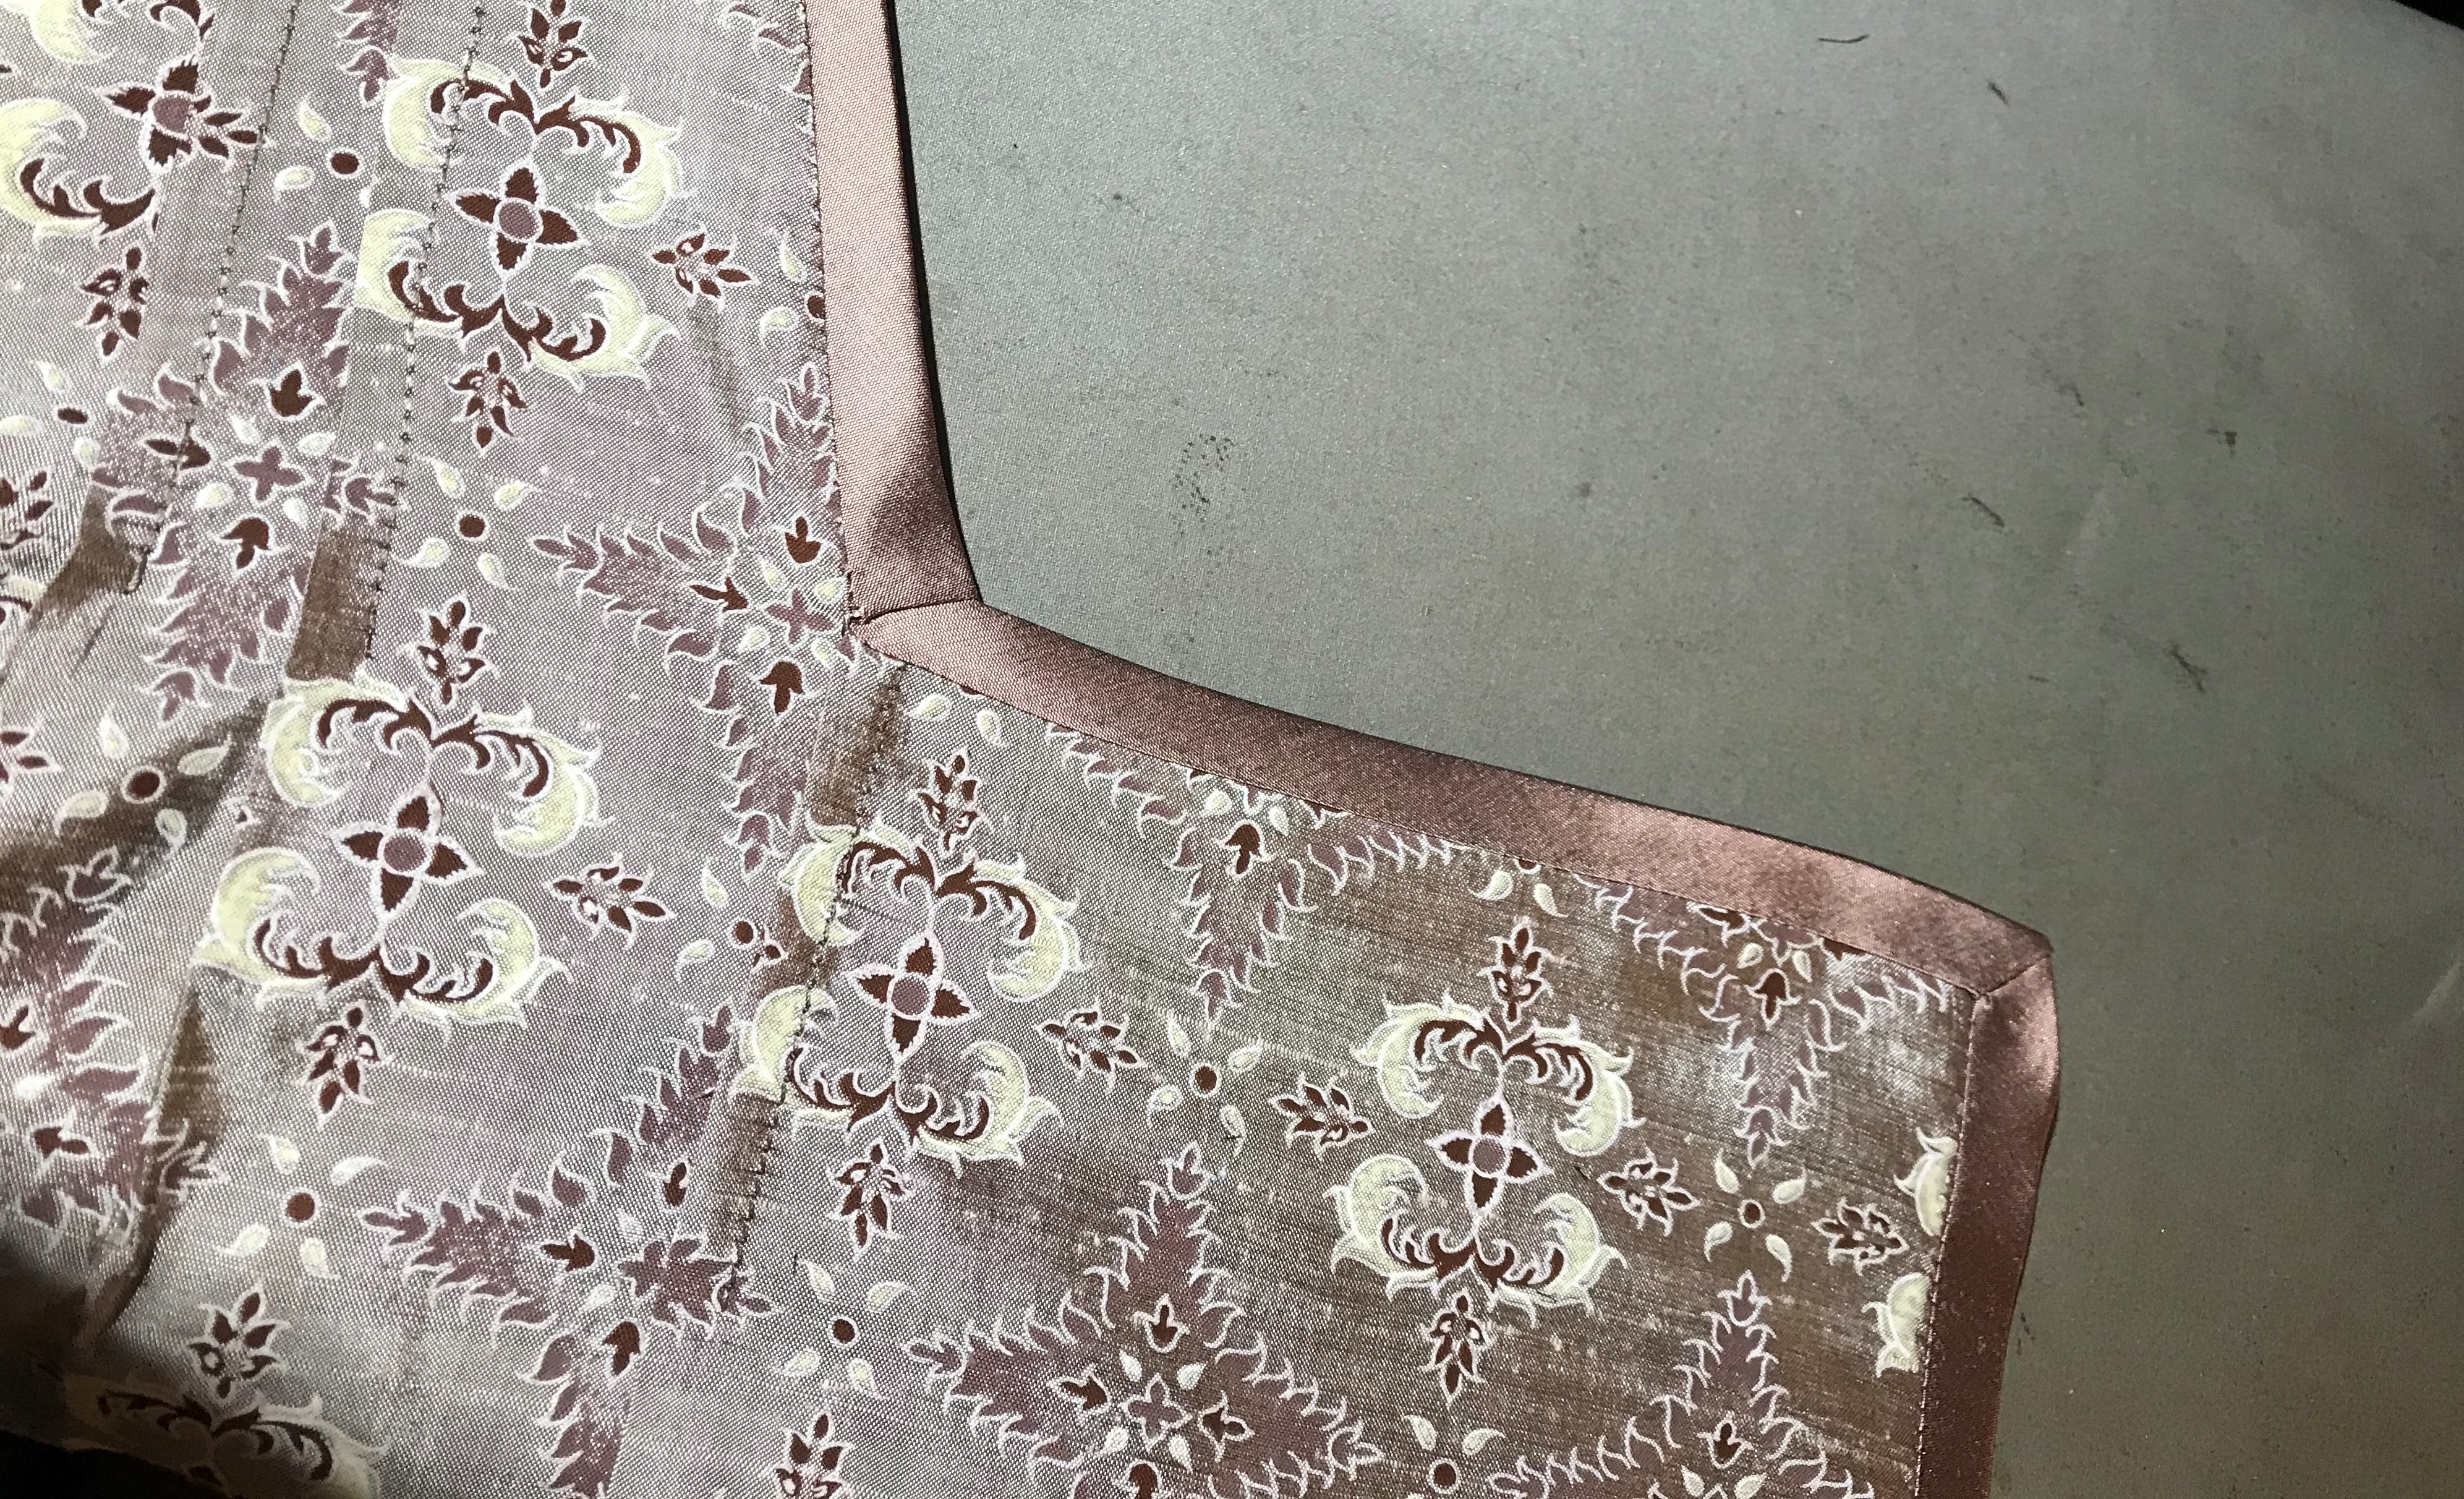
Bias silk used as a finish along the neck edge
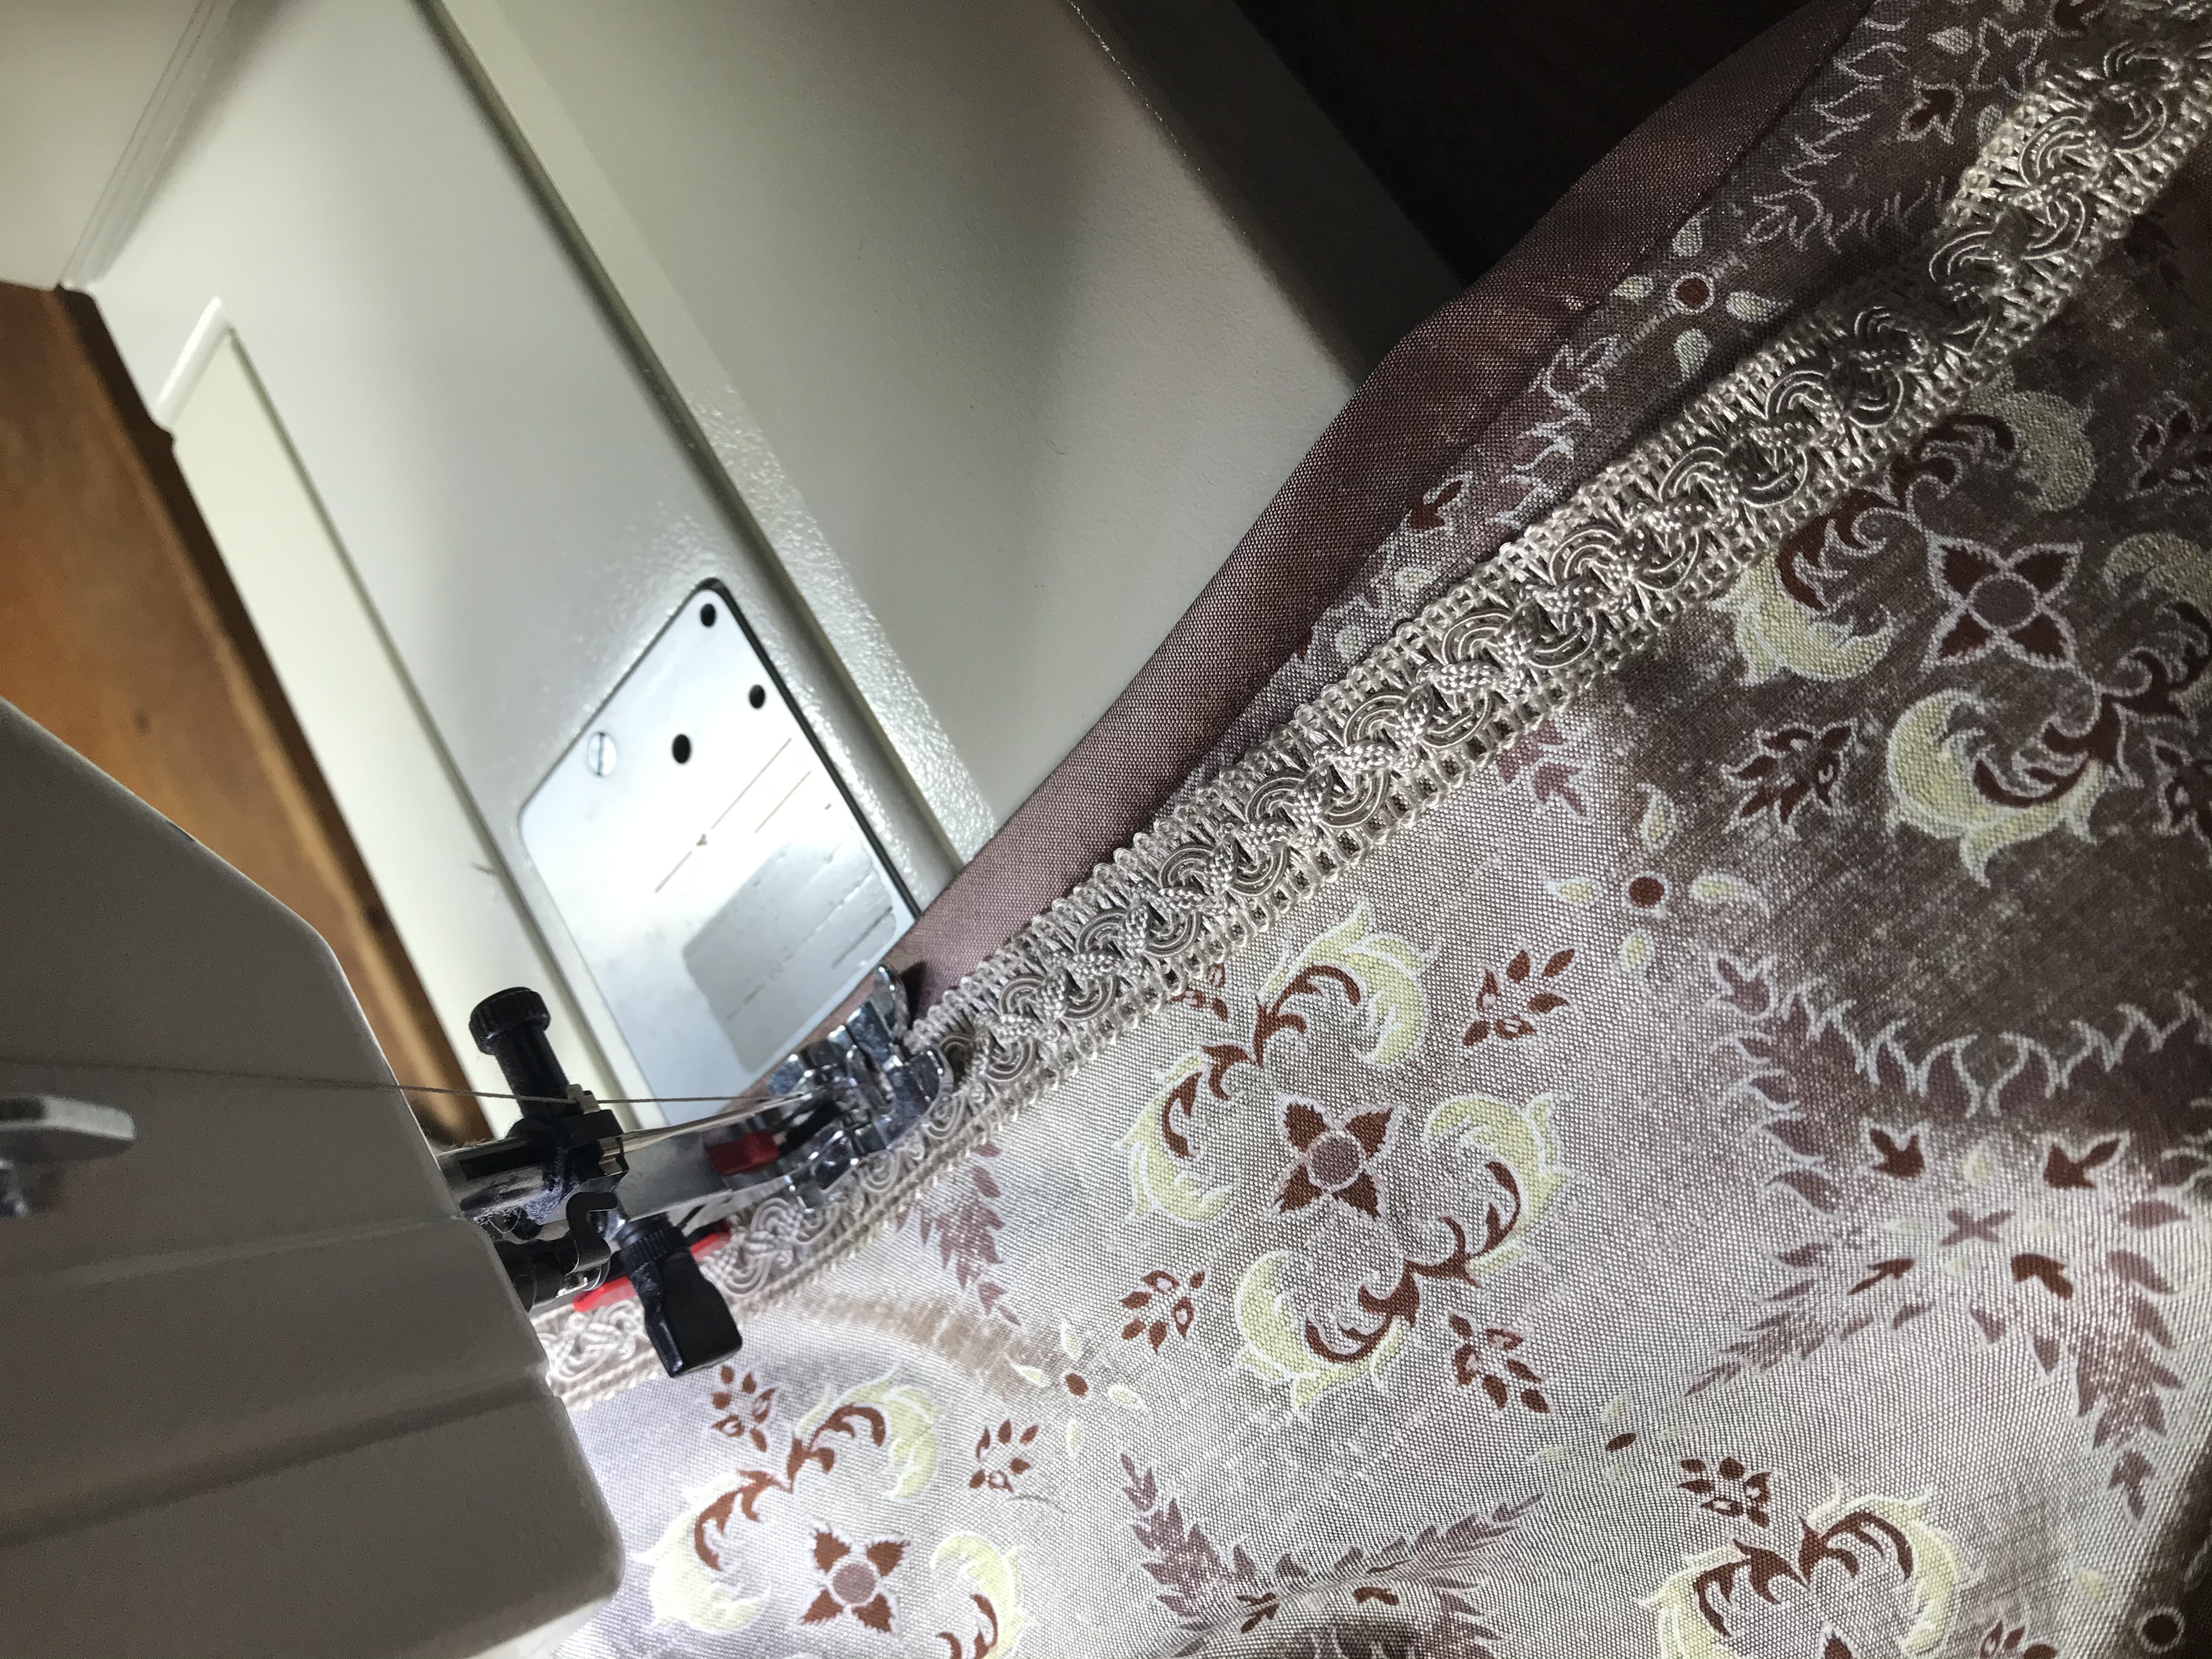
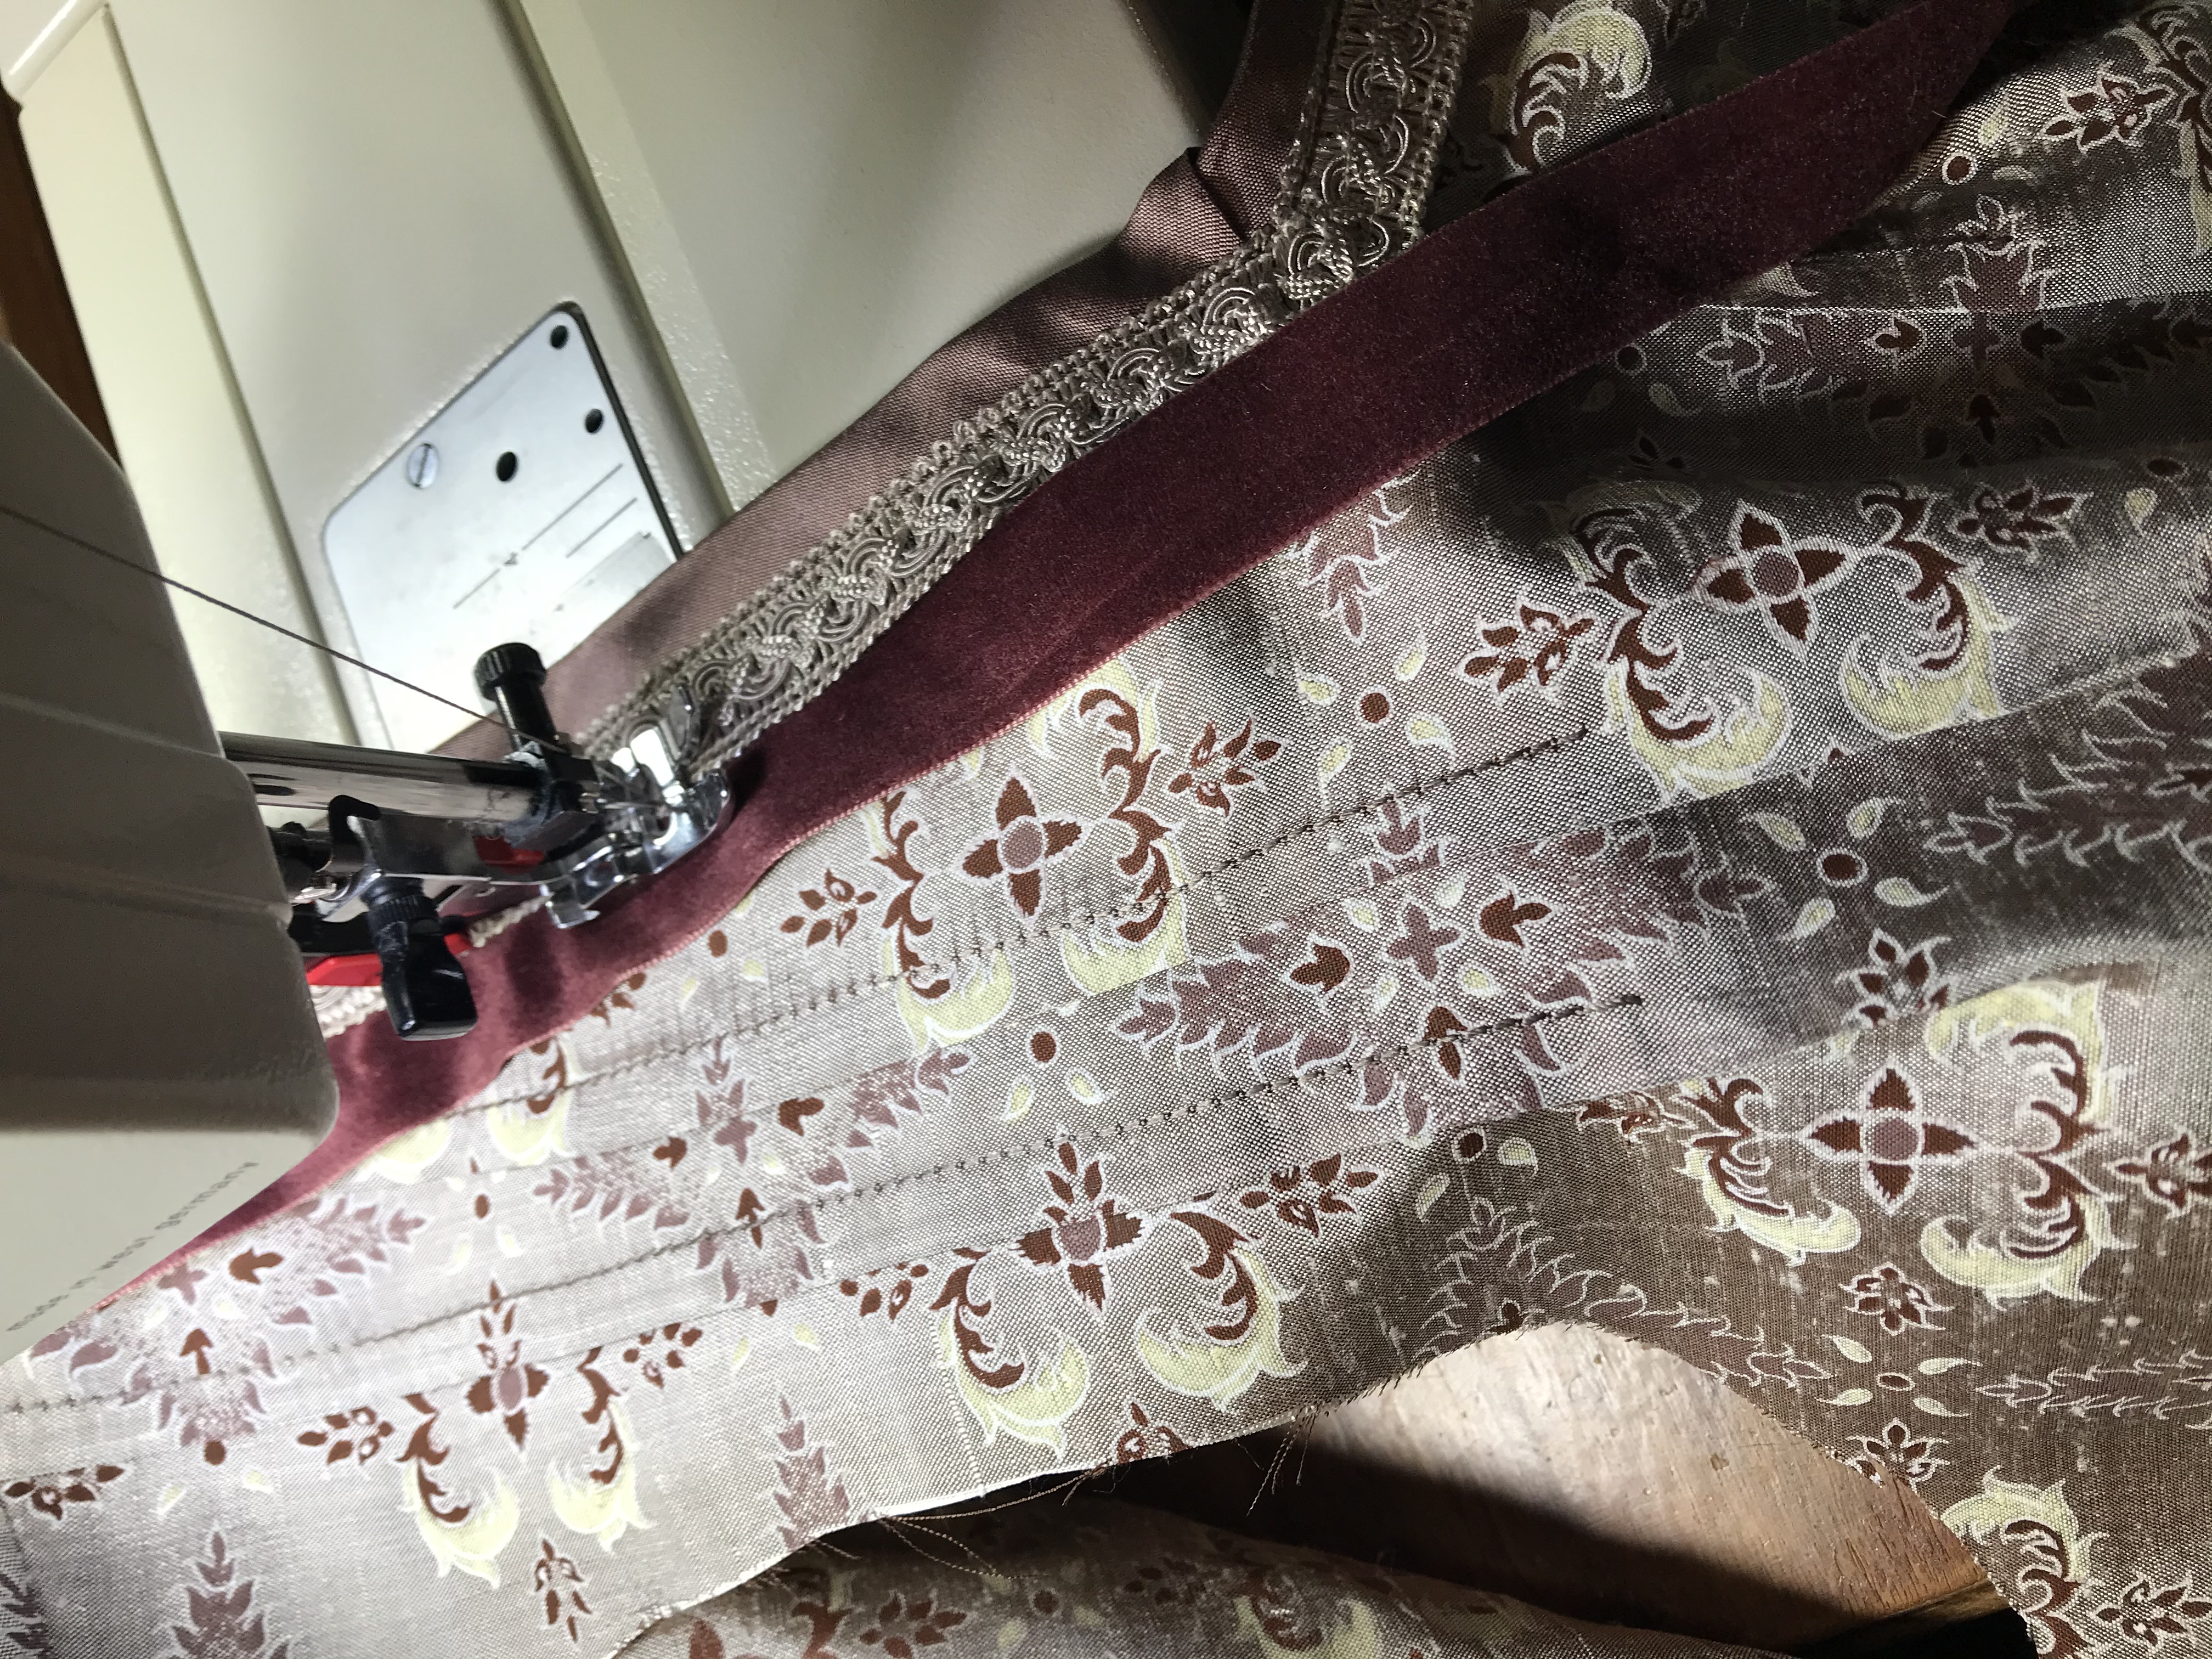
I sewed the bias strips on as a binding at the neck edge. Then I was able to machine stitch the beige braid to cover the edges of the bias strips and the velvet ribbon. I mitered the corners on the front section and forced a bit of ease into the velvet ribbon along the curved back neck edge. Finally, I added closures: hooks and eyes, with a button detail. I also made a coordinating sash, trimmed with velvet ribbon, to complete the garment. According to McCall’s Magazine, that was an important part of the waist!

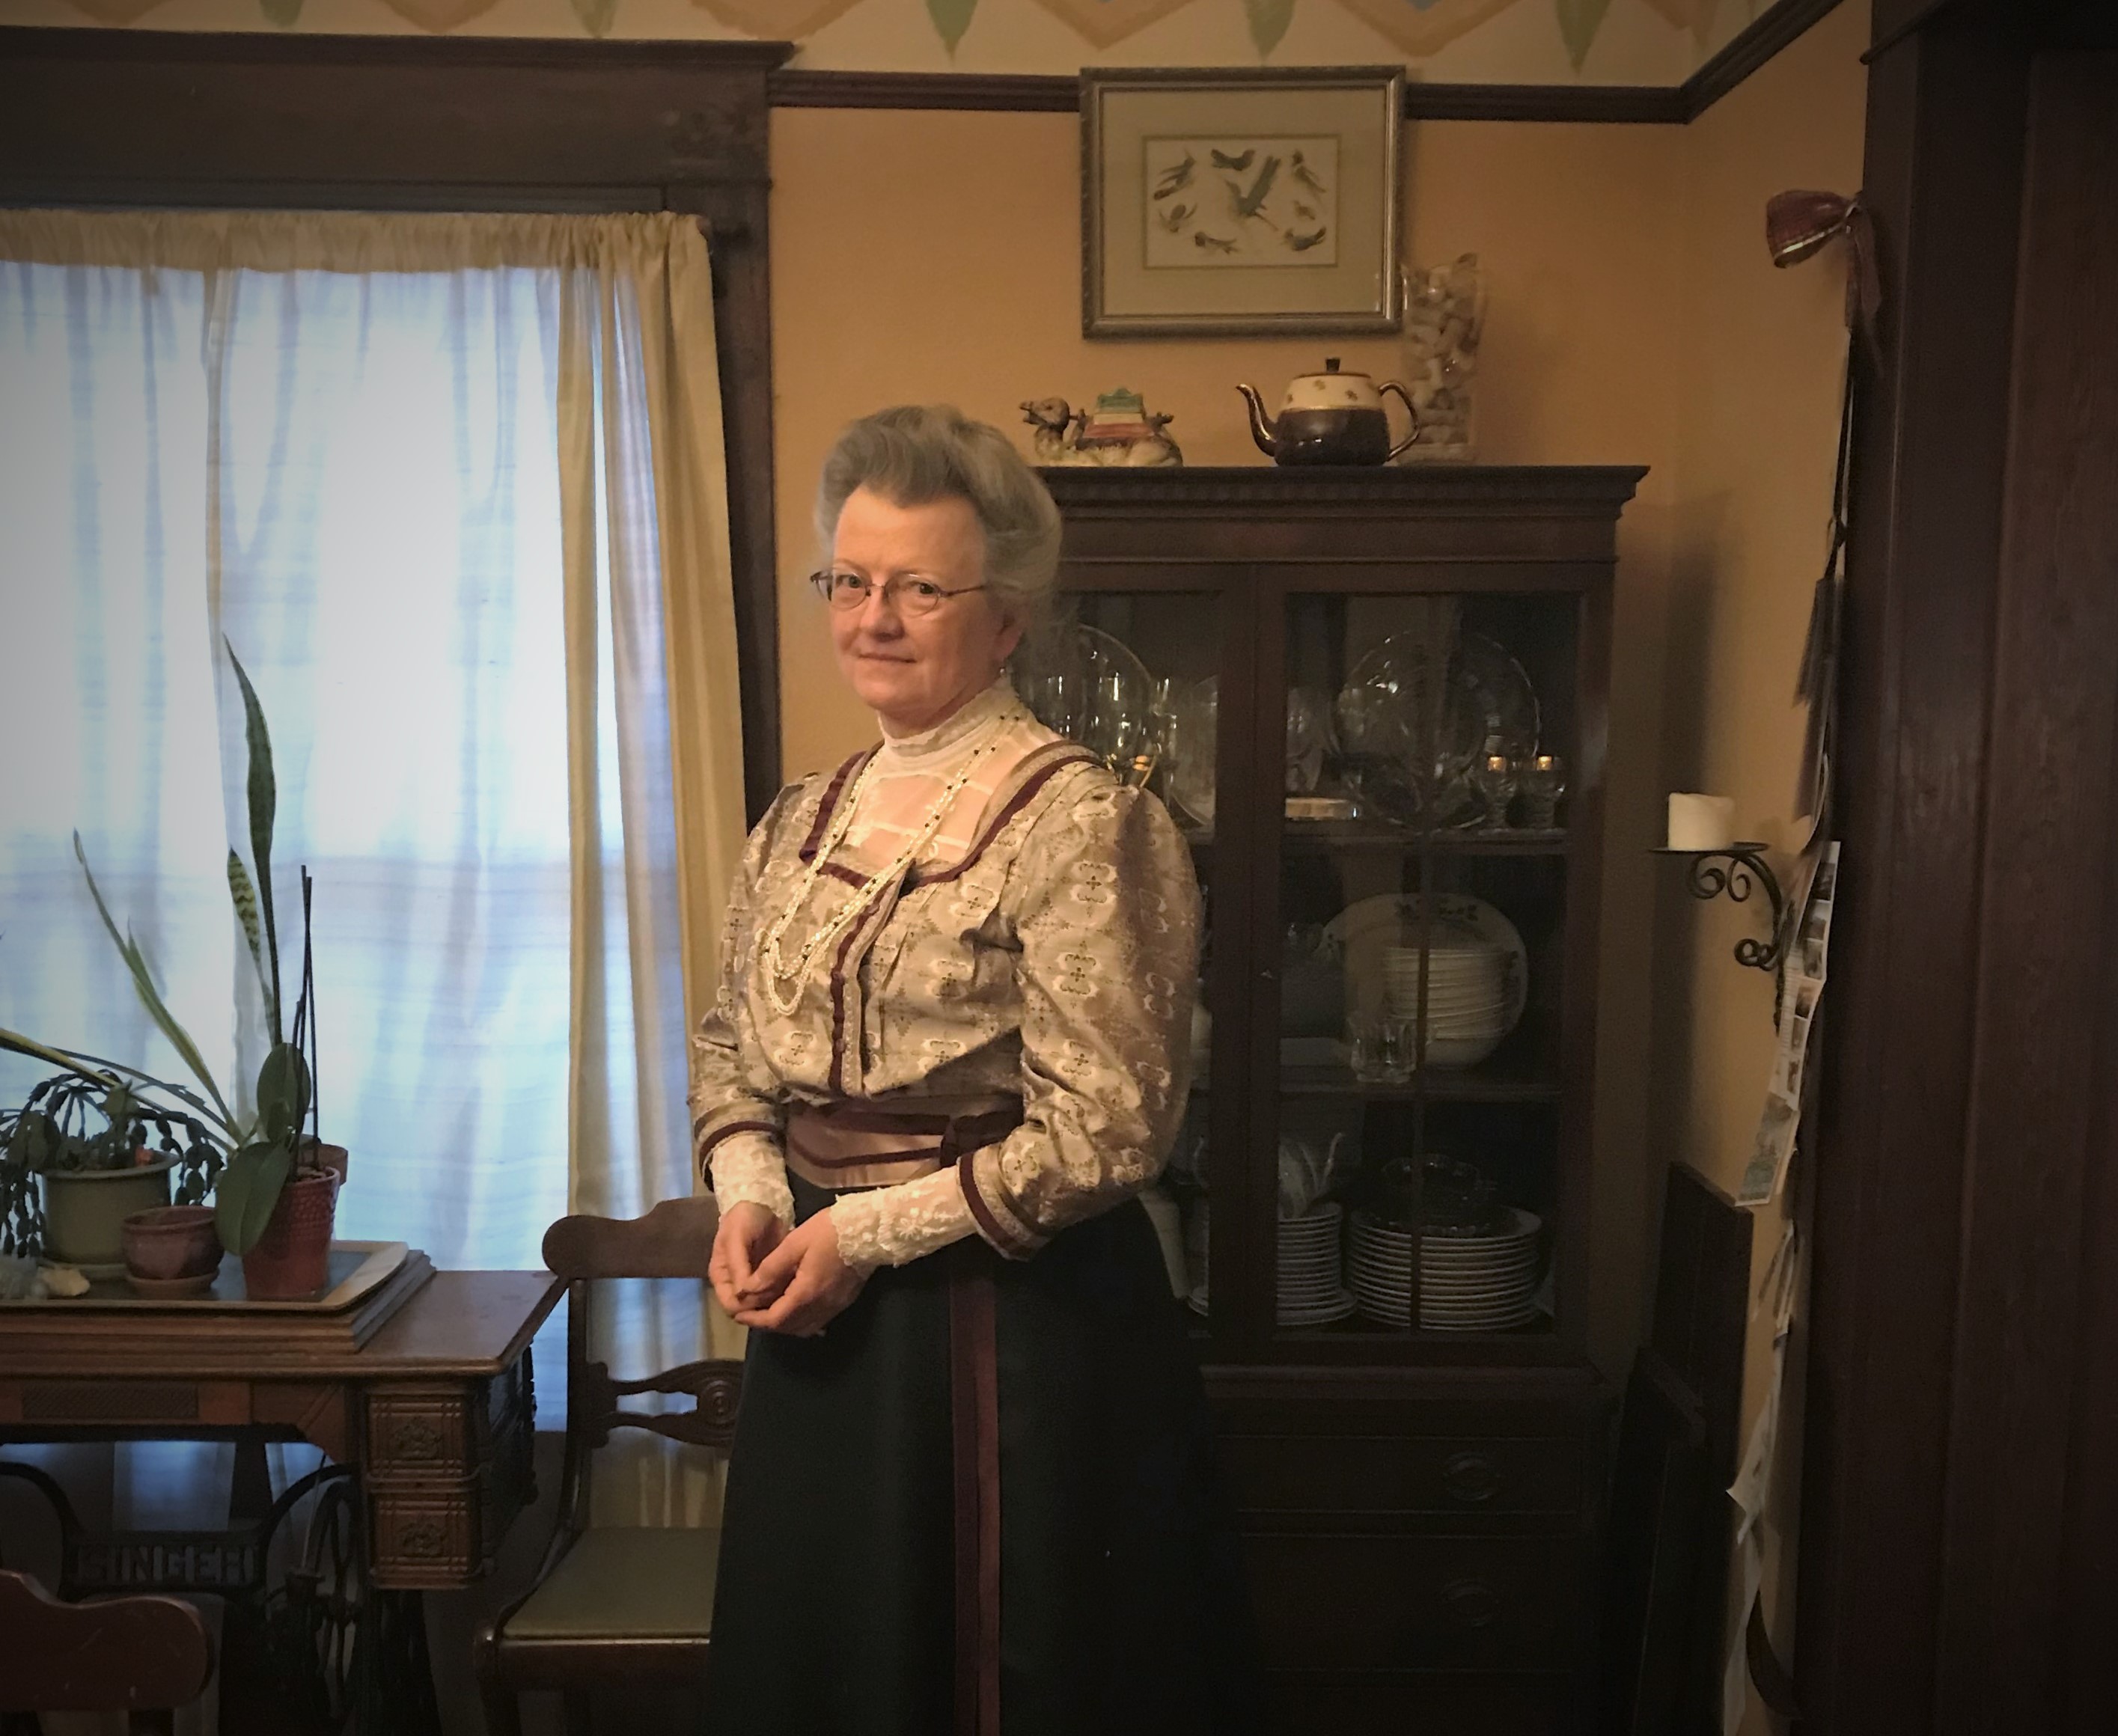
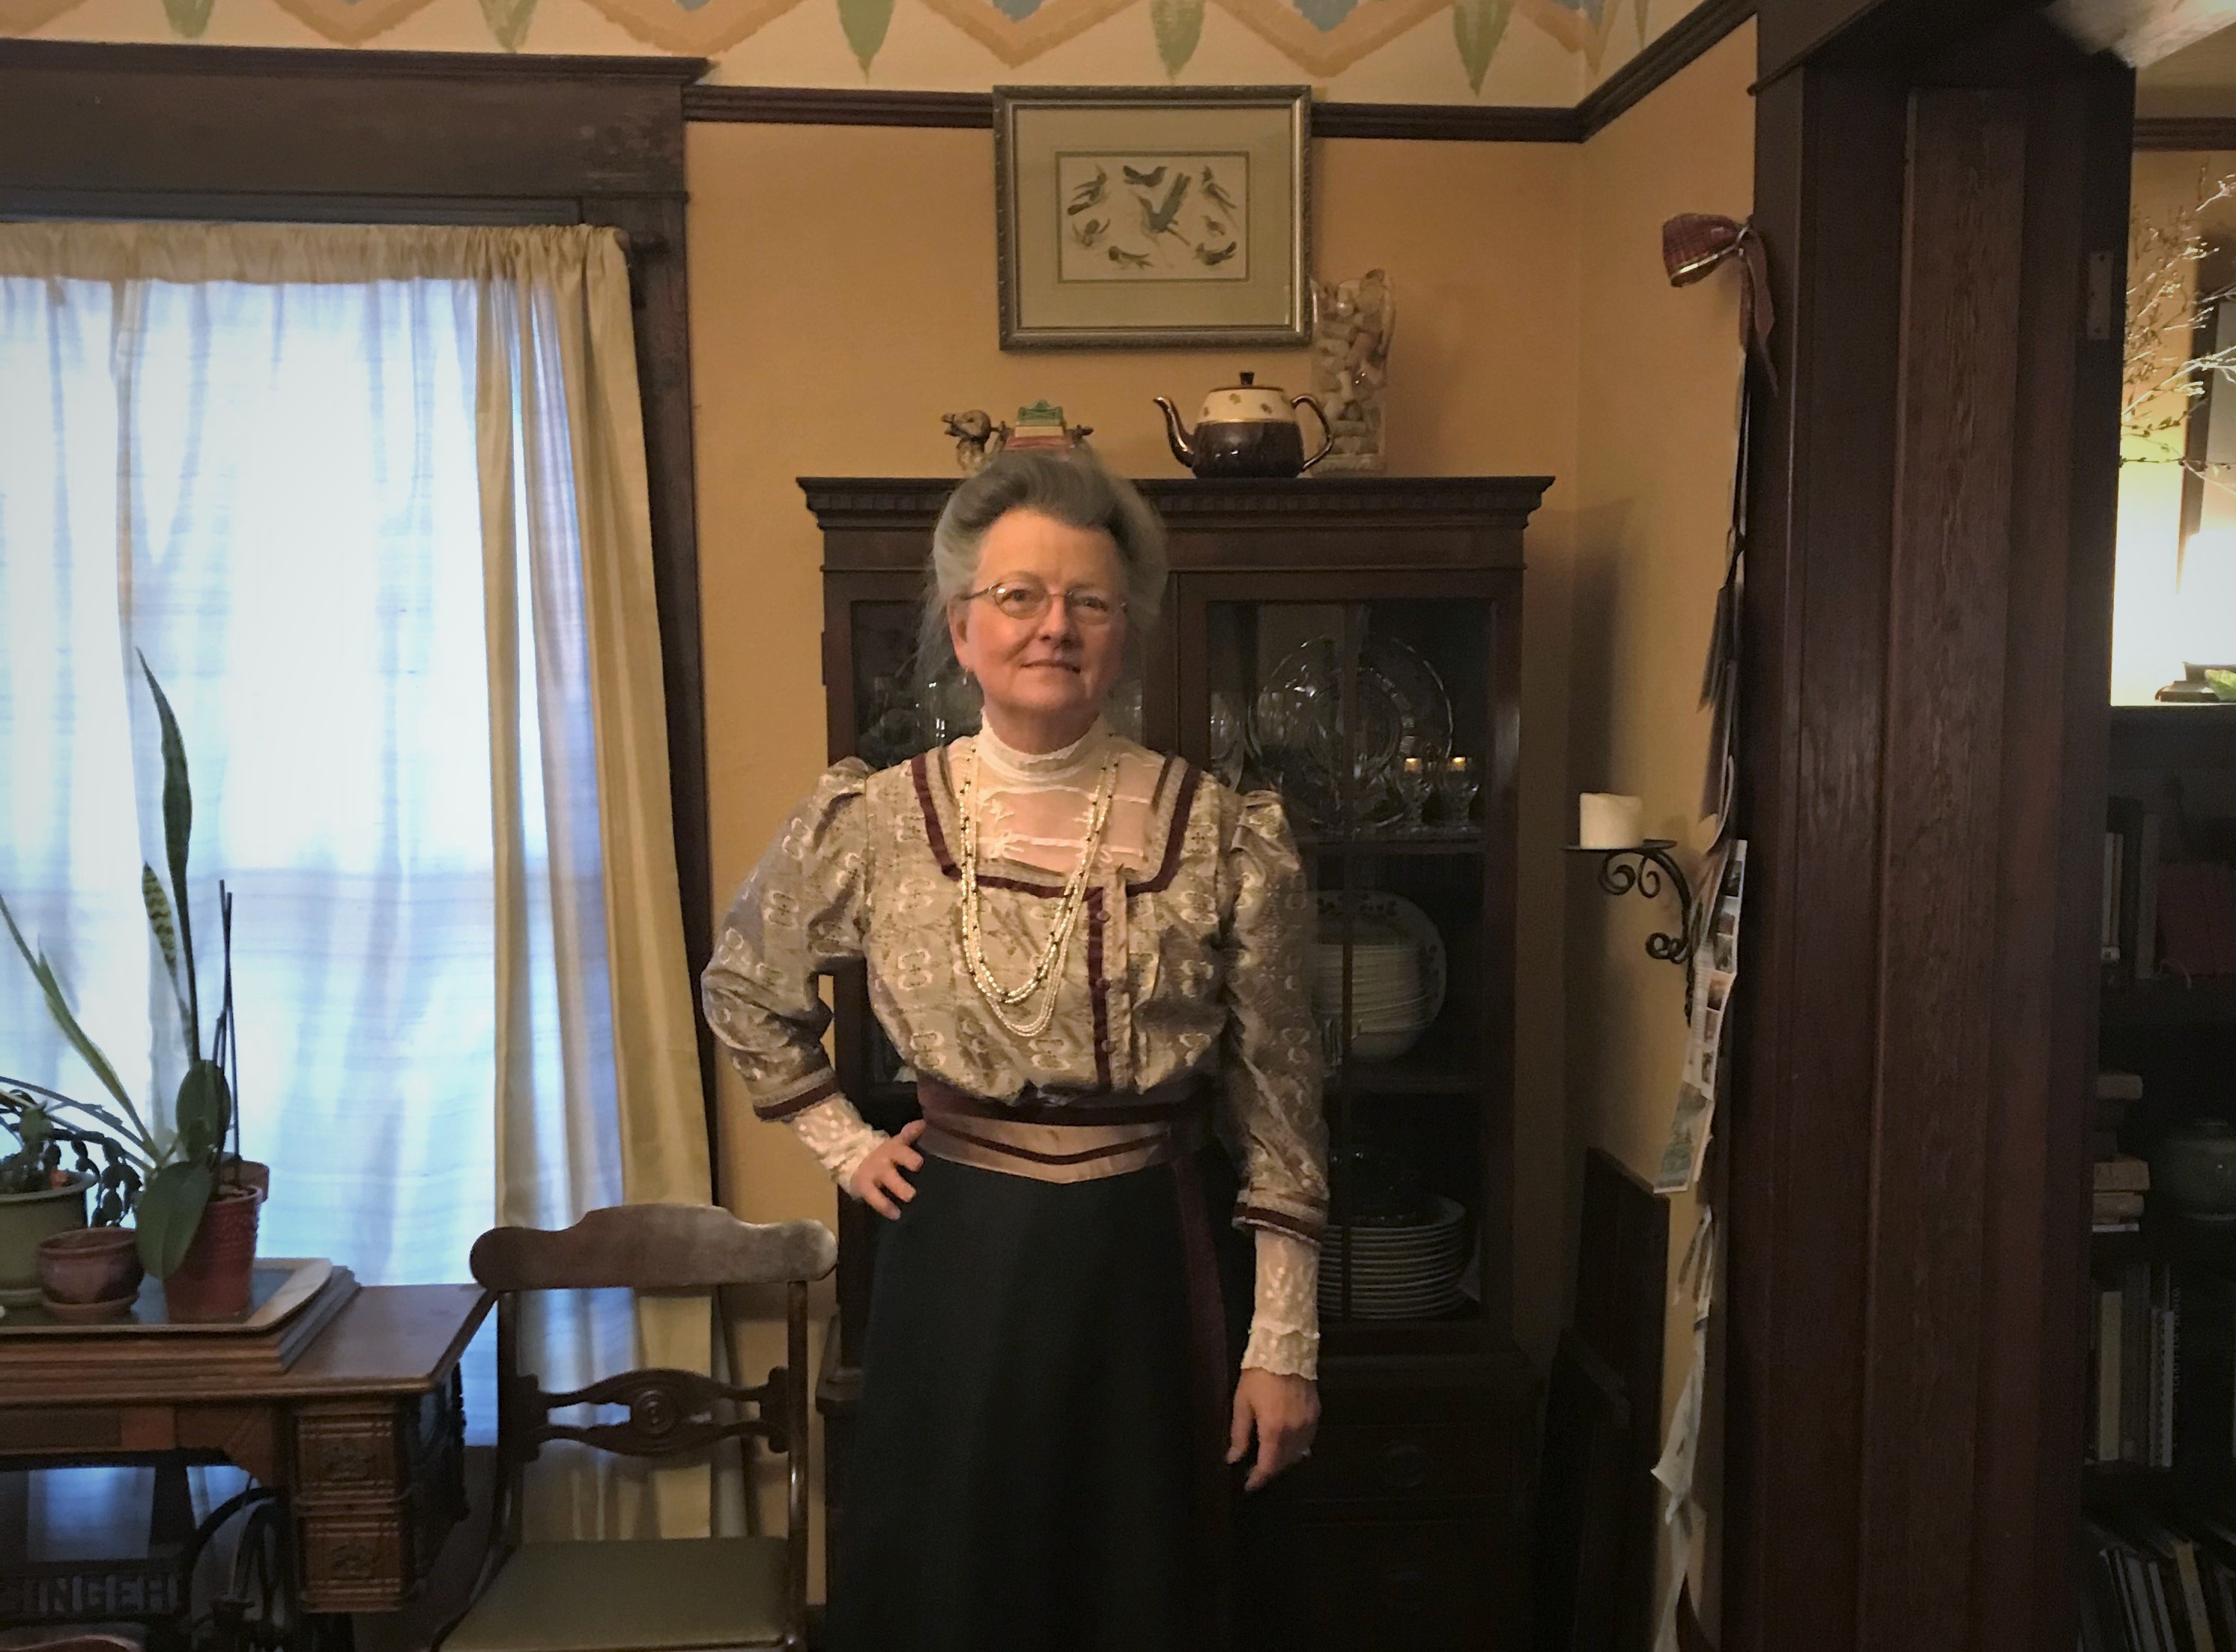
The finished Party Waist and sash on the mannequin
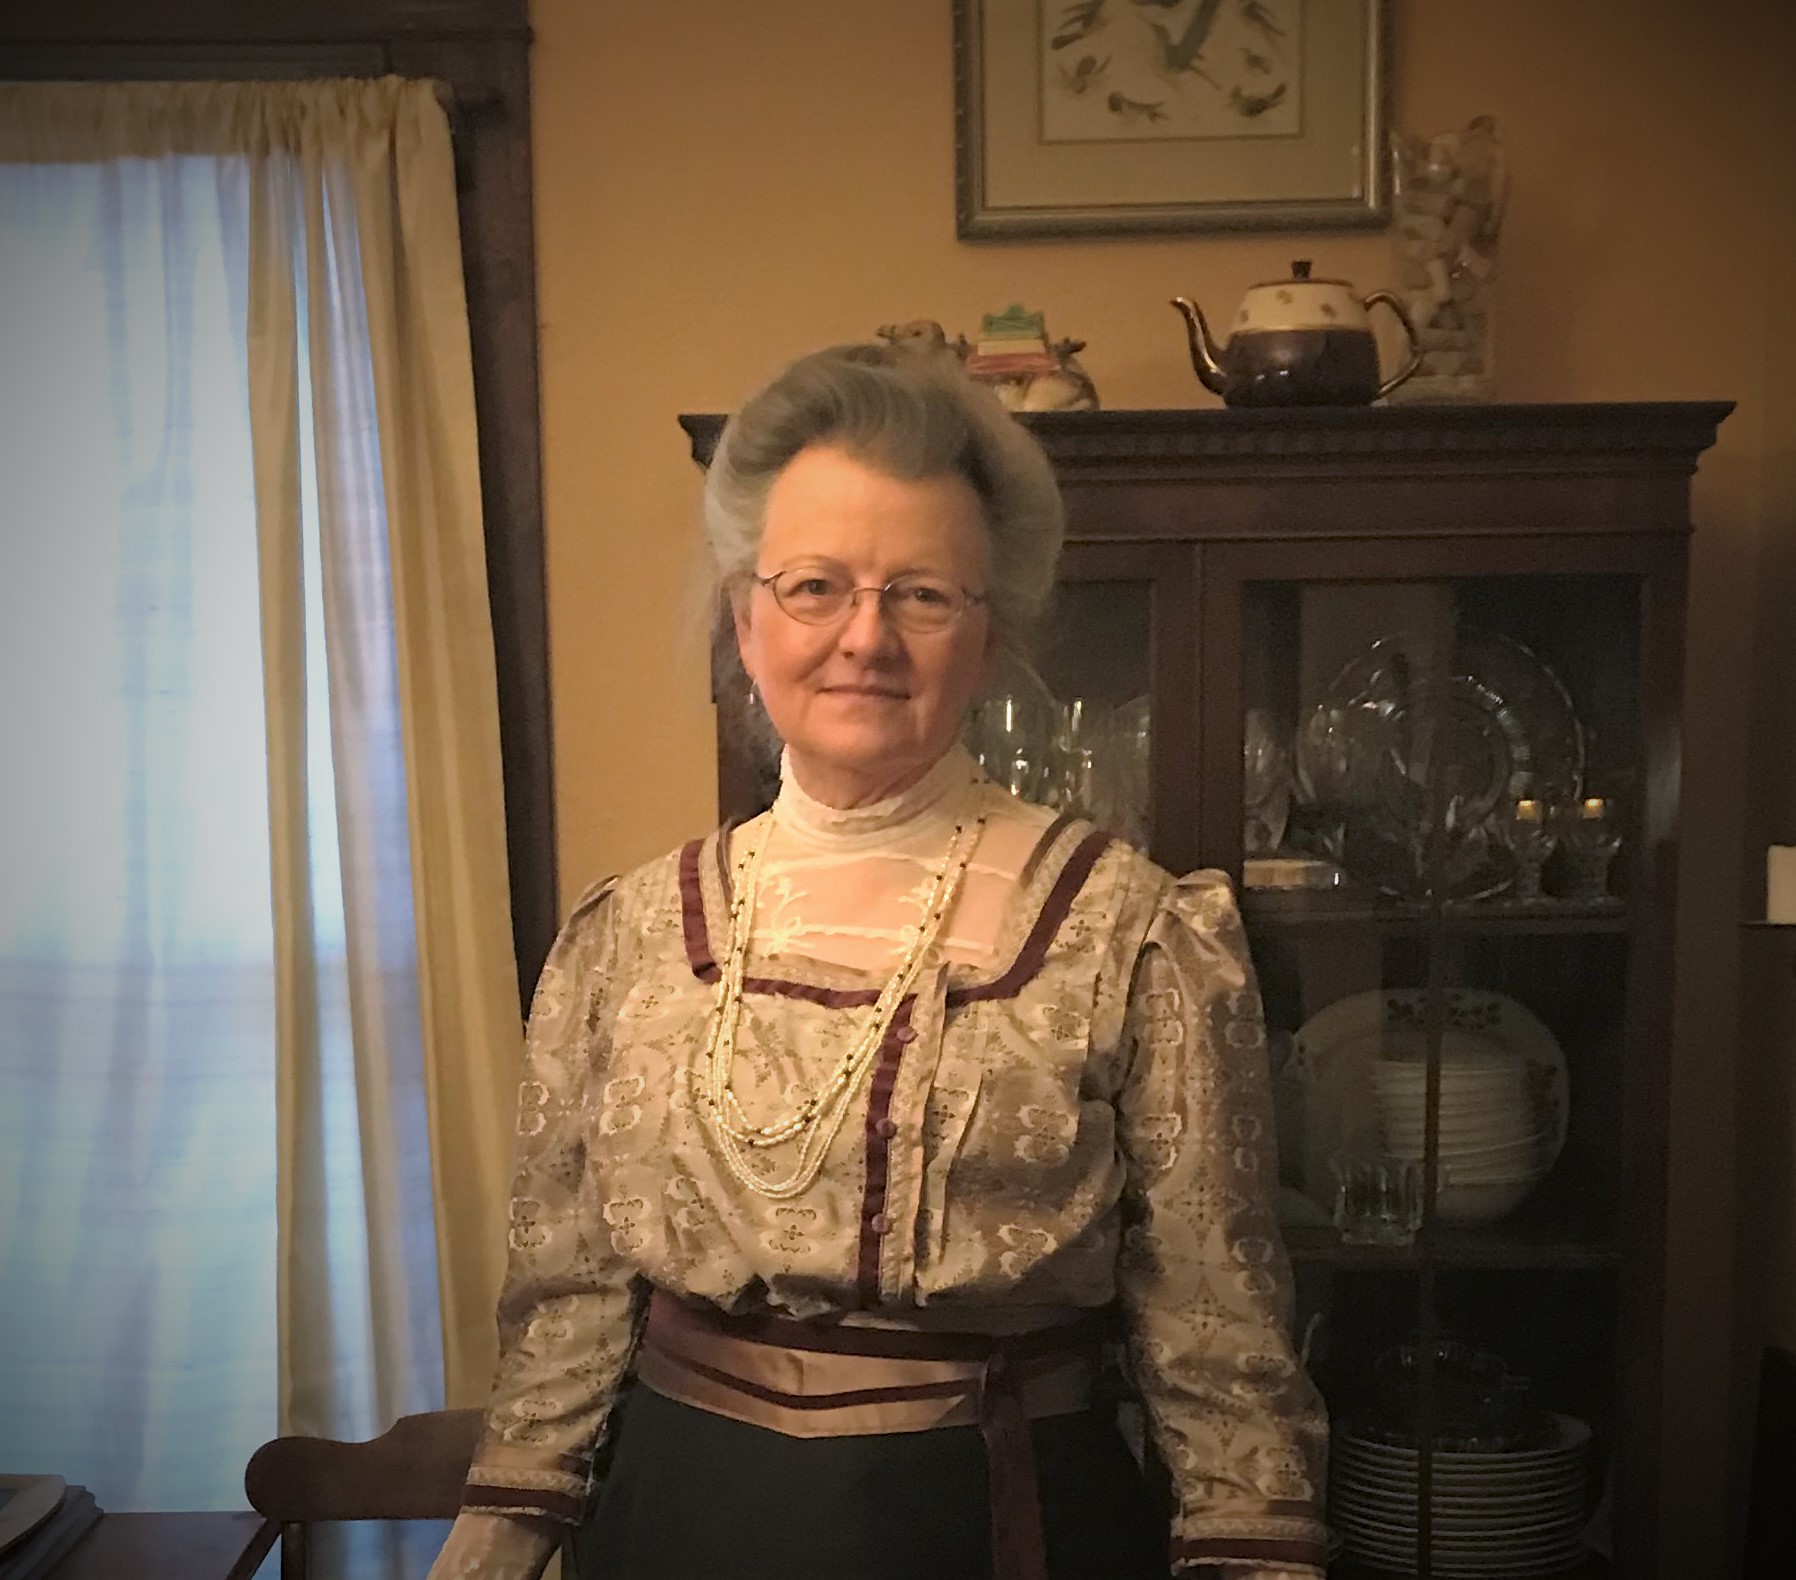
Wearing the Party Waist
I finished it in time and wore the Party Waist to a party, an online New Year’s Eve event! I wore it with an existing black skirt and a guimpe that I made last summer. I felt festive and well-dressed. There are still some issue to address before it’s truly a part of my wardrobe: I need a fashionable, flowing skirt, not the slightly short, drab black one I am wearing in these photos.
Now I have started the new guimpe to wear under the waist. When I was selecting fabrics and trims, I discovered that a length of antique ivory lace in my stash was perfect as an accompanying yoke and sleeves. The size and shape of the geometric motifs were an artistic compliment to the printed shapes of the silk. When I finish the new guimpe, I will share pictures of it, too!

- Playing with the Arts and Crafts style - December 4, 2025
- Looking back at “Sweetness and Light” - June 6, 2025
- Plans for The 1909 School in 2025 - April 8, 2025
Your Party waist is Stunningly Beautiful. ❤️
What an absolutely charming waist! I adore your fabric and trim selections. You look a very pretty picture wearing it.