1907 Edwardian House Dress

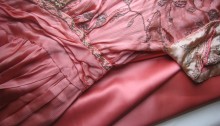
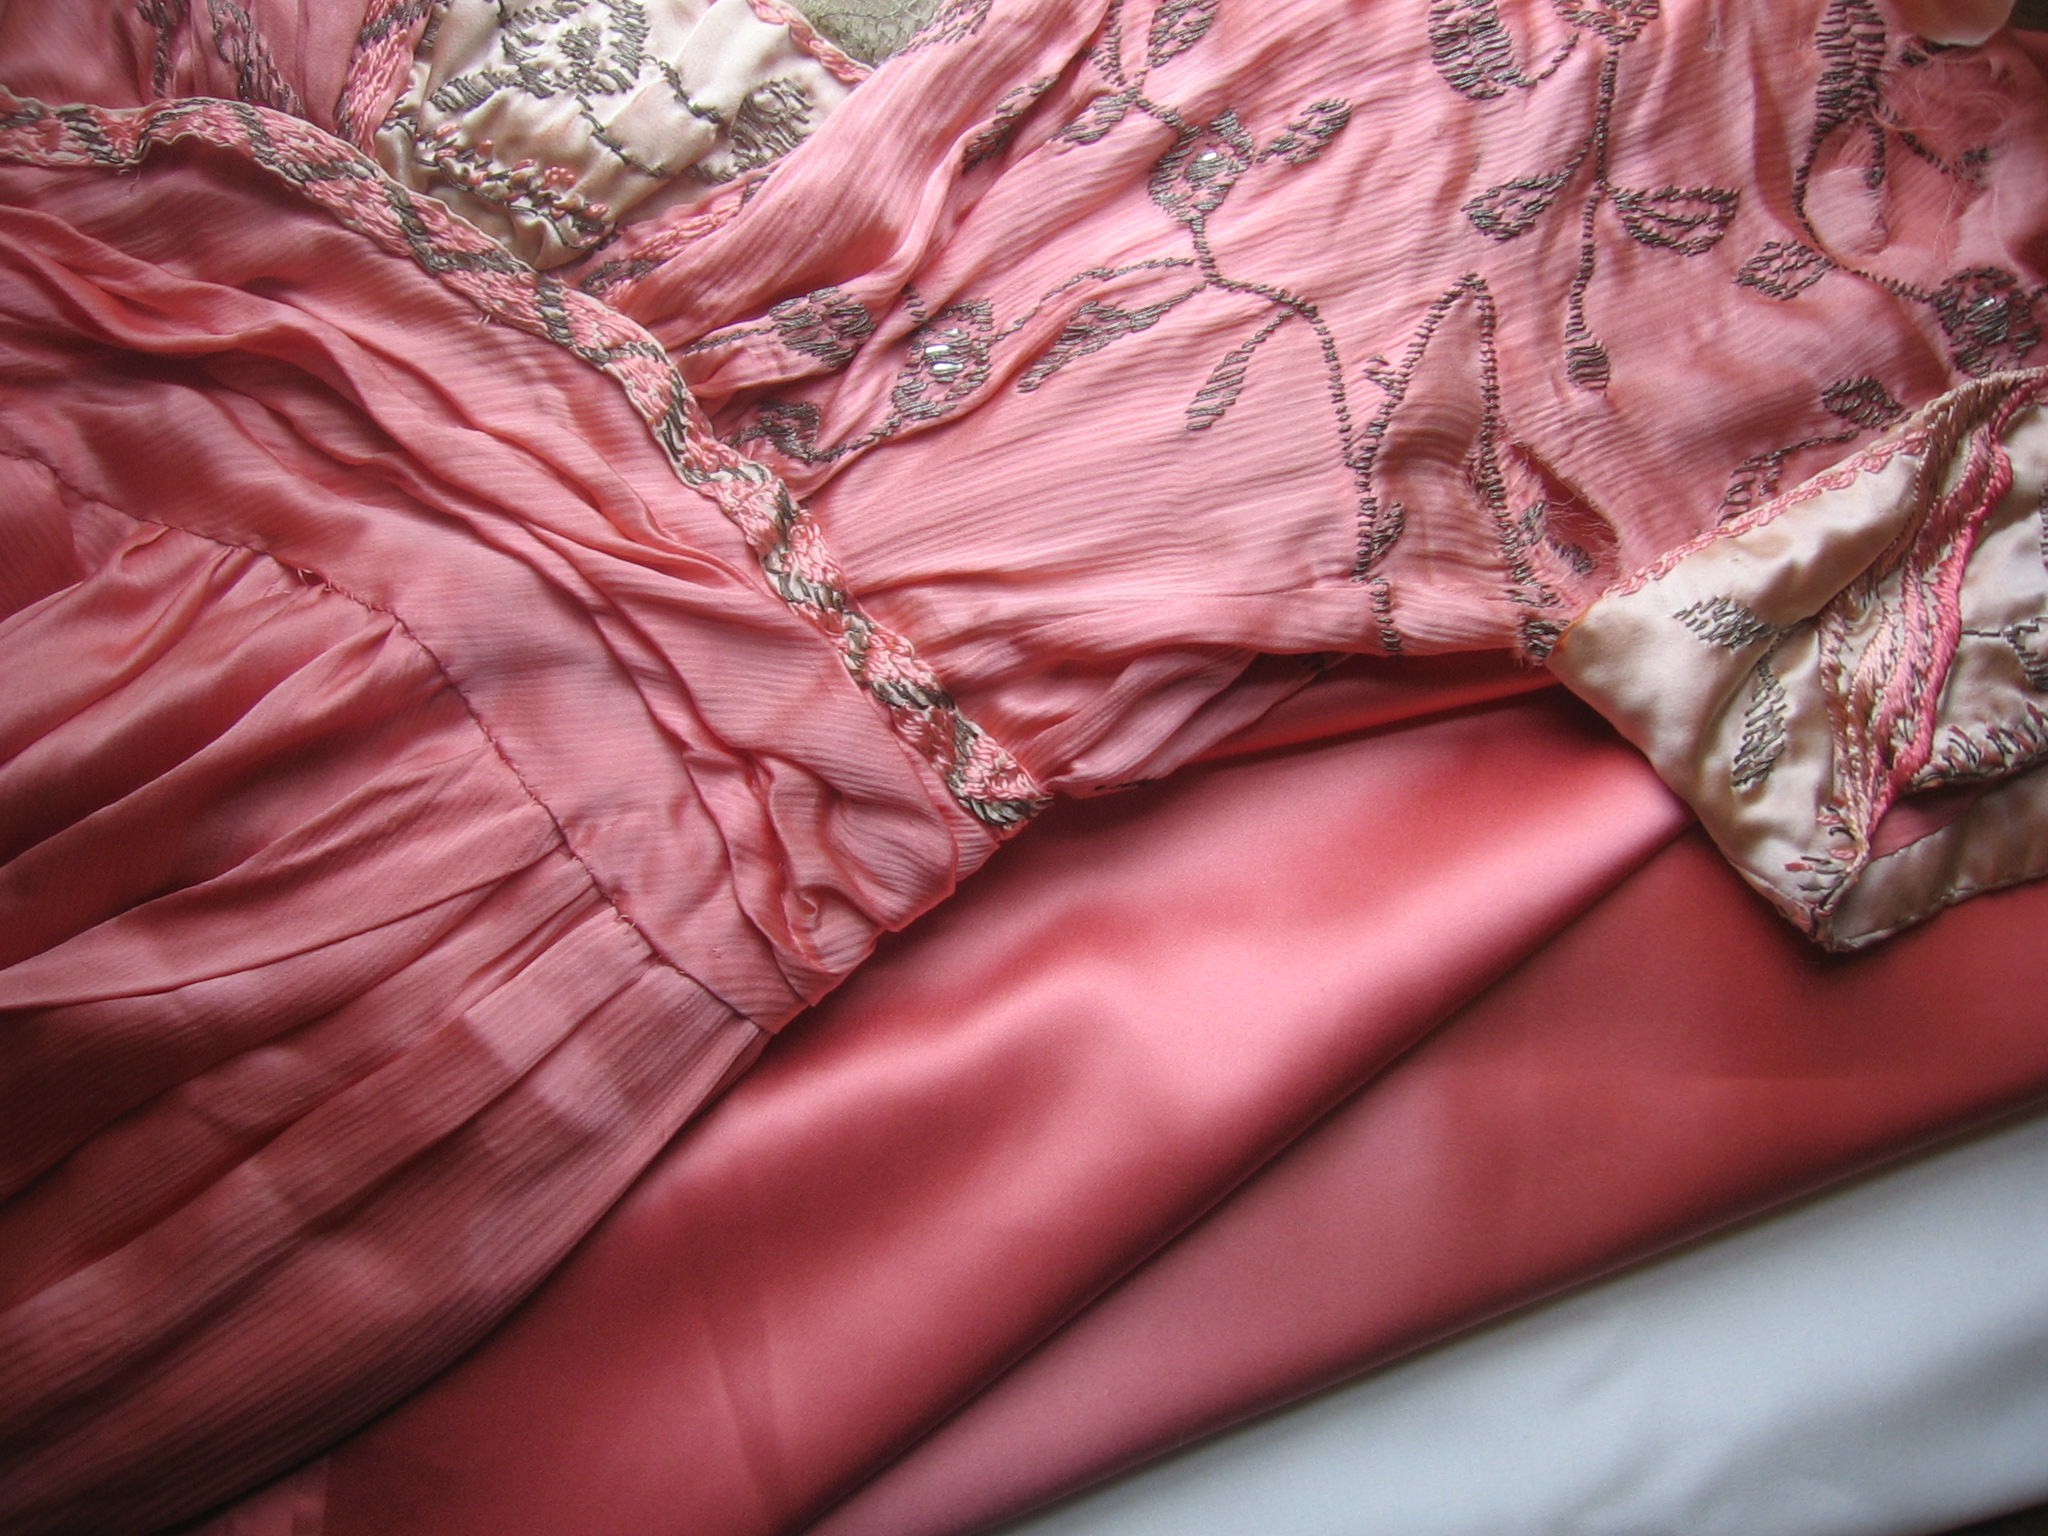
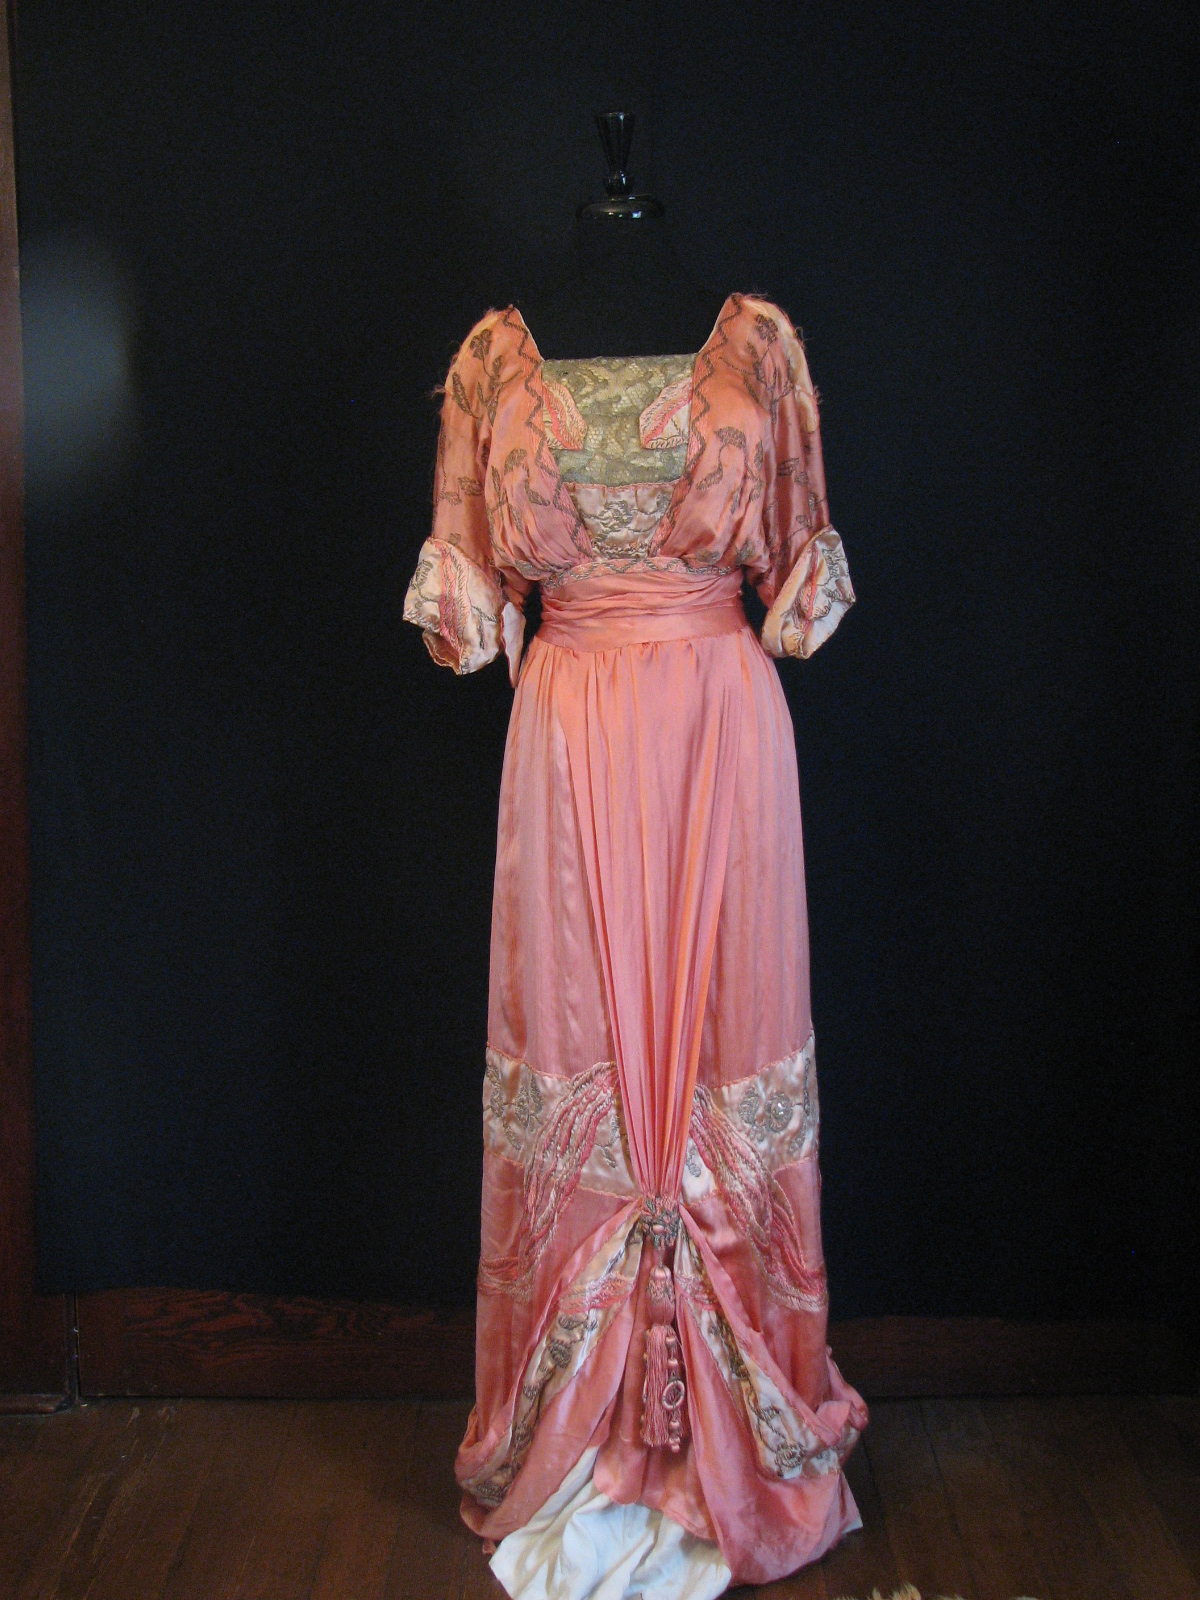
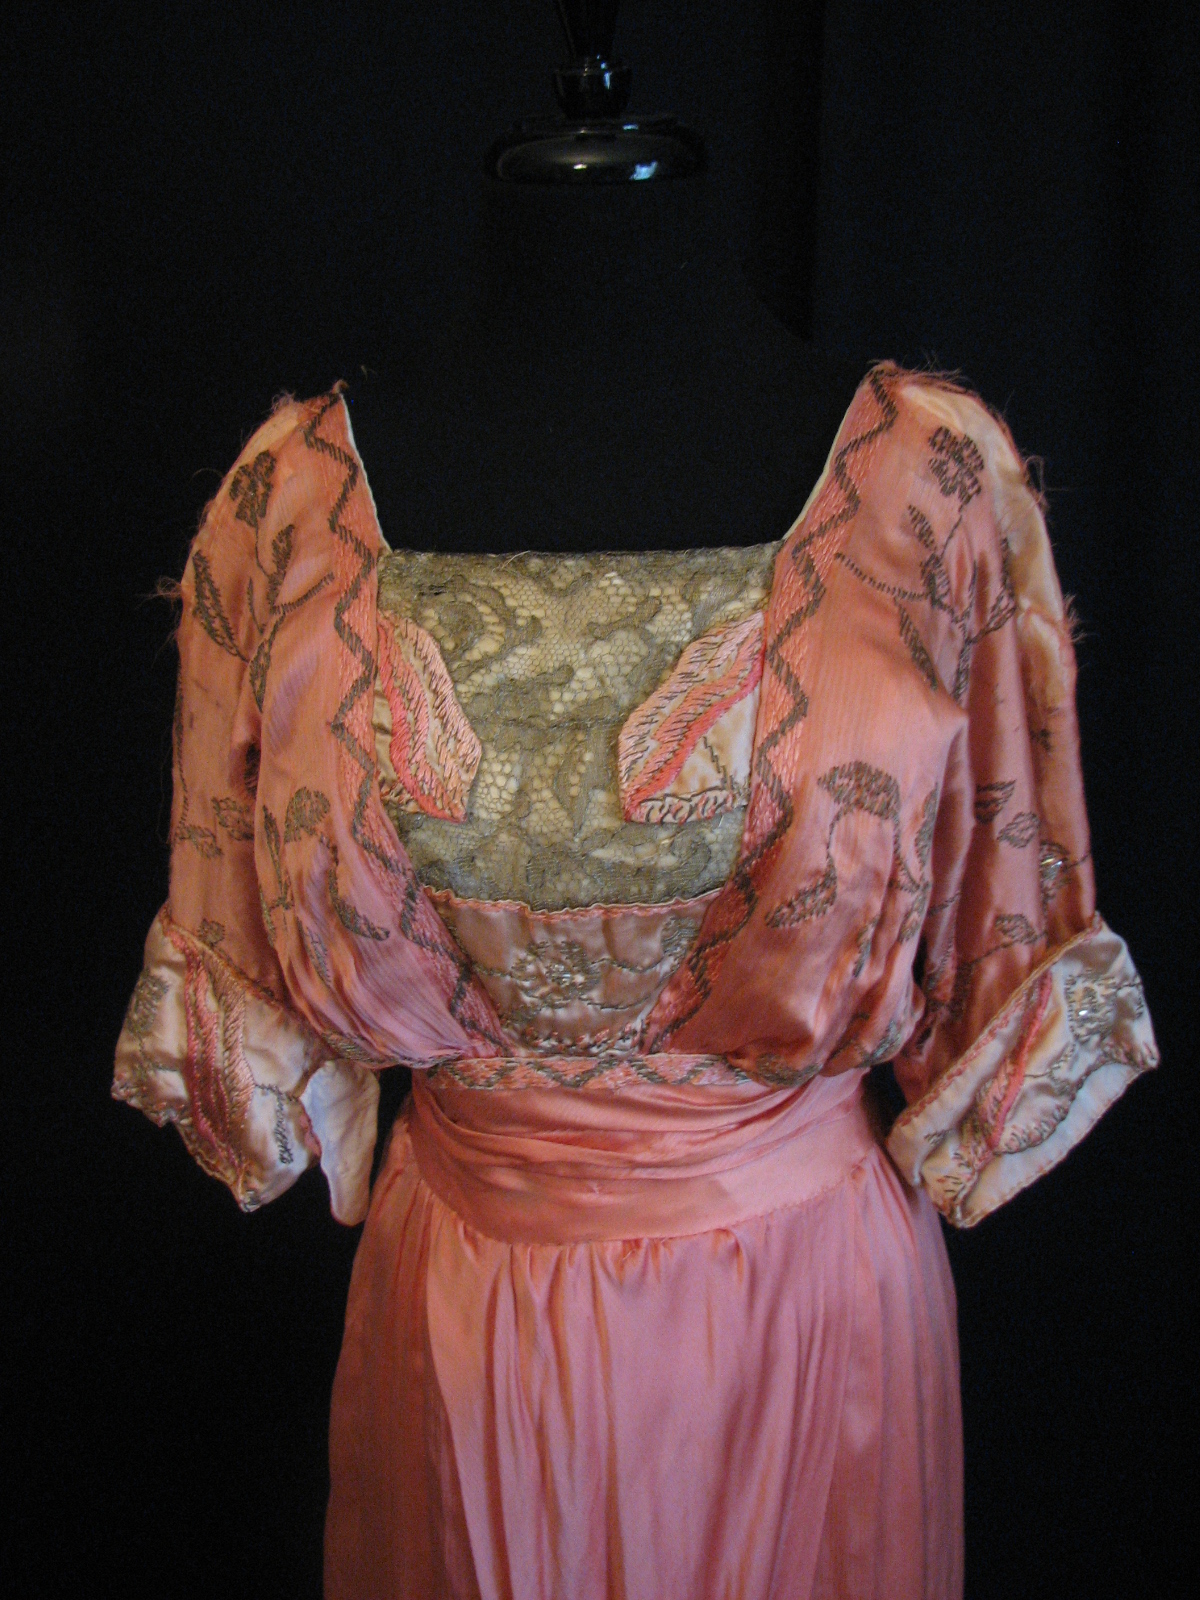
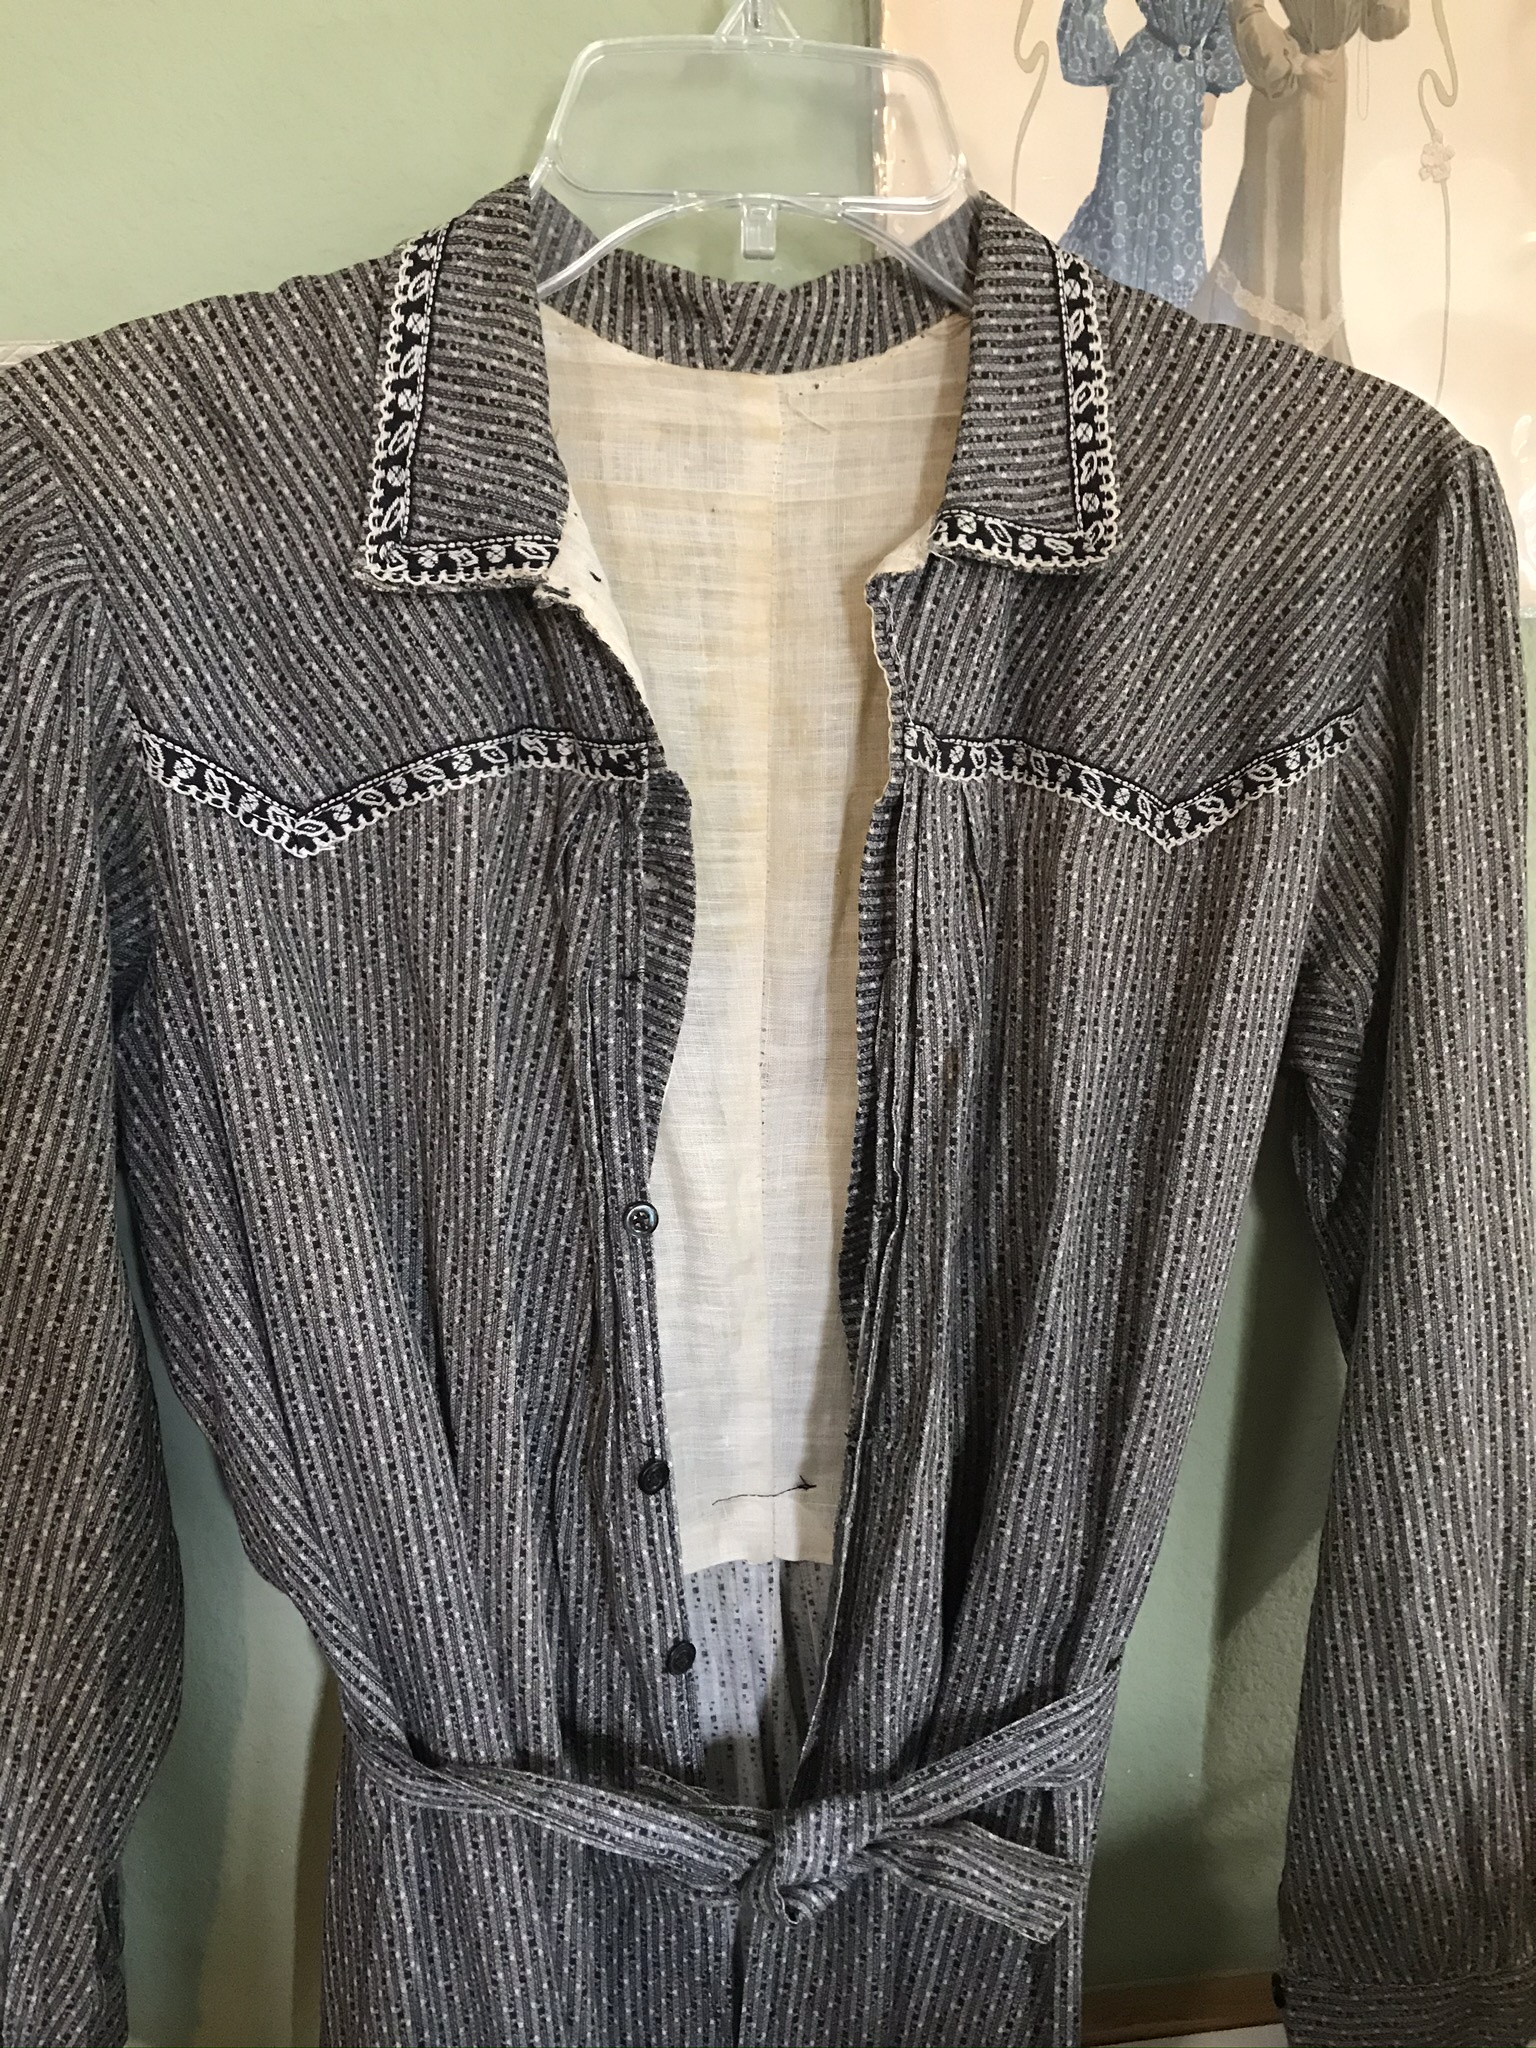
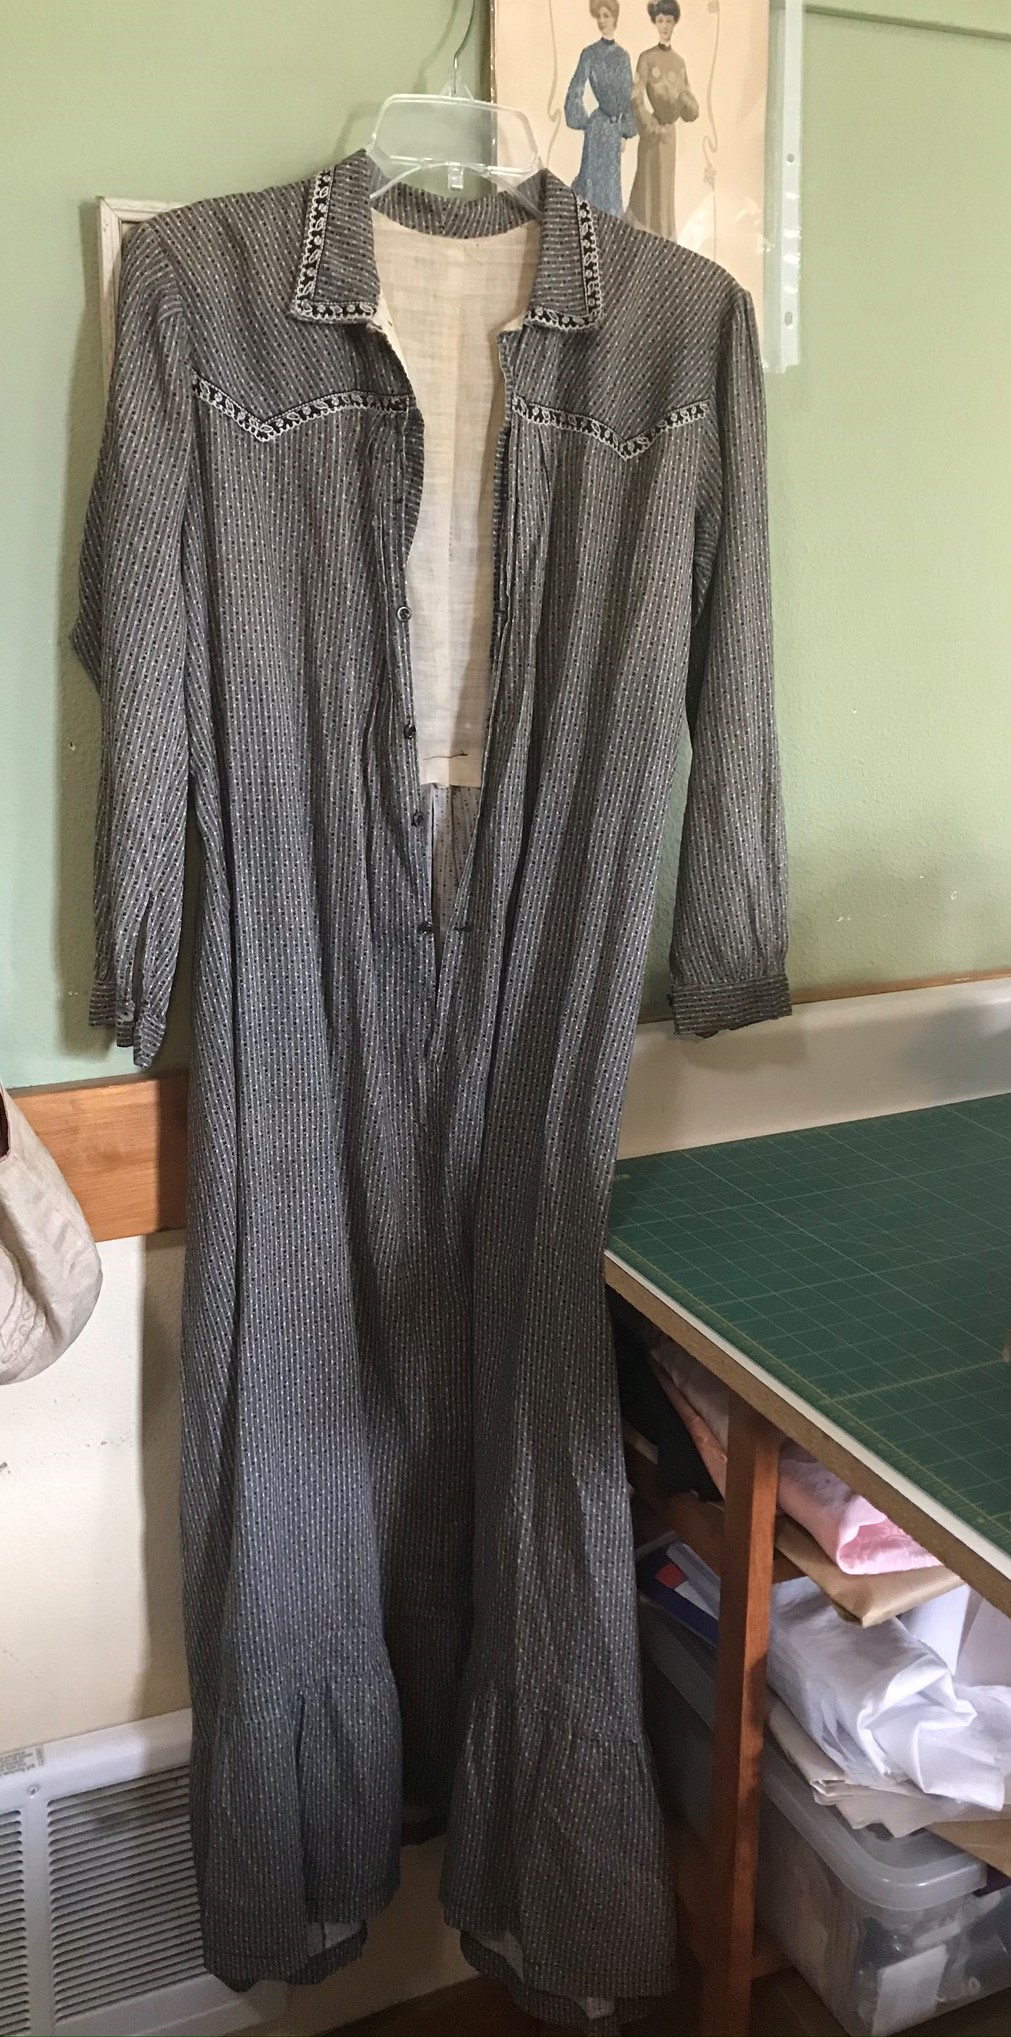
One of the best ways to learn about “what they wore” is to study a garment from the era. I am fortunate to own an antique cotton house dress, circa 1907 – 1909, judging by the style details. It’s a simple garment, with only a bit of trim on the yoke and collar. It has the silhouette of the era, with a flounce at the bottom and gathered sleeves.

edwardian house dress vintageLooking at the House Dress

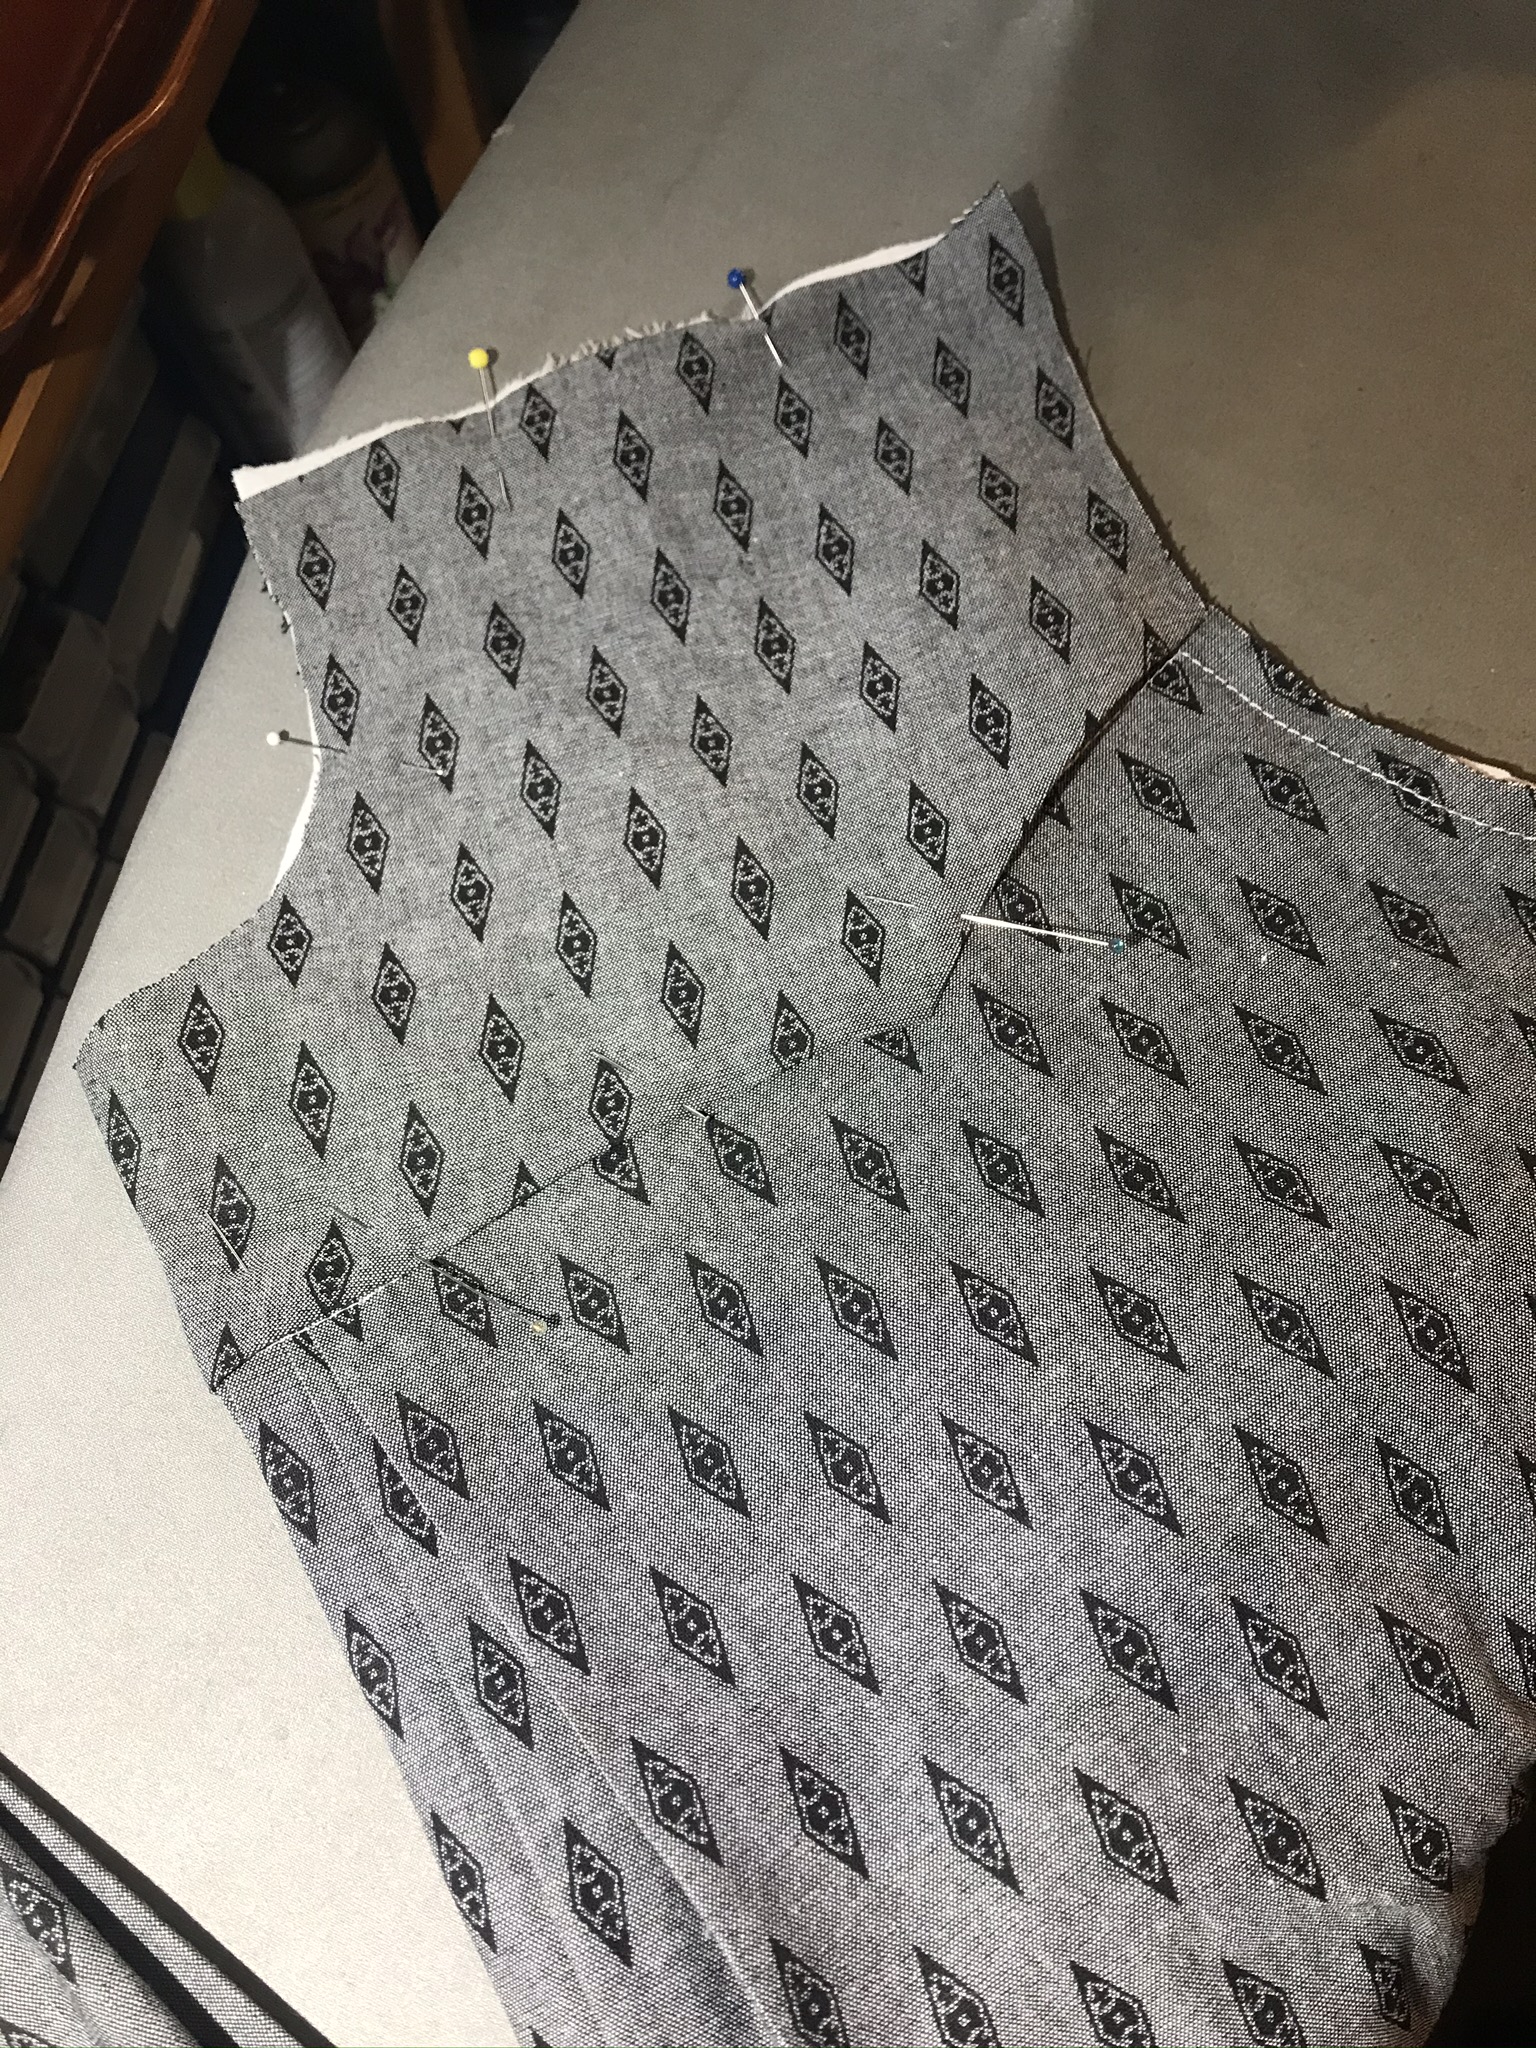
The yoke is shaped in a “western” style. If you think about it, this dress pre-dates “western” movies and cowboy singers. This shape was a variation on the clothing of the 1890s through 1910s. It was only in the decades after that it became a symbol of the American cowboys.

edwardian house dress vintage & replica (25)

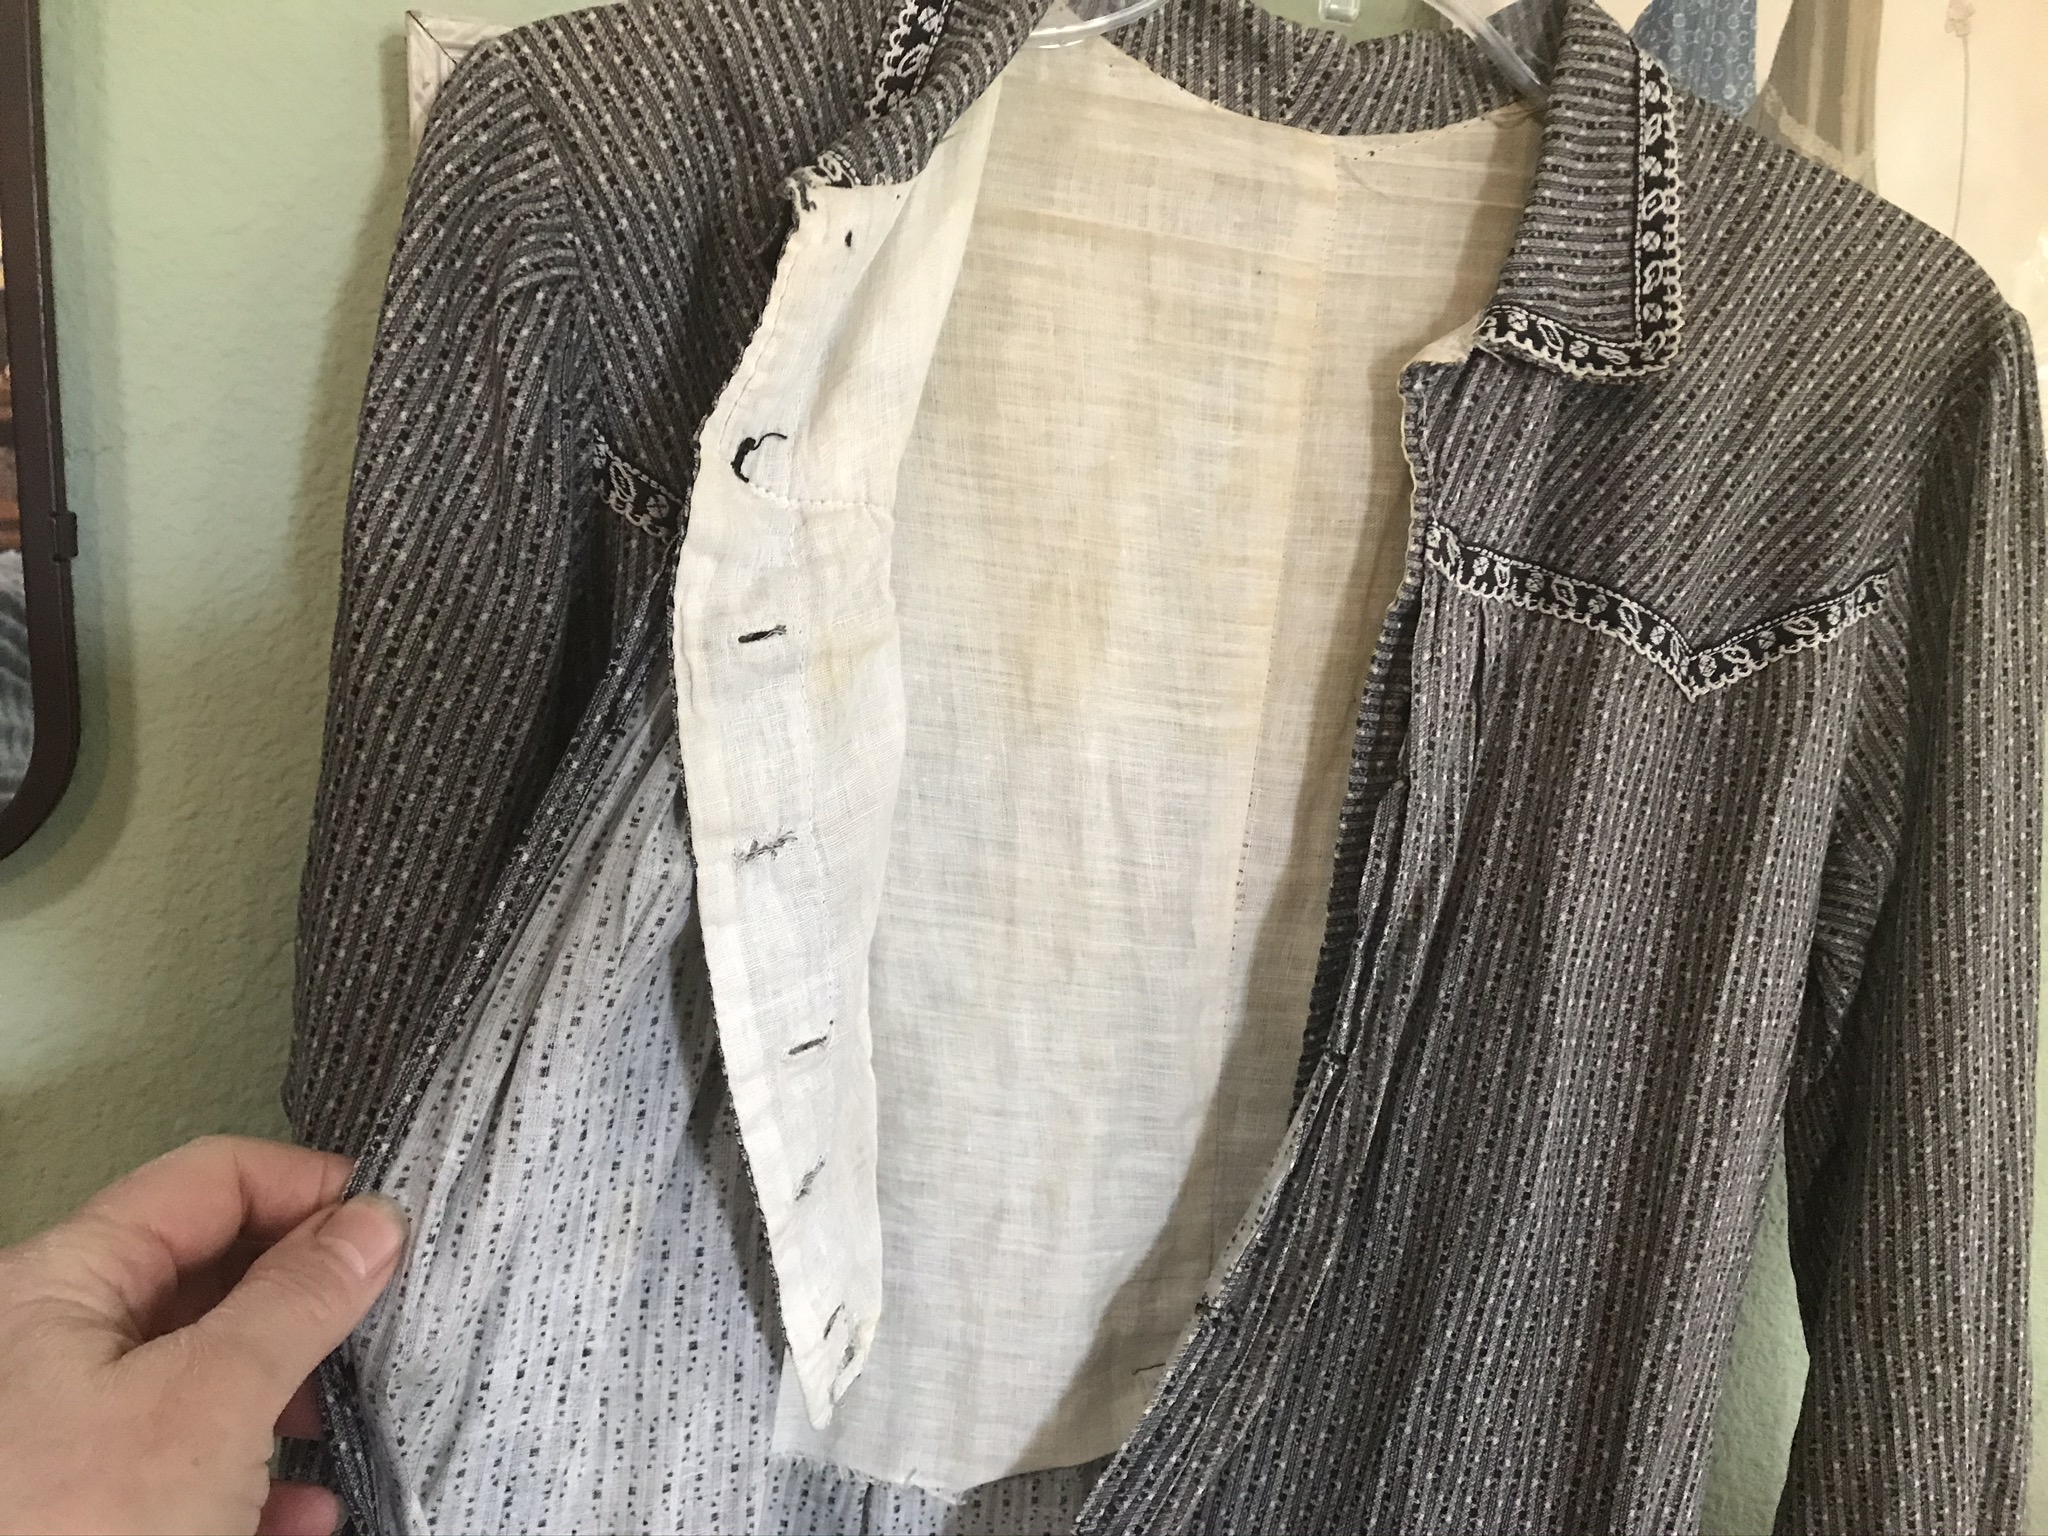
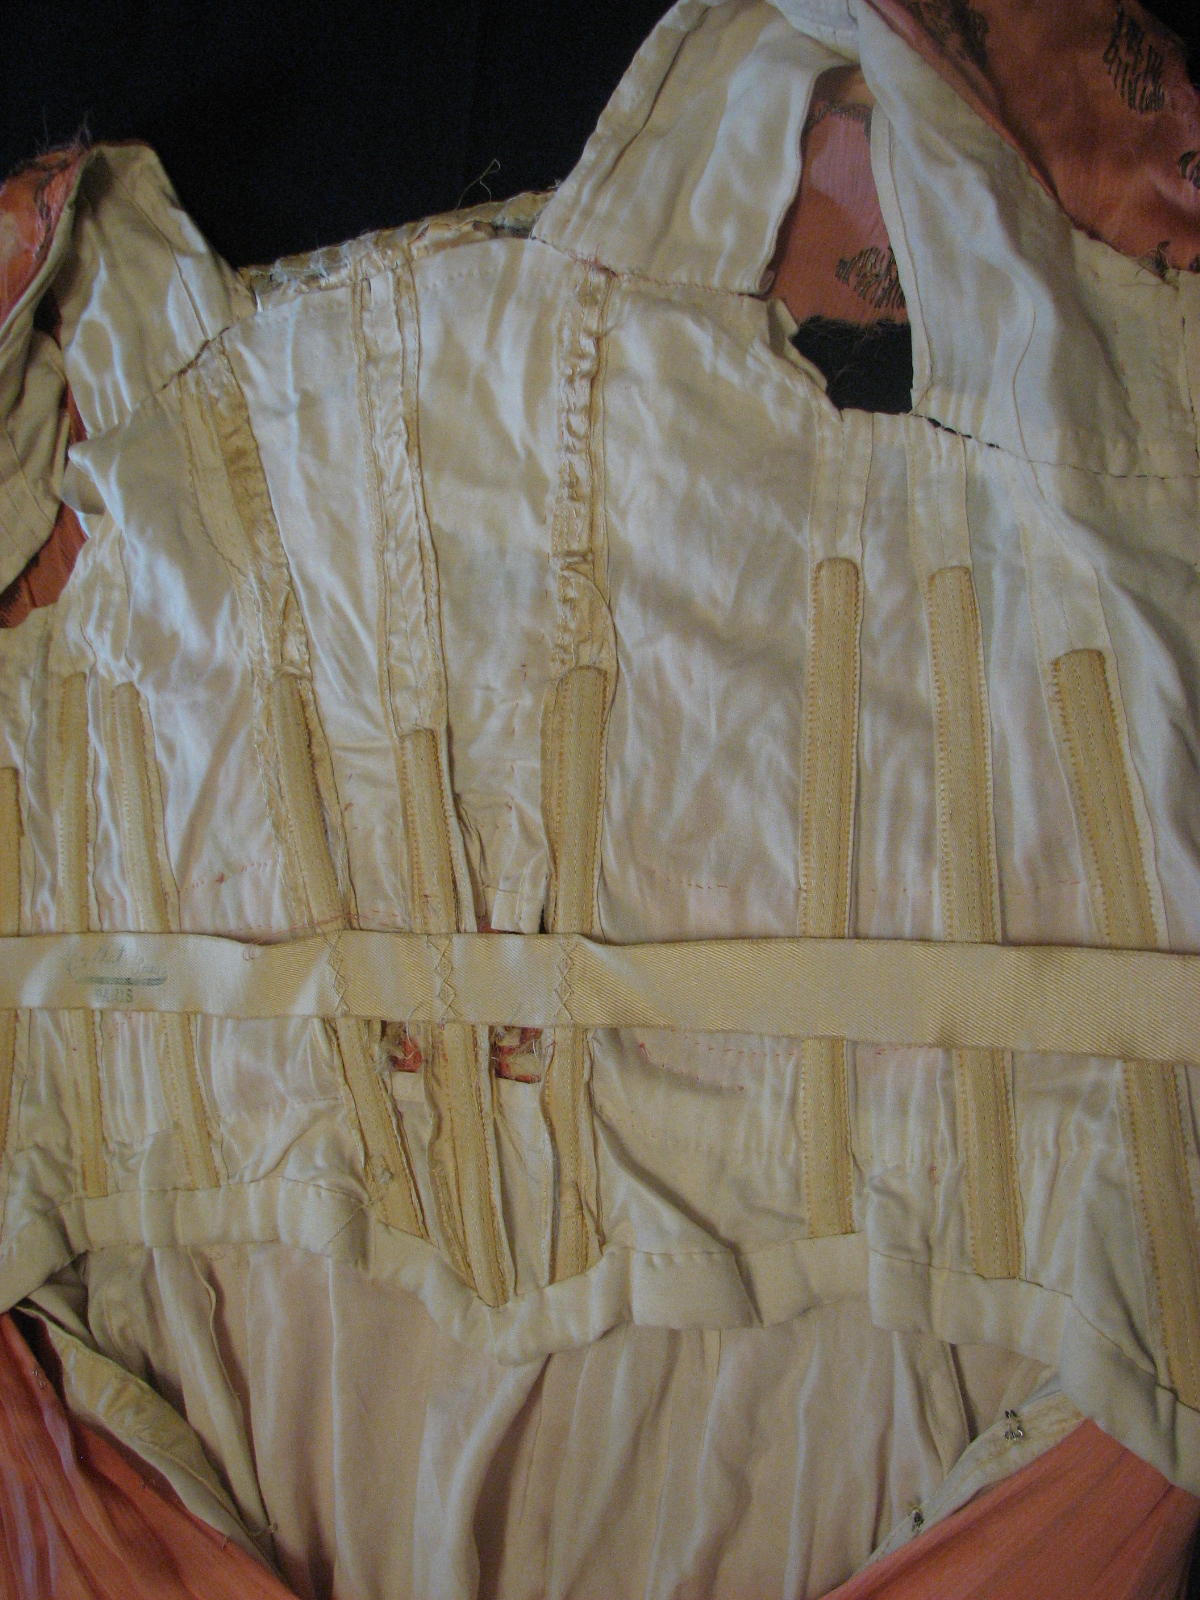
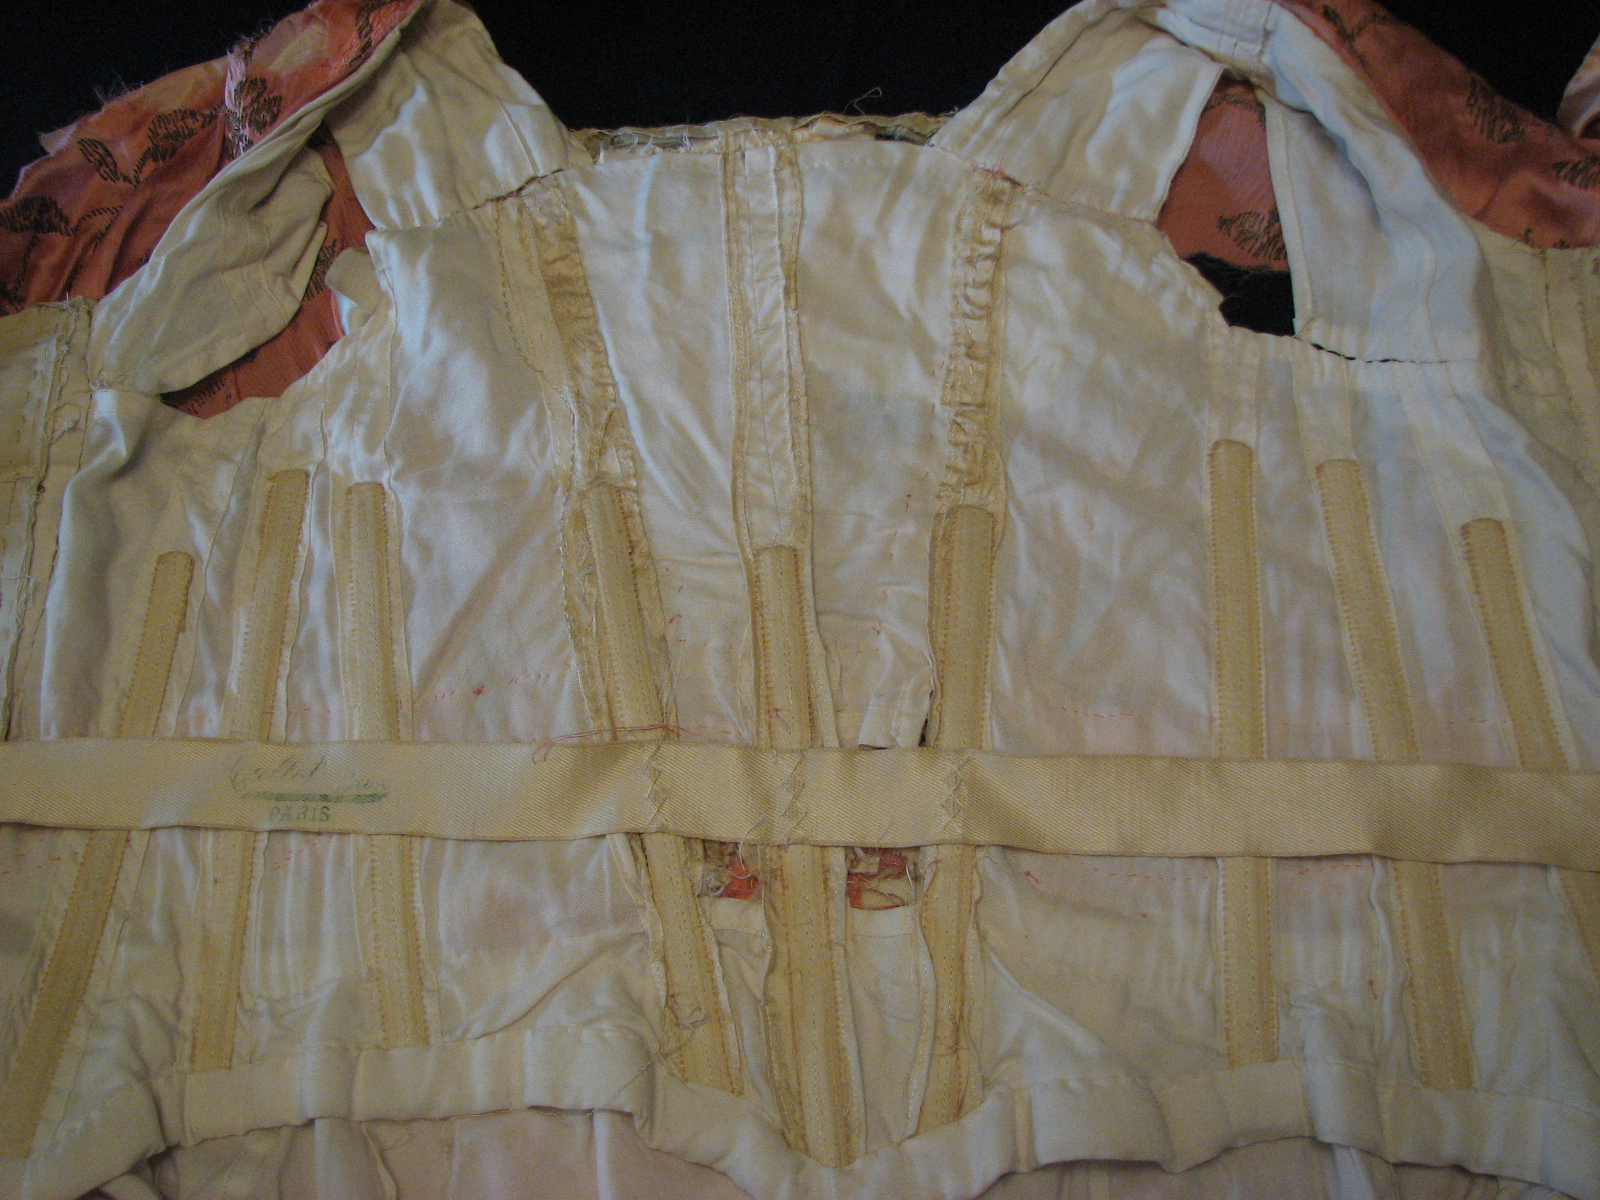
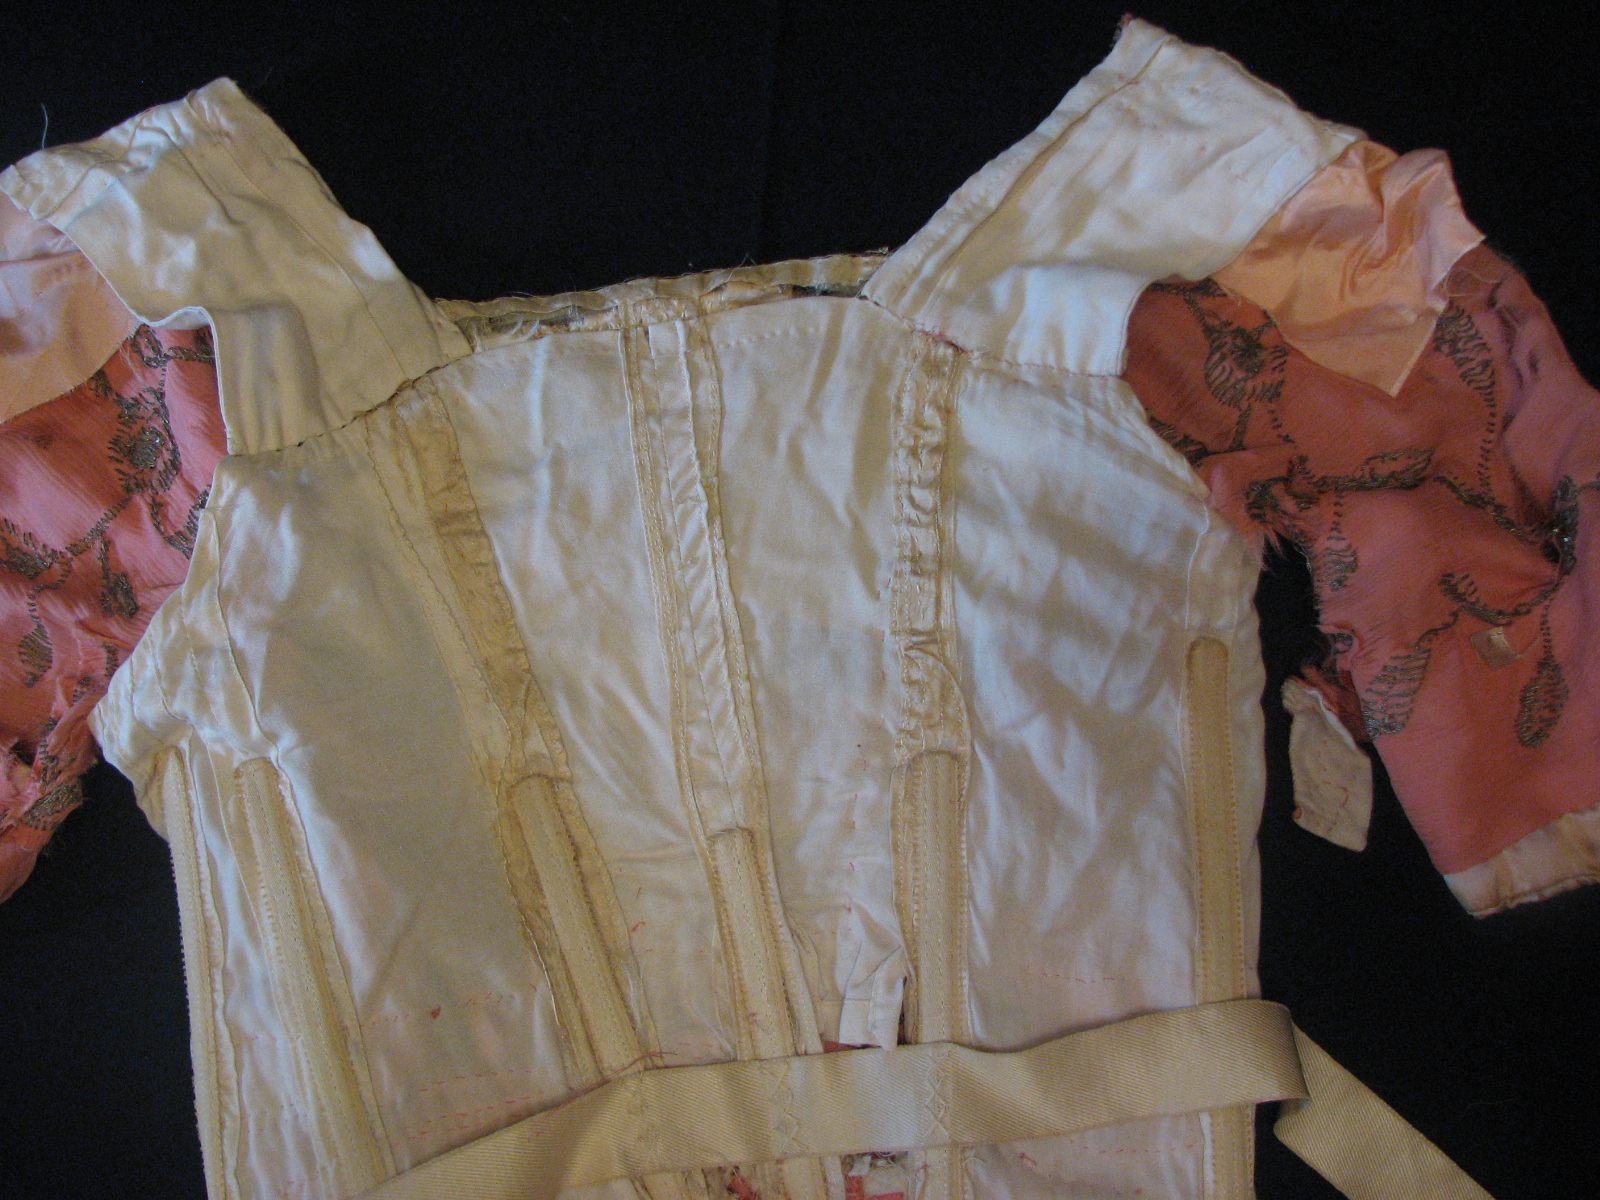
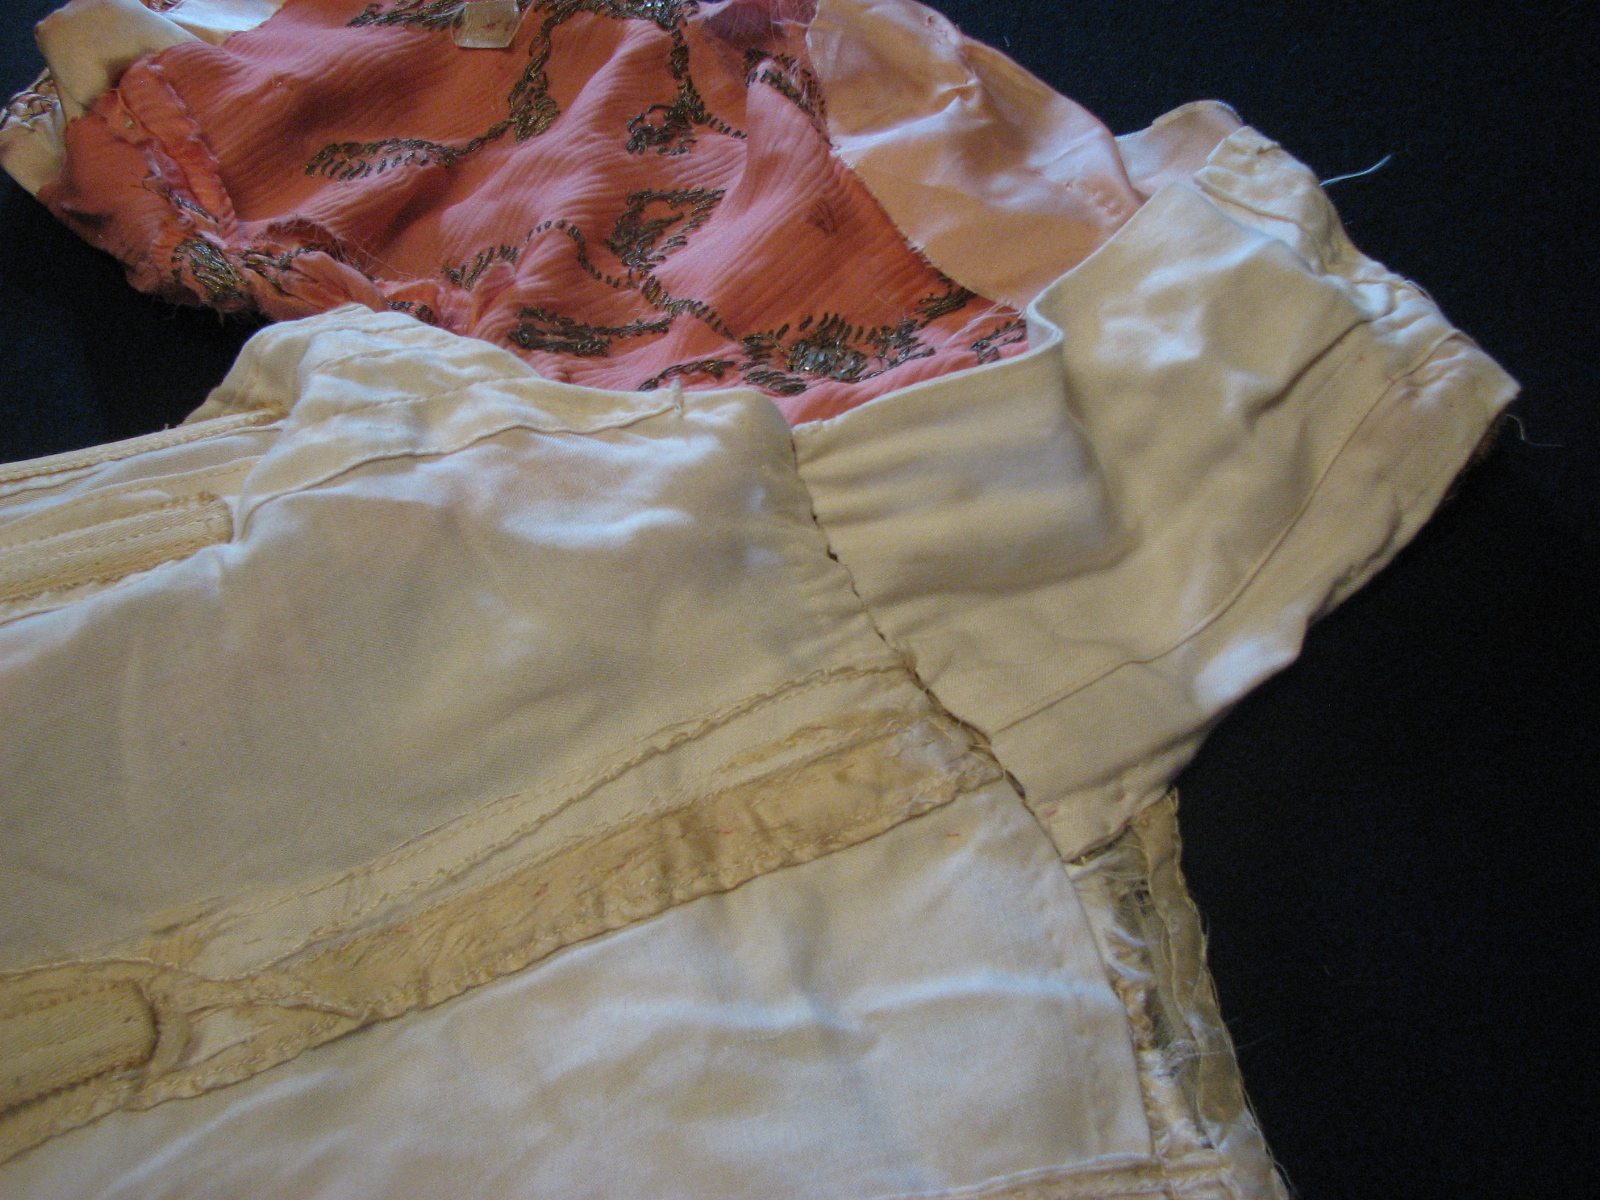
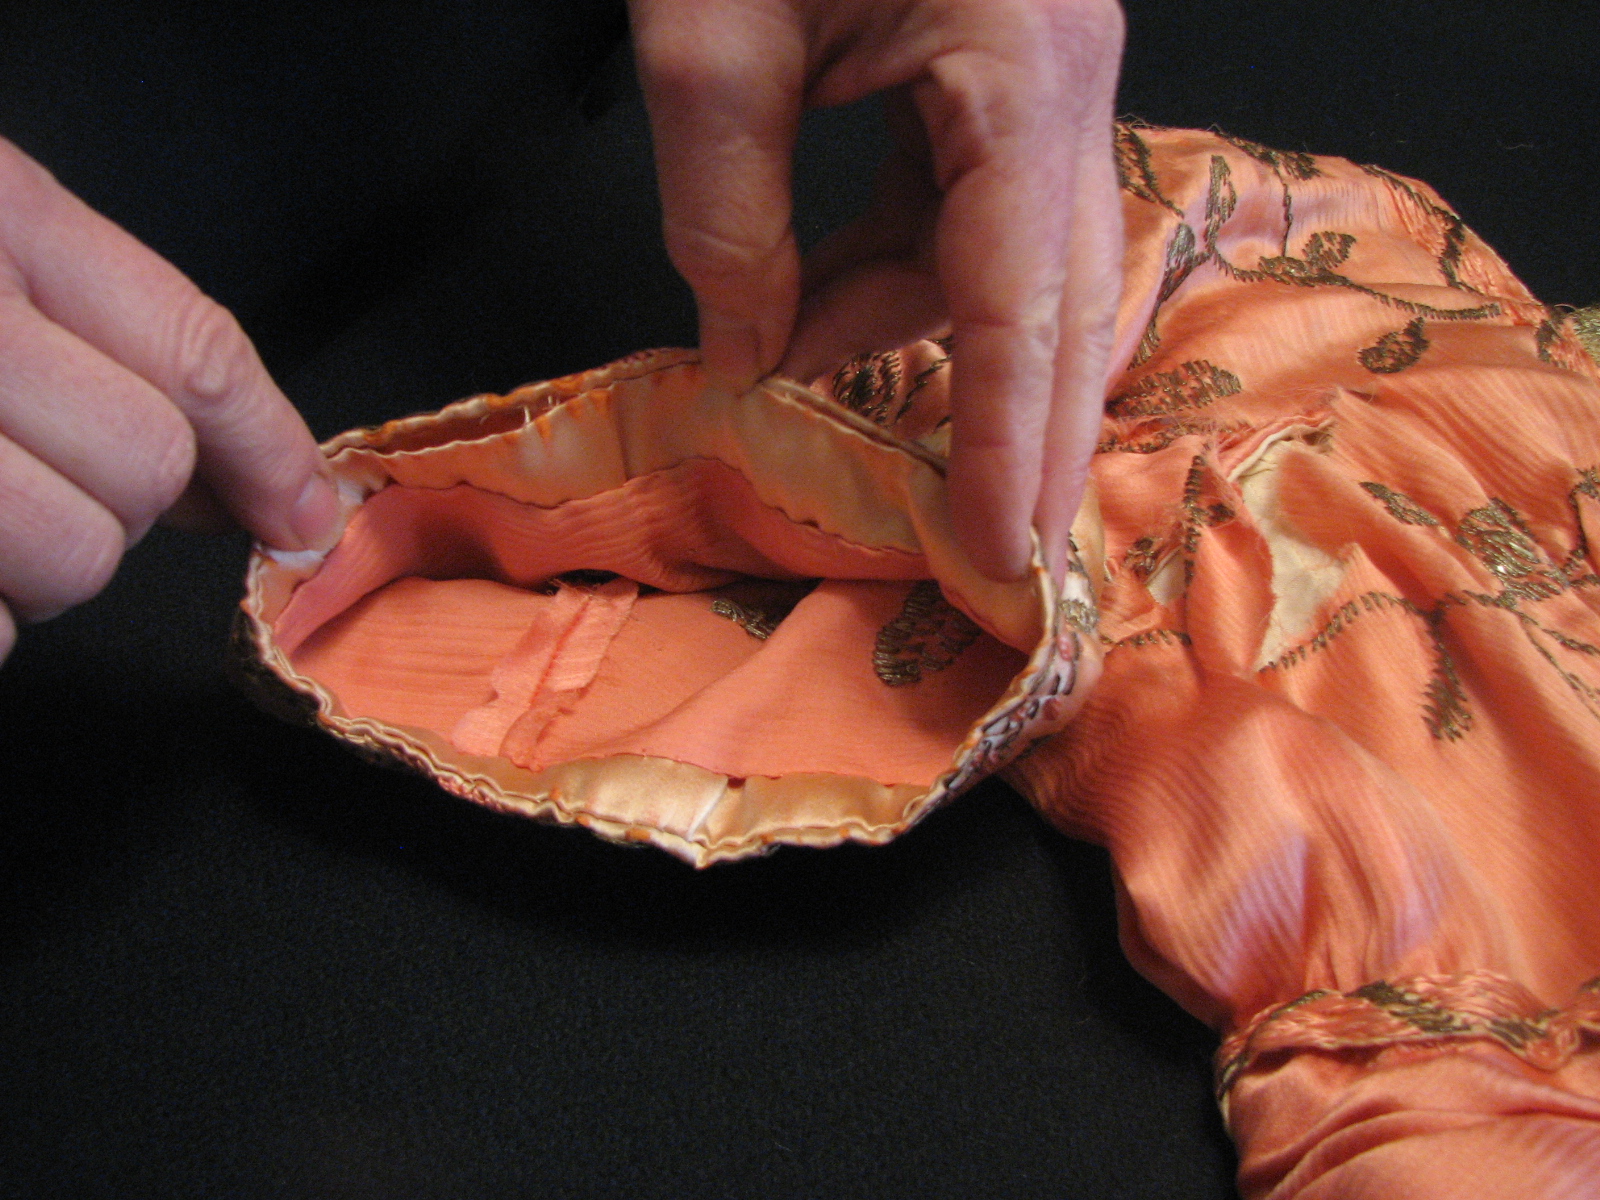
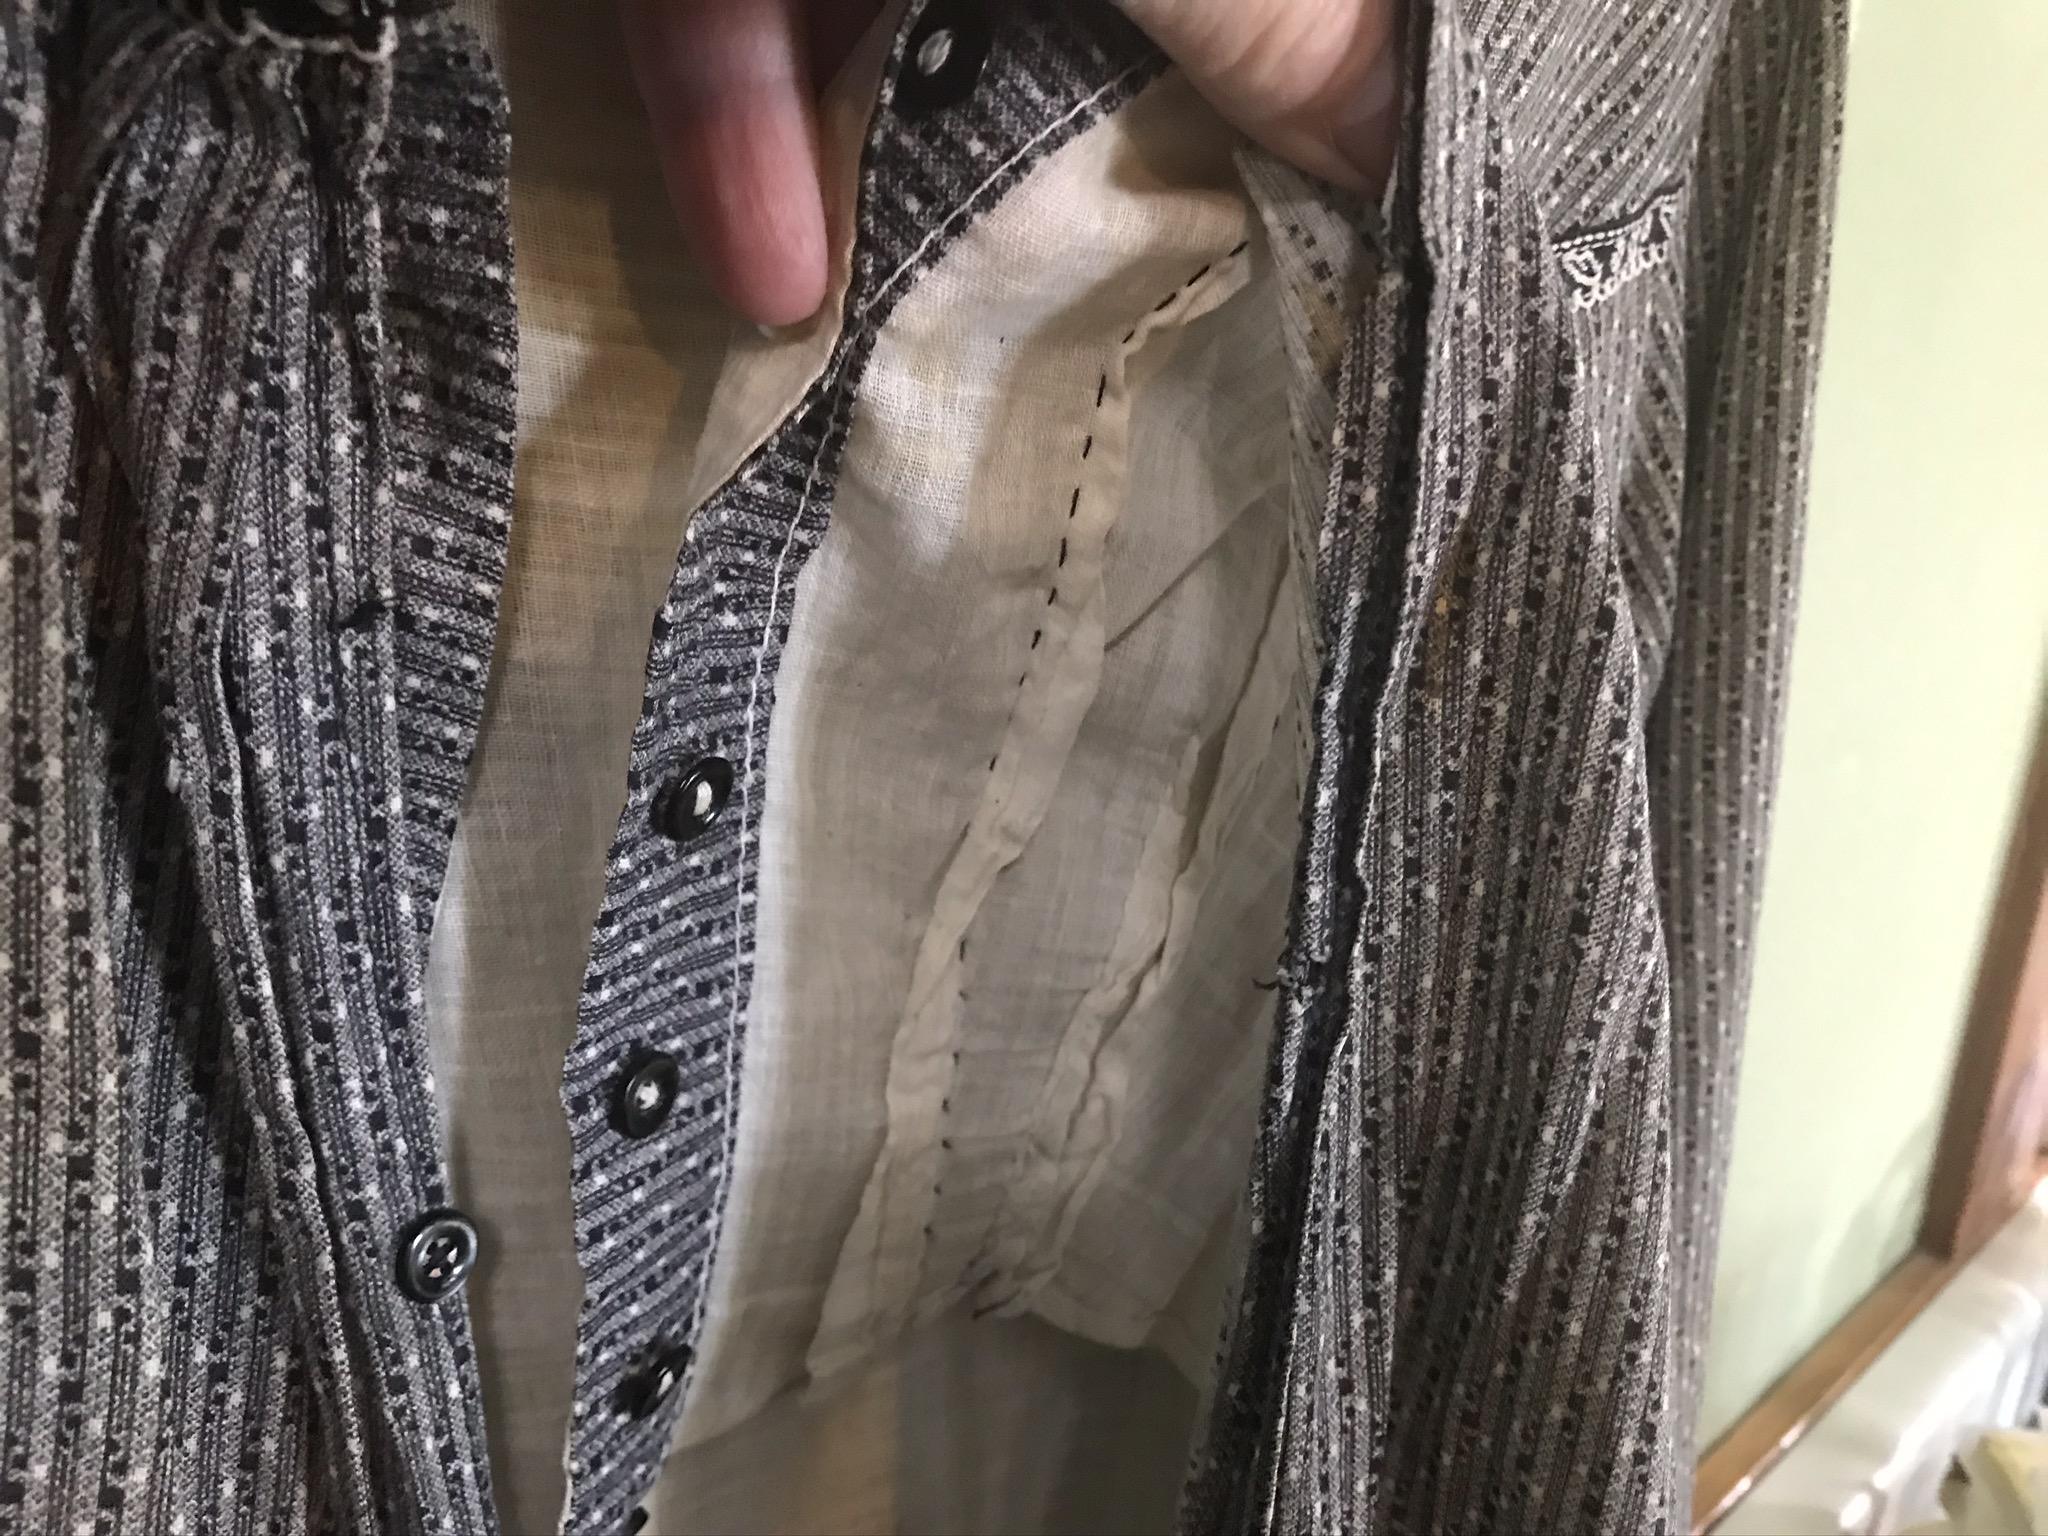
The lining is made of a thin, open-weave type of cotton. If you look inside, you can see that it’s a mixture of machine stitching and hand sewing. The darts are sewn by hand! And the area at the center front, at the button closure, plus the short plackets at the sleeve cuffs, are stitched by machine. The trim is sewn by machine, as well.

edwardian house dress vintage & replica (26)

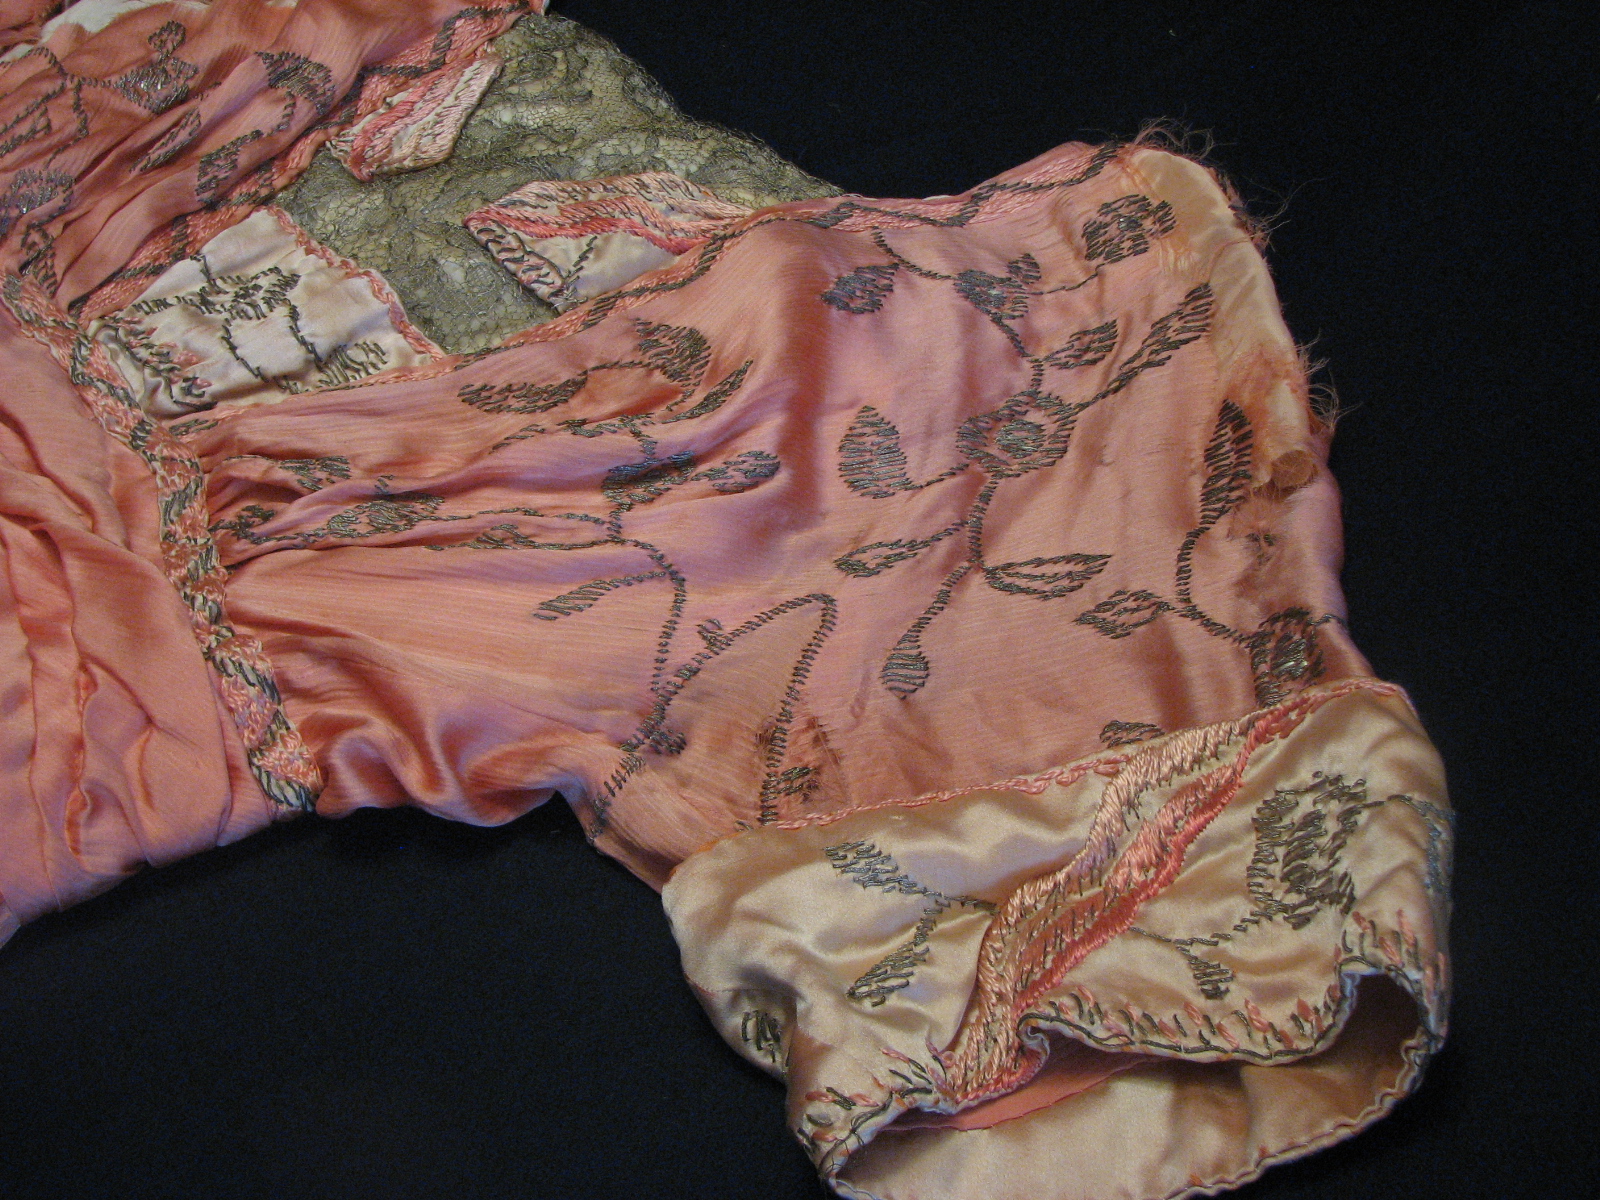
The original dress was made for someone much shorter and smaller than I am, probably about 4’10” tall. I noticed that the original owner found it was too long in front; she took an internal tuck just above the flounce to shorten it.

edwardian house dress vintage & replica (28)

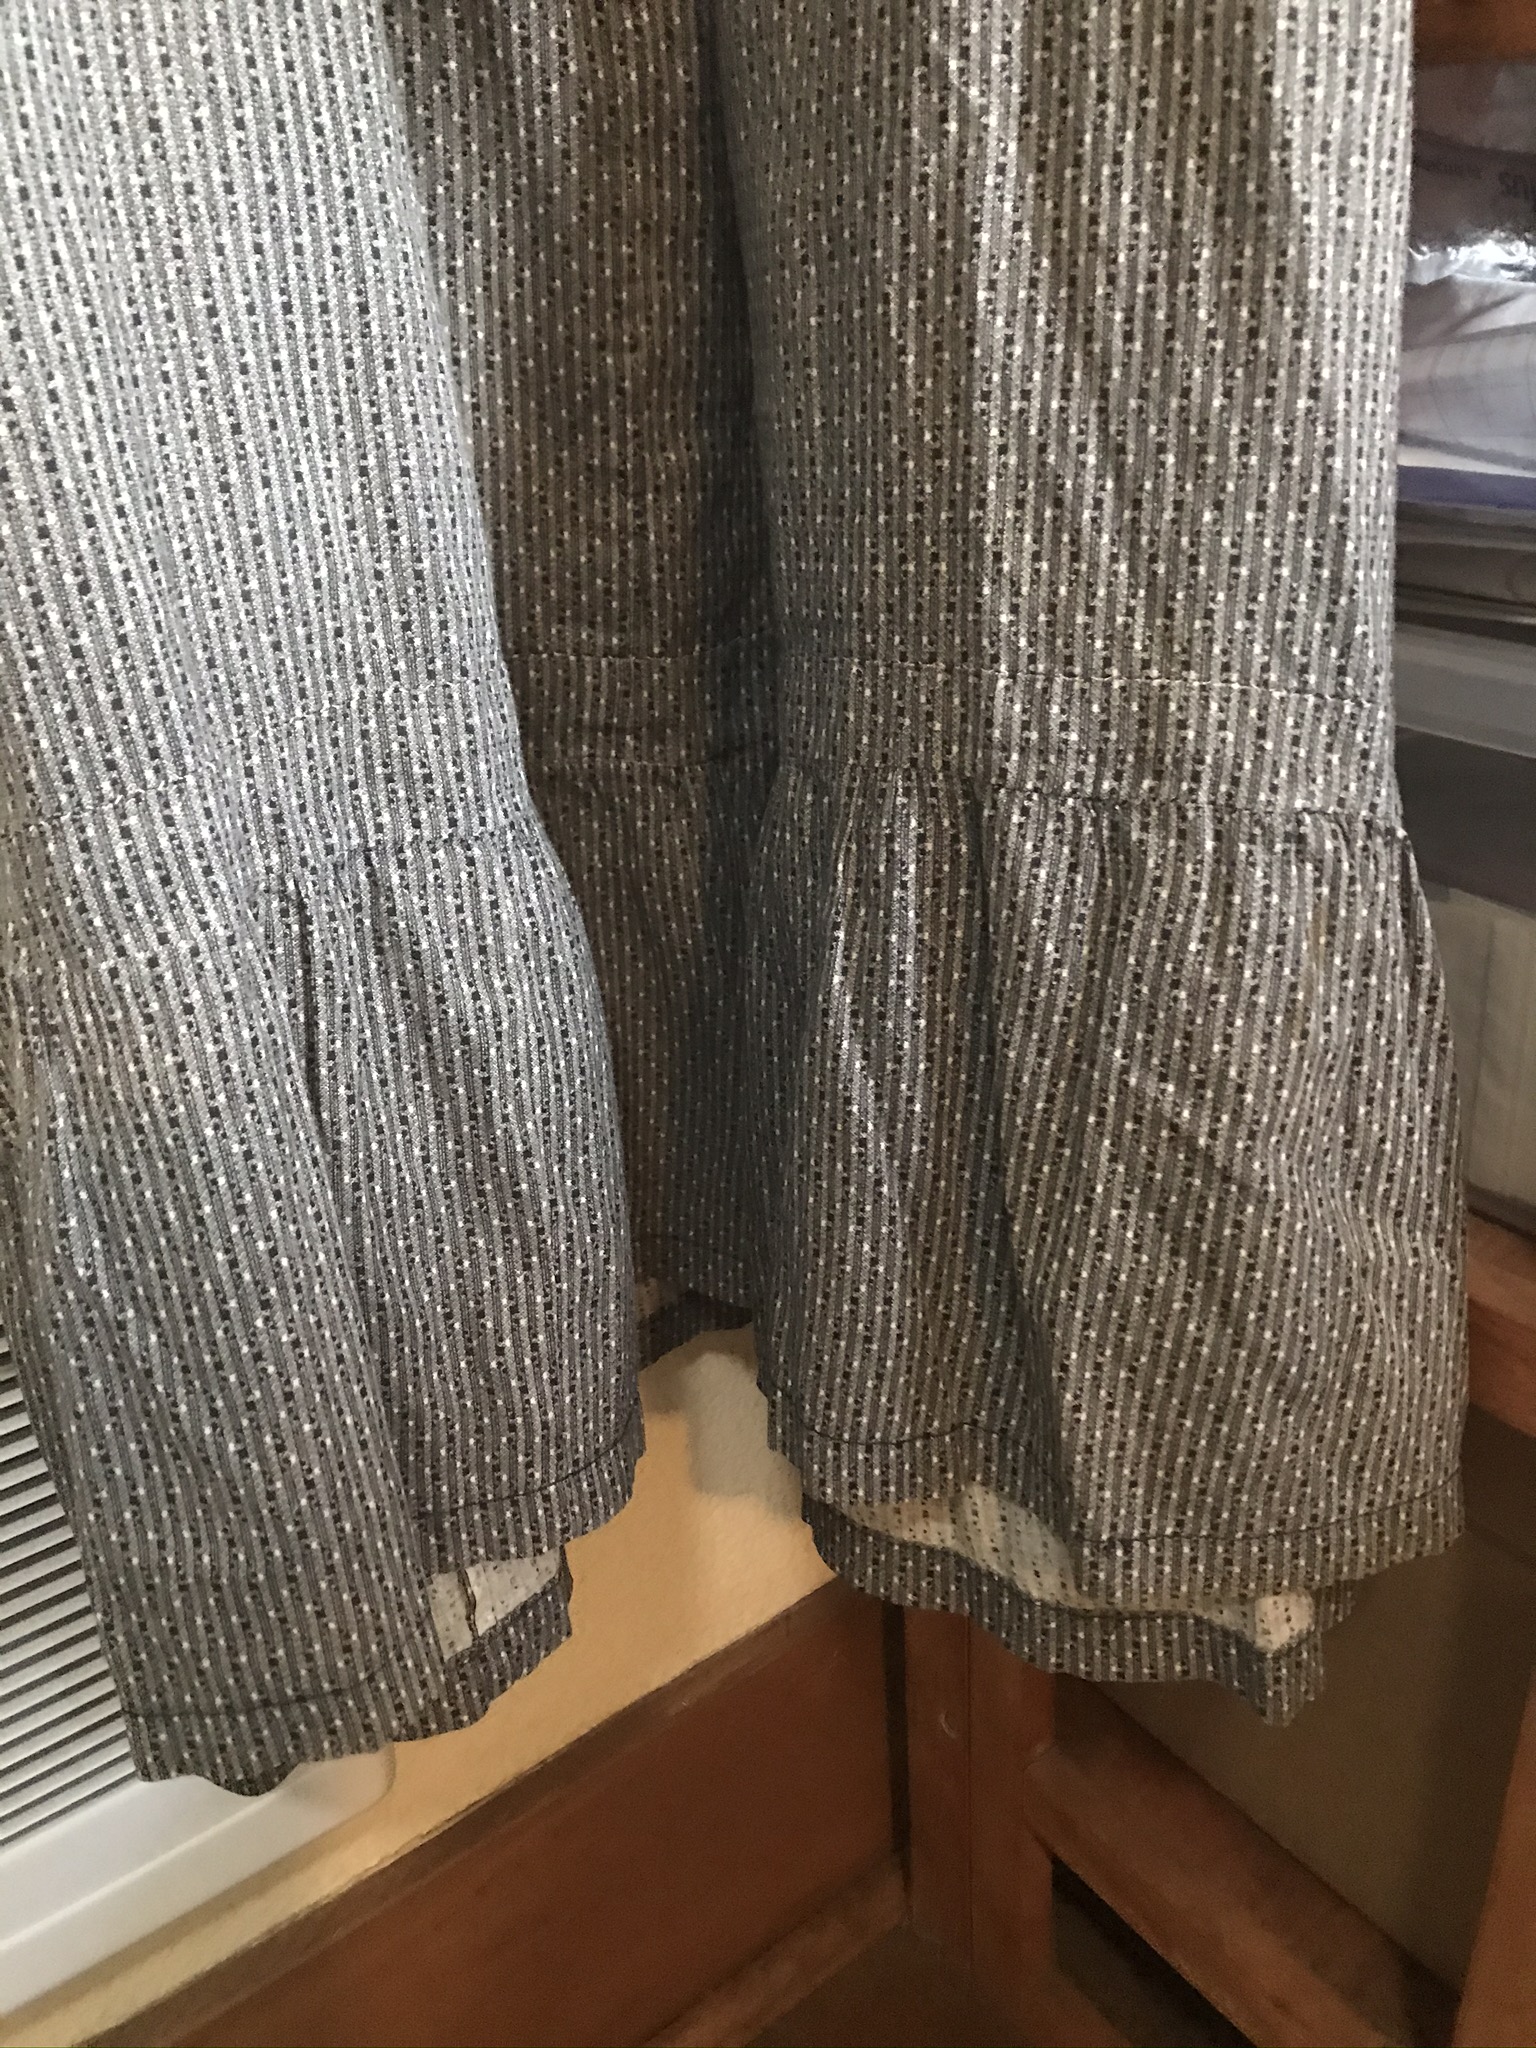
It’s quite possible that this dress was made for maternity wear. That tuck above the flounce and those hand stitched darts could have been added after the pregnancy, so the new mother could continue to wear the dress.

To make a copy for myself, I started with my own personal sloper for the bodice lining and a sleeve pattern from a 1907 blouse waist that I liked. I was able to draft the front and back by copying the angles and pleats of the original, but with my own measurements for skirt length and back waist. (I tend to be much longer in the waist than most patterns, so this is always an important measurement for me.)

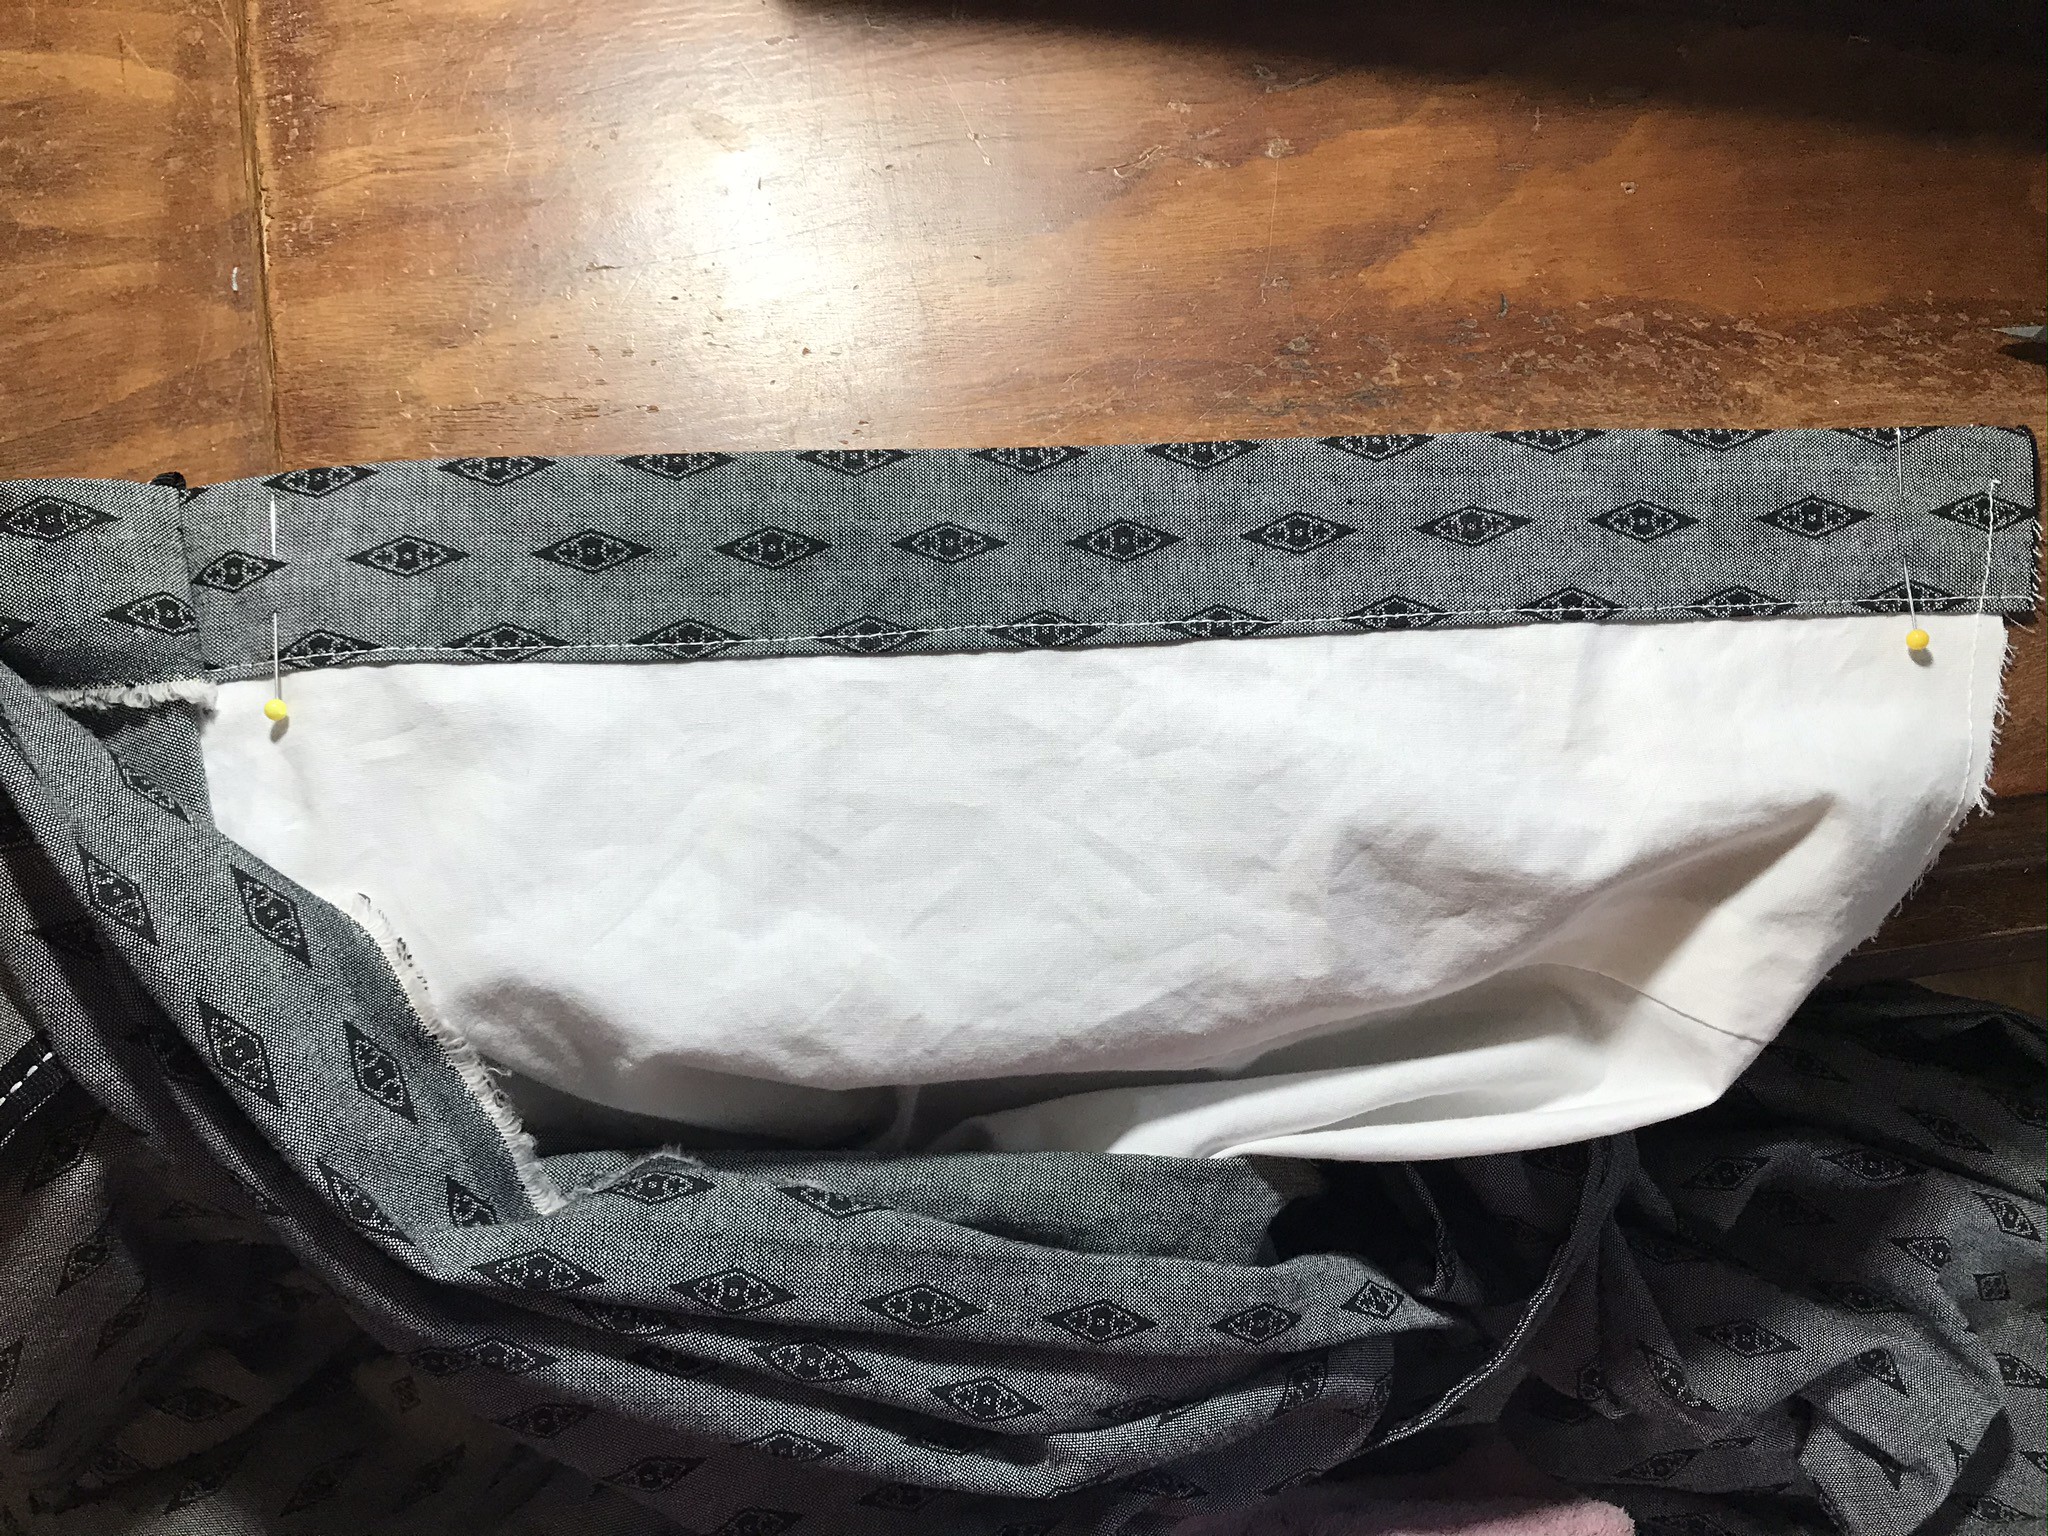
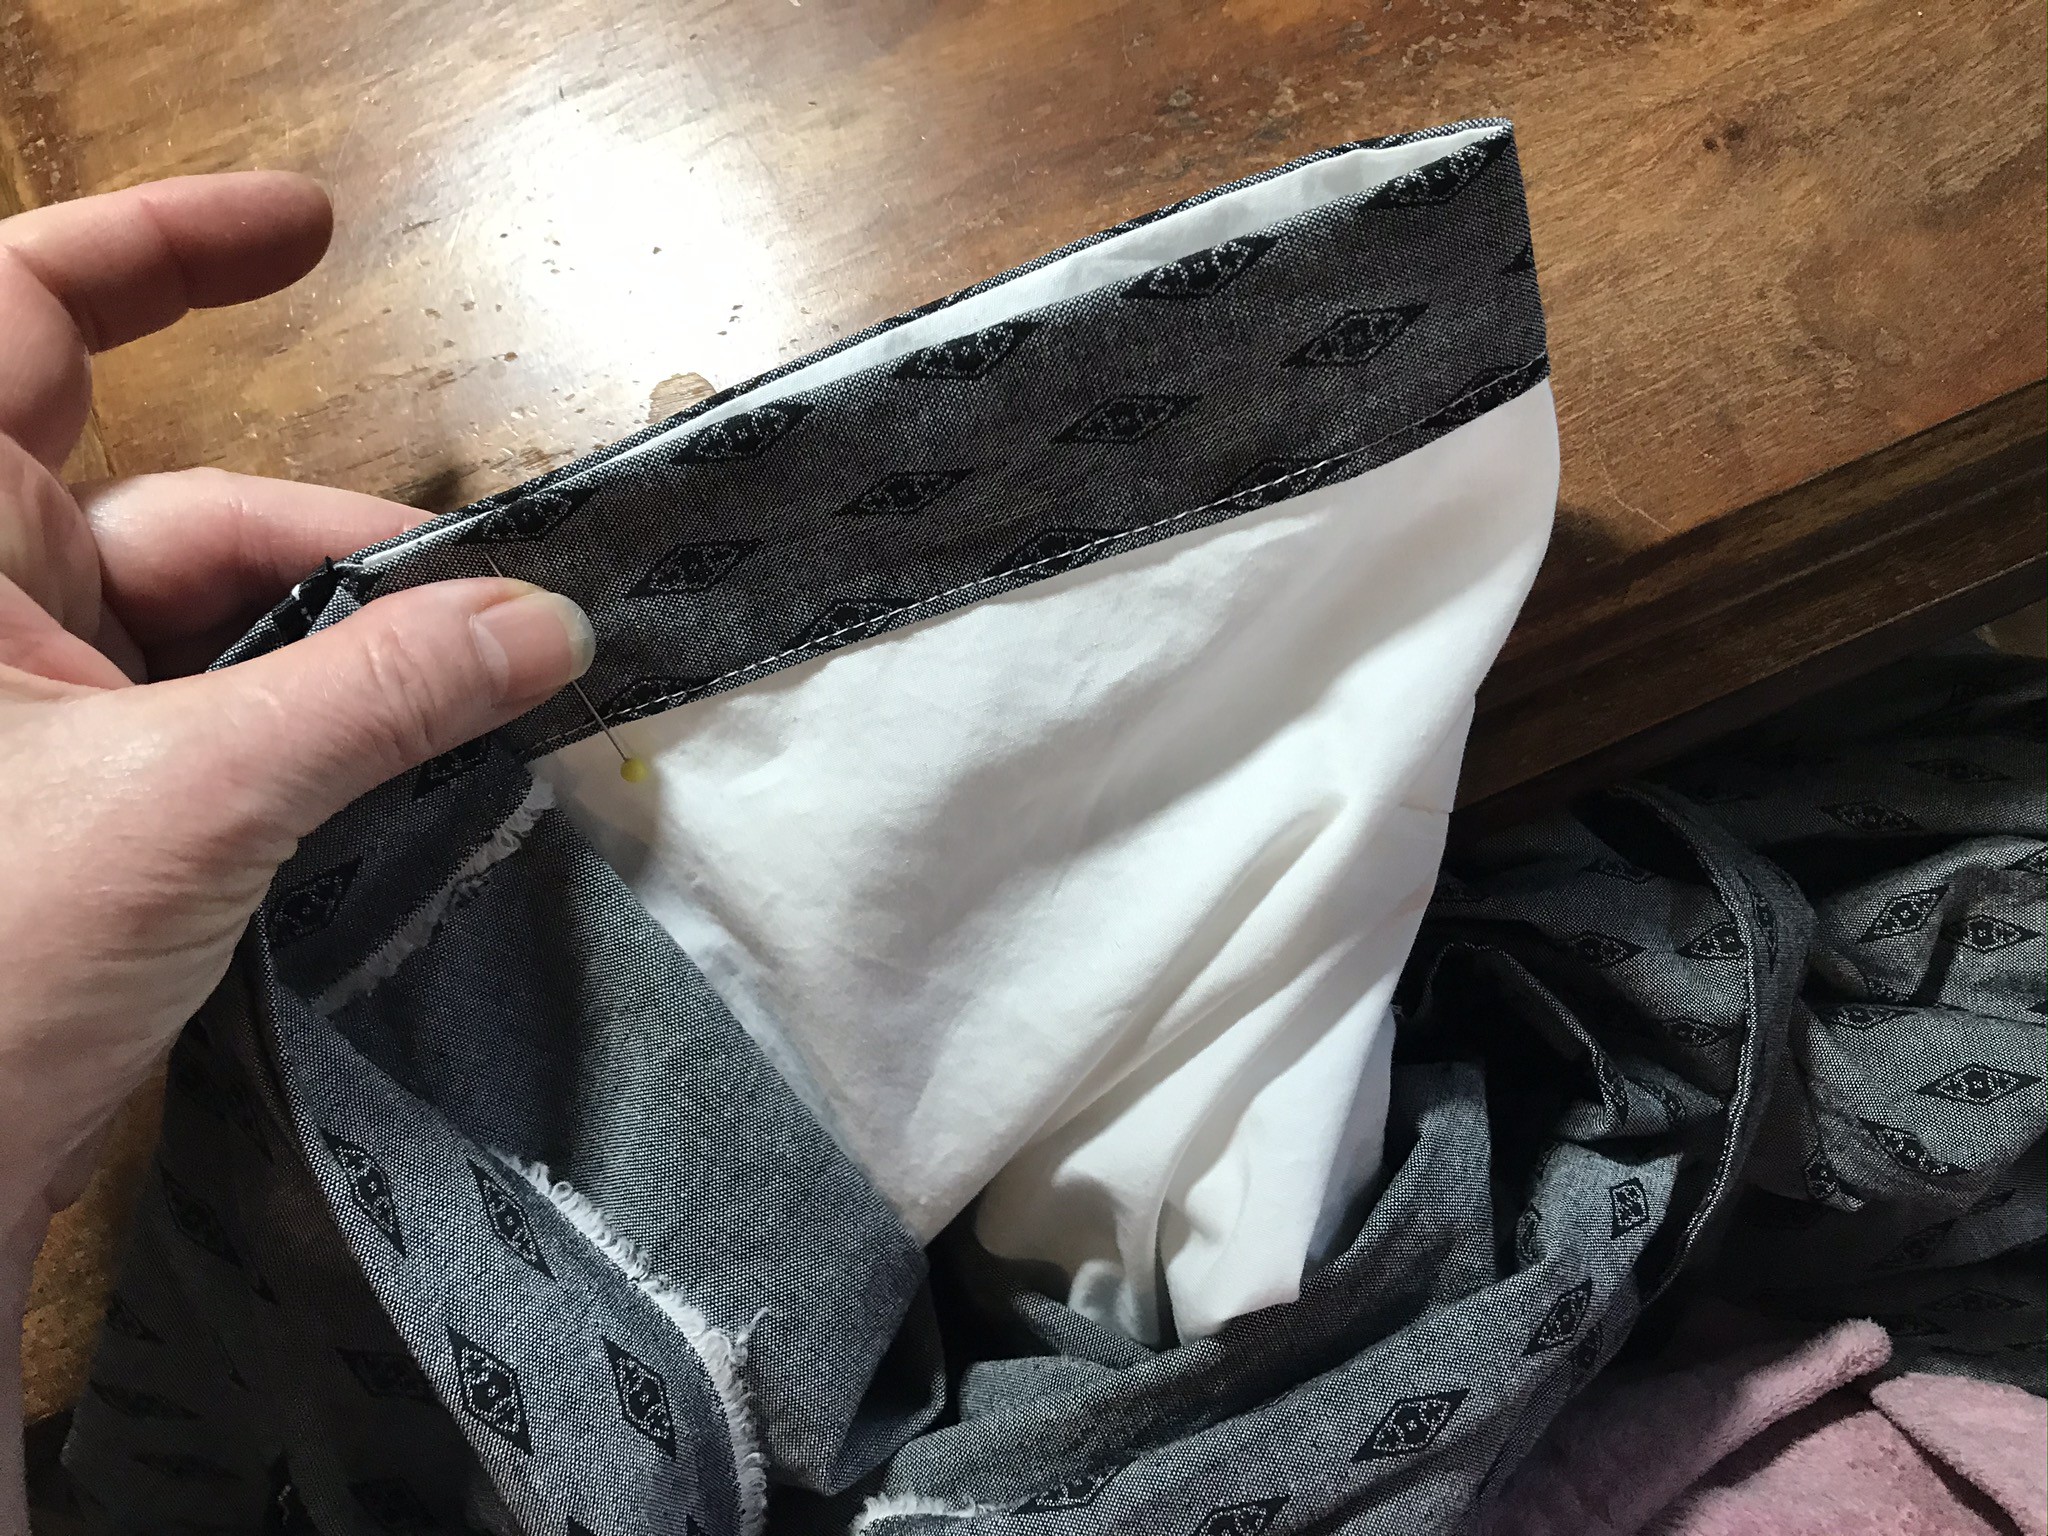
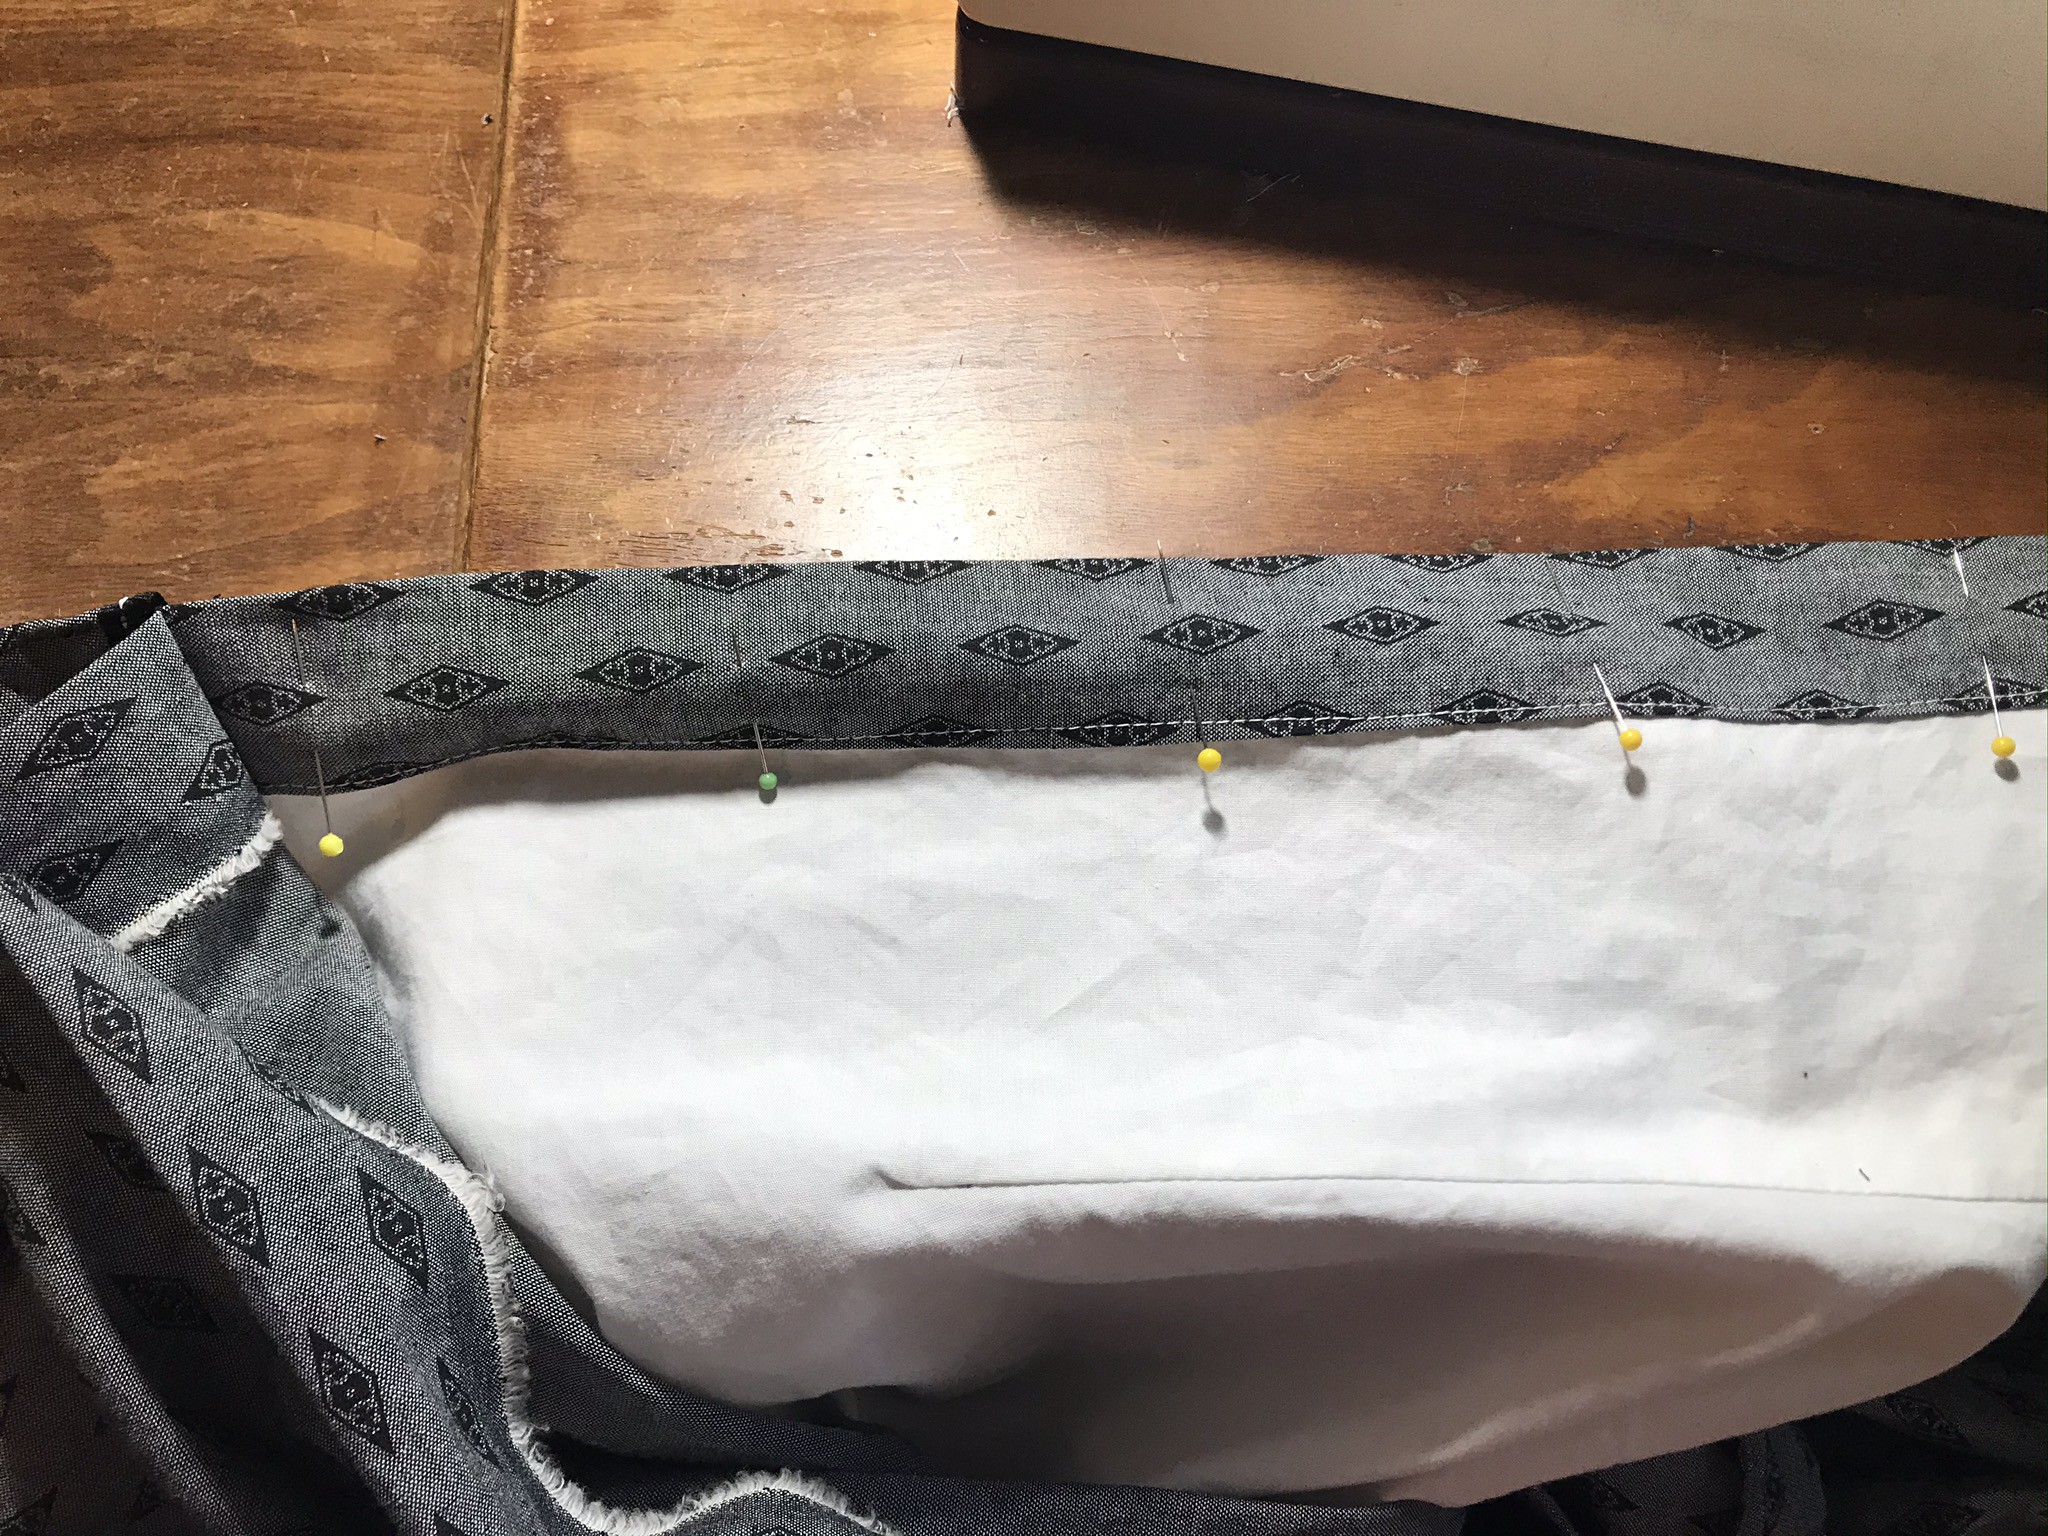
The original bodice lining was attached in a different way than other garments I have seen: the lining pieces were sewn to the fashion fabrics so that the raw edges were enclosed. And yet, the lower edge of the lining was completely unfinished! More than 100 years after it was first worn, the lining is still holding up well.

edwardian house dress vintage & replica (27)


Making the House Dress

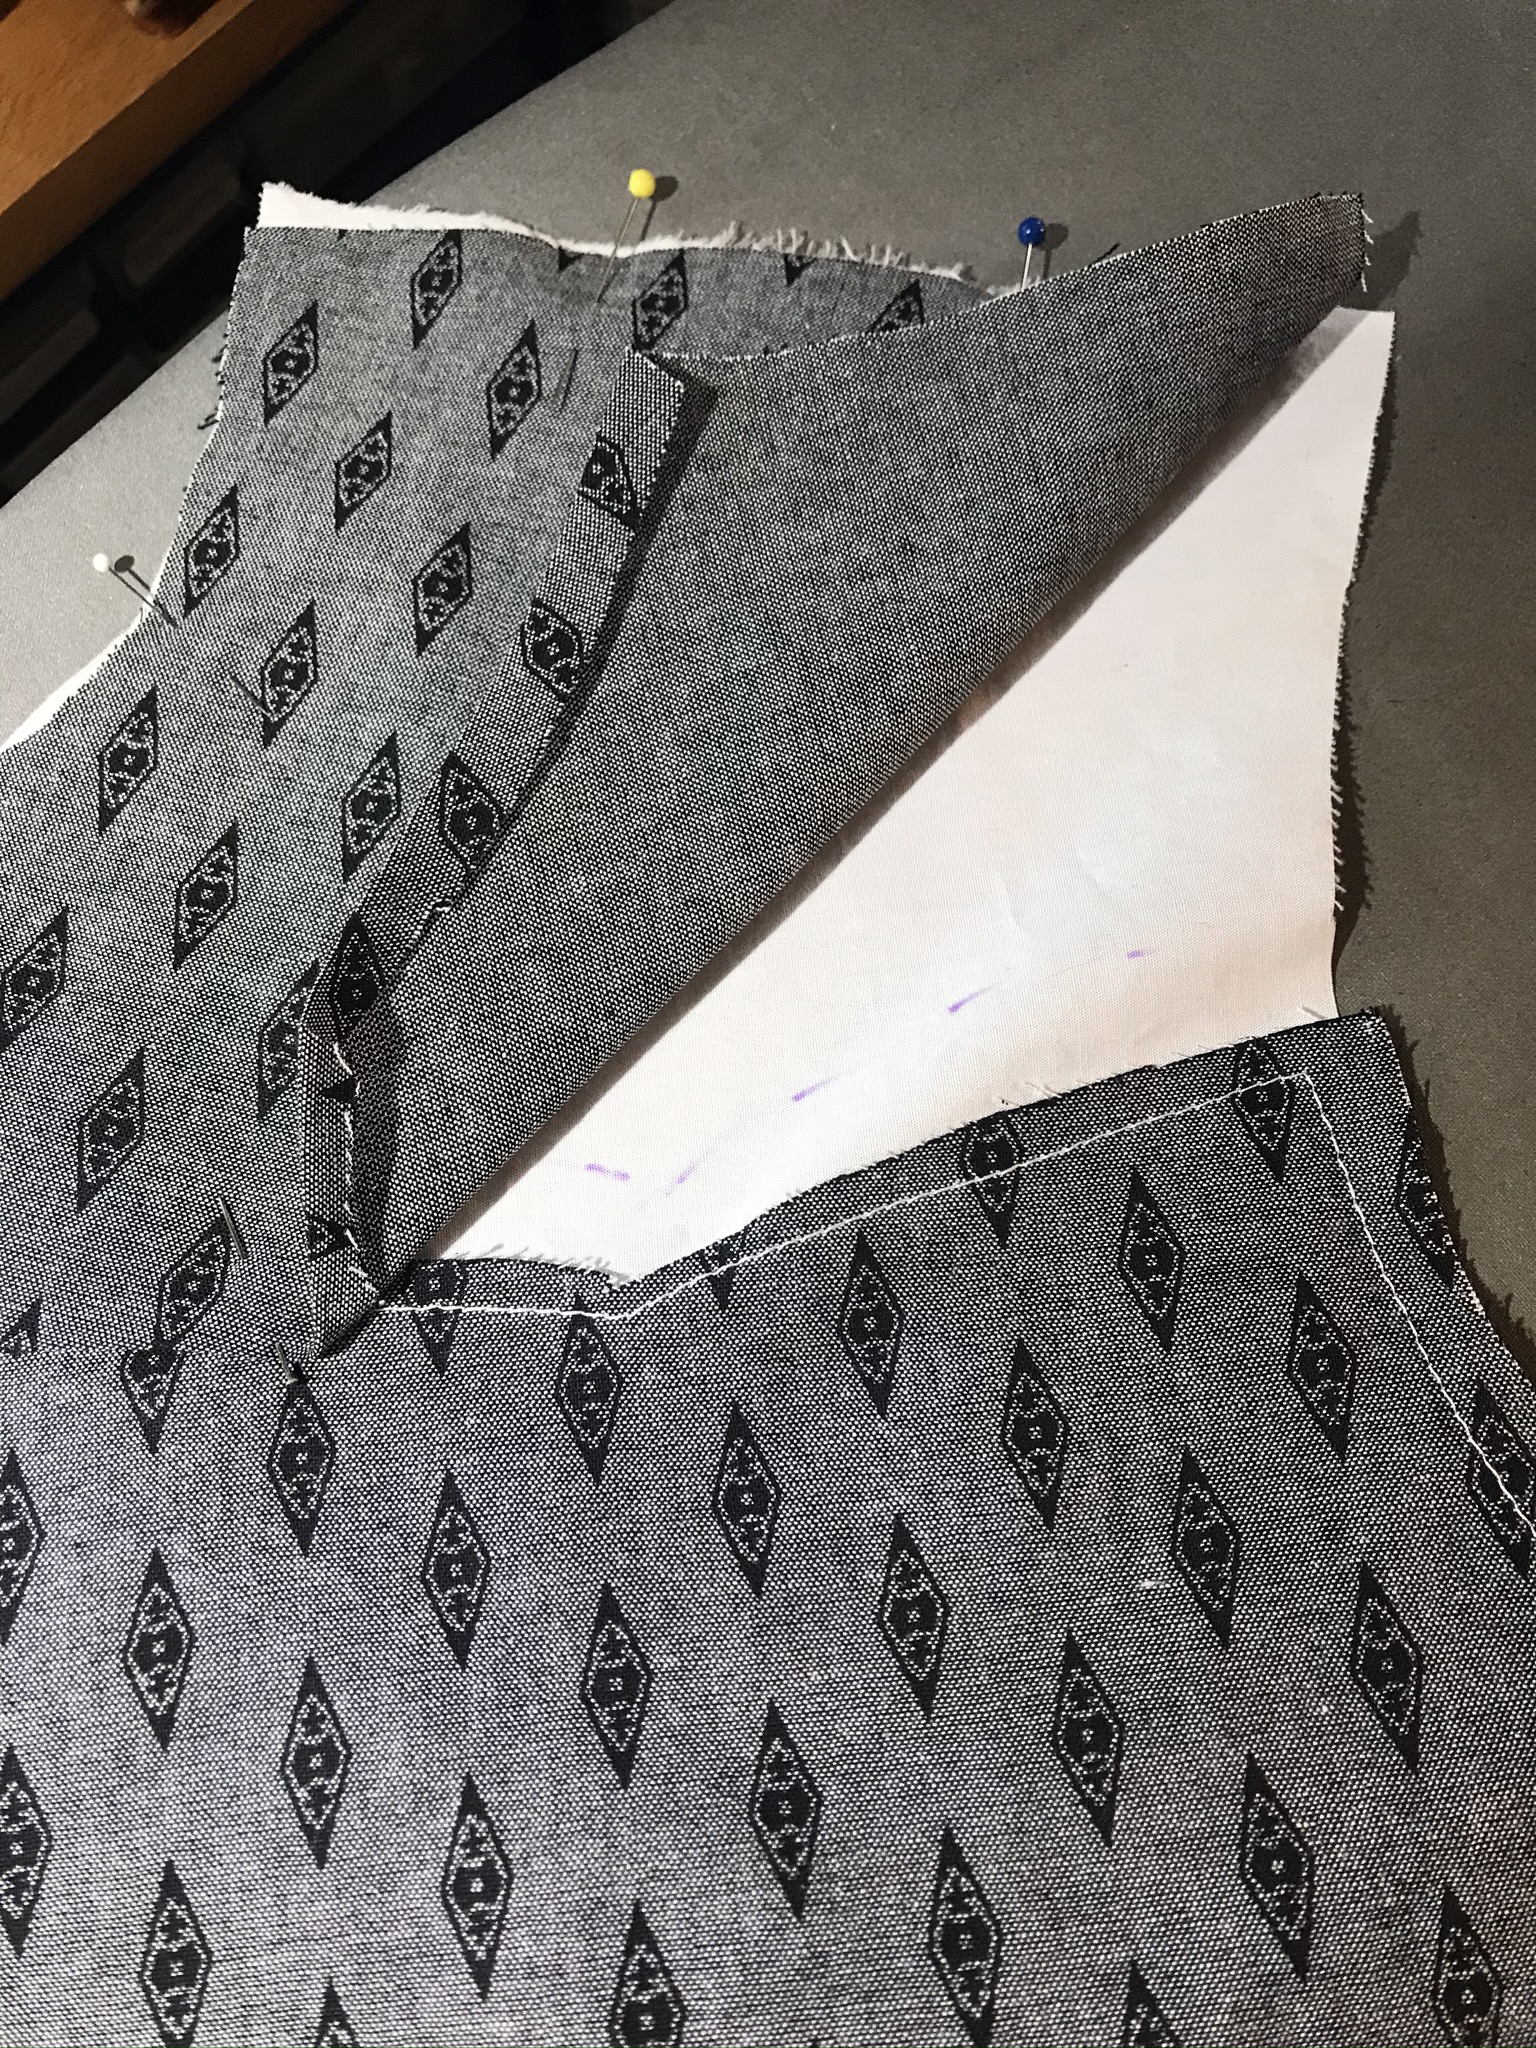
This was a fairly straightforward project. I used my personal sloper that I had already tested as the lining pattern. I drafted the yoke pattern freehand, based on the angles and proportions of the original. I allowed for pleats at center front and center back, just as the original seamstress had done. You’ll notice that I stitched the front of the dress to the lining before applying the yoke.

edwardian house dress vintage & replica (31)edwardian house dress vintage & replica (30)

edwardian house dress vintage & replica (29)


The original dress collar was made in two sections, with a seam at the center back. This apparently accommodated the unusual method of assembling it, with both lining sections sewn together over the back seam to cover the raw edges. I decided to adapt the pattern to my own sewing style, so the back seam is pressed open and the top collar piece is cut on the fold.

The original dress had a self-fabric facing sewn down along the front edge of the lining to carry the buttons and buttonholes. I copied this detail, which gives the dress a smooth fit over my undergarments  and prevents the white lining from peeking out. The outer layer is pleated into the yoke at center front, with a row of buttons. I copied these buttons, too.

The antique garment had several buttons at the lining closure, somewhat randomly spaced. I chose instead to space my buttons evenly. Here’s a helpful hint for positioning five buttons, evenly spaced, without using a measuring tape.

edwardian house dress vintage & replica (37)


First, locate the positions of the top and bottom buttonholes. Mark these with pins, perpendicular to the edge.

edwardian house dress vintage & replica (38)

Fold the edge in half, pinching a crease at the center point. Place a pin at the crease to mark this position. Finally, fold each of the other halves to find those centers, creasing and marking. Now all your buttonholes are evenly spaced!

edwardian house dress vintage & replica (39)


The sleeve pattern I used was from a design that I had already made and knew that I liked. The style is sometimes called a “bishop” sleeve: a full sleeve is gathered into a fitted cuff at the wrist. The original had a narrower bishop sleeve, while my copy had more fullness at the top.

Wearing the House Dress

This is a basic dress (sometimes called a wrapper or a “Mother Hubbard”) that a middle-class woman might have worn at home in the morning. I finished sewing on the last of the buttons at about 9:00 AM, and I wanted to wear it right away! I put it on over my basic Edwardian underpinnings: corset, petticoat, drawers. Under the corset I wore a modern white cotton tee shirt instead of my pretty white cotton chemise. (I was avoiding the work of laundering and ironing it.)

edwardian house dress vintage & replica (45)

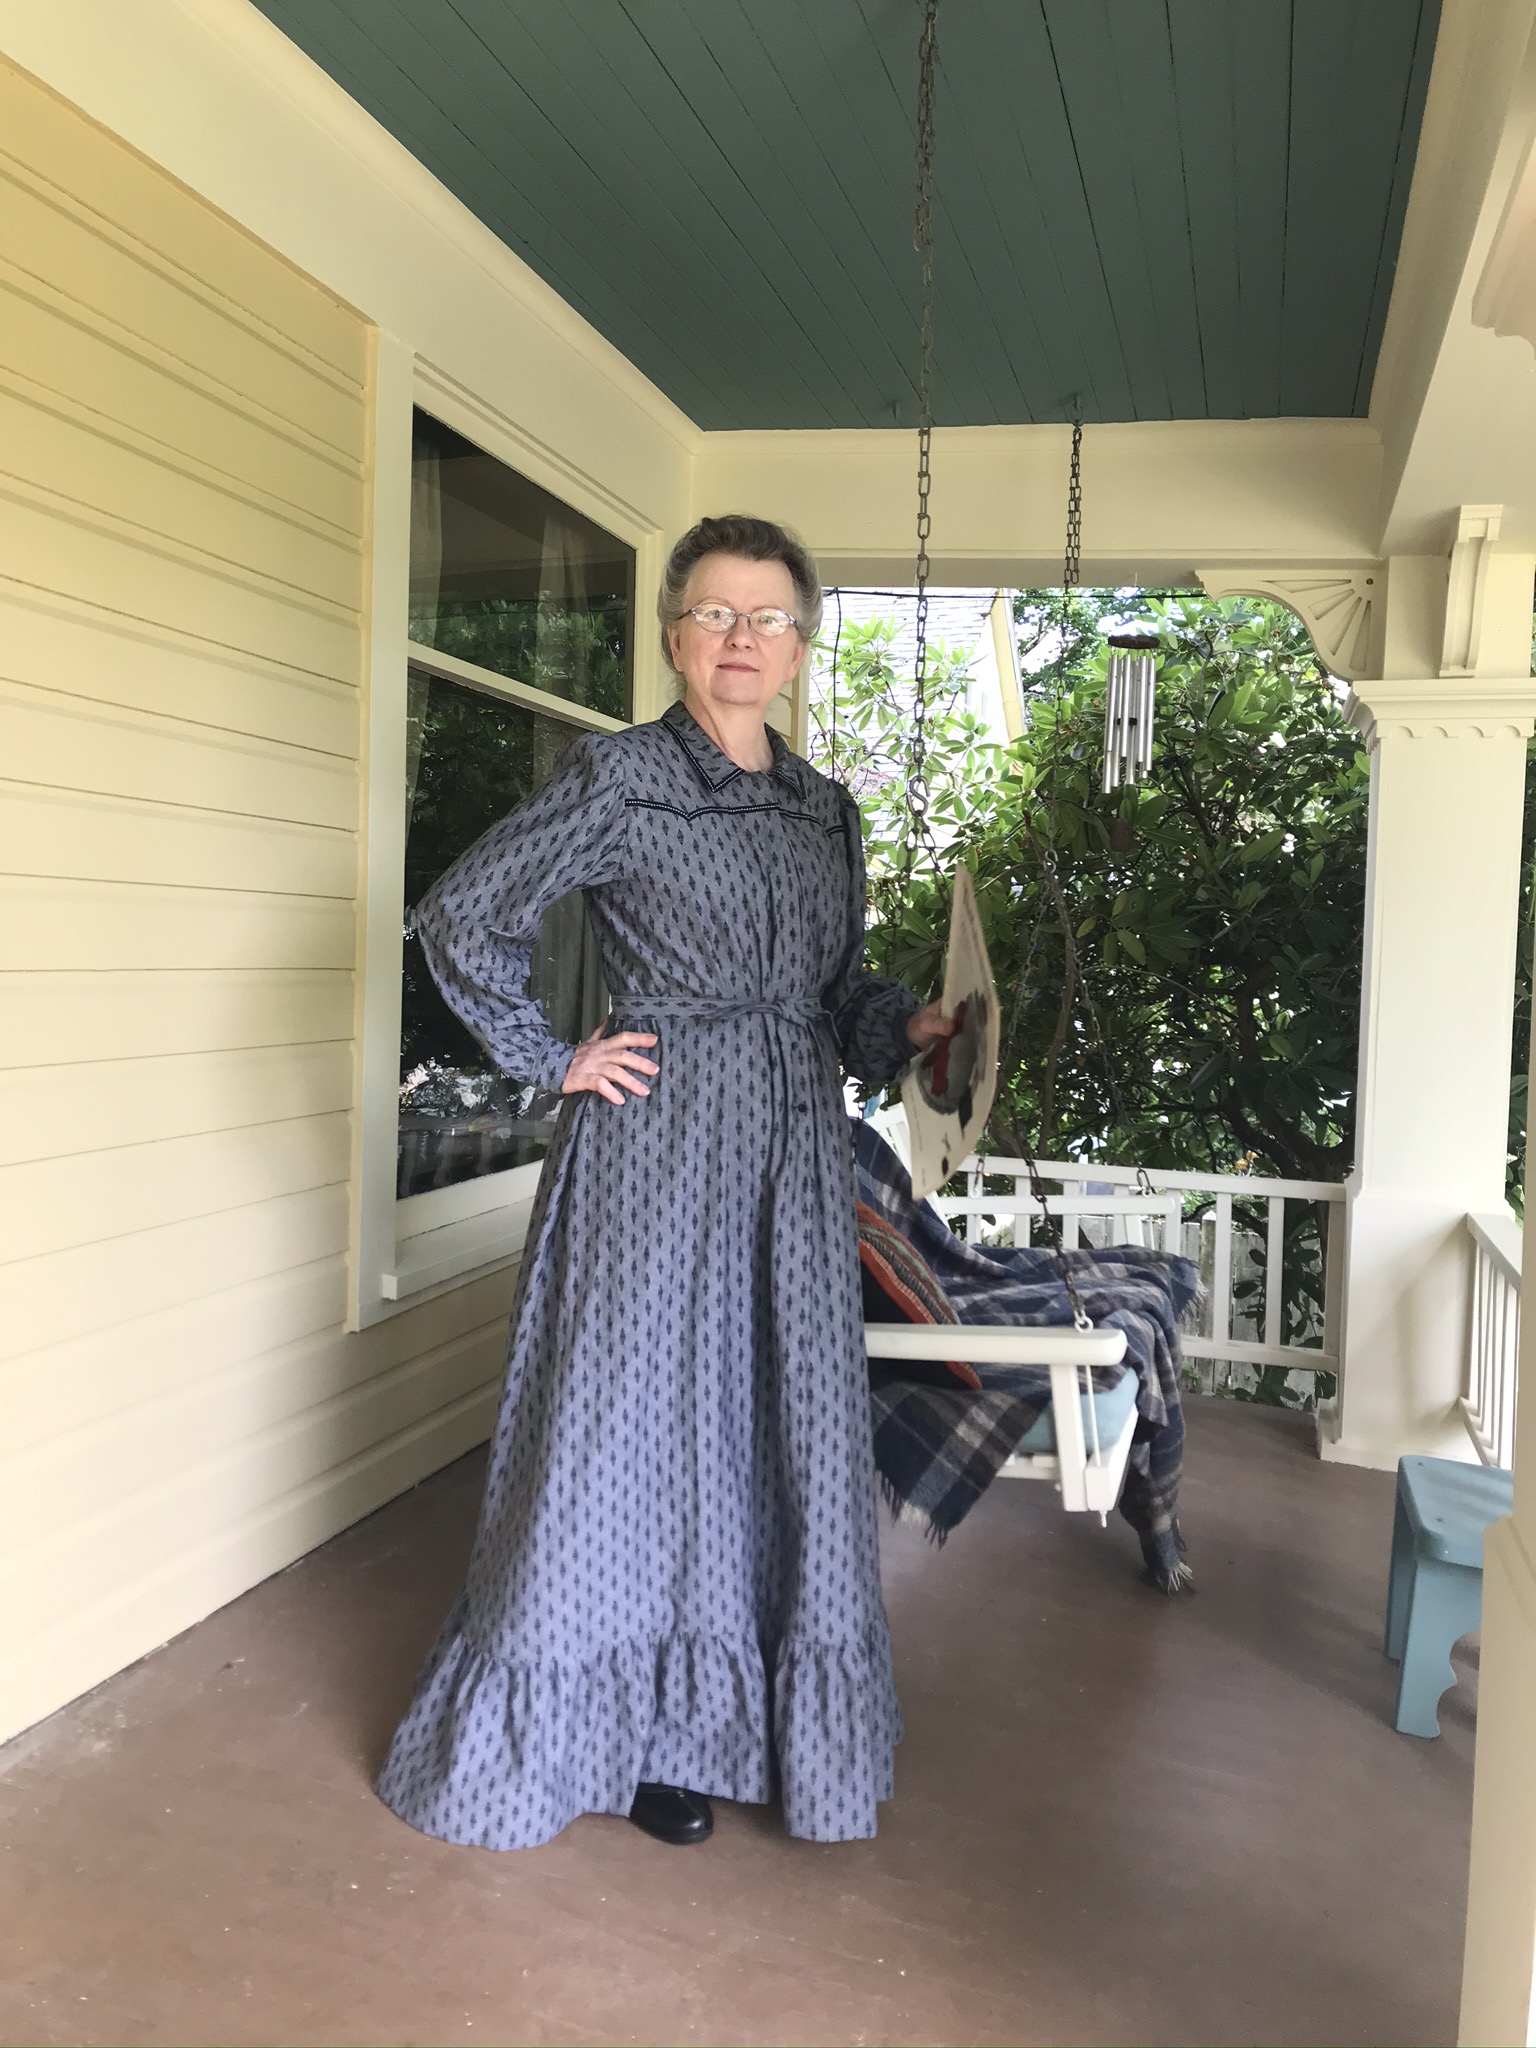
The house dress was comfortable! I wore it the rest of the morning in my studio, and then through lunch and into the afternoon. It was perfect for a break on the porch swing with a ladies’ magazine (a “Modern Priscilla” from 1909). I finally changed out of it at about 4:00 PM.

edwardian house dress vintage & replica (44)

If it had been 1907, I might have put on something a bit nicer at noon to serve and eat dinner. Or, I might have changed into a street costume after dinner to go out and run errands or visit friends. As it was, I had a quiet day at home, and stayed comfortable all day long.


Recreating a Paris Gown, Part Two: deconstructing an antique Paris gown

Paris was an exciting place for the fashion industry at the beginning of the century. The House of Worth in the late 19th century had created an image of luxury, style and exquisite needlework for wealthy customers not just from France, but from the Continent, England and the United States. The industry included not just employees, but contract seamstresses, embroiders, and finishers in little ateliers throughout the fashion district. Some of these capable women went on to create their own reputations and their own clientele.


Inside the bodice is a customized stay tape at the waist.

Inside the bodice is a customized stay tape at the waist.

Inside the gown that I was to reconstruct was this label, which led me to discover one of these innovative fashion houses: Callot Soeurs. You can find out more about them at these links:

http://www.fashionintime.org/callot-sisters-history-fashion/

http://www.victoriana.com/GazetteduBonTon/designerdresses.html


Here is an image of another of Callot Soeurs gown. (Source unknown)

Here is an image of another of Callot Soeurs gown. (Source unknown)

Photo of embroiderers from Les Creatuers des Mode, 1910; I do not know if these women were working on gowns for the Callot sisters, but it is possible! Many of these ateliers were on the upper floors of buildings so that they could take advantage of natural daylight from the skylights overhead.

Photo of embroiderers from Les Creatuers des Mode, 1910; I do not know if these women were working on gowns for the Callot sisters, but it is possible! Many of these ateliers were on the upper floors of buildings so that they could take advantage of natural daylight from the skylights overhead.


Beautiful embroidery, damaged fabric

Beautiful embroidery, damaged fabric

The Callot sisters were known for the use of gold and silver lame and poly-colored embroideries… On this antique bodice the metallic threads have torn the silk fabric. But the wealthy patrons never expected the gowns to last 100 years, so it didn’t matter to them that the metallic threads might damage the silk. These gowns were expected to be ephemeral things, worn only once or twice in the presence of a circle of friends, then packed away, possibly to be brought out again on a voyage or at a resort. The styles changed so quickly in this era that by the next year the lady would order another gown featuring some new and novel design.

The silk embroideries have lasted, so we are able to re-use these lovely pieces.

Silk embroidery on the original gown, shown against the skirt lining. Inside the elaborate darpery I found a straiht pin, left there by a long-ago seamstress in Paris.

Silk embroidery on the original gown, shown against the skirt lining. Inside the elaborate drapery I found a straight pin, left there by a long-ago seamstress in Paris.

One of the typical features in many of these late Edwardian gowns is the insert at the front of the bodice. These vestees are often the most distinctive and artistic section of the gown, repeating and embellishing the overall theme. On this gown, the silk backing the vestee has been shattered and broken apart, but the metallic lace was intact.

I carefully removed the intact embroidered bands, revealing the original vestee.

I carefully removed the intact embroidered bands, revealing the original vestee.


The silk organza backing was shattered.

The silk organza backing was shattered.

The “S-curve” silhouette is another trademark of the Edwardian era. You might look at those early photos and wonder how they puffed their chests out like that! This glimpse of the supporting ruffles may answer the question. These ruffles were made of substantial silk satin, gathered to the lining and allowed to support the outer fabric. You can see from the photo that the edges were pinked, not hemmed, and that this section of the dress is still like new after 100 years.

The original ruffles supported the "S-curve" shape.

The original ruffles supported the “S-curve” shape.

The bodice lining, fromthe inside, reveals much about couture construction techniques.

The bodice lining, from the inside, reveals much about couture construction techniques.

I was reminded of a different approach to garment construction as I studied the lining of this gown. If you look closely at the photo, you will notice that the shoulder strap section is sewn by hand to the body of the lining. The edges were hand hemmed first, and then the entire section was whip stitched along the connecting edges. Our modern method would be to machine these pieces together along a standard seams line, but this couture method gives the designer much more control over the final fit.

I have sometimes read ladies’ complaints about the endless time spent in fittings at the dressmaker’s in journals and letters of earlier times. As we examine the careful attention to a perfect fit, starting with that innermost layer, we can see why the fittings were necessary. This also helps me to understand some of the exorbitant expense of a designer gown. This dress was not pre-cut with dozens of other dresses and then sewn together by machine in an assembly line! This couture gown was created, customized and crafted for only one client. Of course she (or her husband) would pay for that sort of detail!

An underarm gusset was added for better fit and then embroidered to blend into the overall design.

An underarm gusset was added for better fit and then embroidered to blend into the overall design.

Note the underarm gusset… Madeleine Vionnet originally worked at the Callot Soeurs house, where this gown was made – imagine her learning to work with this element here, to be carried on later in her revolutionary bias cut gowns?

It’s a strange sensation to disassemble a piece of history. My usual inclination would be to preserve it. But, the client wanted to wear the gown, not merely look at it, and it was not wearable in its present state. It would be too small to fit her, and there would have been the constant threat of further damage. Plus, of course, a large part of this gown had already been removed from the skirt. We can only imagine how grand that section must have been!

I was privileged to be able to take my time in the process and to take clear photos every step of the way. As I worked, I learned.


Next post: the new gown

Recreating an Antique Paris Gown

Vintage garments are our windows to the past. In them we can discover the techniques of early designers and dressmakers. Since I value each garment as an original source for research, I am reluctant to do anything to an original vintage garment that would destroy that information. However, some time ago I had a client approach me with an intriguing project: could I replicate a Paris original, circa 1912, salvaging the primary elements that made it a true work of art?

The original Paris gown with modern silk for the replica

The original Paris gown with modern silk for the replica


The dress was beautiful! The skirt had been draped cleverly in a novel style, and several sections of the gown were embroidered with metallic threads. There was a heavy, luxurious silk tassel at the front of the skirt. With all the draping and embellishment, it was clearly of the era. The shape of the skirt was slim, yet there was a graceful train. There was a high waist to the bodice, but a structured lining beneath it all. The most significant design detail was the square neckline in front, with a rich vestee of metallic lace, and a corresponding vee shaped section at the back closure. We have seen this line in Janet Arnold’s Patterns of Fashion, and of course, in the elegant dinner gowns in films like “Titanic” and shows like “Downtown Abbey.”

The original Paris gown

The original Paris gown

However, this particular garment was damaged beyond any change of wearing or even exhibiting it. The bodice had worn away on the shoulders. Sections of it were in shreds, probably due to the weight and roughness of the beautiful metallic embroideries. Sometime in the past, someone had cut away a section of the skirt, probably to use the rich embroideries as a home décor item. The skirt was ruined. And finally, the client wanted to wear it but couldn’t in its current condition. It was a size too small.

IMG_3447 The tops of the sleeves had worn away.

The silk in the bodice was shattered.

The silk in the bodice was shattered.

I agreed to take on the challenge. Along the way I documented the original gown as well as I could so that I would have a record of the 1912 Paris couture techniques that were used in the original. Here is what I recorded.

IMG_3461

IMG_3463

The hand embroidered trim continued into the lower back sections. I thought of those early Parisiennes, spending their days under skylights in ateliers to create this gown.


IMG_3477

The front of the gown, with its intricate draping and ornate tassel, was one of its most beautiful features.

The inside of the bodice showed 19th century contstruction and boning.

The inside of the bodice showed 19th century construction and boning.


The shoudler straps had been attached by hand, using whip stitches... probably after a fitting.

The shoulder straps had been attached by hand, using whip stitches… probably after a fitting.


Close=up of strap interior

Close-up of strap interior


The inside of the sleeve shows the layers of fabric and the method of slip stitching them together.

The inside of the sleeve shows the layers of fabric and the method of slip stitching them together.


The outside layers of the bodice were constructed over the boned foundation, giving the appearance of a soft kimono sleeve over the lace insert.

The outside layers of the bodice were constructed over the boned foundation, giving the appearance of a soft kimono sleeve over the lace insert.


Under the arm, a gusset gave additional wearing ease.

Under the arm, a gusset gave additional wearing ease.

In my next post, I will share the step by step process of recreating the 1912 gown, using new materials where necessary and the original luxurious fabric where possible.