The Party Waist: Part 2

I loved Lucy Ward Montgomery’s short story, “Penelope’s New Waist”. Of course, as a fashion historian, I was curious about the style. What sort of a blouse (our name for the waist) could Doris make in three evenings? After all, she worked all day long as a “typewriter” in an office uptown. She only had a few hours for this fancy waist.

The story was published in 1904, so I looked at fashion plates from 1904 and slightly earlier to get a sense of the style. This was an age of excess! Some of these gowns and waists featured elaborate combinations of both black and white lace with colored silk fabrics. It seems that lavish trims were preferable to restraint or good taste.

Lovely place to research: January, 1904 Delineator magazine

Lovely place to research: January, 1904 Delineator magazine

1904 Day dress from the Galleria del Costume di Palazzo Pitti, Europeana Fashion

1904 Day Dress from the Galleria del Costume di Palazzo Pitti, Europeana Fashion

1906 November McCall's; The Stylish Jumper Waist

1906 November McCall’s; The Stylish Jumper Waist

Designing the Waist

I knew that I didn’t want to buy new fabric for this project; after all, I have been collecting fabric treasures for years. I also had some antique velvet ribbons in a lovely mulberry color; somehow, I wanted to use these in my new party waist. I gathered several fabrics and trims that I thought would work, and I pondered my choices overnight.

IMG_6924(1)

I decided that the crisp printed silk looked best with the velvet ribbons. I had a mauve iridescent silk that harmonized well, so I decided to use it as an accent. Then it was time to choose the style.

Since my velvet ribbons were fairly stiff, they wouldn’t work for curved details. I decided on the square necked, asymmetrical style shown in a December 1905 McCall’s magazine. The general shape and the pleats were similar to tailored waist patterns I have used before, so I would be able to adapt them.

December 1905 McCall's Magazine

December 1905 McCall’s Magazine

A rough sketch of the Party Waist design

A rough sketch of the Party Waist design

Sewing the waist

When I am sewing Edwardian styles, I try to follow the methods they would have used. I am fortunate to have a library of sewing books, including this one:

The Complete Dressmaker, 1916 edition; first published in 1907

The Complete Dressmaker, 1916 edition; first published in 1907

I started with the lining, using a sloper pattern already adapted to my measurements. I used an antique mannequin that has measurements very similar to mine, plus the fashionable Edwardian figure. I fitted my lining on her.

First fitting; note the pulling at the bust and the gaping at the armscye

First fitting; note the pulling at the bust and the gaping at the armscye

I wasn’t happy with the fit, especially the gaping armscye. I experimented with lowering my dart points to give it more room across the bust. I also tweaked the shape of the back section.

Much better fit when the bust dart was lowered

Much better fit when the bust darts were lowered

Once I had the lining fitted properly, I was ready to cut out the fashion fabric. My silk was a mystery, discovered at a thrift shop some years ago. It was narrower  than most modern fabrics, and of course I couldn’t buy more of it if I made a mistake! Fortunately, I have experience with the styles of this era, so I knew where I would want fullness and how it would drape. I did not use the draping method shown in my antique book, although I could have.

Illustration: draping fashion fabric on the mannequin

Illustration: draping fashion fabric on the mannequin

Instead, I used my lining as the base pattern and calculated the pleats on the cutting table. (If you are not comfortable with this type of free-hand cutting, then you should follow the wise advice of making a muslin first out of scrap fabric.) But I was in a hurry, trying to make this waist in three days! And I trusted my measurements and my knowledge of the style.

Laying out the lining on the fashion fabric

Laying out the lining on the fashion fabric

For my sleeves, I did use a paper pattern. I have made up this waist pattern before, and I knew that I liked the shape. Of course, for my Party Waist (and with limited fabric) I would be making a three-quarter sleeve instead of the full length, so there were still modifications to make.

Sleeve pattern on narrow silk fabric

Sleeve pattern on narrow silk fabric

Given the fullness of the sleeves and the narrow width of my silk, I needed to piece the fabric. This is an absolutely period-correct approach, but I still didn’t want the seam to show. I laid the pattern on my fabric so that the pieced section would be under the arm in back. Then I made sure that the new section would line up with the motif in my print. I didn’t have enough fabric to match every element of the design, so I had to be content with piecing it along the horizontal pattern.

Matching the fabric pattern for piecing

Matching the fabric pattern for piecing

The piecing, sewn and pressed

The piecing, sewn and pressed

Trimming the waist

Finally, the waist was assembled! Now it was time for the fun part: adding my trims. I cut bias strips of the mauve silk (about two inches wide) and then pieced, folded, and pressed them for a continuous length.

Bias silk used as a finish along the neck edge

Bias silk used as a finish along the neck edge

IMG_7028 IMG_7029

I sewed the bias strips on as a binding at the neck edge. Then I was able to machine stitch the beige braid to cover the edges of the bias strips and the velvet ribbon. I mitered the corners on the front section and forced a bit of ease into the velvet ribbon along the curved back neck edge. Finally, I added closures: hooks and eyes, with a button detail. I also made a coordinating sash, trimmed with velvet ribbon, to complete the garment. According to McCall’s Magazine, that was an important part of the waist!

The finished Party Waist and sash on the mannequin

The finished Party Waist and sash on the mannequin

Wearing the Party Waist

I finished it in time and wore the Party Waist to a party, an online New Year’s Eve event! I wore it with an existing black skirt and a guimpe that I made last summer. I felt festive and well-dressed. There are still some issue to address before it’s truly a part of my wardrobe: I need a fashionable, flowing skirt, not the slightly short, drab black one I am wearing in these photos.

IMG_7078 EIMG_7082 EIMG_7096 E

Now I have started the new guimpe to wear under the waist. When I was selecting fabrics and trims, I discovered that a length of antique ivory lace in my stash was perfect as an accompanying yoke and sleeves. The size and shape of the geometric motifs were an artistic compliment to the printed shapes of the silk. When I finish the new guimpe, I will share pictures of it, too!

The Party Waist, Part 1

I gain so much insight into the customs and styles of the American Edwardian era when I read the popular fiction of the time. I especially enjoy the short stories in popular magazines. They were written to be a short read, created with a predictable story arc and sprinkled with little details about food, pastimes, and especially clothing.

Where do I find these stories? I have a large collection of women’s fashion magazines, focused on the years between the 1890s and the 1920s. I started collecting them for the beautiful pictures; I continue to revisit them for the context they give me into daily life. I find another source of these short stories in compilations. The Complete Works of O. Henry is a great book to read for pleasure and historical insight. Akin to Anne, a little paperback from Bantam Books (edited by Rea Wilmshurst) is another.

“Penelope’s Party Waist” by L.M. Montgomery

Originally published in The Designer, March 1904

“Penelope’s Party Waist” is a sweet story of two sisters, Penelope and Doris Hunter, who are orphaned and making their way in the world alone. They own the tiny cottage that they live in, but  otherwise, their poverty keeps them from pursuing their wishes: music lessons for Penelope and being able to stay home and “keep house” for Doris. Penelope is seventeen and works hard at her studies. Doris supports them both with a small income from her job as a “typewriter” in an uptown office.

Two women and man rowing by Marsden A. Kemp

Two Canadian women, taken about 1904 by an amateur photographer, Marsden A. Kemp. Our two sisters might have looked something like these girls.


When Penelope gets an invitation to a friend’s party, she thinks she can’t go because she doesn’t have “a suitable dress to wear”. Doris suggest that “If your black skirt were sponged and pressed and re-hung, it would do very well.” However, there is still the problem of a blouse (a “waist”) to wear with it. They have no money for even a small bit of silk fabric to make a new waist. So, they sigh and make the best of it, giving up the idea of the party.

The very next day a package arrives! (I love how these coincidences occur just in time to advance the story line.) A letter has arrived, too, explaining what is in the package. Sadly, it is not a party dress, but an old quilt from Aunt Adella. She has closed up her household to move West, where she will live with her son. She is disposing of the quilt that Grandmother Hunter had made long ago. Doris recognizes the pattern; she thinks it is called “Little Thousands”. Neither girl is especially impressed by the quilt’s appearance; it is faded and old-fashioned.

Note: A brief internet search didn’t turn up a “Little Thousands” quilt pattern, but here is an example of a quilt called Thousand Pyramids, made about 1890.  It’s from this blog: http://quiltstudy.blogspot.com/2016/01/10000-pyramids-of-past-and-present.html. This gives us an idea of what the family heirloom may have looked like.

Thousand Pyramids 2003_003_0137However, the back of the quilt is beautiful!

‘“Why, the wrong side is ever so much prettier than the right!” exclaimed Penelope. “What lovely, old-timey stuff! And not a bit faded.”

The lining was certainly very pretty. It was a soft, creamy yellow silk, with a design of brocaded pink rosebuds all over it.

“That was a dress Grandmother Hunter had when she was a girl,” said Doris absently. “I remember hearing Aunt Adella speak of it. When it became old-fashioned, Grandmother used it to line her quilt. I declare, it is as good as new.”

Doris’s thoughts start to work on how to use that pretty fabric to help her sister go to the party.

“It would make the loveliest party waist,” she said under her breath.” Creamy yellow is Penelope’s colour and I could use that bit of old black lace and those knots of velvet ribbon that I have to trim it. I wonder if Grandmother Hunter’s reproachful spirit will forever haunt me if I do it.”’

IMG_6931

English cotton print, circa 1872, from Textile Designs, Susan Meller and Joost Elffers

IMG_6934

French fabric design, circa 1850, from Textile Designs


That silk fabric from “long ago” (perhaps the 1850s) might have looked something like one of these floral patterns.

‘In the three following evenings Doris made the waist. She thought it a wonderful bit of good luck that Penelope went out each evening to study some especially difficult problems with a school chum.

Penelope was surprised as much as the tender, sisterly heart could wish when Doris flashed out upon her triumphantly on the evening of the party with the black skirt nicely pressed and re-hung, and the prettiest waist imaginable — a waist that was a positive “creation” of dainty rose-besprinkled silk, with a girdle and knots of black velvet.’

1900 ish Pawnee City, Nebraska

The teen-aged girl in the center is wearing a fancy waist very much like Penelope’s.


The story tells us how Penelope went to the party and was admired by all the girls there. She also met a sweet, white haired old lady, a Mrs. Fairweather, who was most interested the lovely fabric. Mrs. Fairweather reveals that she and her half-sister each had a dress of that very fabric, long ago, before their mother died and they moved apart. Over the years they had lost touch with each other. Mrs. Fairweather was widowed, and her only granddaughter had died. She was alone in the world. And, of course, during the conversation we discover that Penelope’s grandmother was the long-lost half-sister, and the fabric was from that long-ago dress! The girls and their great-aunt are all thrilled to find each other and make plans to live together. They will be able to escape their poverty, find a family connection, and follow their dreams.

As a student of cultural and fashion history, I am so pleased with this little story.

1909 Wardrobe Inventory: Dresses

Our 1909 American lady, Mrs. Maggie Lynde, is making an inventory of her clothing in preparation for a small spending spree. After years of caring for her aging Auntie, and then a year in mourning and half-mourning, she is finding her wardrobe quite depressing. The older dresses are quite worn to pieces, and not worth including in her list.

1909 Wardrobe Inventory6

The few dresses that are still in decent condition are a very small collection indeed. She has two wrappers that she still wears. One is from the time before Auntie passed away. The rich colors are still so pleasing. The other one, made of a black cotton print on black chambray, is a reminder of that year of mourning, and perhaps not Maggie’s favorite color. But wrappers are useful garments, easy to put on first thing in the morning for breakfast and light housework, and Maggie will keep them both for now.

Prescott trip 2011 071There is the blue plaid gingham dress, mostly worn in the house, but nice enough for a quick visit to the neighbors.

There is the purple wool-and-cotton gown, trimmed with black brocade ribbon. It was the height of elegant style when she first made it, back in 1907. It was a soft blue-gray then, but over the years the color has faded. Maggie had been seeing the ads for Diamond Dyes, and finally grew bold enough to attempt changing the color with dye! She is still not 100% happy with the result. Perhaps some Diamond Dyes IMG_3037day she will mix up another dye bath on the stove and give it a second pass.

IMG_8018

1909 Wardrobe Inventory4

And, of course, there is the lovely white summer dress! It’s a simple cotton batiste, made ornate with tucks, insertion, and appliqued lace. Every lady that Maggie know owns at least one of these. They wear them to church, to club meetings, and to social events all summer long. On hot days, these gowns are fresh and cool. Yes, they do need to be washed and ironed again after wearing, but they are so easy to get clean! Hot water and strong soap take out almost every stain, and a few hours on the line in the summer sun do the rest. A bit of starch before ironing helps to keep the hem from staining.

IMG_2082 cropped 10592667_10202534653387877_5383581013667984898_n Kay picnicking edit 40133574_2166790950270798_2613091951523659776_n


A white dress is so versatile! Maggie has many fond memories of all those outings in her white lingerie gown.

1909 Wardrobe Inventory: Underpinnings

Over many years of researching, making, and sharing the fashions of the past, I have given fashion talks, workshops, and full-blown fashion shows. One of the questions that people often ask is, “How many dresses would a woman have?” Of course, there is no easy answer! So much would depend on the decade, the woman’s social status, her stage of life, and many other factors.

In my alter-ego persona of Maggie Lynde, I am exploring the wardrobe of a typical middle-class, middle aged woman in a small Oregon town. By making and wearing these items myself, I hope to gain a deeper understanding of how her wardrobe functioned; how fast could she add new items? How did the old ones fade and wear out? And how would the latest styles mix with the garments from seasons gone by?

Our character, Maggie, has always been interested in fashion, so she might have purchased a copy of the guide by Mrs. Eric Pritchard, The Cult of Chiffon, first published in London in 1902. One the topic of how many garments to include in your wardrobe, here is Mrs. Pritchard’s advice:

“I would add that I think the girl about to invest in a trousseau should profit by this advice. Lingerie, as I have said, is by far the most important part of the wardrobe; it is, therefore, a mistake to buy a great number of dresses if our underwear has to suffer in consequence. … Two dozen is a good all-round number for each type of garment, except petticoats, of which you can do with far less. You should endeavor to have a pretty day petticoat in brocade to match your corset, and another, of some pale shade, for evening wear. Petticoats, with the exception of brocade, can be picked up at shops as cheaply as you can make them at home.”

IMG_3885_Moment 2Mrs. Pritchard was writing for upper-middle-class Englishwomen, not for a small-town American, but her descriptions and suggestions were still so tempting! Mrs. Maggie Lynde would have loved a brocade petticoat to wear under her best dresses, back in 1902. As it was, she couldn’t afford such elegance, and she “made do” with a pale blue cotton sateen petticoat instead. Of course, seven years have passed since the book was published, and Maggie Lynde no longer covets a brocade petticoat. They are now completely out of fashion! She does have a length of black silk taffeta, though, and she plans to make herself a nice silk petticoat with that distinctive rustling sound of quality.

1909 Wardrobe Inventory9

But Mrs. Pritchard makes a very good point about proper lingerie. Maggie must admit that her underpinnings are woefully shabby. She firmly intends to make some new chemises and drawers as part of the new 1909 wardrobe.

1909 Wardrobe Inventory8

She is pleased that she has two good corsets, made in the new, slimmer style. One is her white cotton “everyday” corset; the other is a recent purchase, now that she has some funds and is no longer in mourning. It’s a pink silk brocade corset with lace and a ribbon bow! She feels positively pretty in it. And she has made a new corset cover, dainty with insertion designs and pale pink baby ribbon, to wear over it.

1909 Wardrobe Inventory5


90797723_10218653307177287_6930885332254588928_o my embroidered corset coverMrs. Pritchard talked about dainty nightgowns and tea dresses in her book, but Maggie Lynde is not a newlywed, and she has decided to remain practical in the matter of sleep wear. Her white cotton nightgowns will do quite well.

And, as for tea gowns! None of her American friends has time for such things. If she wore a tea gown when her women’s society met, she would feel quite ridiculous.


Making a Versatile 1909 Guimpe

McCall’s Magazine for June 1909 shows a pattern for a Guimpe, also called an Underwaist or a Lining – or a Slip! To modern people this might be confusing; I know it was for me, at first. But as I have been making my own Edwardian wardrobe, I have begun to see the need for a pretty, fitted garment to wear under square-necked dresses and tailored jackets.

0 New Designs in Princess Costumes guimpe

Here is the description from the magazine:

No. 2563 (15 cents). – Sleeveless waists and gowns, and those having all sorts of open necks, besides the skirts with “skeleton” waists, all of which are en regle at present, demand a guimpe or under waist of some kind. This slip has been designed especially to meet this need. It may be made of lining or silk, and faced at the neck in any desired outline with net, lace, chiffon or embroidery, which is to show through the open neck of the outside waist. Again, it may be used as the foundation for any individual style of shirt waist, the tucks being stitched in the materials before cutting by the pattern. Two styles of sleeves are given – the pretty tucked style, which is popular, and a plain leg-o’-mutton sleeve, which may be trimmed in any original way one’s fancy may dictate. It may also be used as a slip – of daintily colored lawn or China silk – to be worn under a thin lingerie waist to impart warmth. …

How I Made my Own Guimpe

I didn’t have an Guimpe or Lining pattern on hand (I have the feeling that McCall’s 2563 from 1909 is no longer available!) But I did have one of Past Pattern’s Attic Copies version of McCall’s 3139, which was published in 1910. I have used it before, so I knew that I could make it work for my new Guimpe – or Underwaist. I knew that I would piece the body together from both cotton lawn and tucked net. I wanted to embroider the yoke in a coordinating design. I have seen this type of decoration in period catalogs and antique pieces, and I hoped to replicate it. So, along with the pattern, I assembled my materials.

1 IMG_4451

I assembled my cotton lining fabric, the sheer netting, embroidery thread, buttons, and some beautiful reproduction lace, all in the same shade of off white. The net I used is imported English cotton net. Some years ago, I invested a substantial sum to buy bolts this beautiful material in both white and off-white, and I continue to enjoy using it on replica projects large and small.

3 IMG_4450

I used the Attic Copies pattern to cut out my new Under Waist, including the collar. I planned to make the entire collar of the sheer net and lace, but I wanted to have a fabric version for fitting. I double checked measurements and fit before cutting in to that valuable tucked net!

2 IMG_4452

I planned to make the yoke and the upper sleeves of tucked net and the lower sleeves of my coordinating lace. I made the tucks in my net fabric before laying out my pattern. Here is where precise pressing and stitching are so important!

5


6 IMG_4457I knew that the lower section of the sleeve would be a solid section of lace. I didn’t want to add the intricate fastenings that were part of the 1910 pattern. Instead, I allowed enough wearing ease that I can pull the sleeves over my hands without snaps or buttons.

8 IMG_4459

The Guimpe, Finished

I was pleased overall, with the general shape of the new Under Waist.

9 IMG_5789

For the embroidery motifs, I traced the shape of the floral spray from my lace. Then I enlarged the design using modern technology: the copier on my computer printer. I was able to pin my paper pattern behind the sheer yoke and embroider the design.

10 IMG_5839


11b IMG_5793Sometime after I finished the new Guimpe, I started to admire other dress styles from 1909, including some that had deep vee necks. Or I might someday want to wear a jacket with a vee shaped neck opening. My high, wide yoke wouldn’t work under one of those. As they might have said in a 1909 article, it would not “look well.” Fortunately, I had more or the wide lace available, so I was able to cut a section and add it to the Guimpe.

12 IMG_5796

I hand stitched the new section to the body of the Guimpe. I decided not to cut away the cotton fabric underneath, although that would have been an option in 1909.

13 IMG_5819

Here is the finished Under Waist on my mannequin. The several types of materials and trims blended nicely to create an authentic looking, but simple Guimpe.

Finished!

18 back view IMG_4911 17 side view IMG_4912 19 Front IMG_4914

Finally, I was able to wear my new Under Waist as it was intended: underneath an afternoon dress, circa 1909. The neckline is open and cut in a square shape, which was one of the most fashionable styles in 1909.The yoke extends below the neck opening, so it gives the appearance of an attached piece.

I noticed that my elegant net and lace sleeves appear a bit short on my long arms… Just like a seamstress in 1909, I will probably rework the sleeves before the next wearing. I could add an edge of matching lace at the lower edge, or I can piece in another section of net with a band of insertion lace to conceal the join.

Which should it be?


Ecru Eyelet Dress, Part II

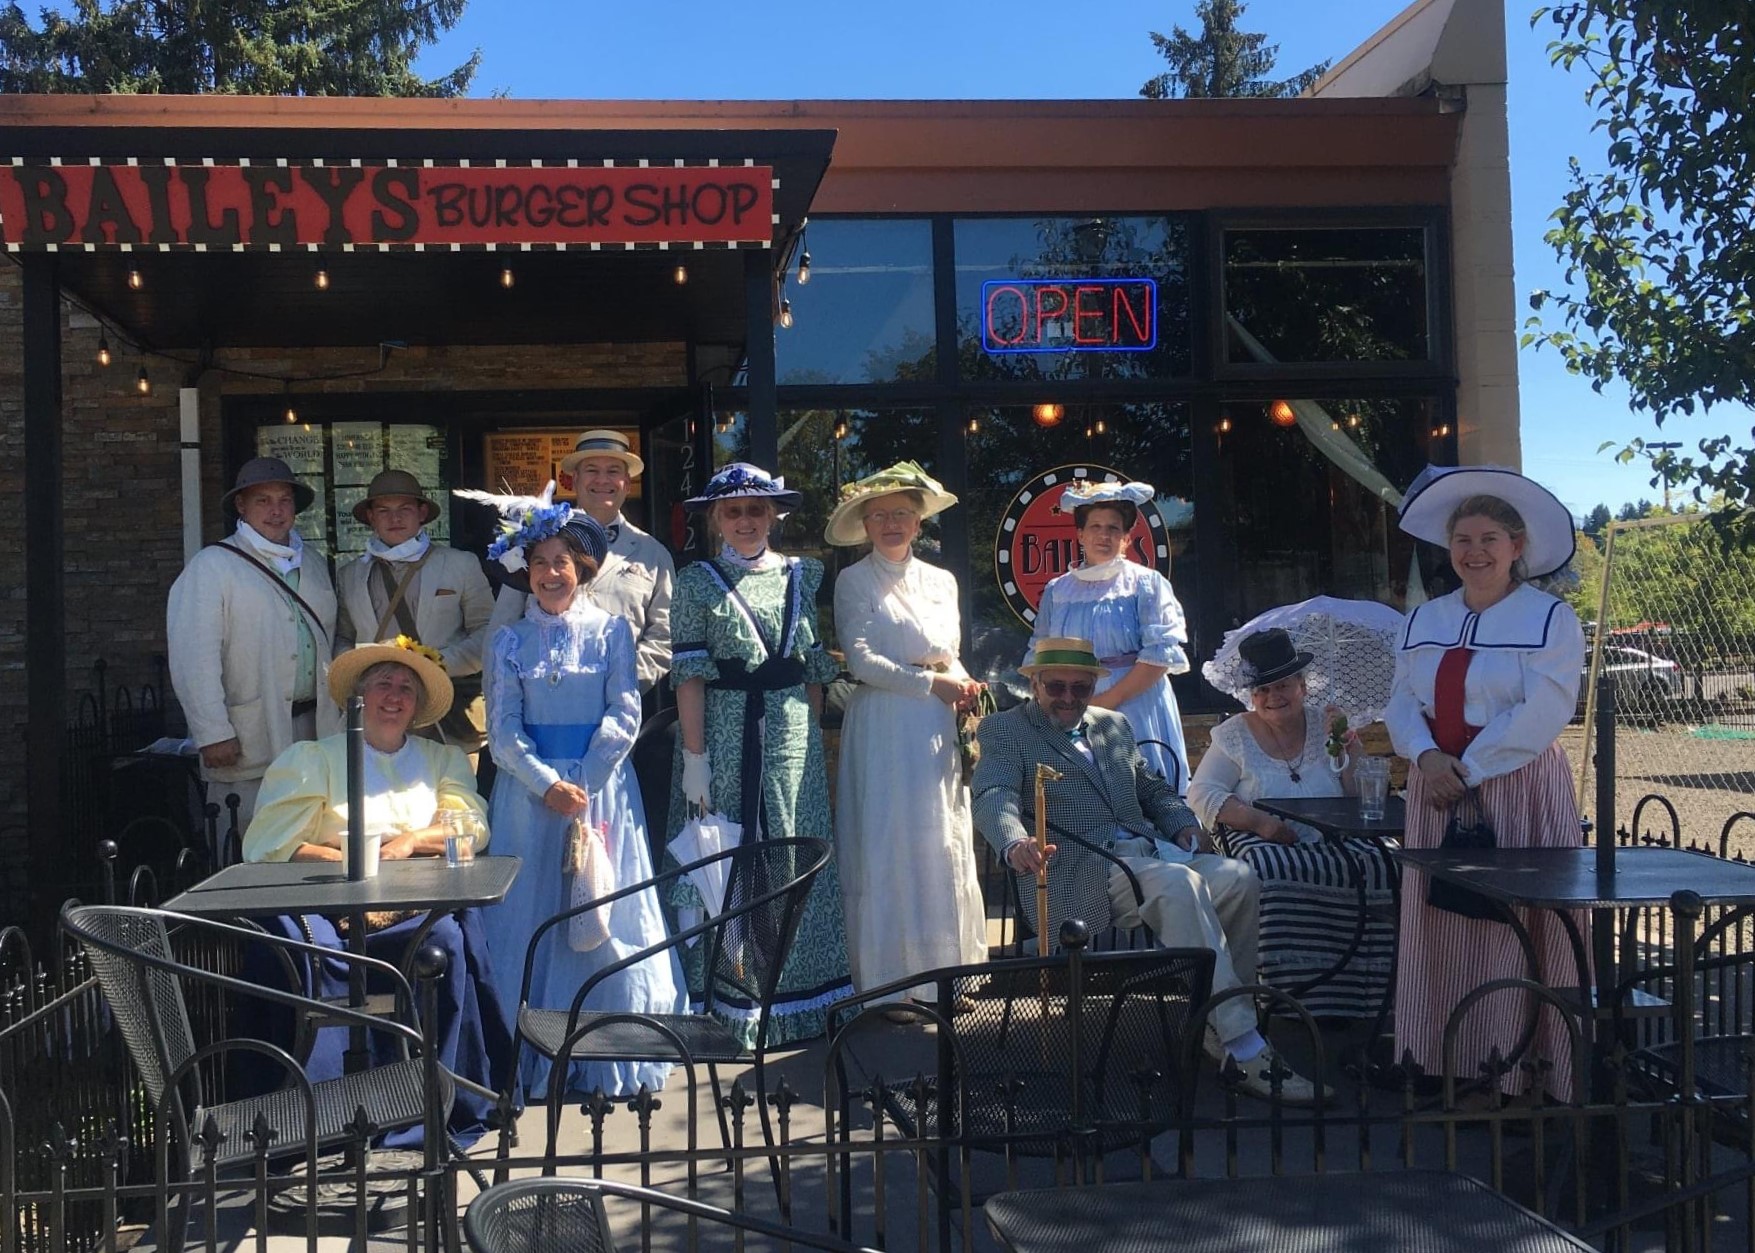
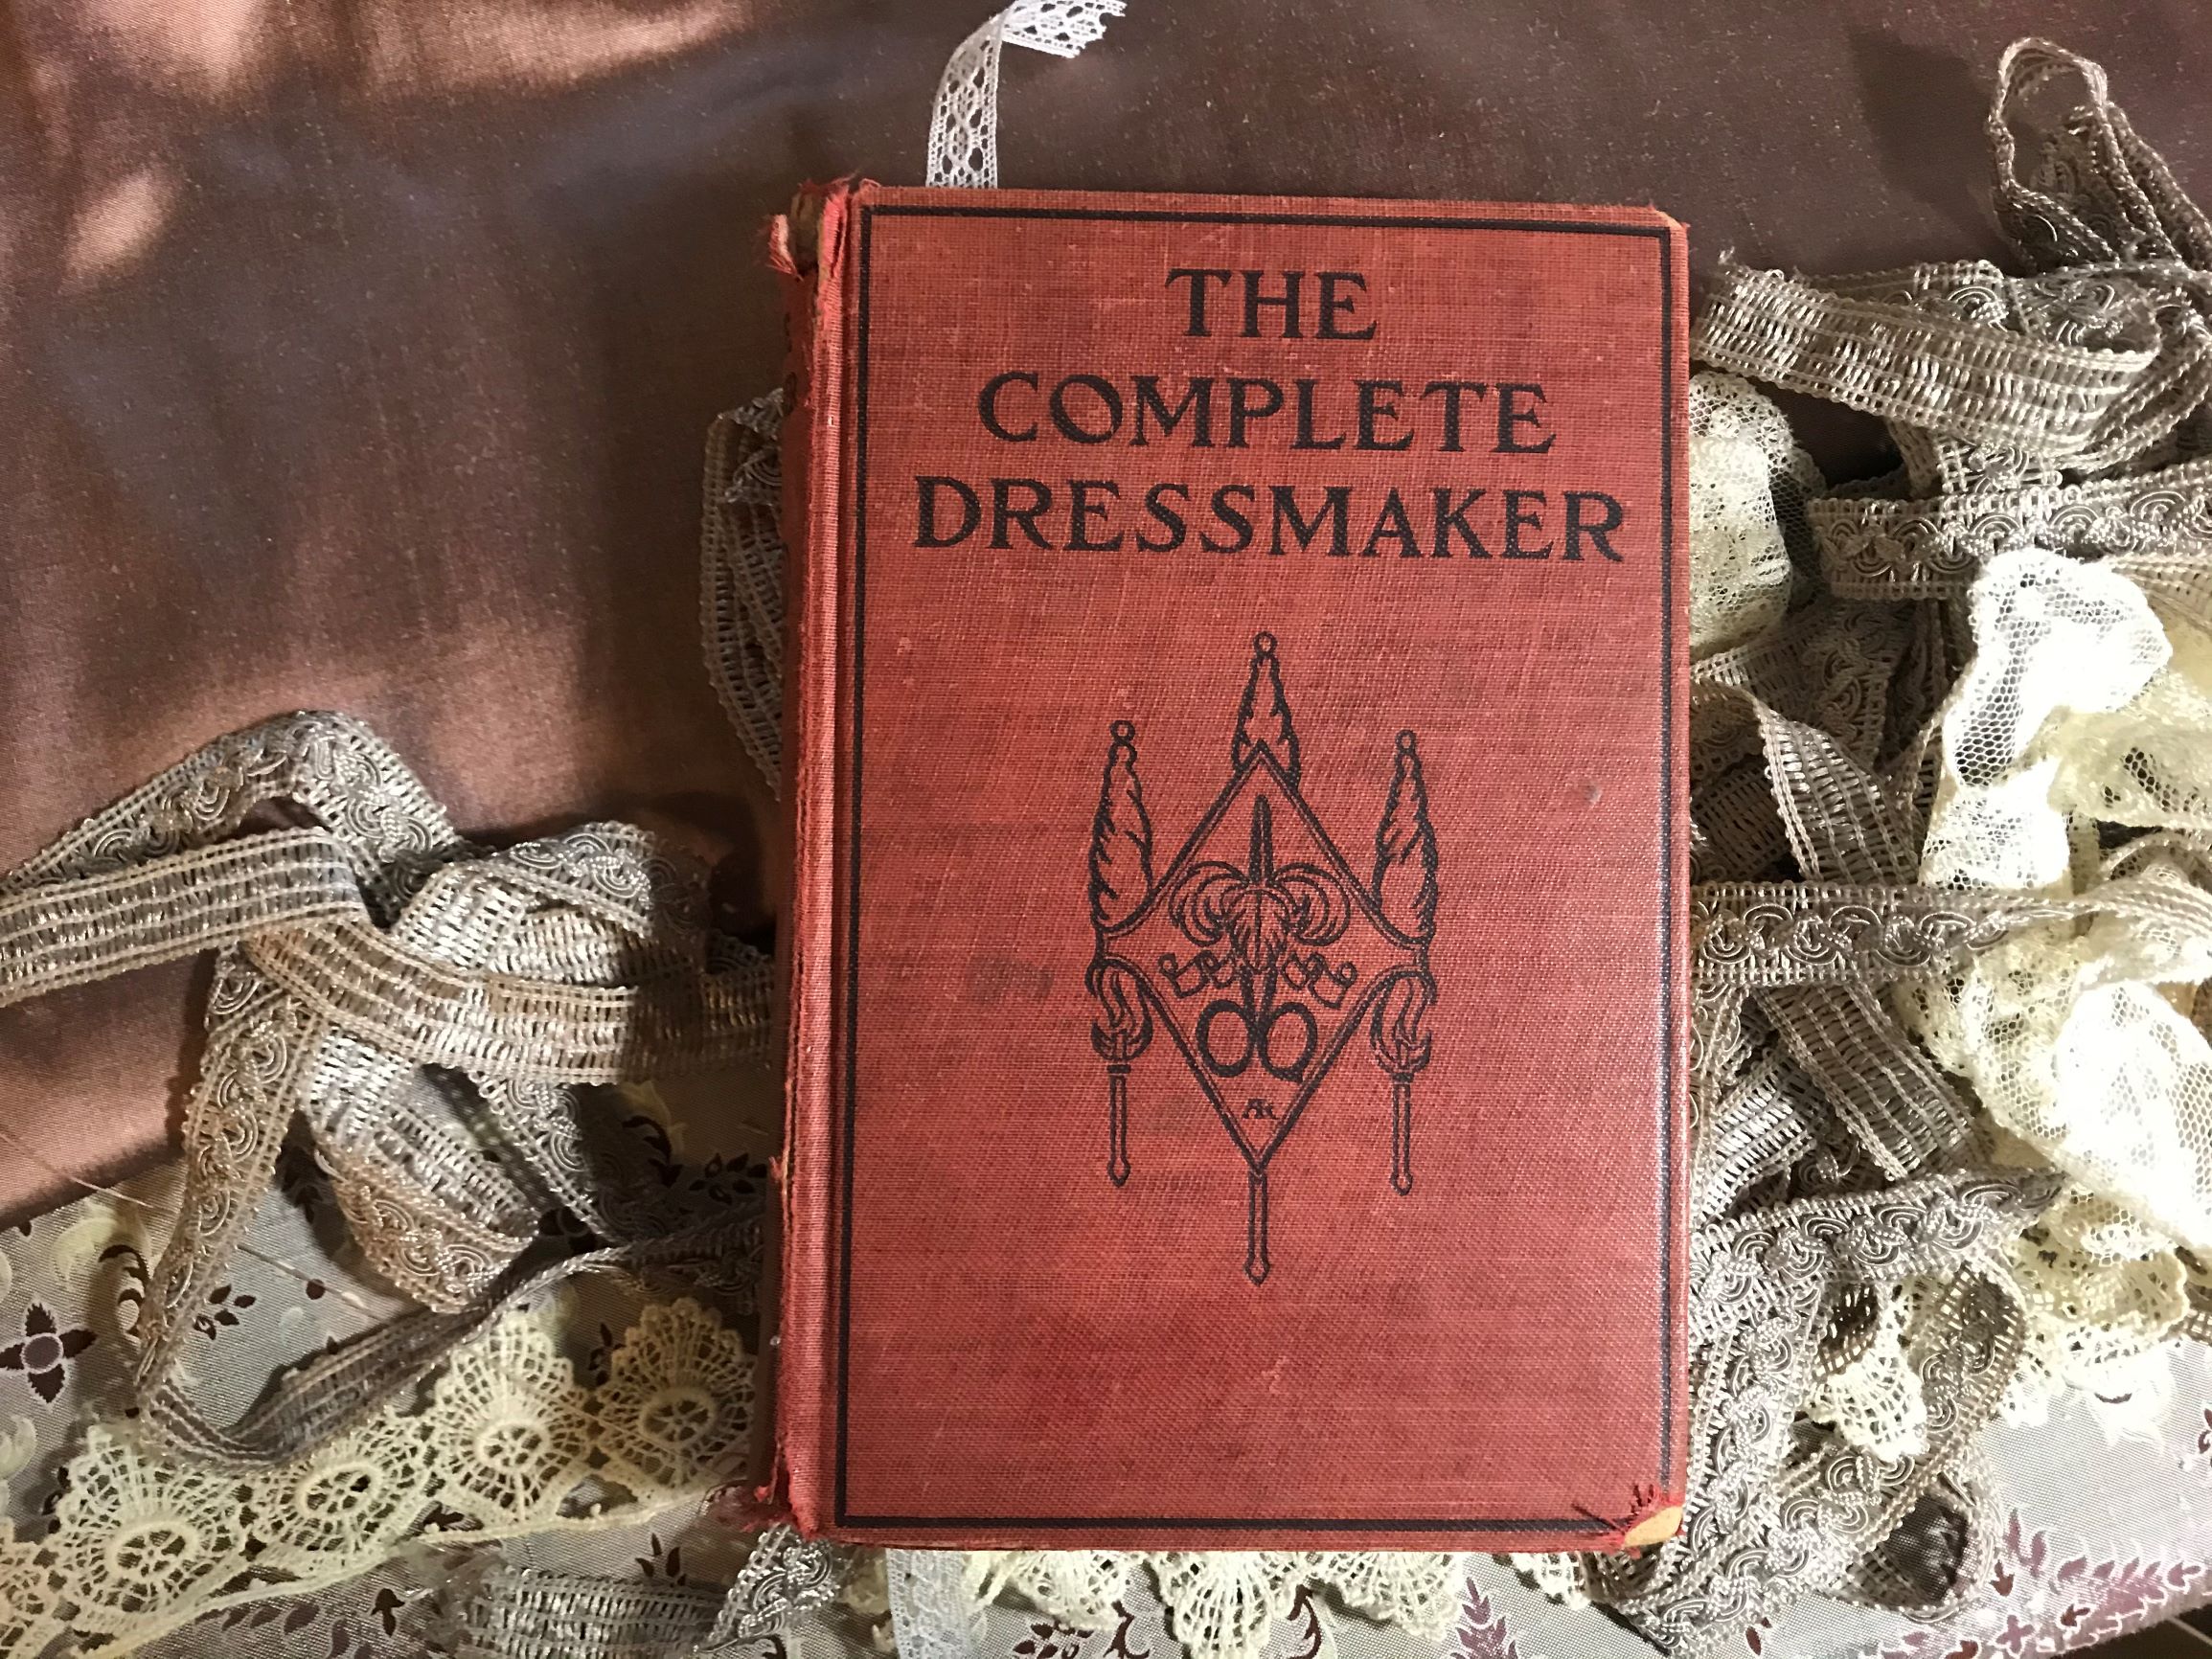
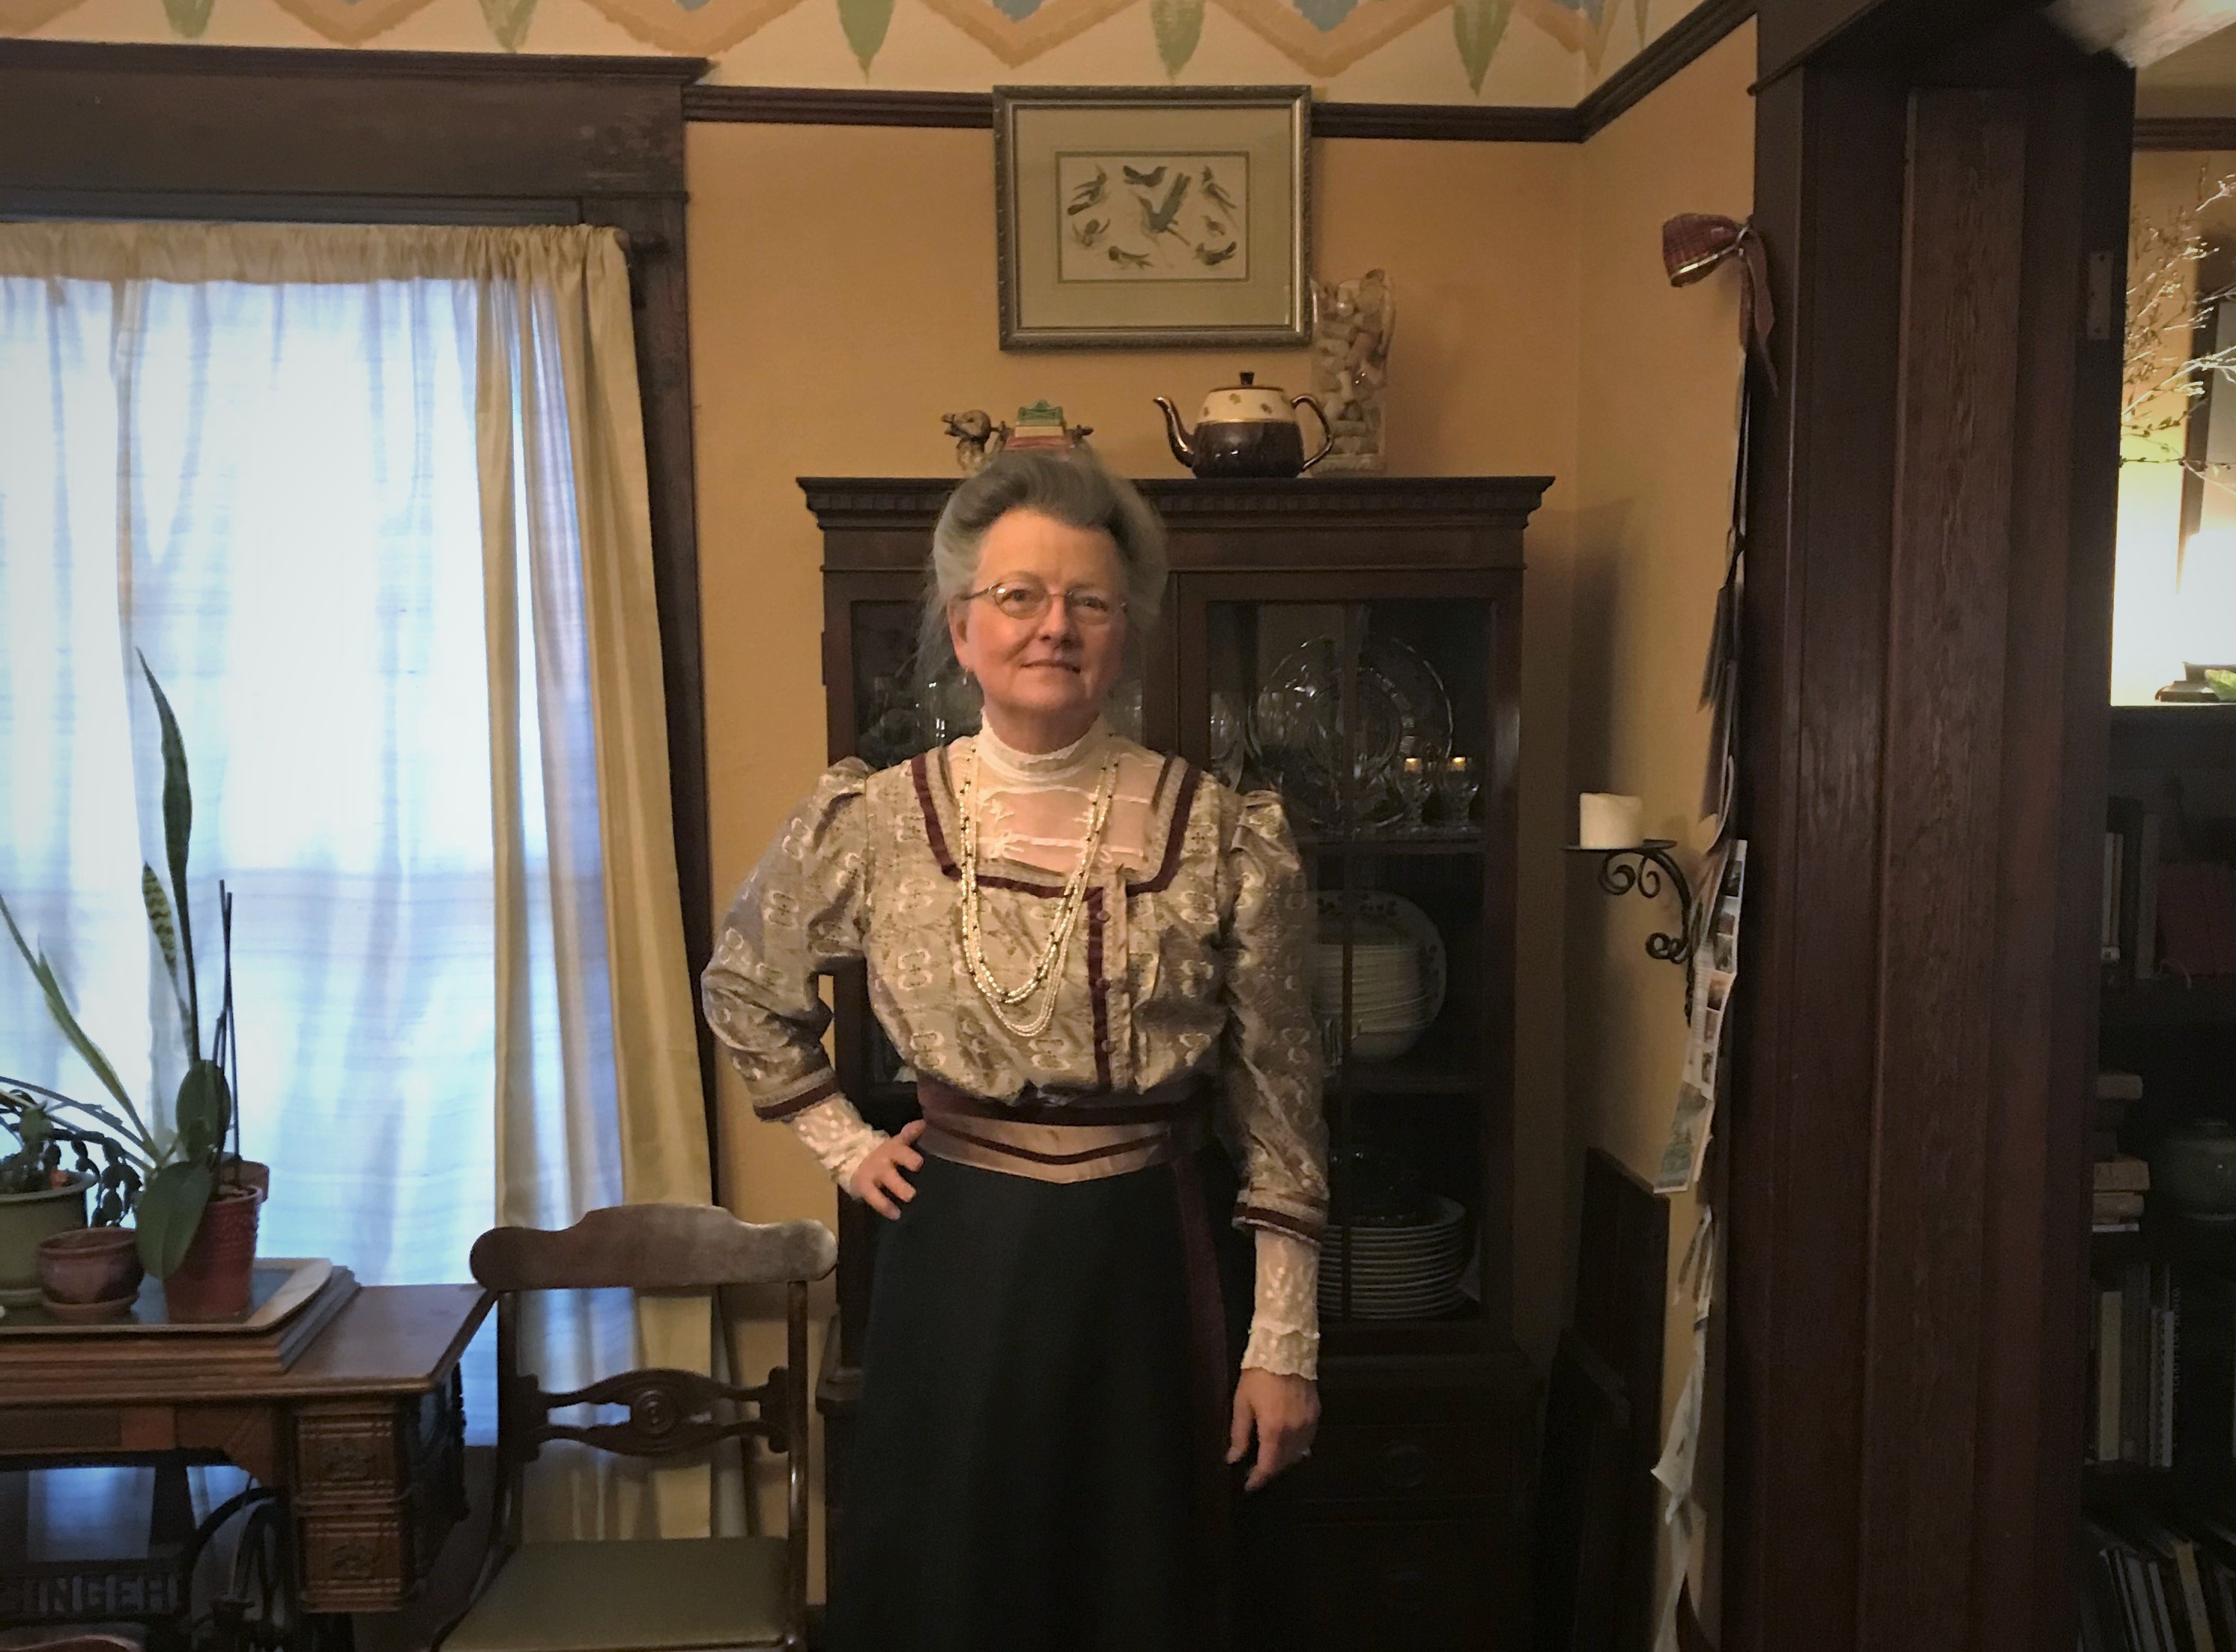
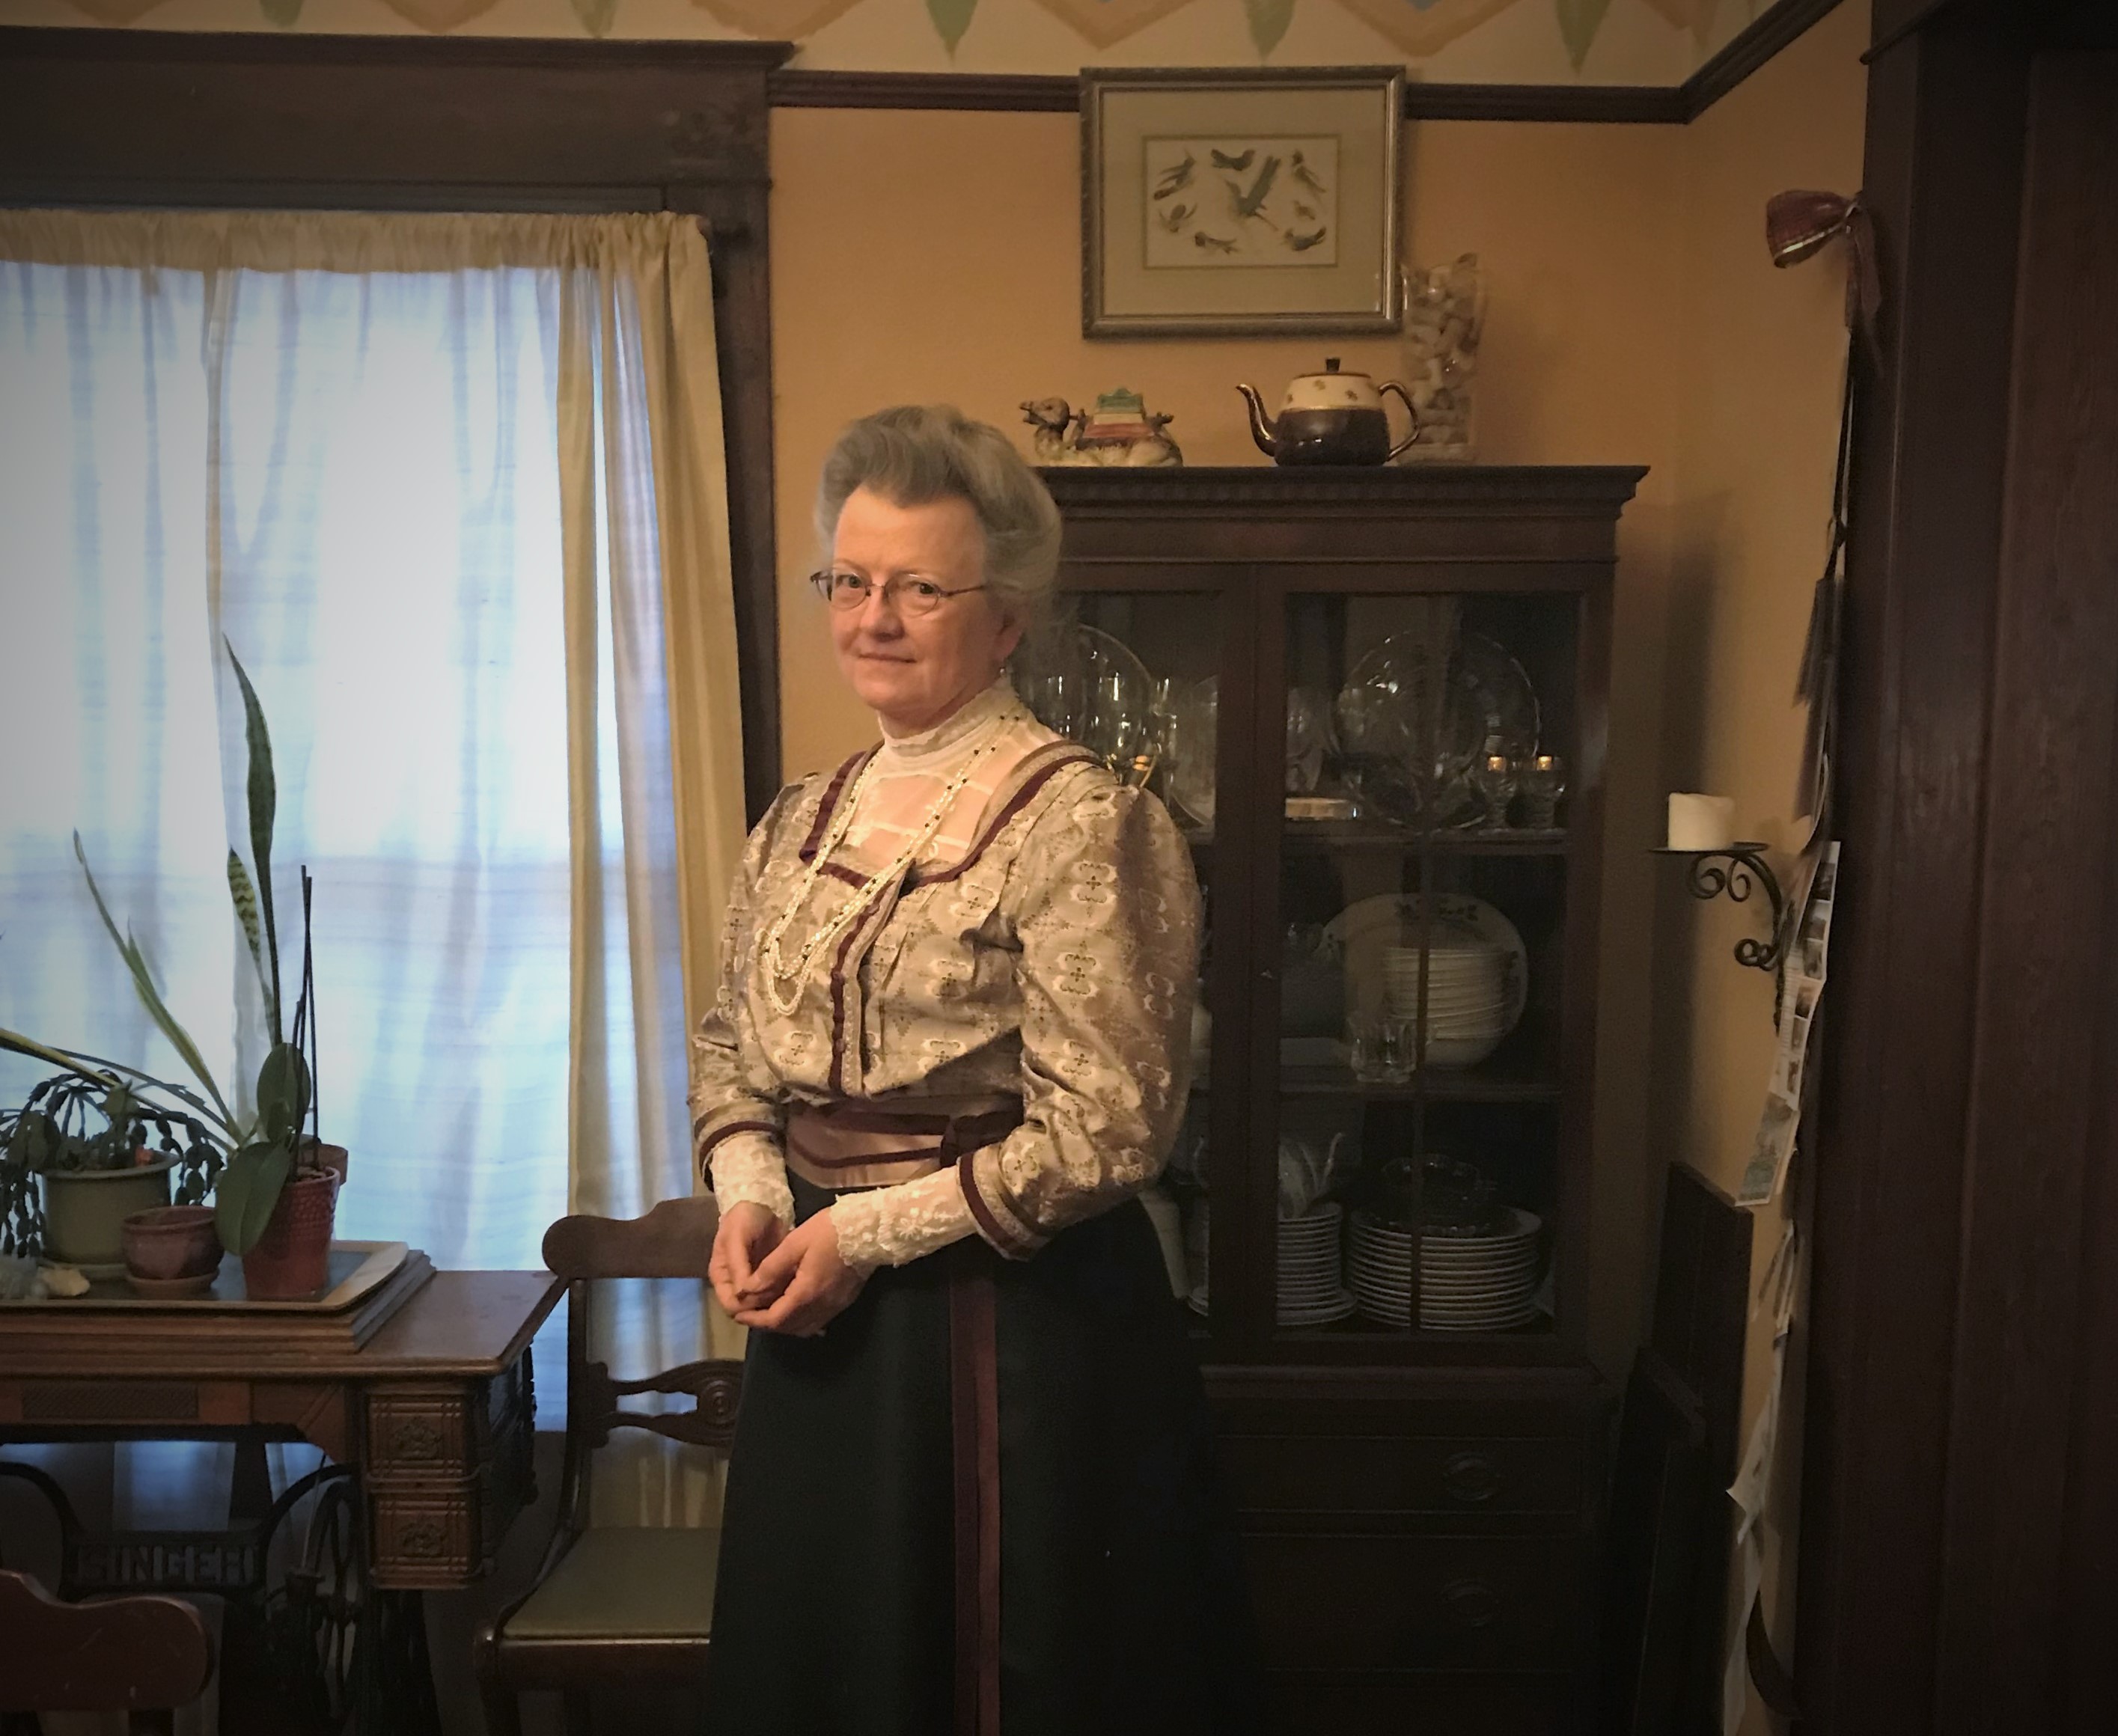
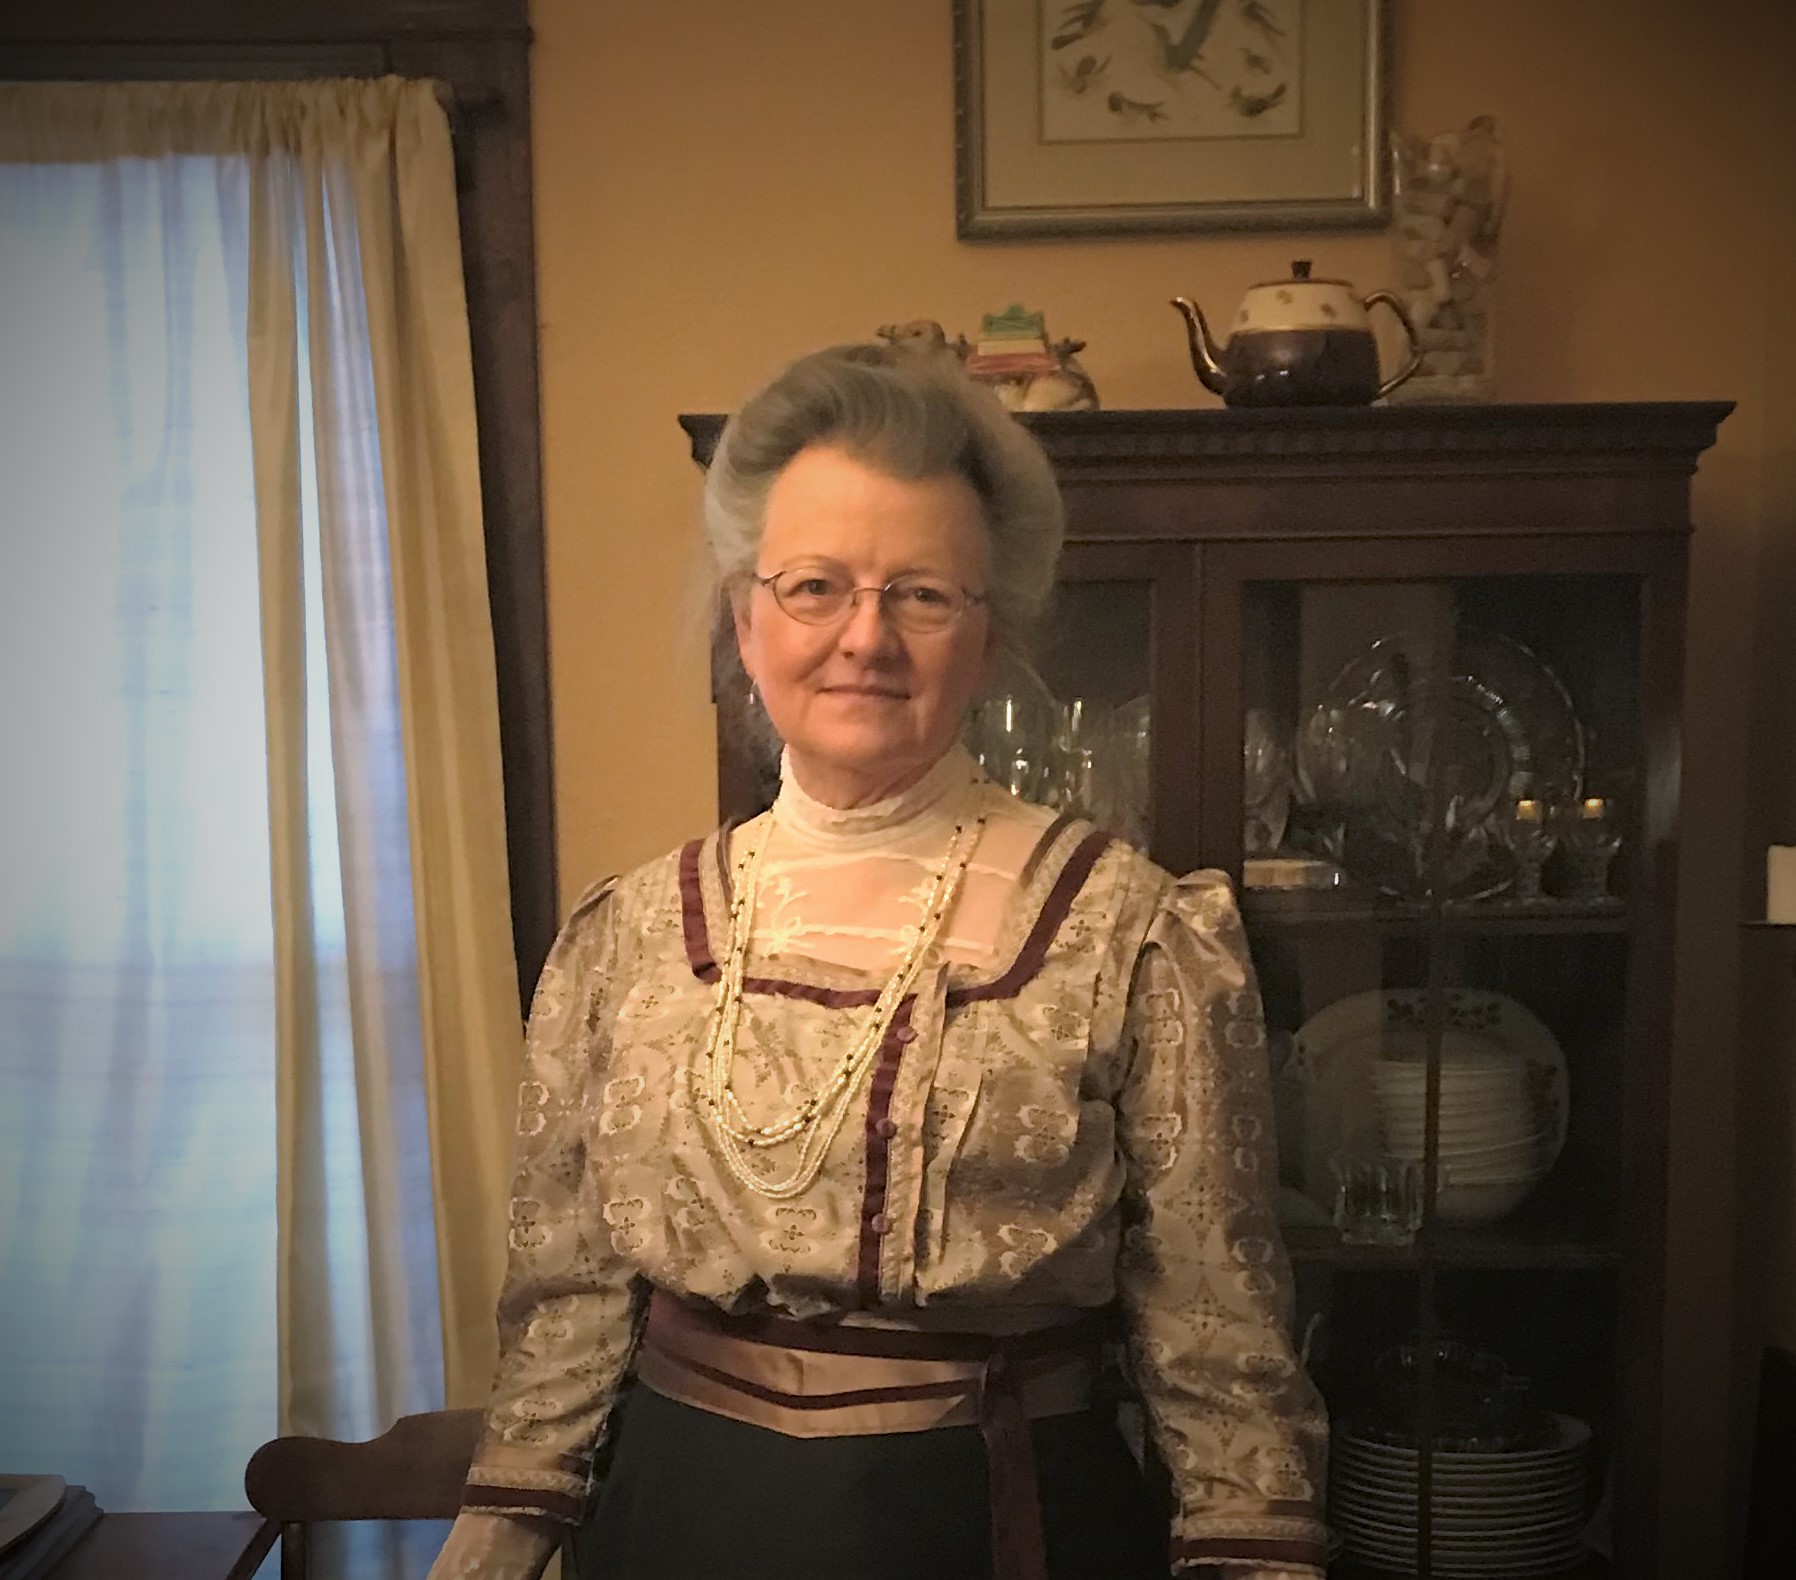
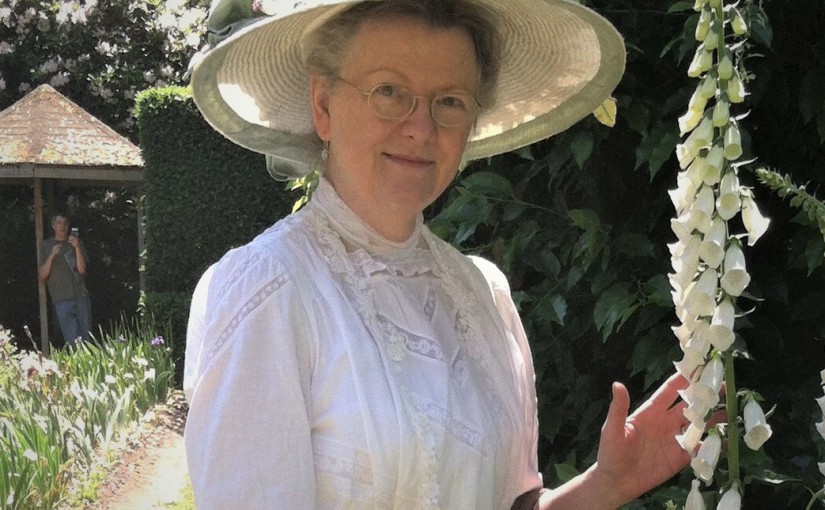
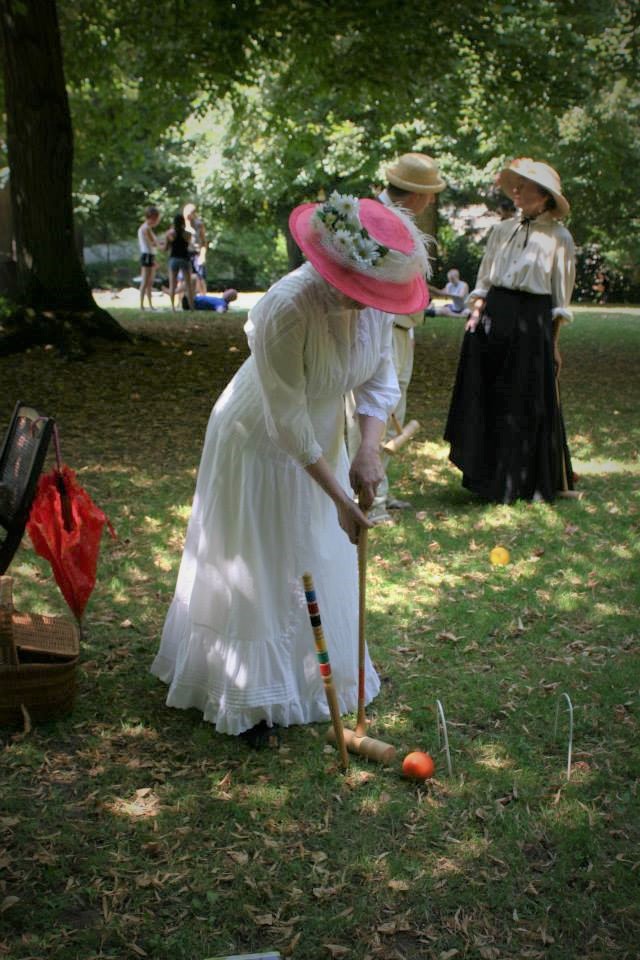
Our fictional character, Mrs. Maggie Lynde of Hillsboro, Oregon, wanted a new summer gown before Saturday. She planned to dress in style to meet her friends for shopping and ice cream.

Since I am Maggie Lynde’s alter ego, and I live in the 21st century, not 1909, I have a few more choices than she did. I have a machine powered by steady, reliable electricity instead of the treadle machine that Maggie would have used. I put my serger to work, finishing seams, where Maggie might have hand whipped them or else left them raw. And finally, I have a husband who tolerates my tendency to spend an entire Friday in my studio, where Maggie would have been responsible for preparing all the meals, doing all the dishes, and otherwise keeping house, in addition to her impromptu dressmaking project. It might have taken her all week to compete the summer dress, while I was able to start on Thursday night and wear it on Saturday morning!

Two Modish Summer Gowns

Patterning the Skirt

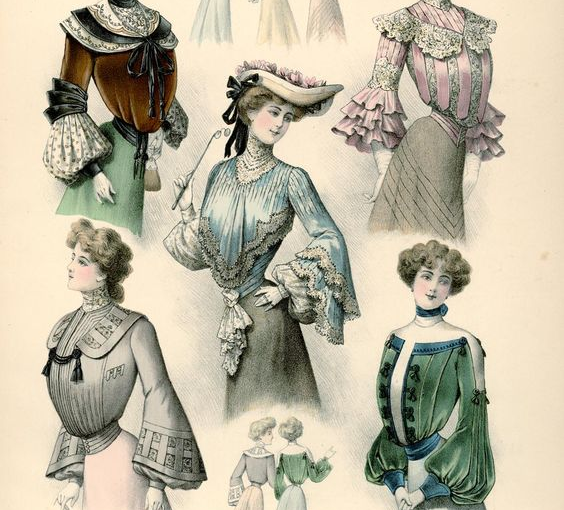
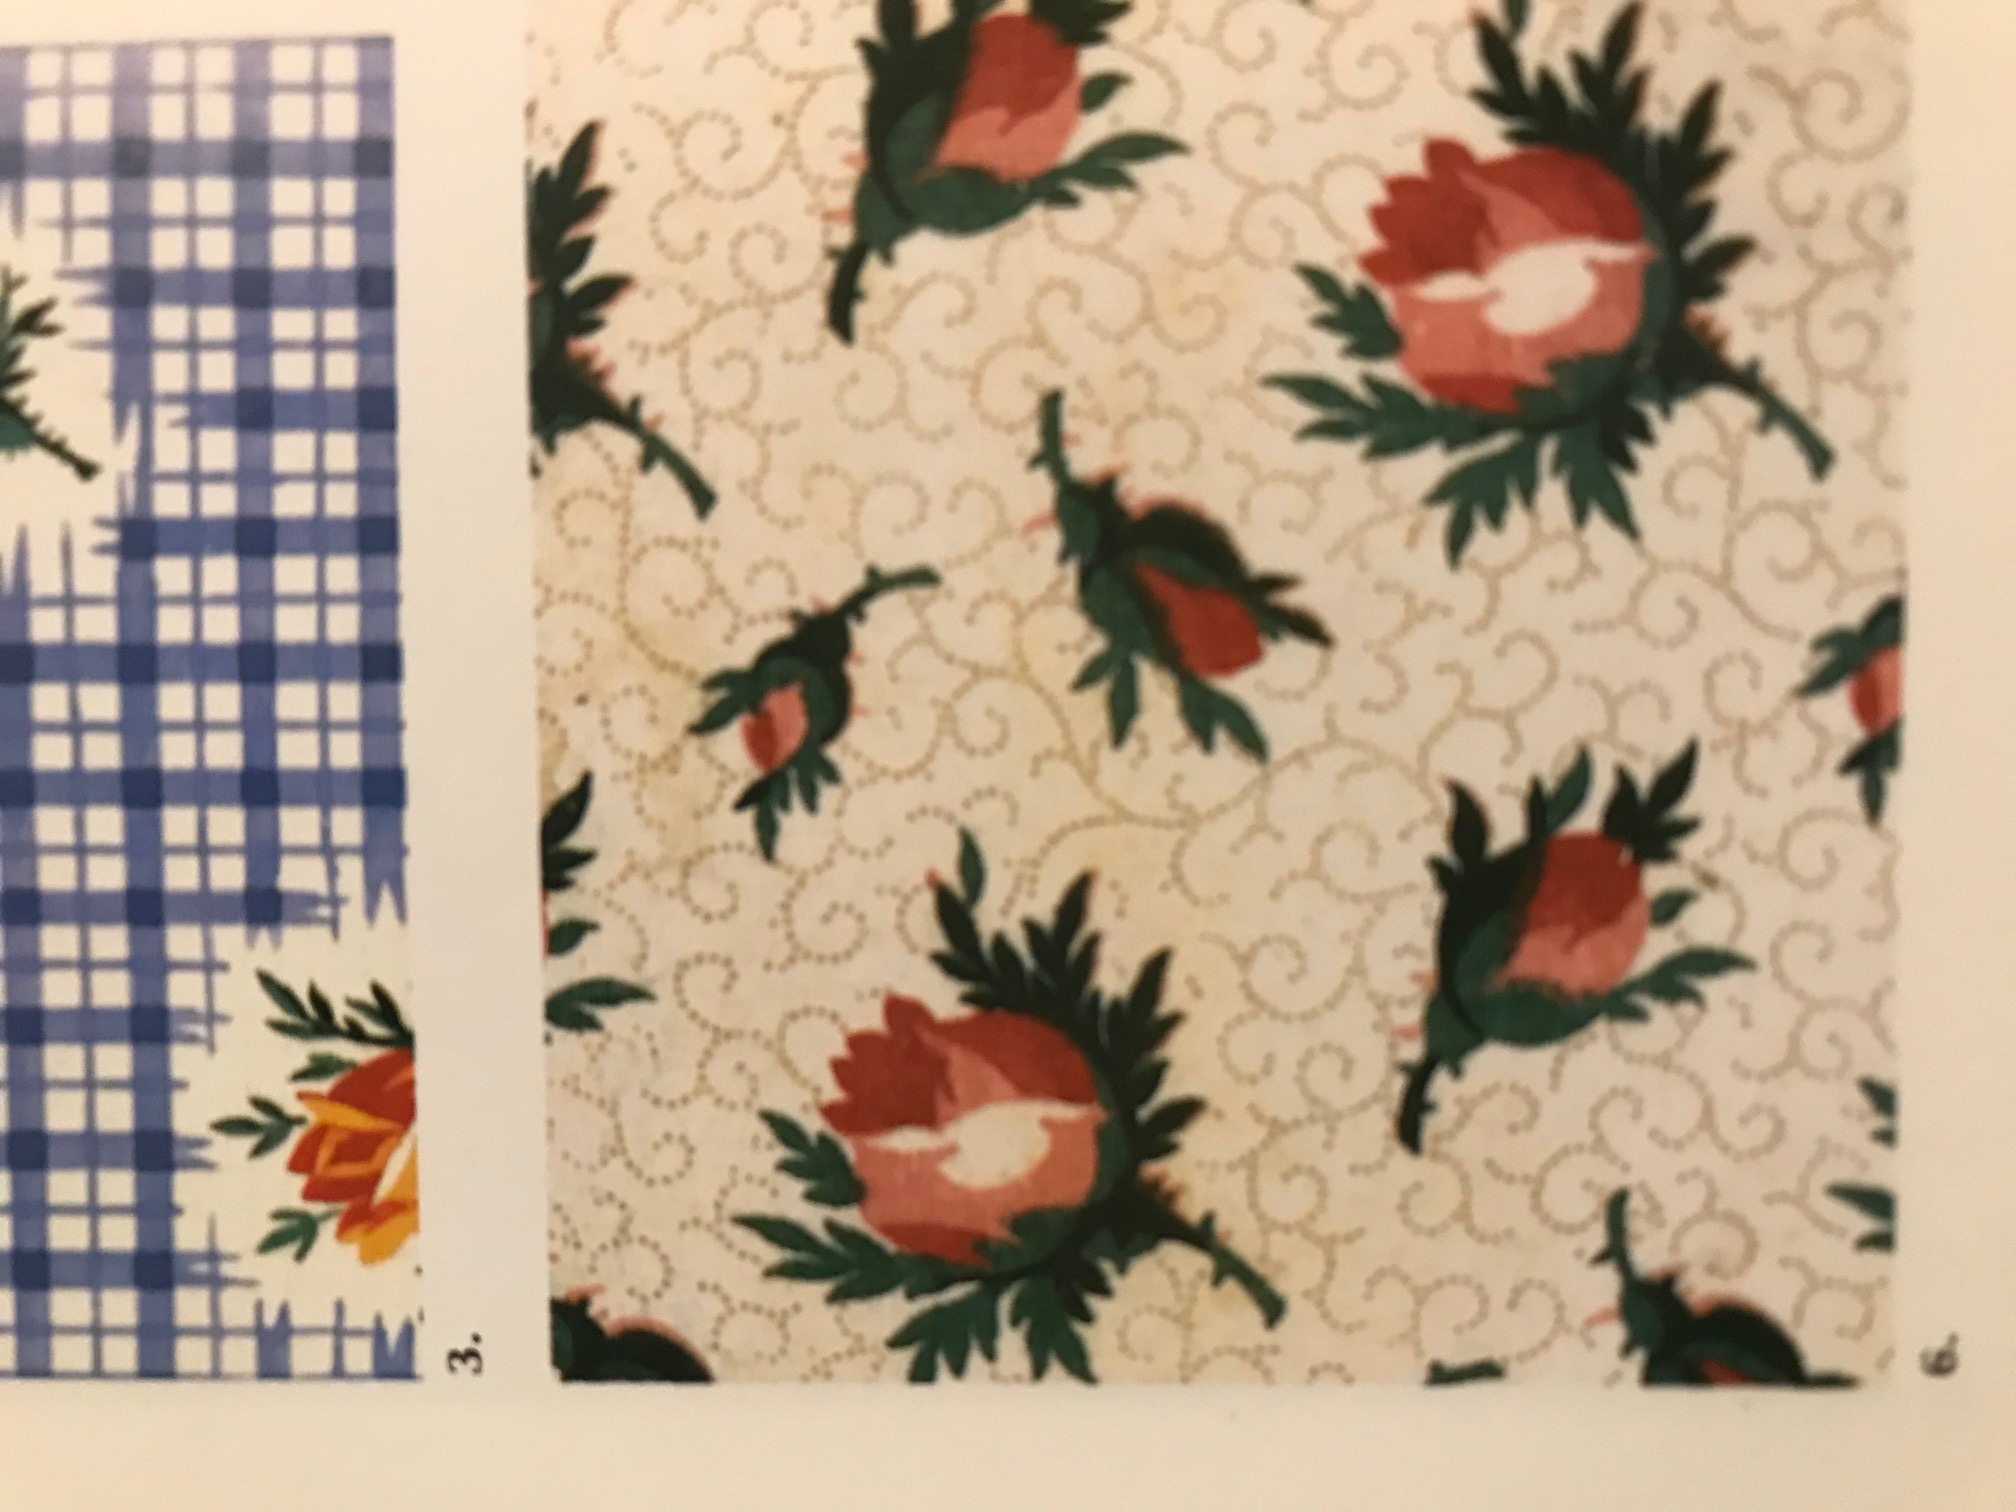
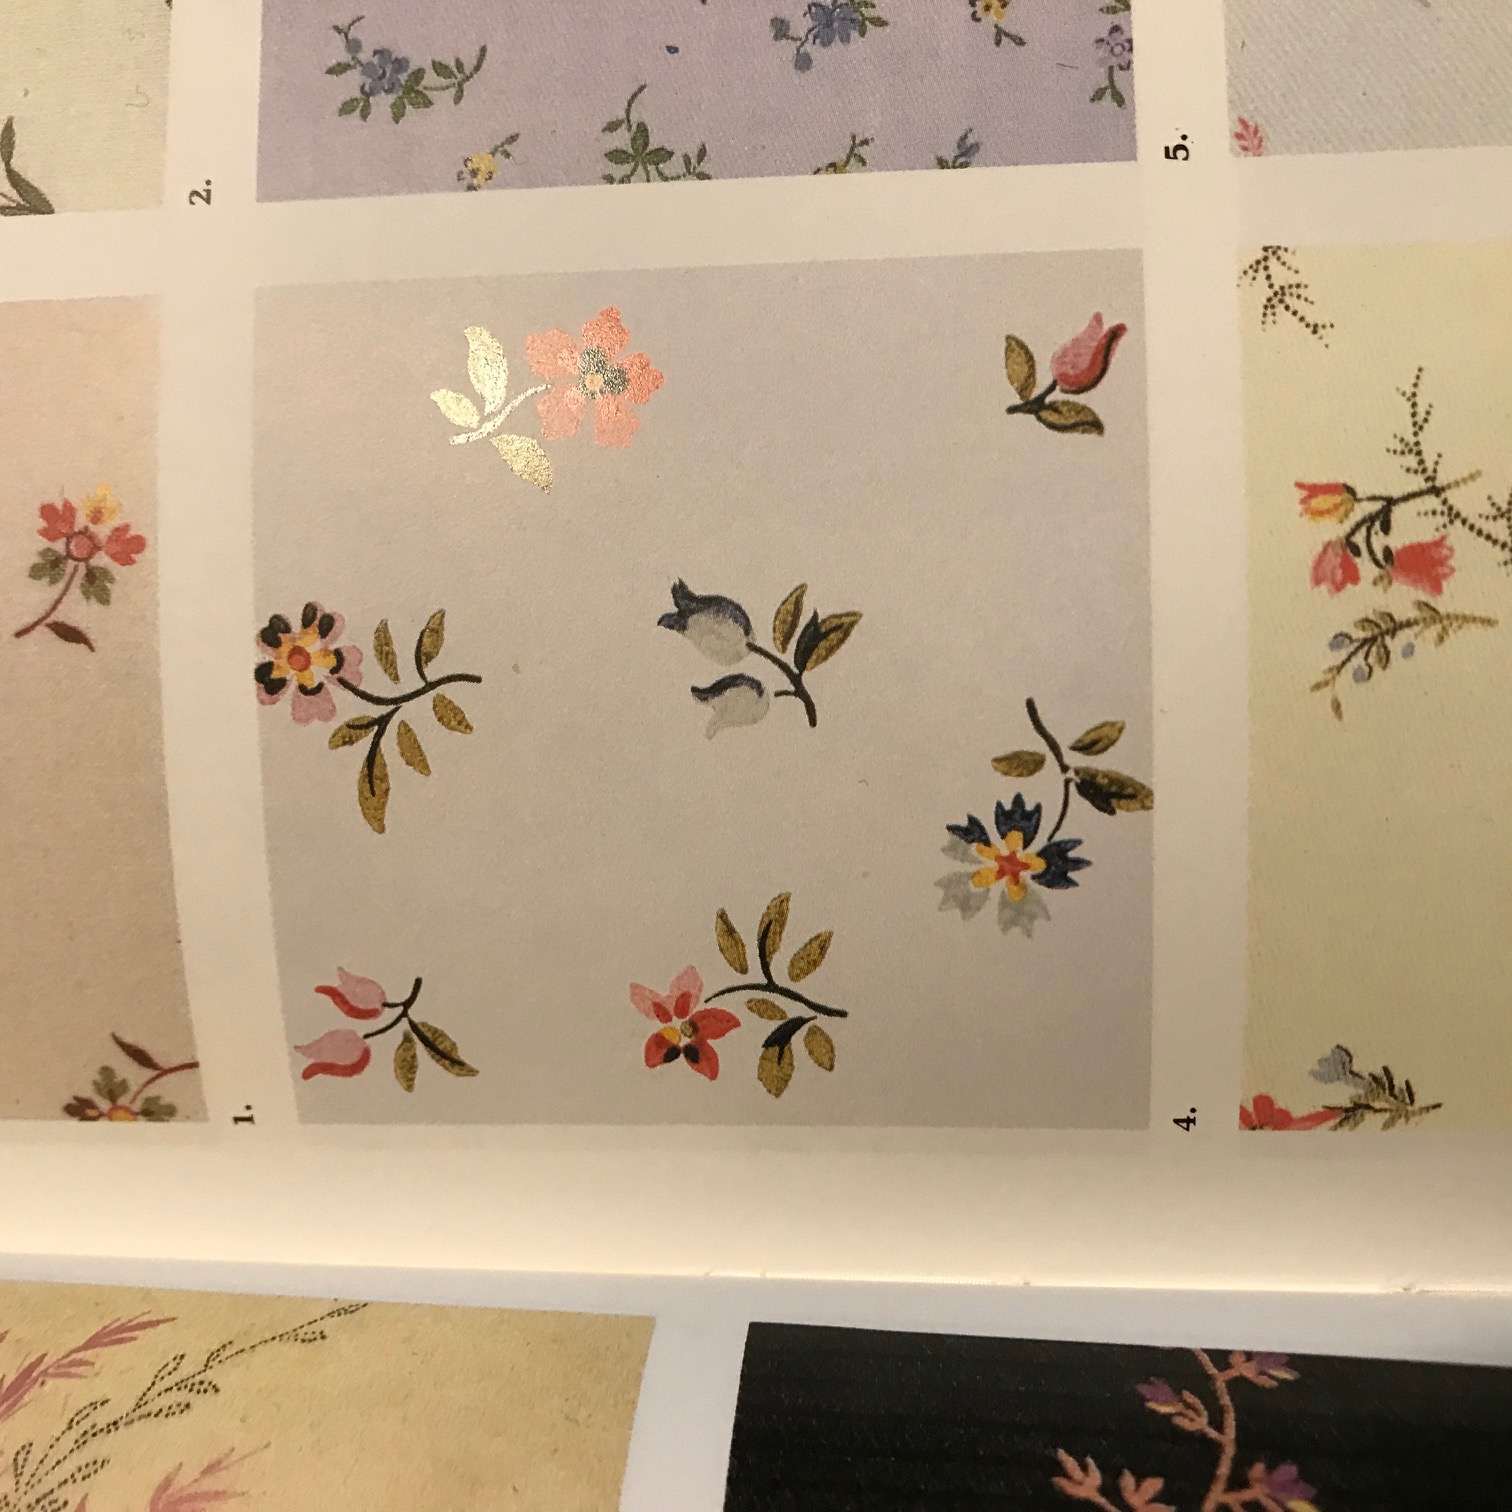
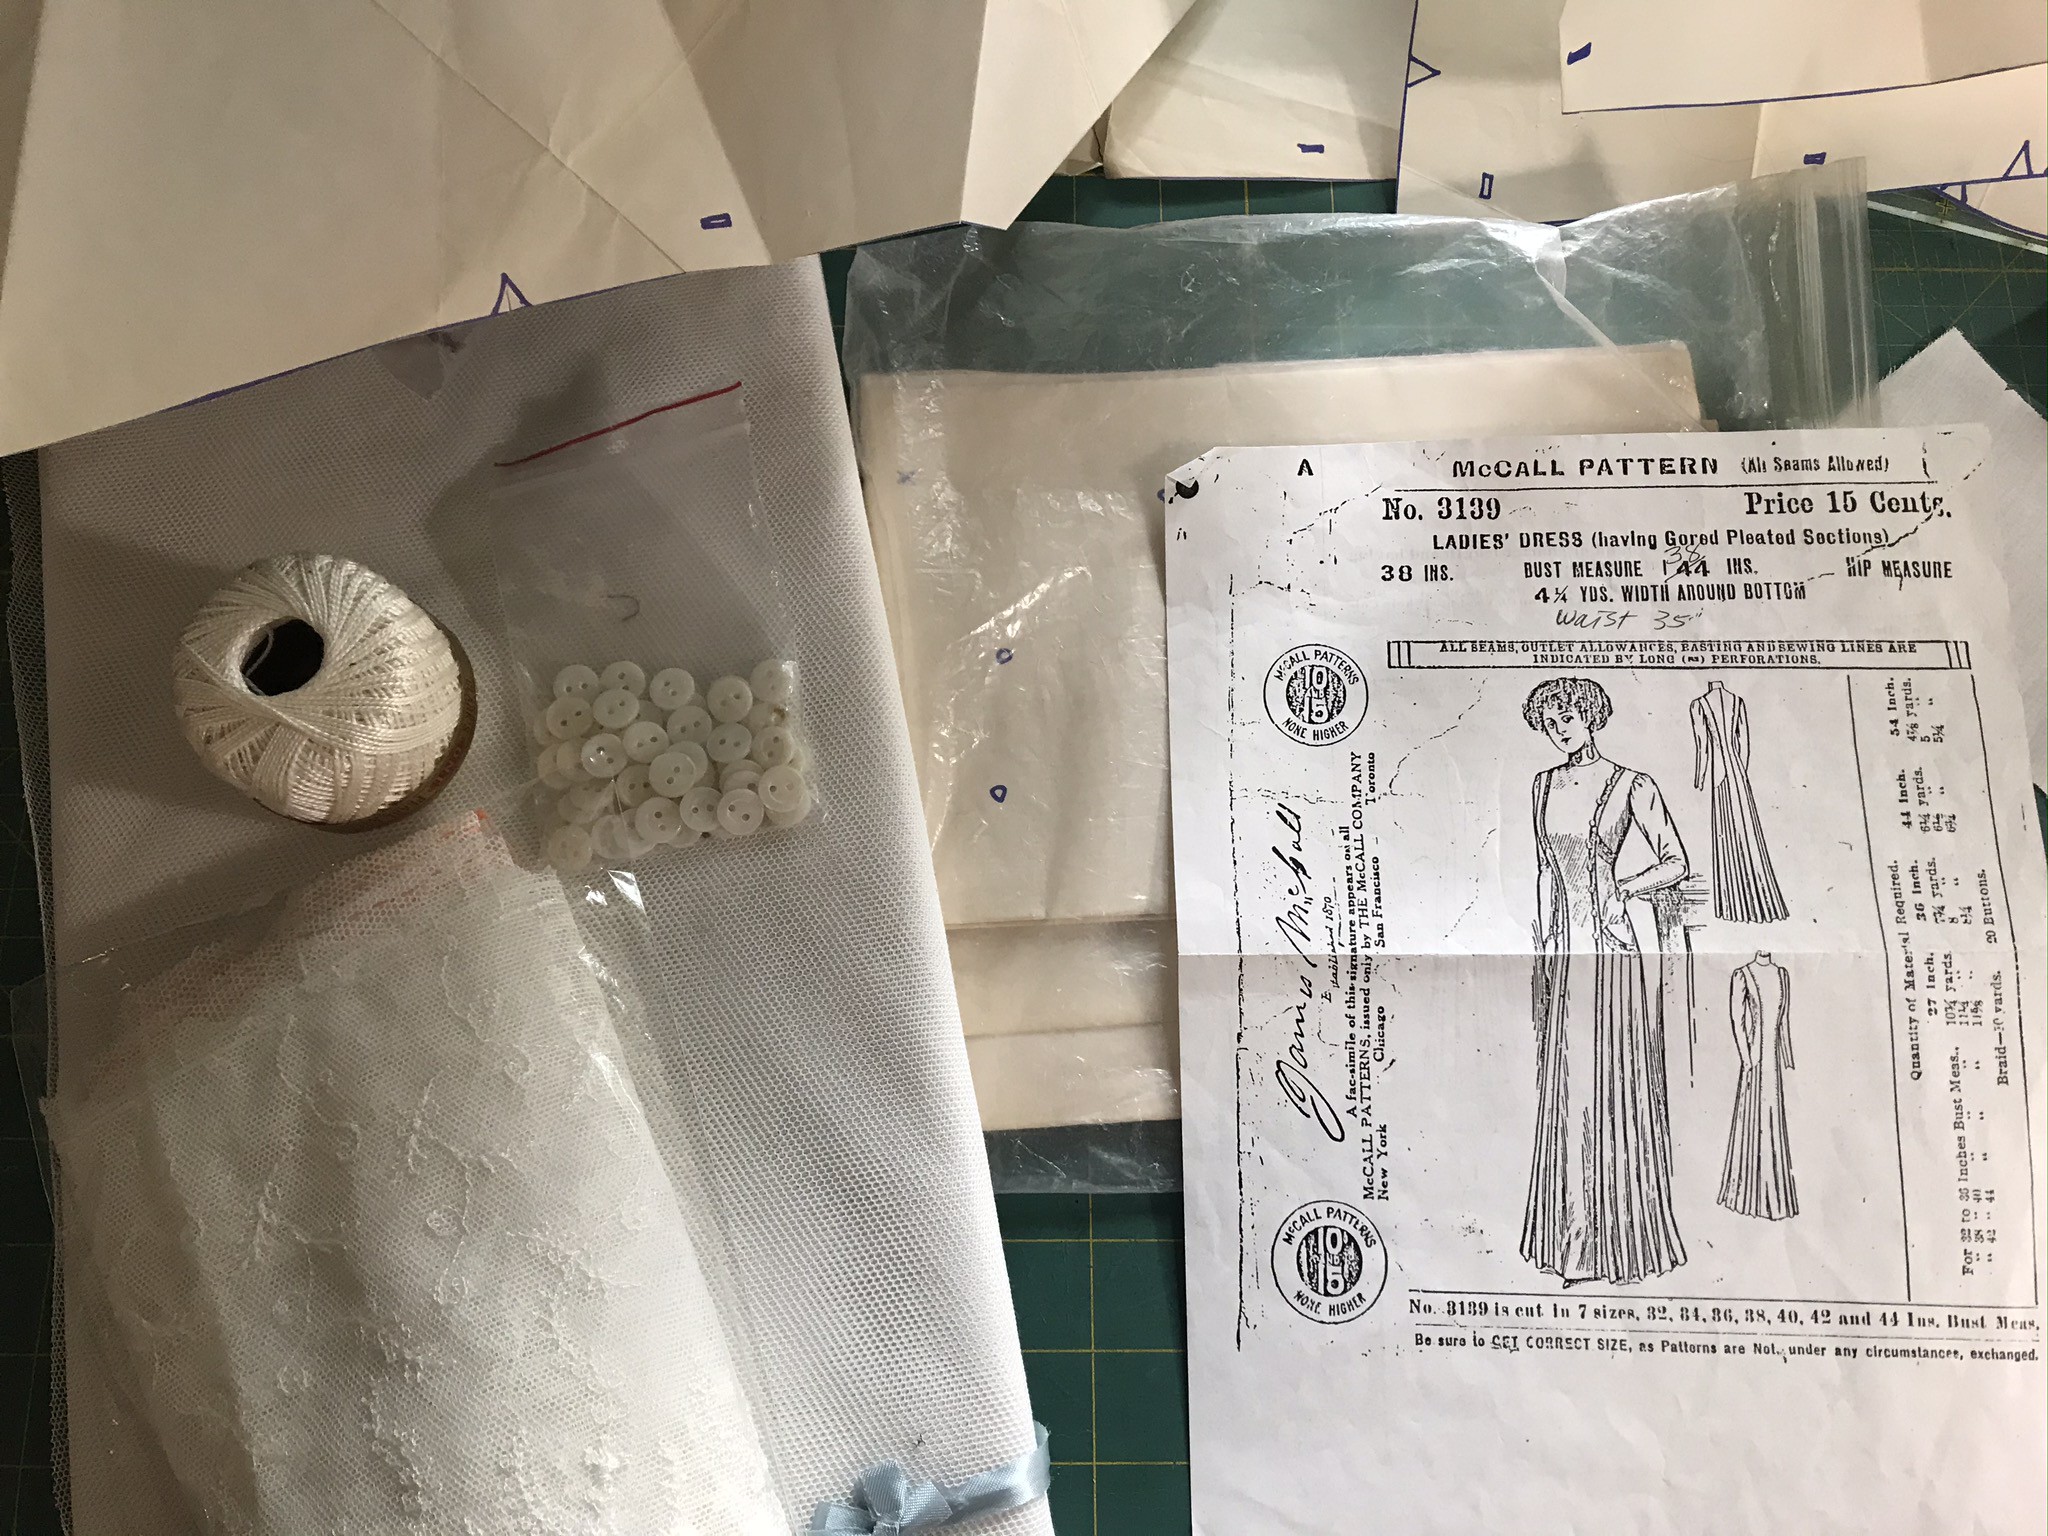
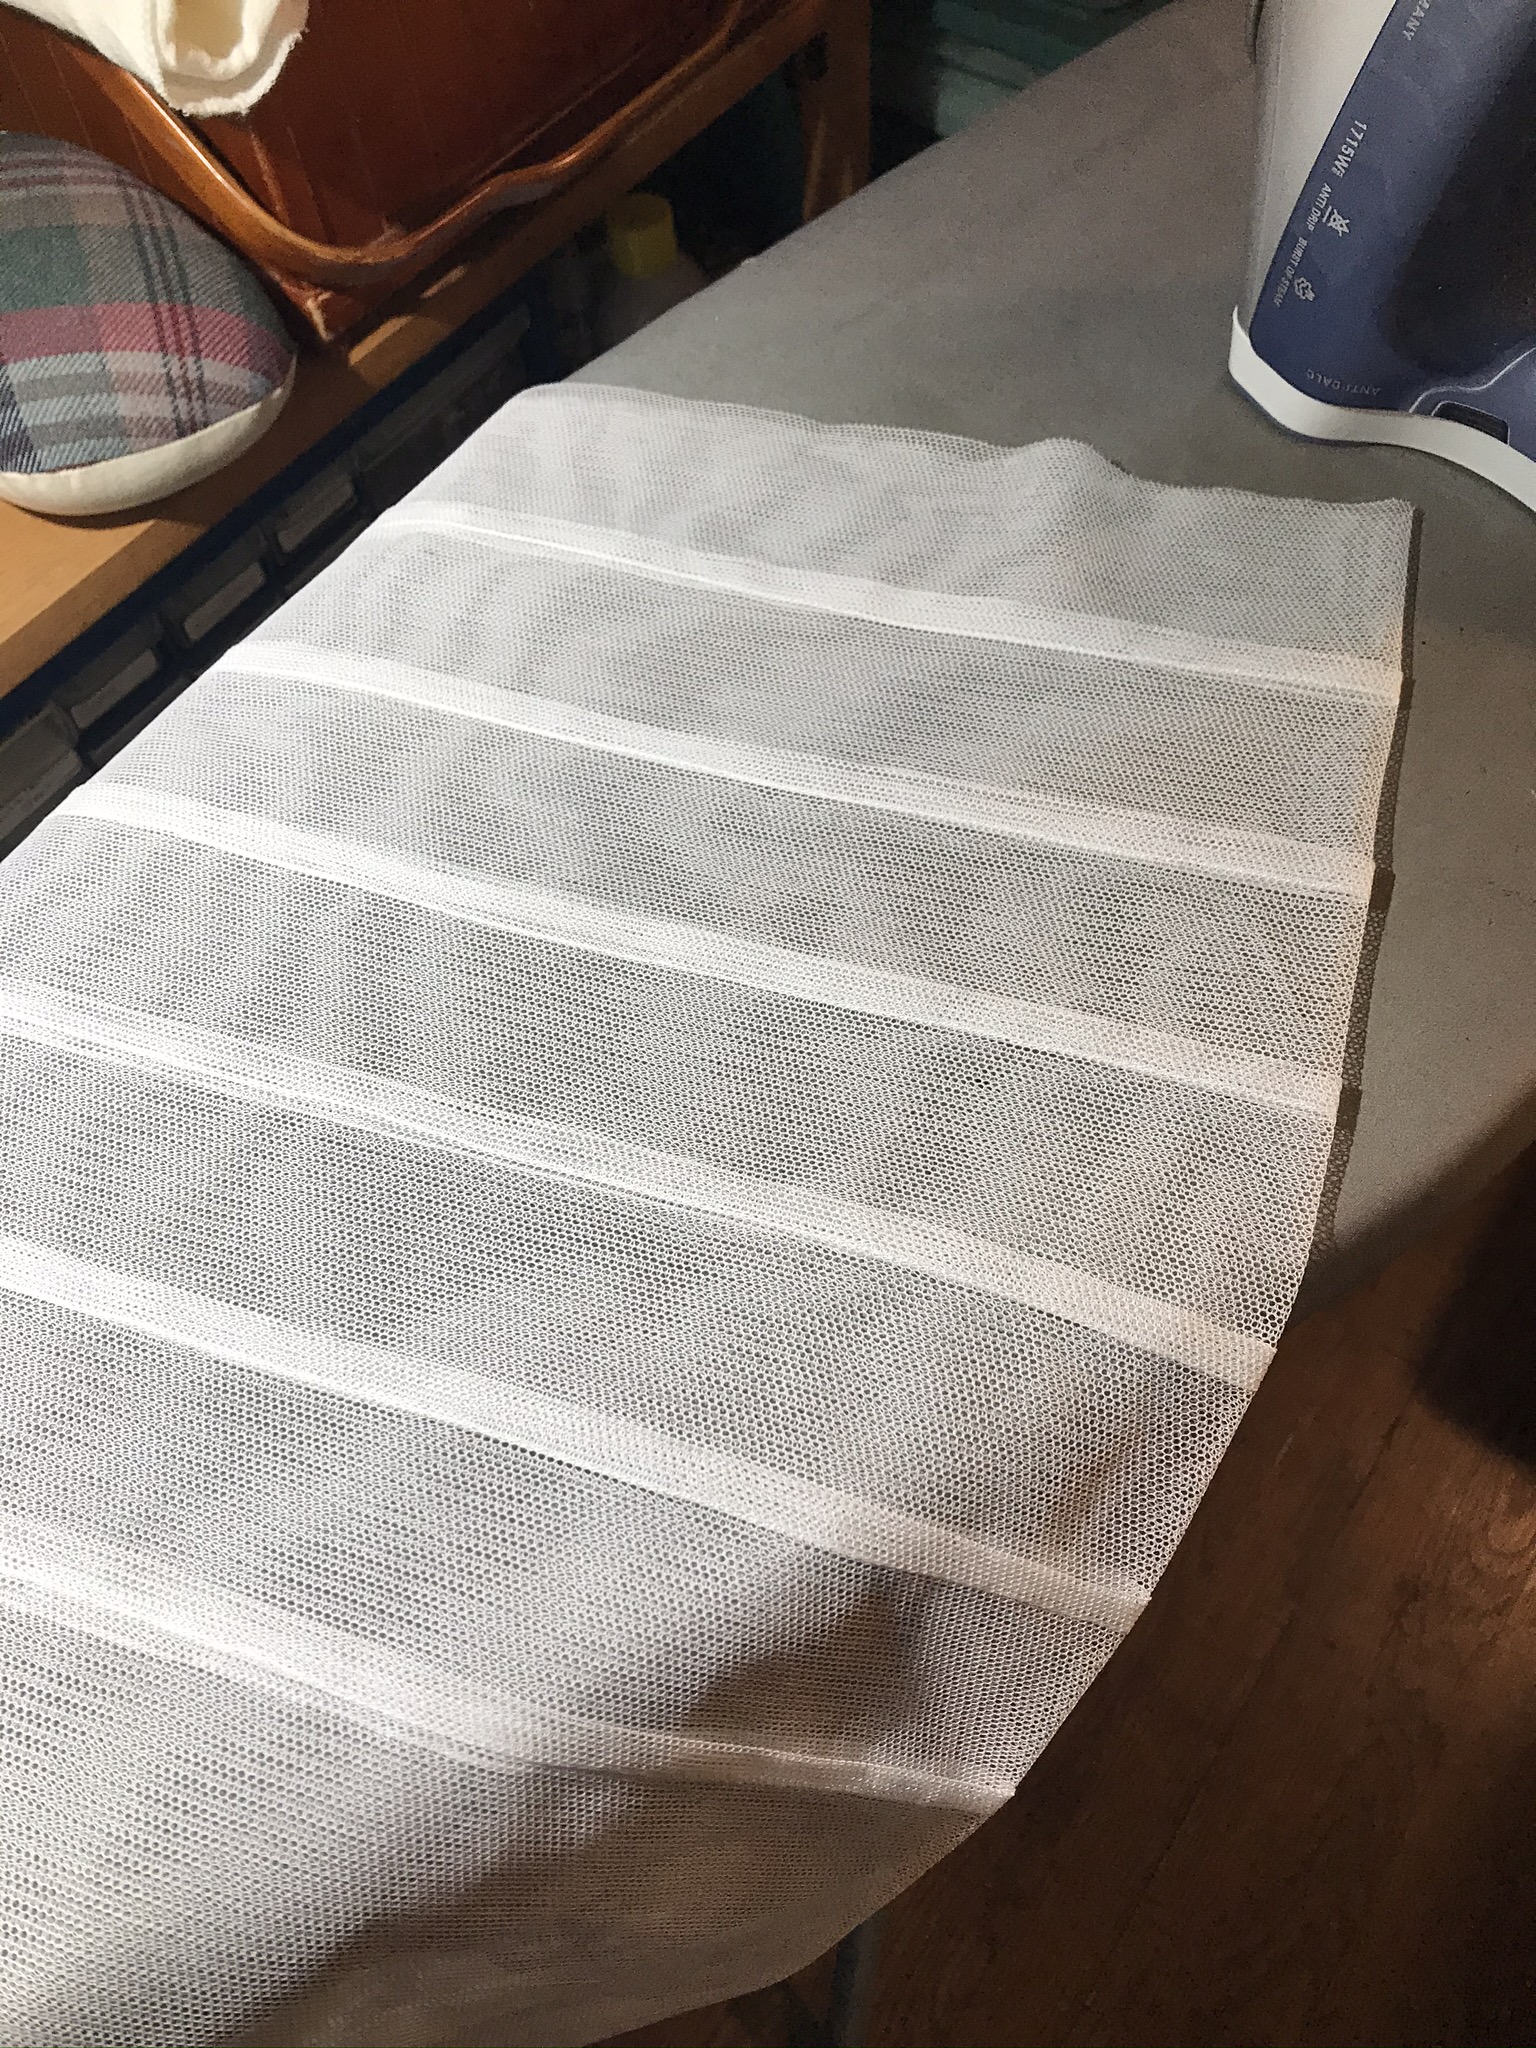
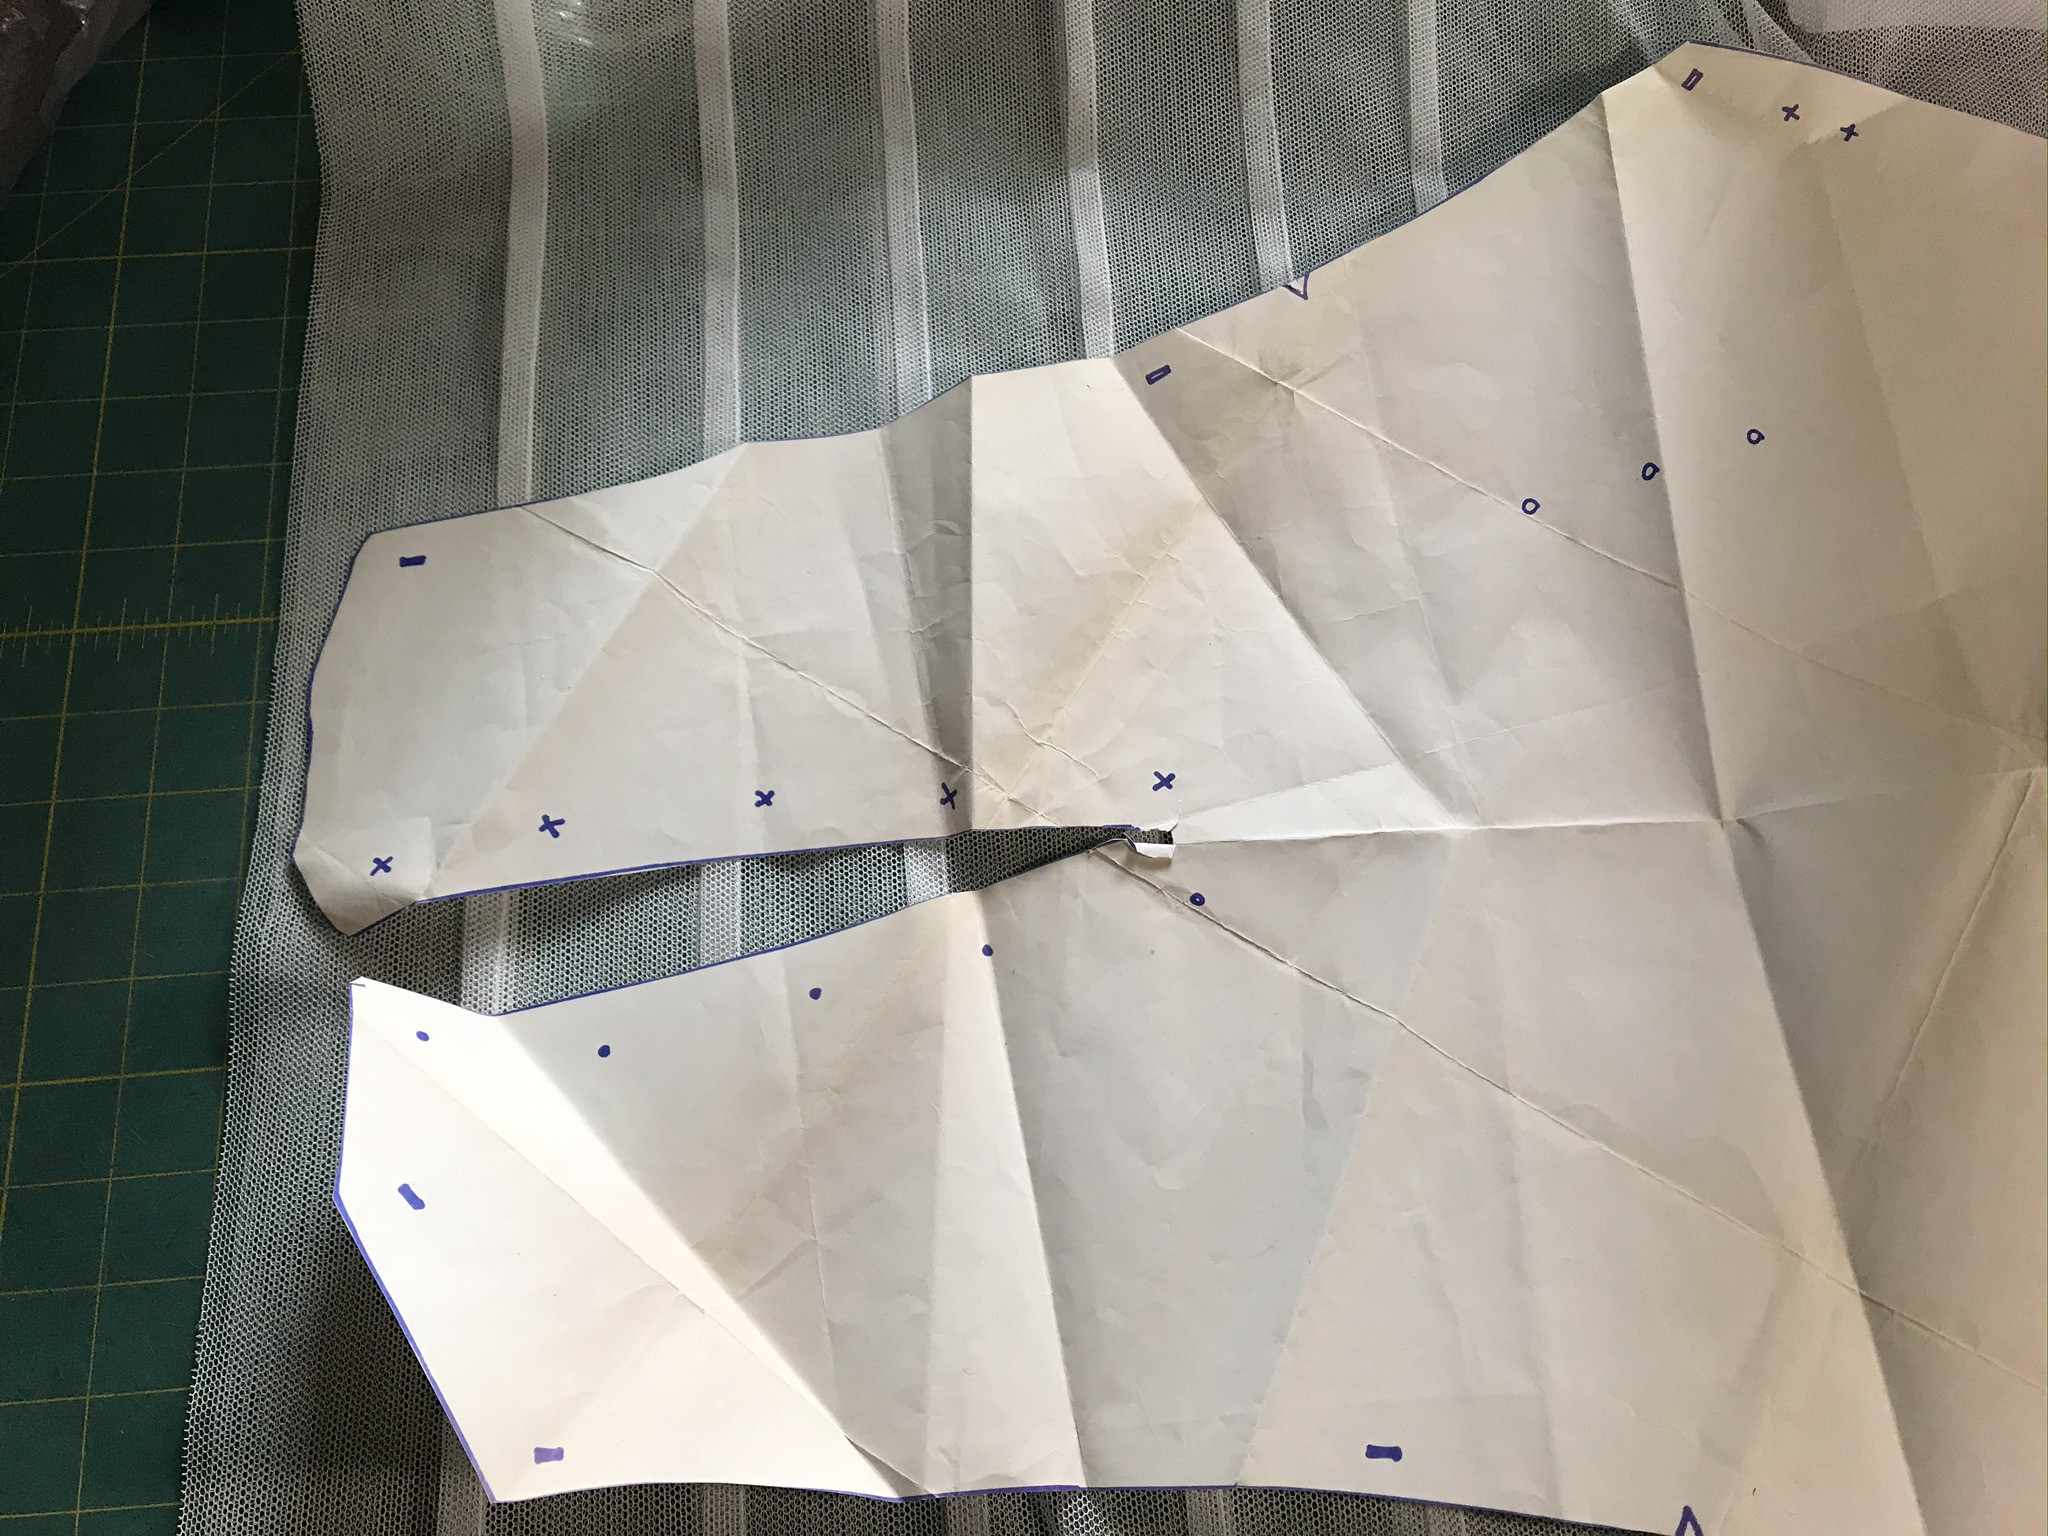
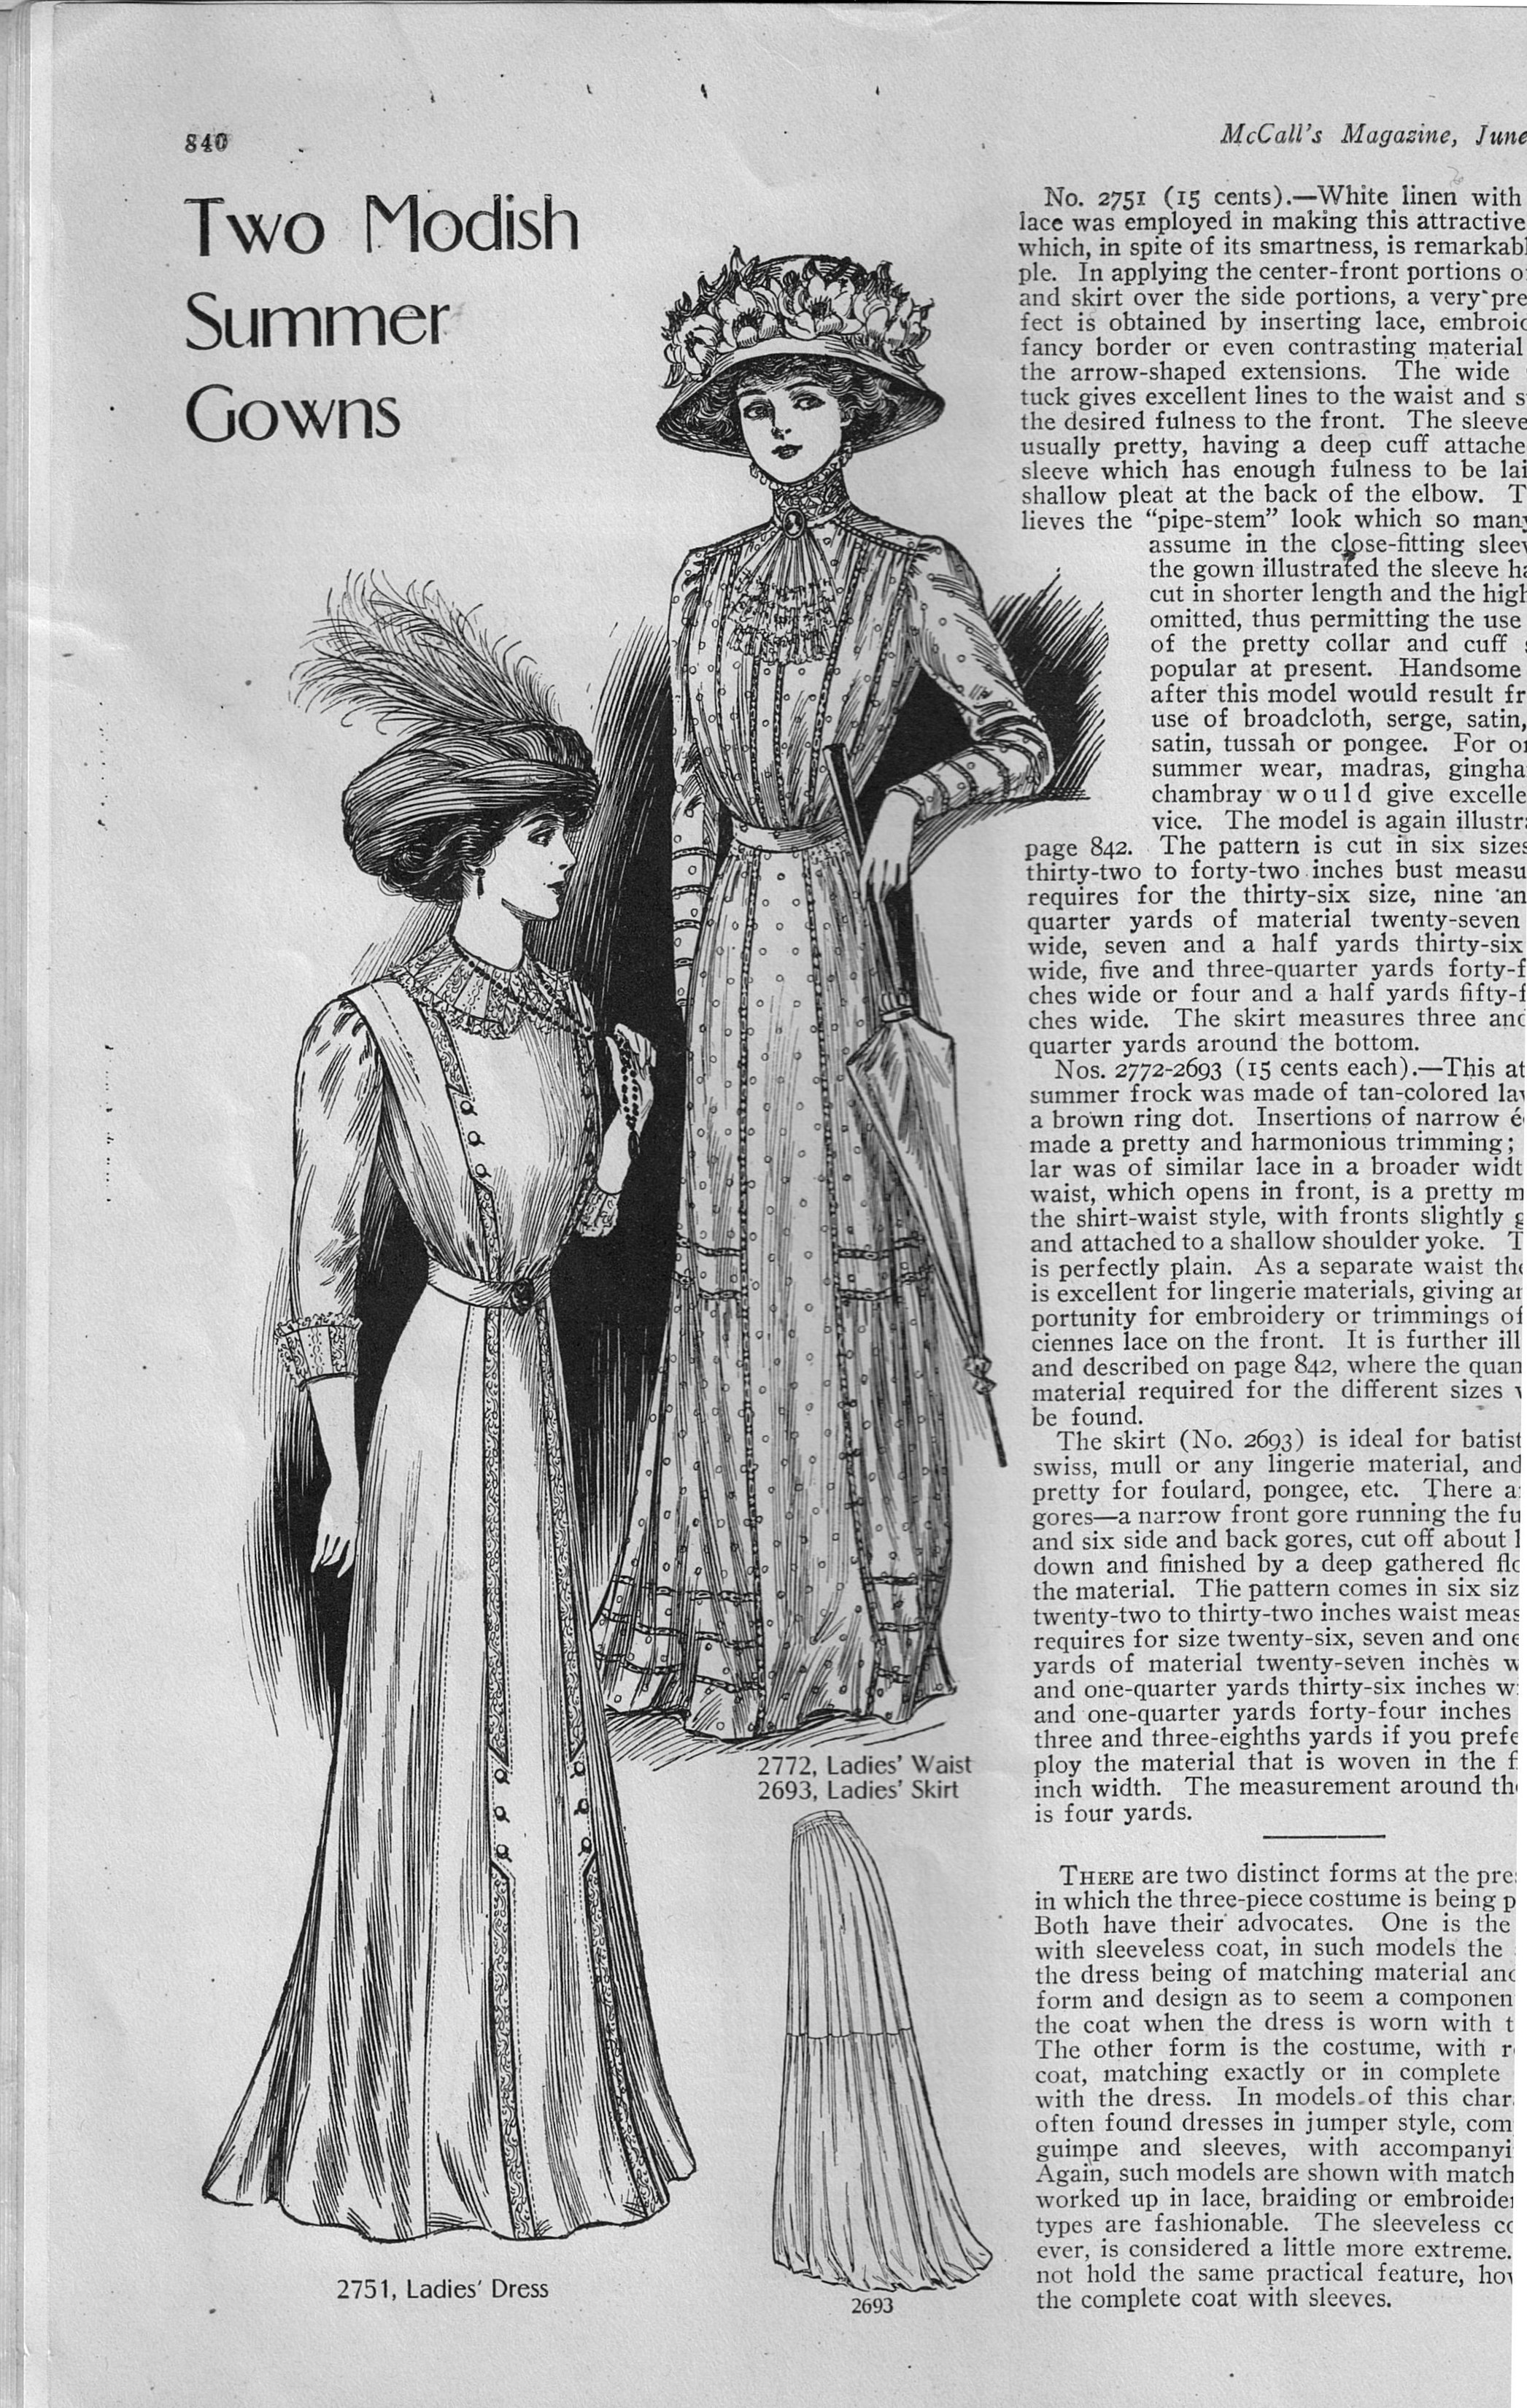
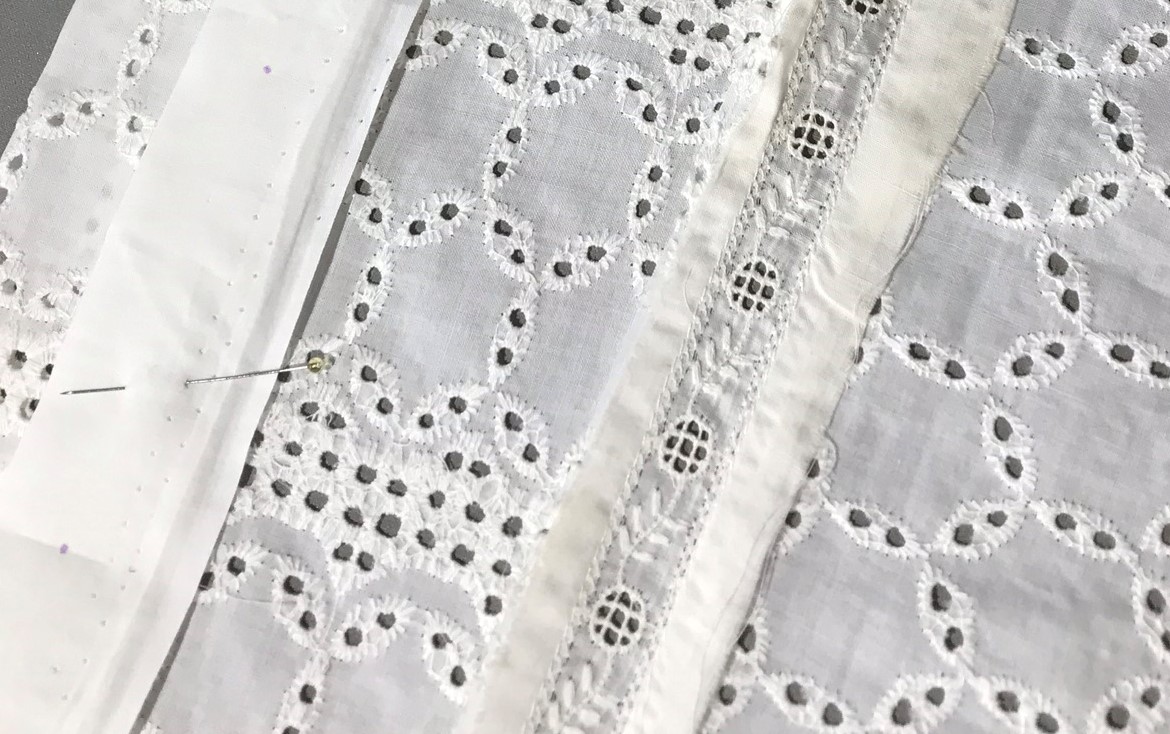
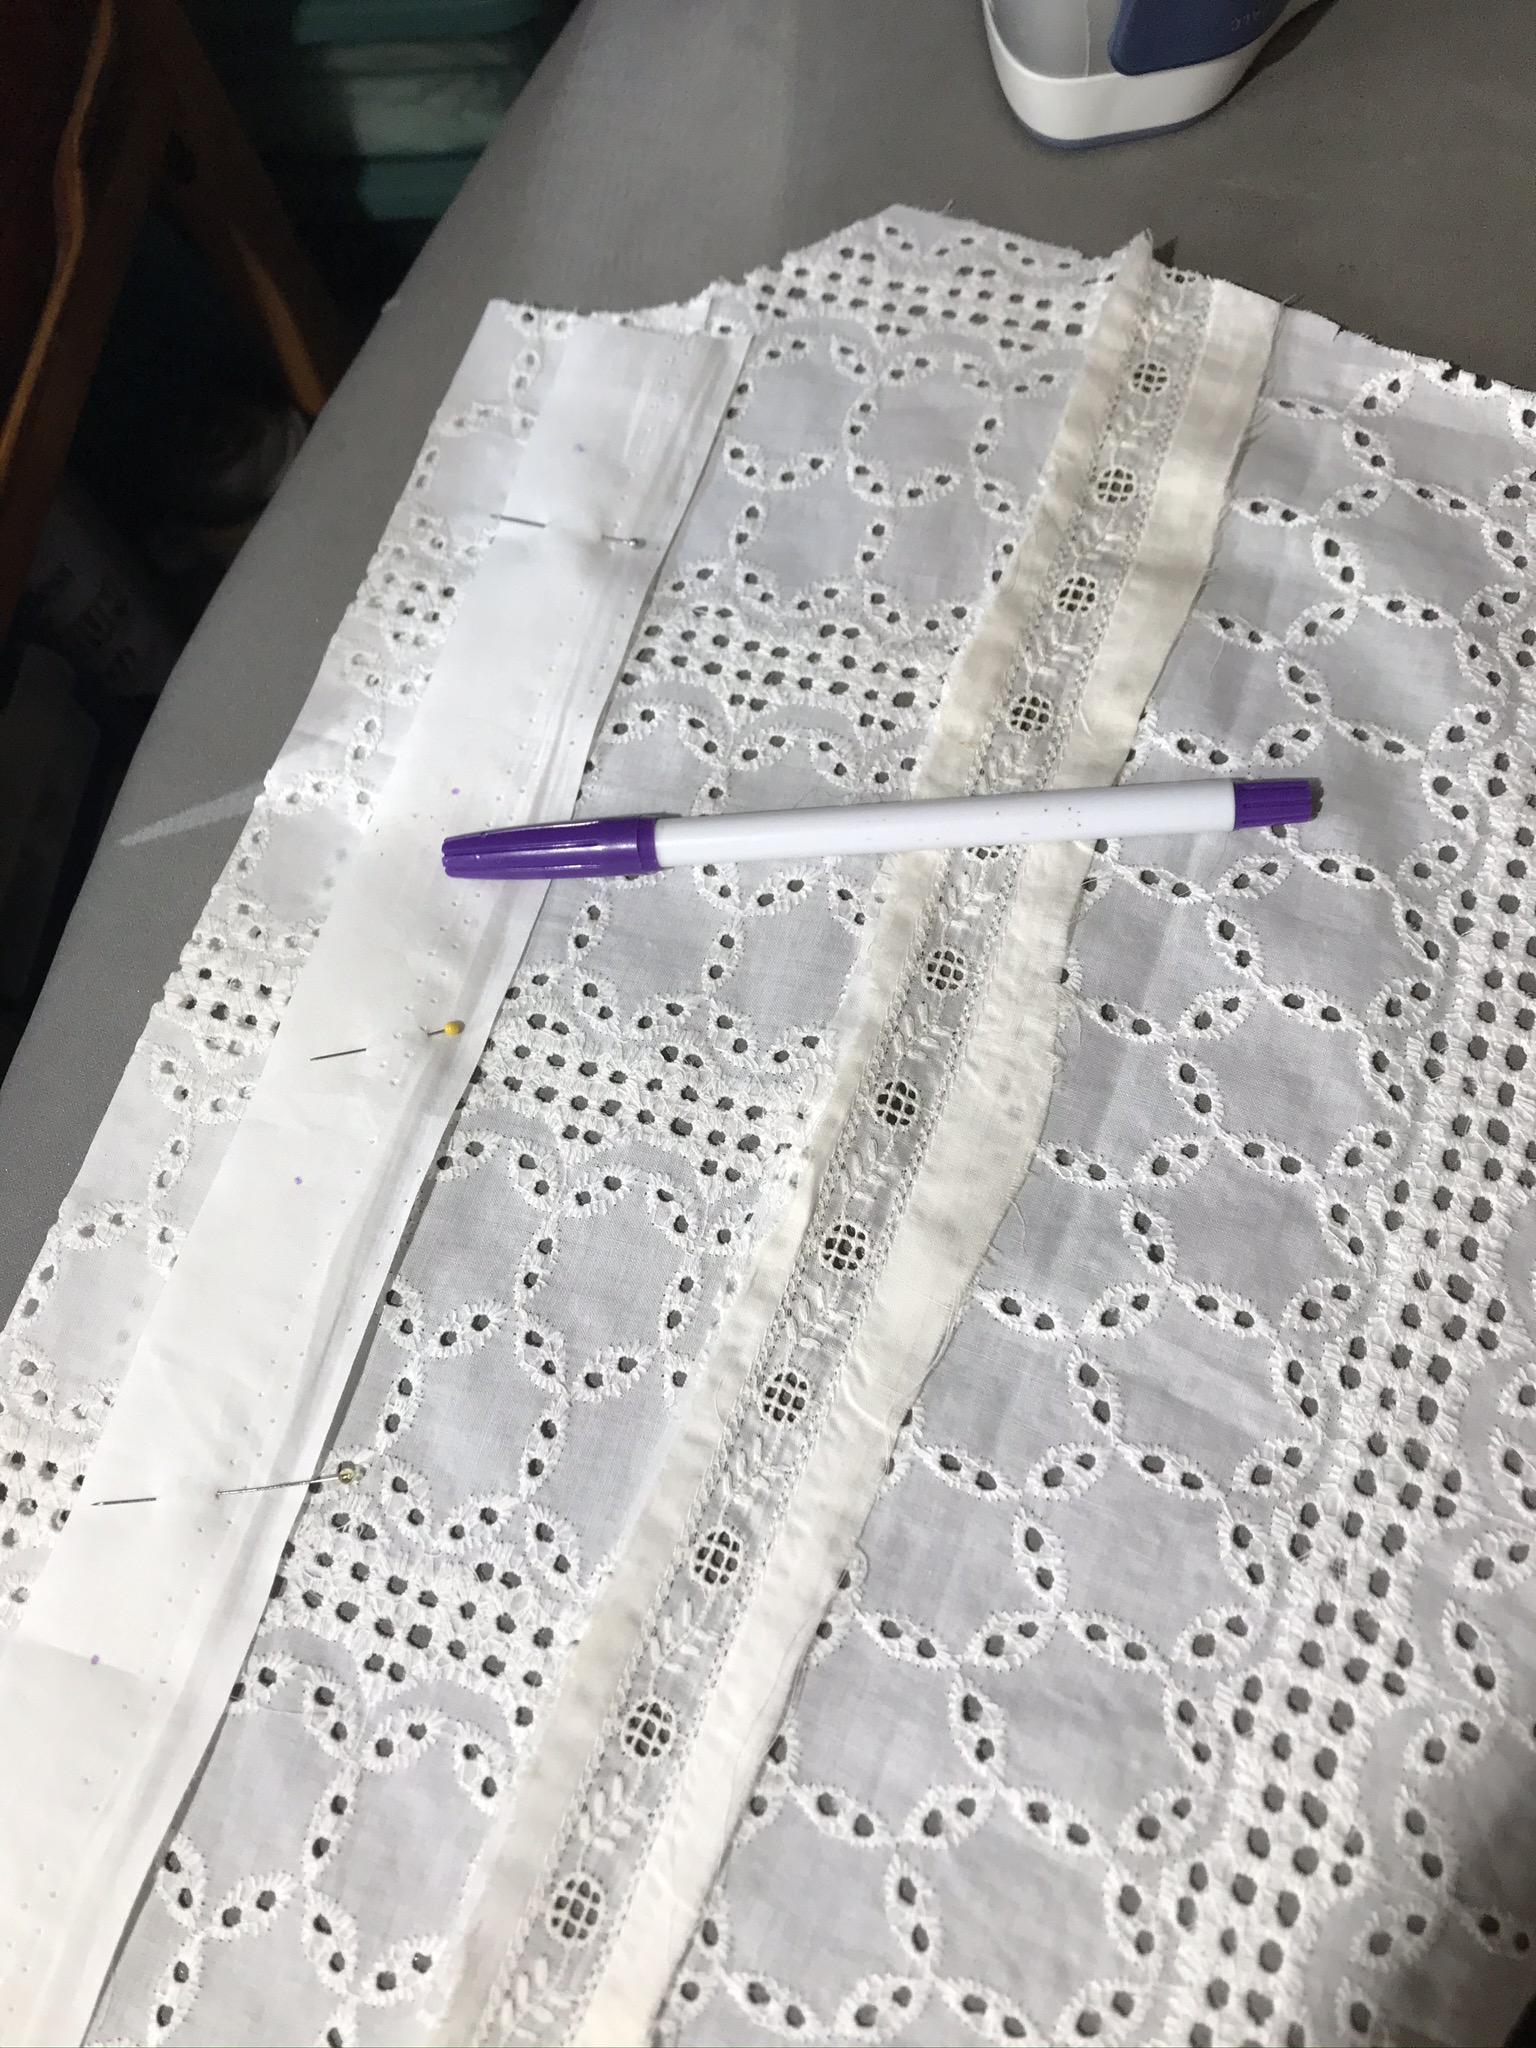
The McCall’s skirt was a seven-gore model, which would provide a smooth, graceful fit in the printed lawn. But my fabric is an embroidered eyelet, which has more texture, so all those fitted seams might not show to the same effect. Plus, I was in a hurry, and my fabric is very wide (over 50”, which was probably not available for Maggie Lynde.) At any rate, I made the decision to use five gores instead of seven. I have made so many five-gored skirts and petticoats over the years that I didn’t need to use a paper pattern. I did, however, get out my tape measure, some scratch paper, and a pencil! I wanted to be sure that my skirt would be long enough, and the body of the skirt full enough (but not unfashionably so!) to copy the silhouette of the original design.

Skirt IMG_5589

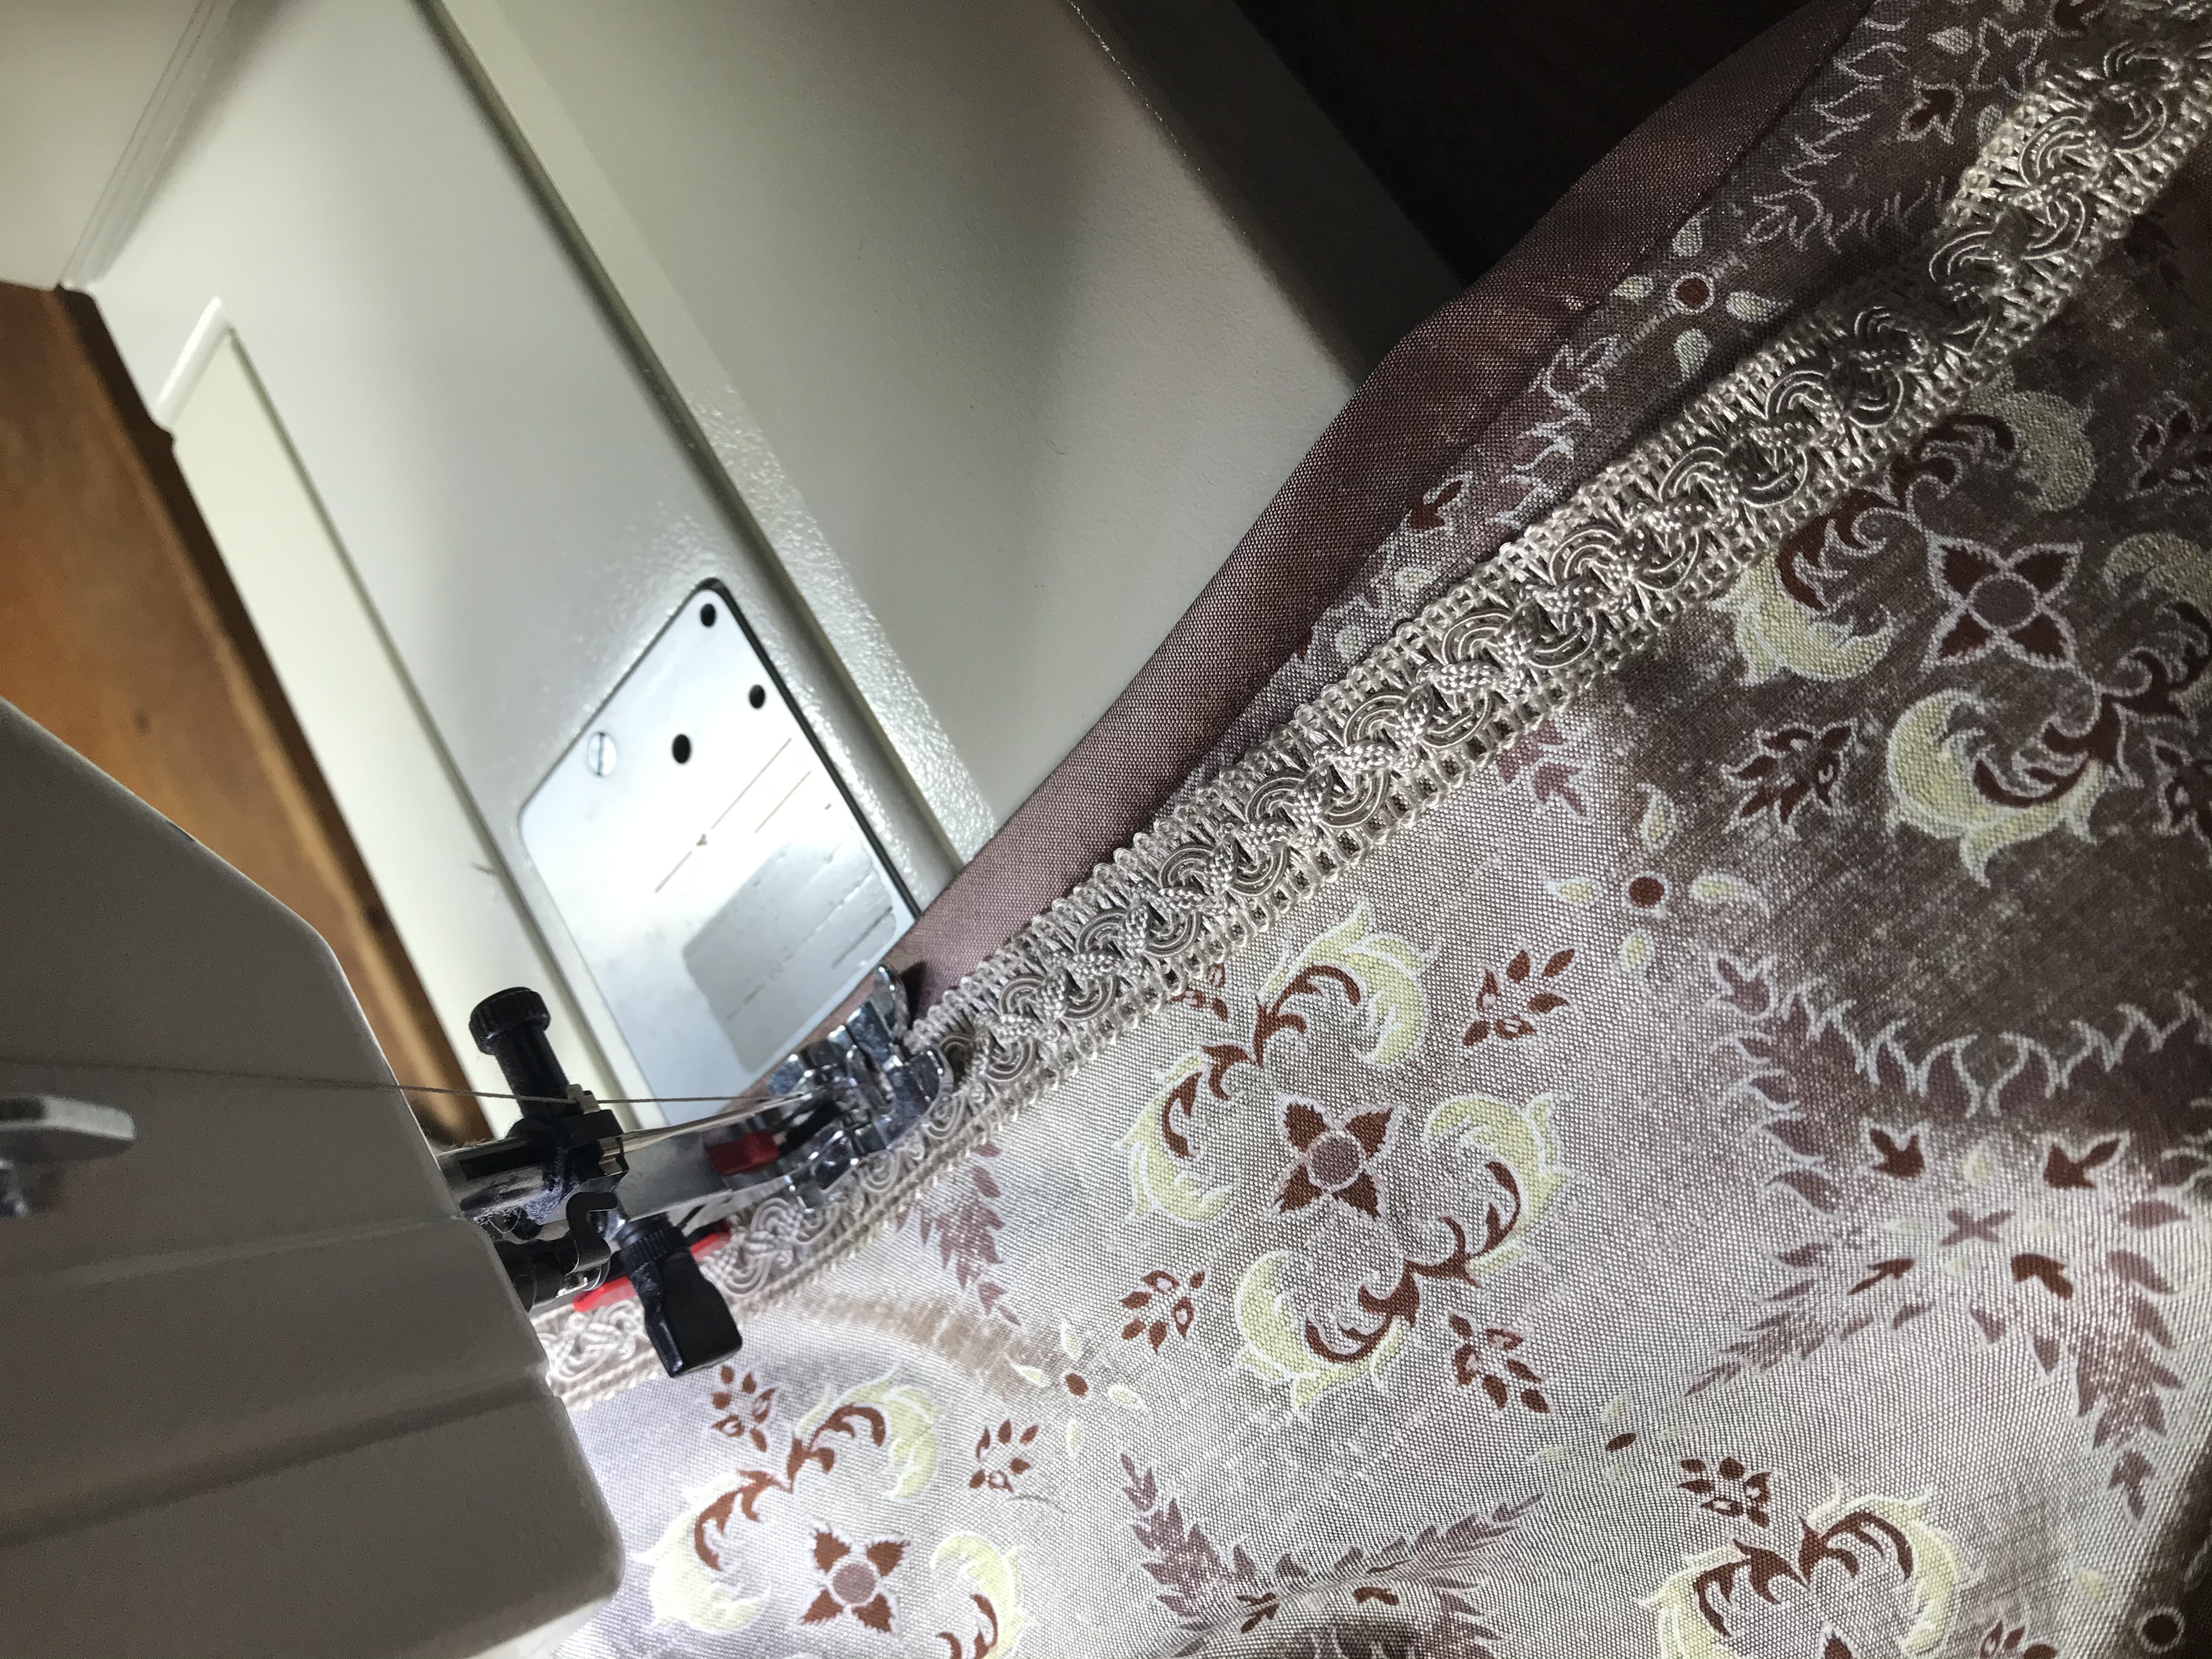
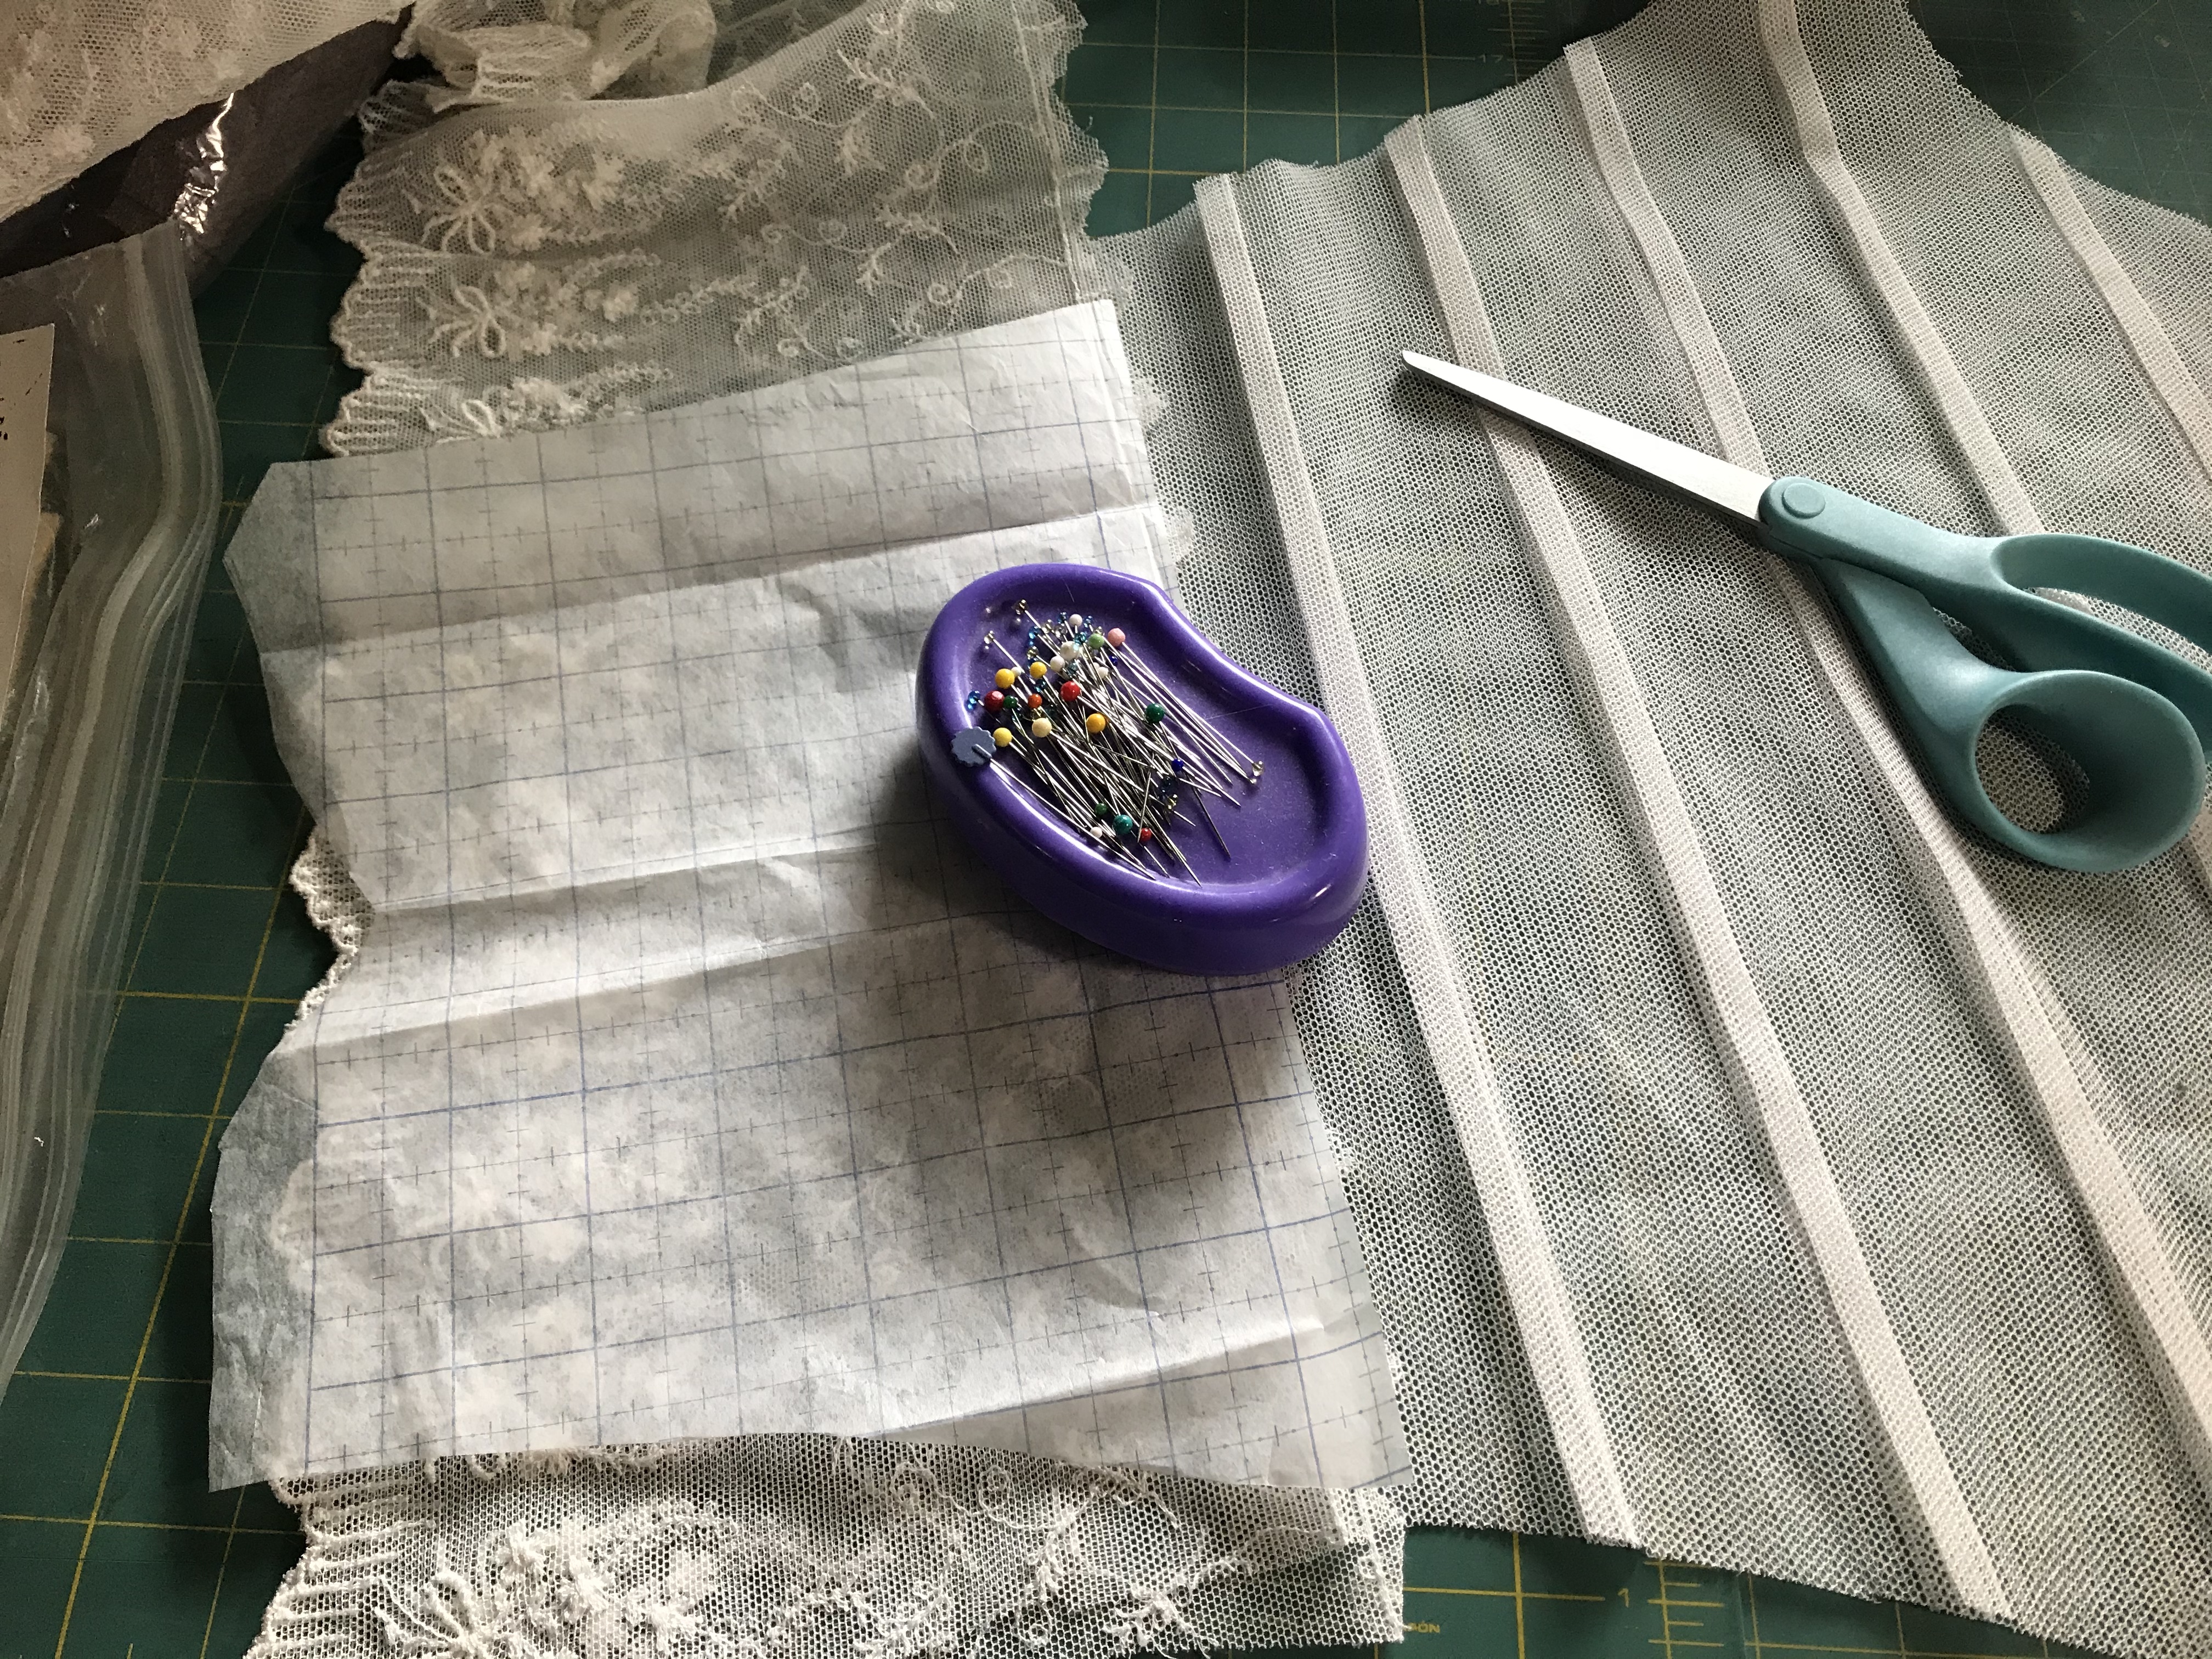
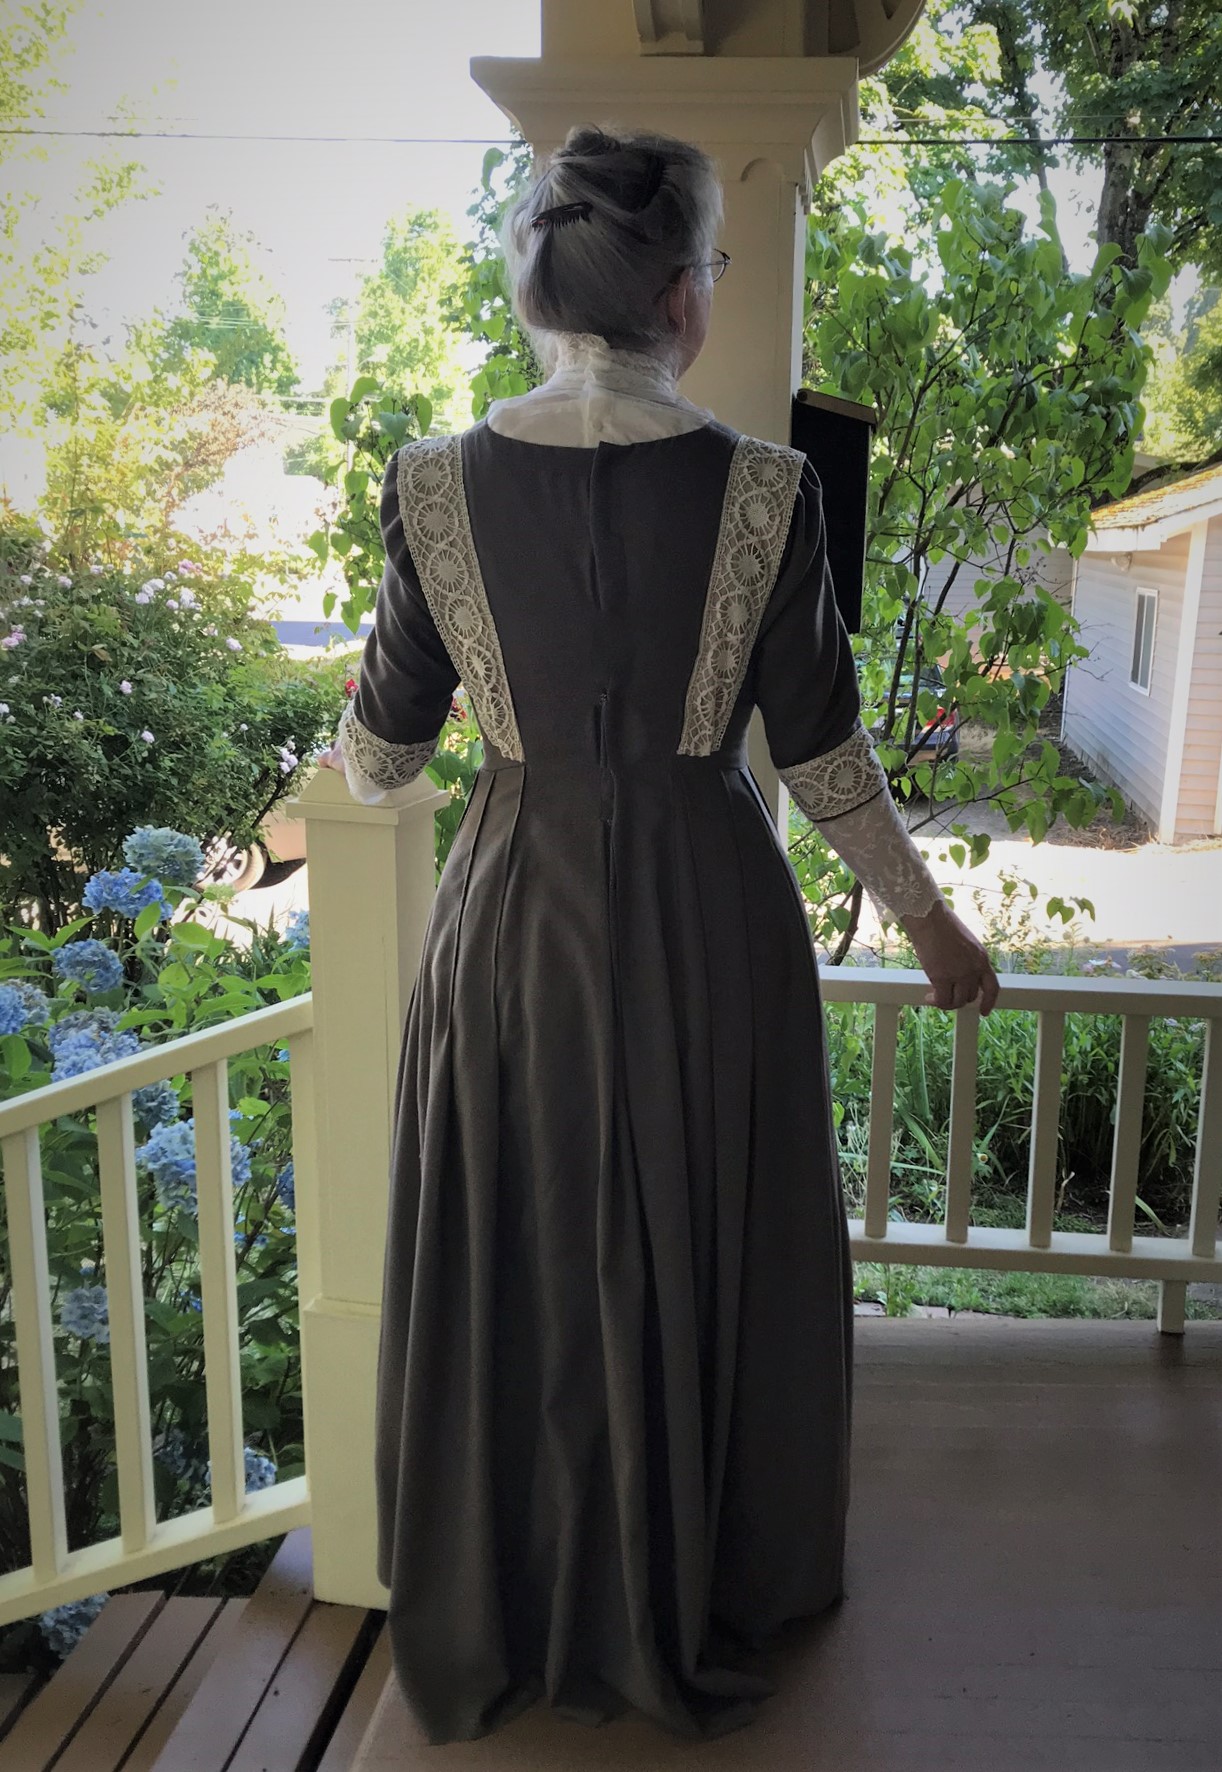
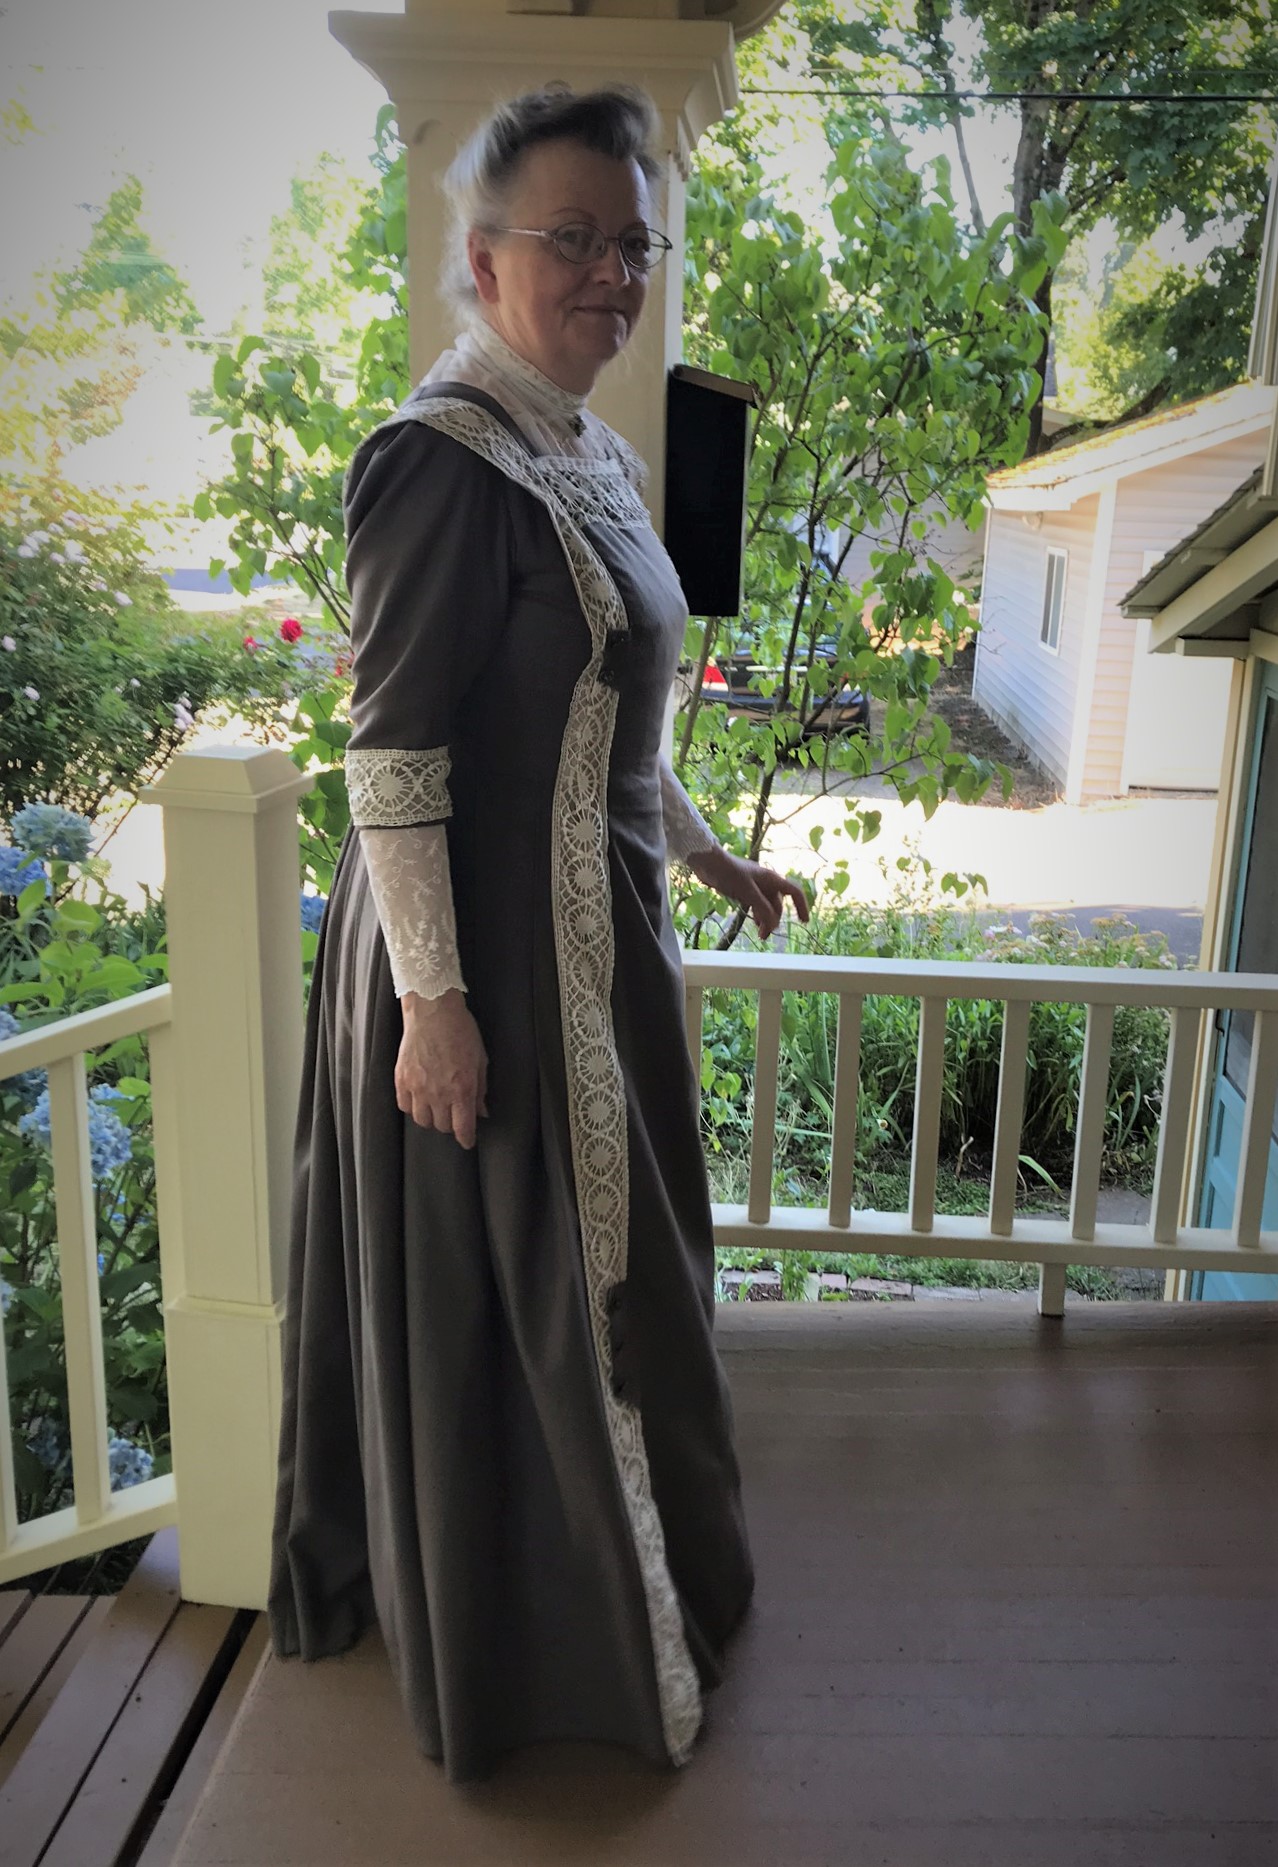
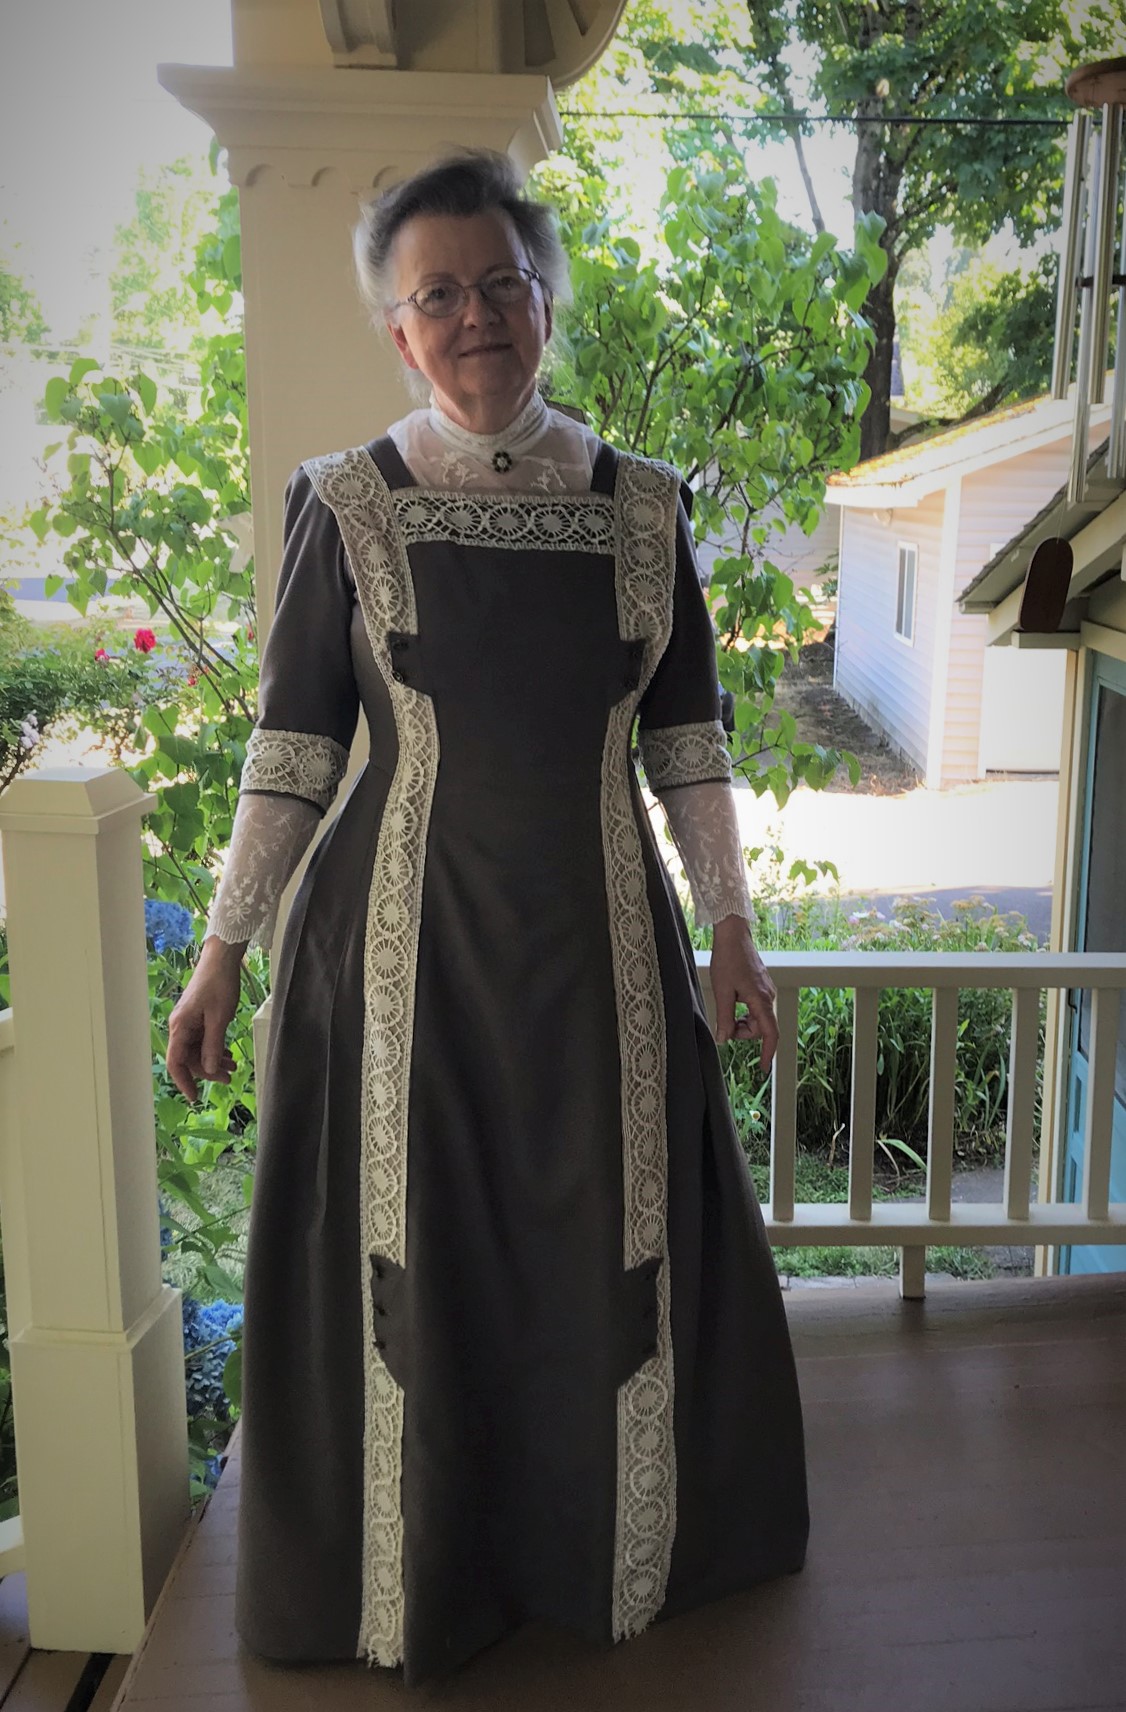
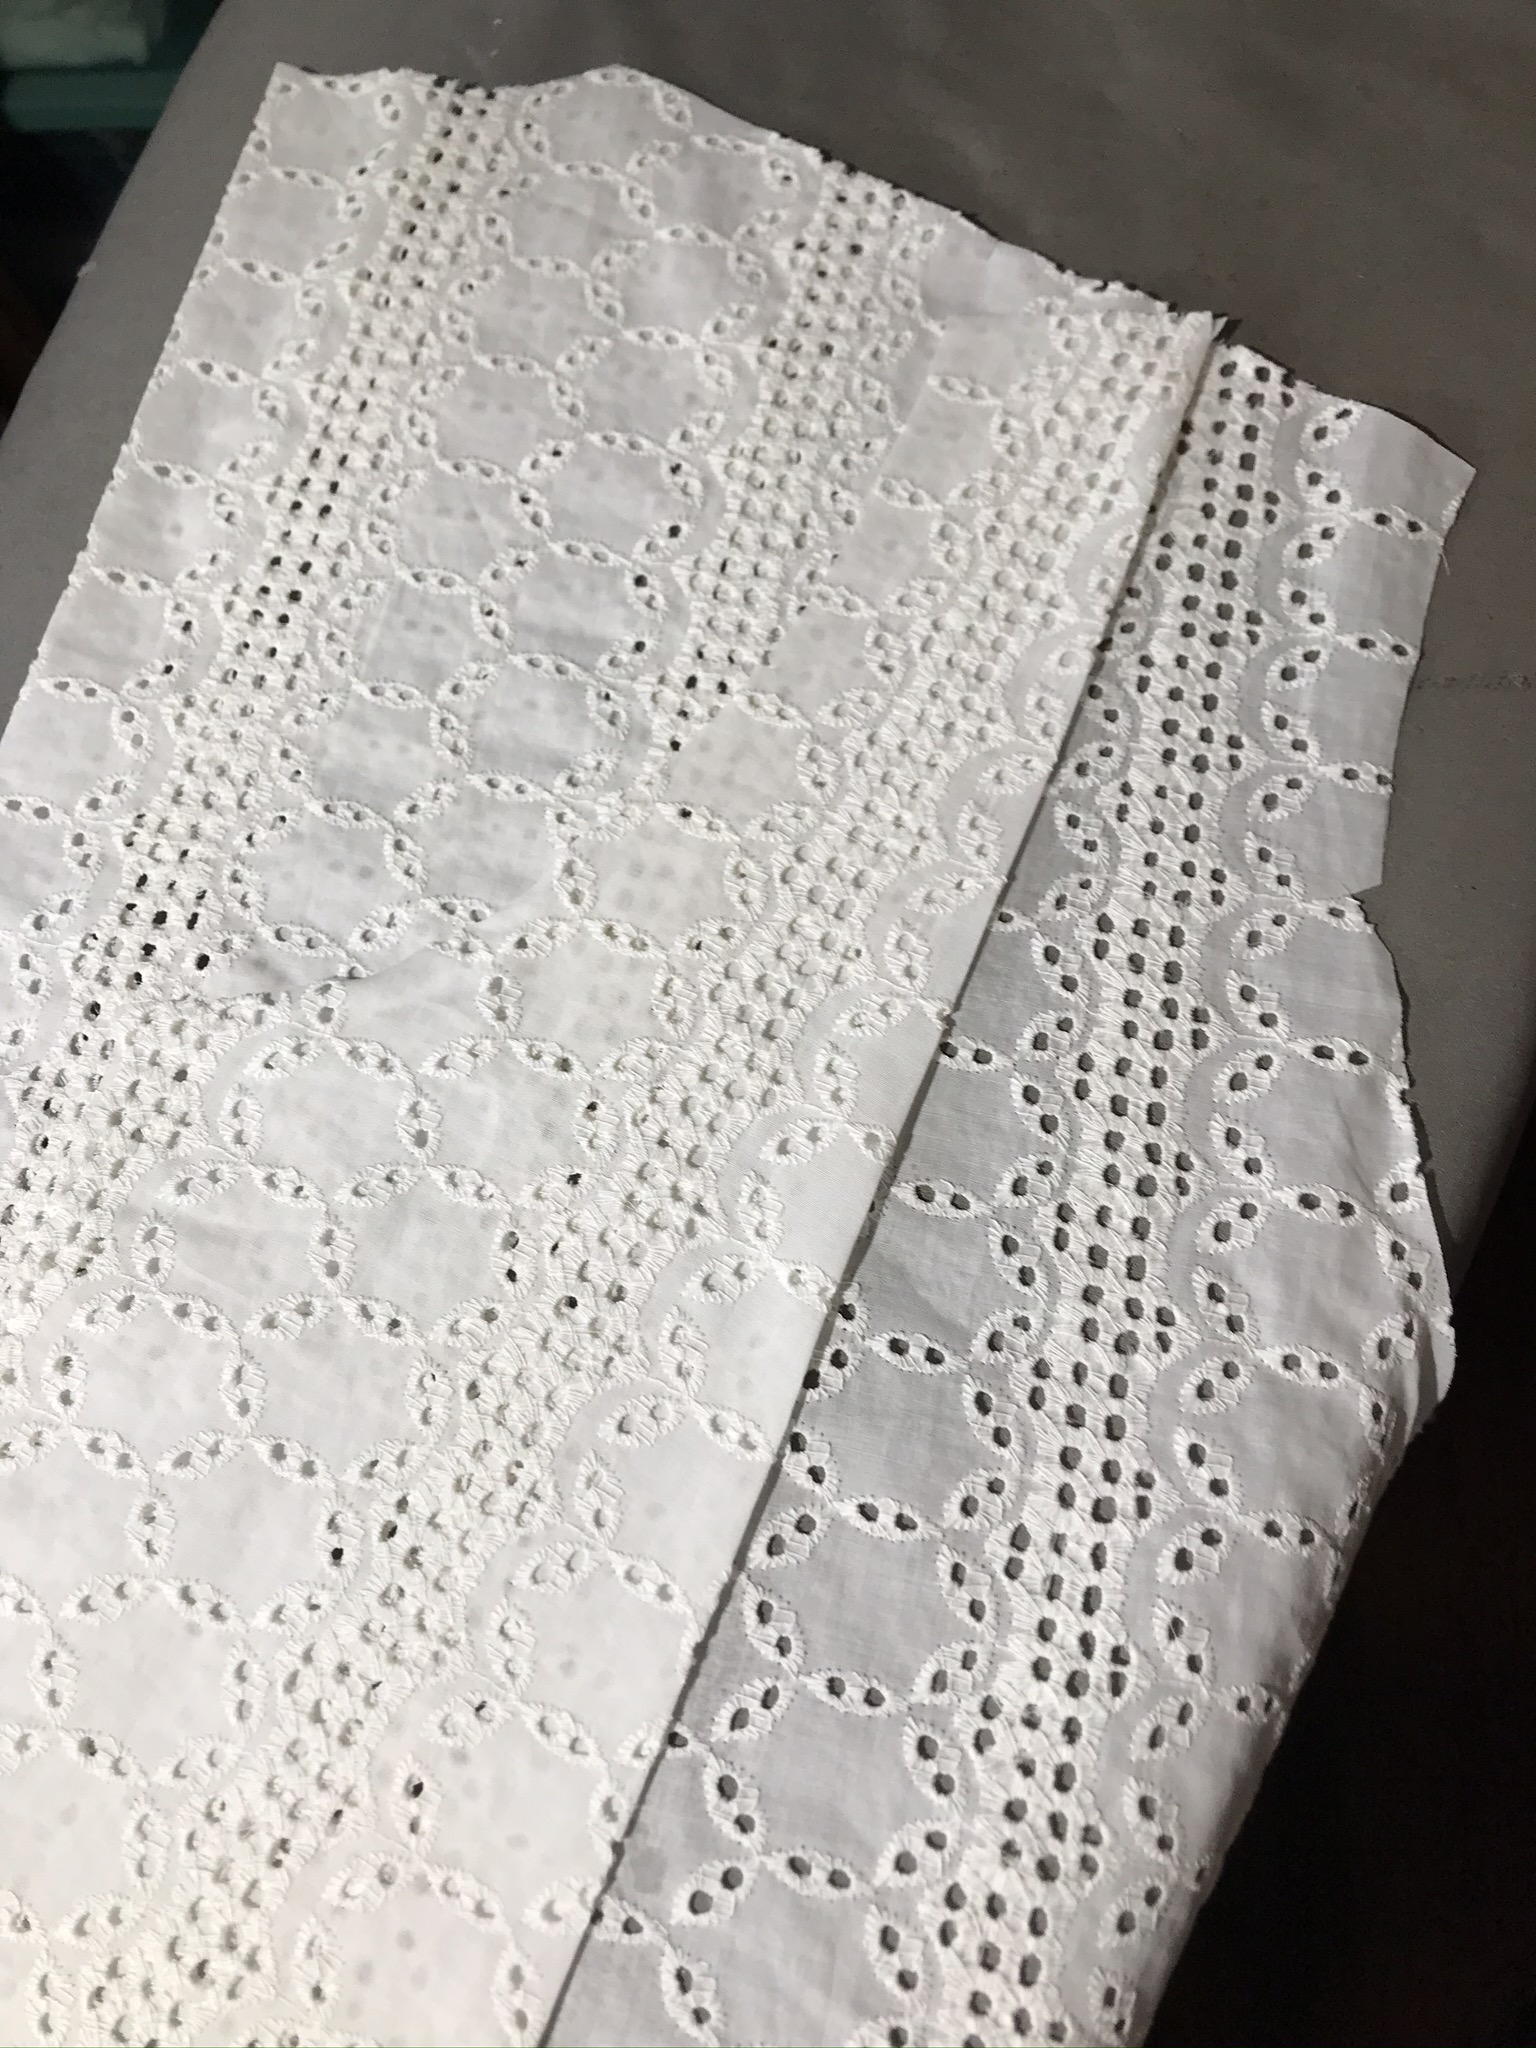
I had some coordinating (antique) insertion, but not enough to copy all the design details from McCall’s. I decided to use the insertion primarily on my vertical seams, and to allow the embroidered stripes from the fabric to serve as the remaining bands. The detail on the insertion is ½”, and there was a generous seam allowance, so I reduced my seam allowance on those skirt sections by ¼” on each panel.

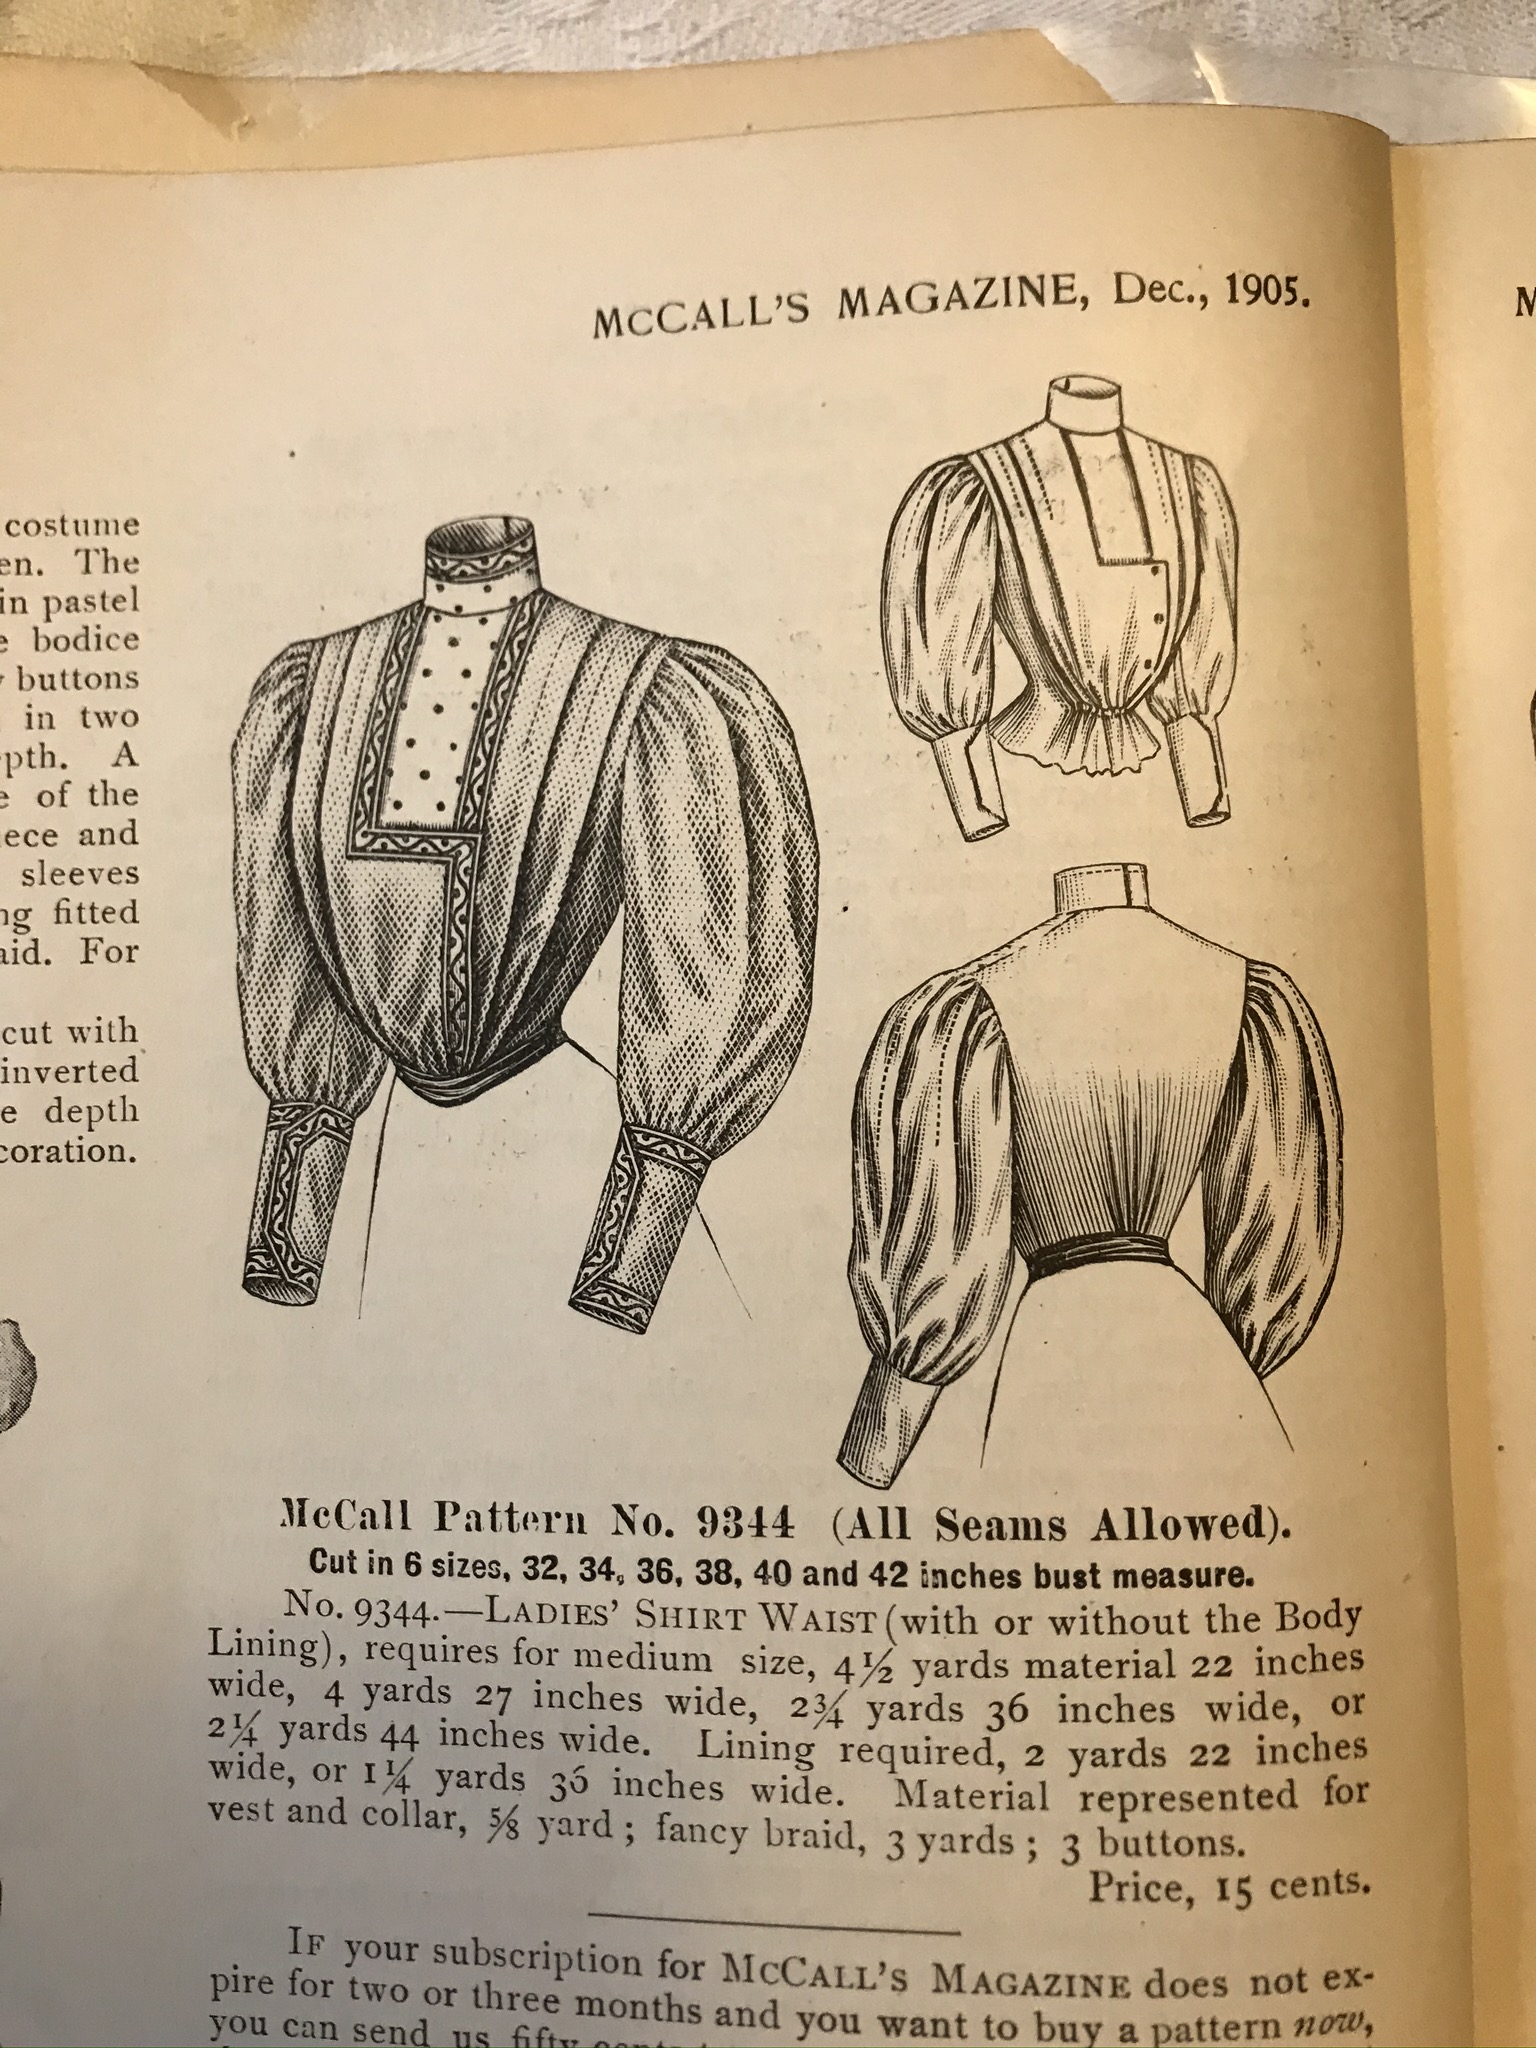
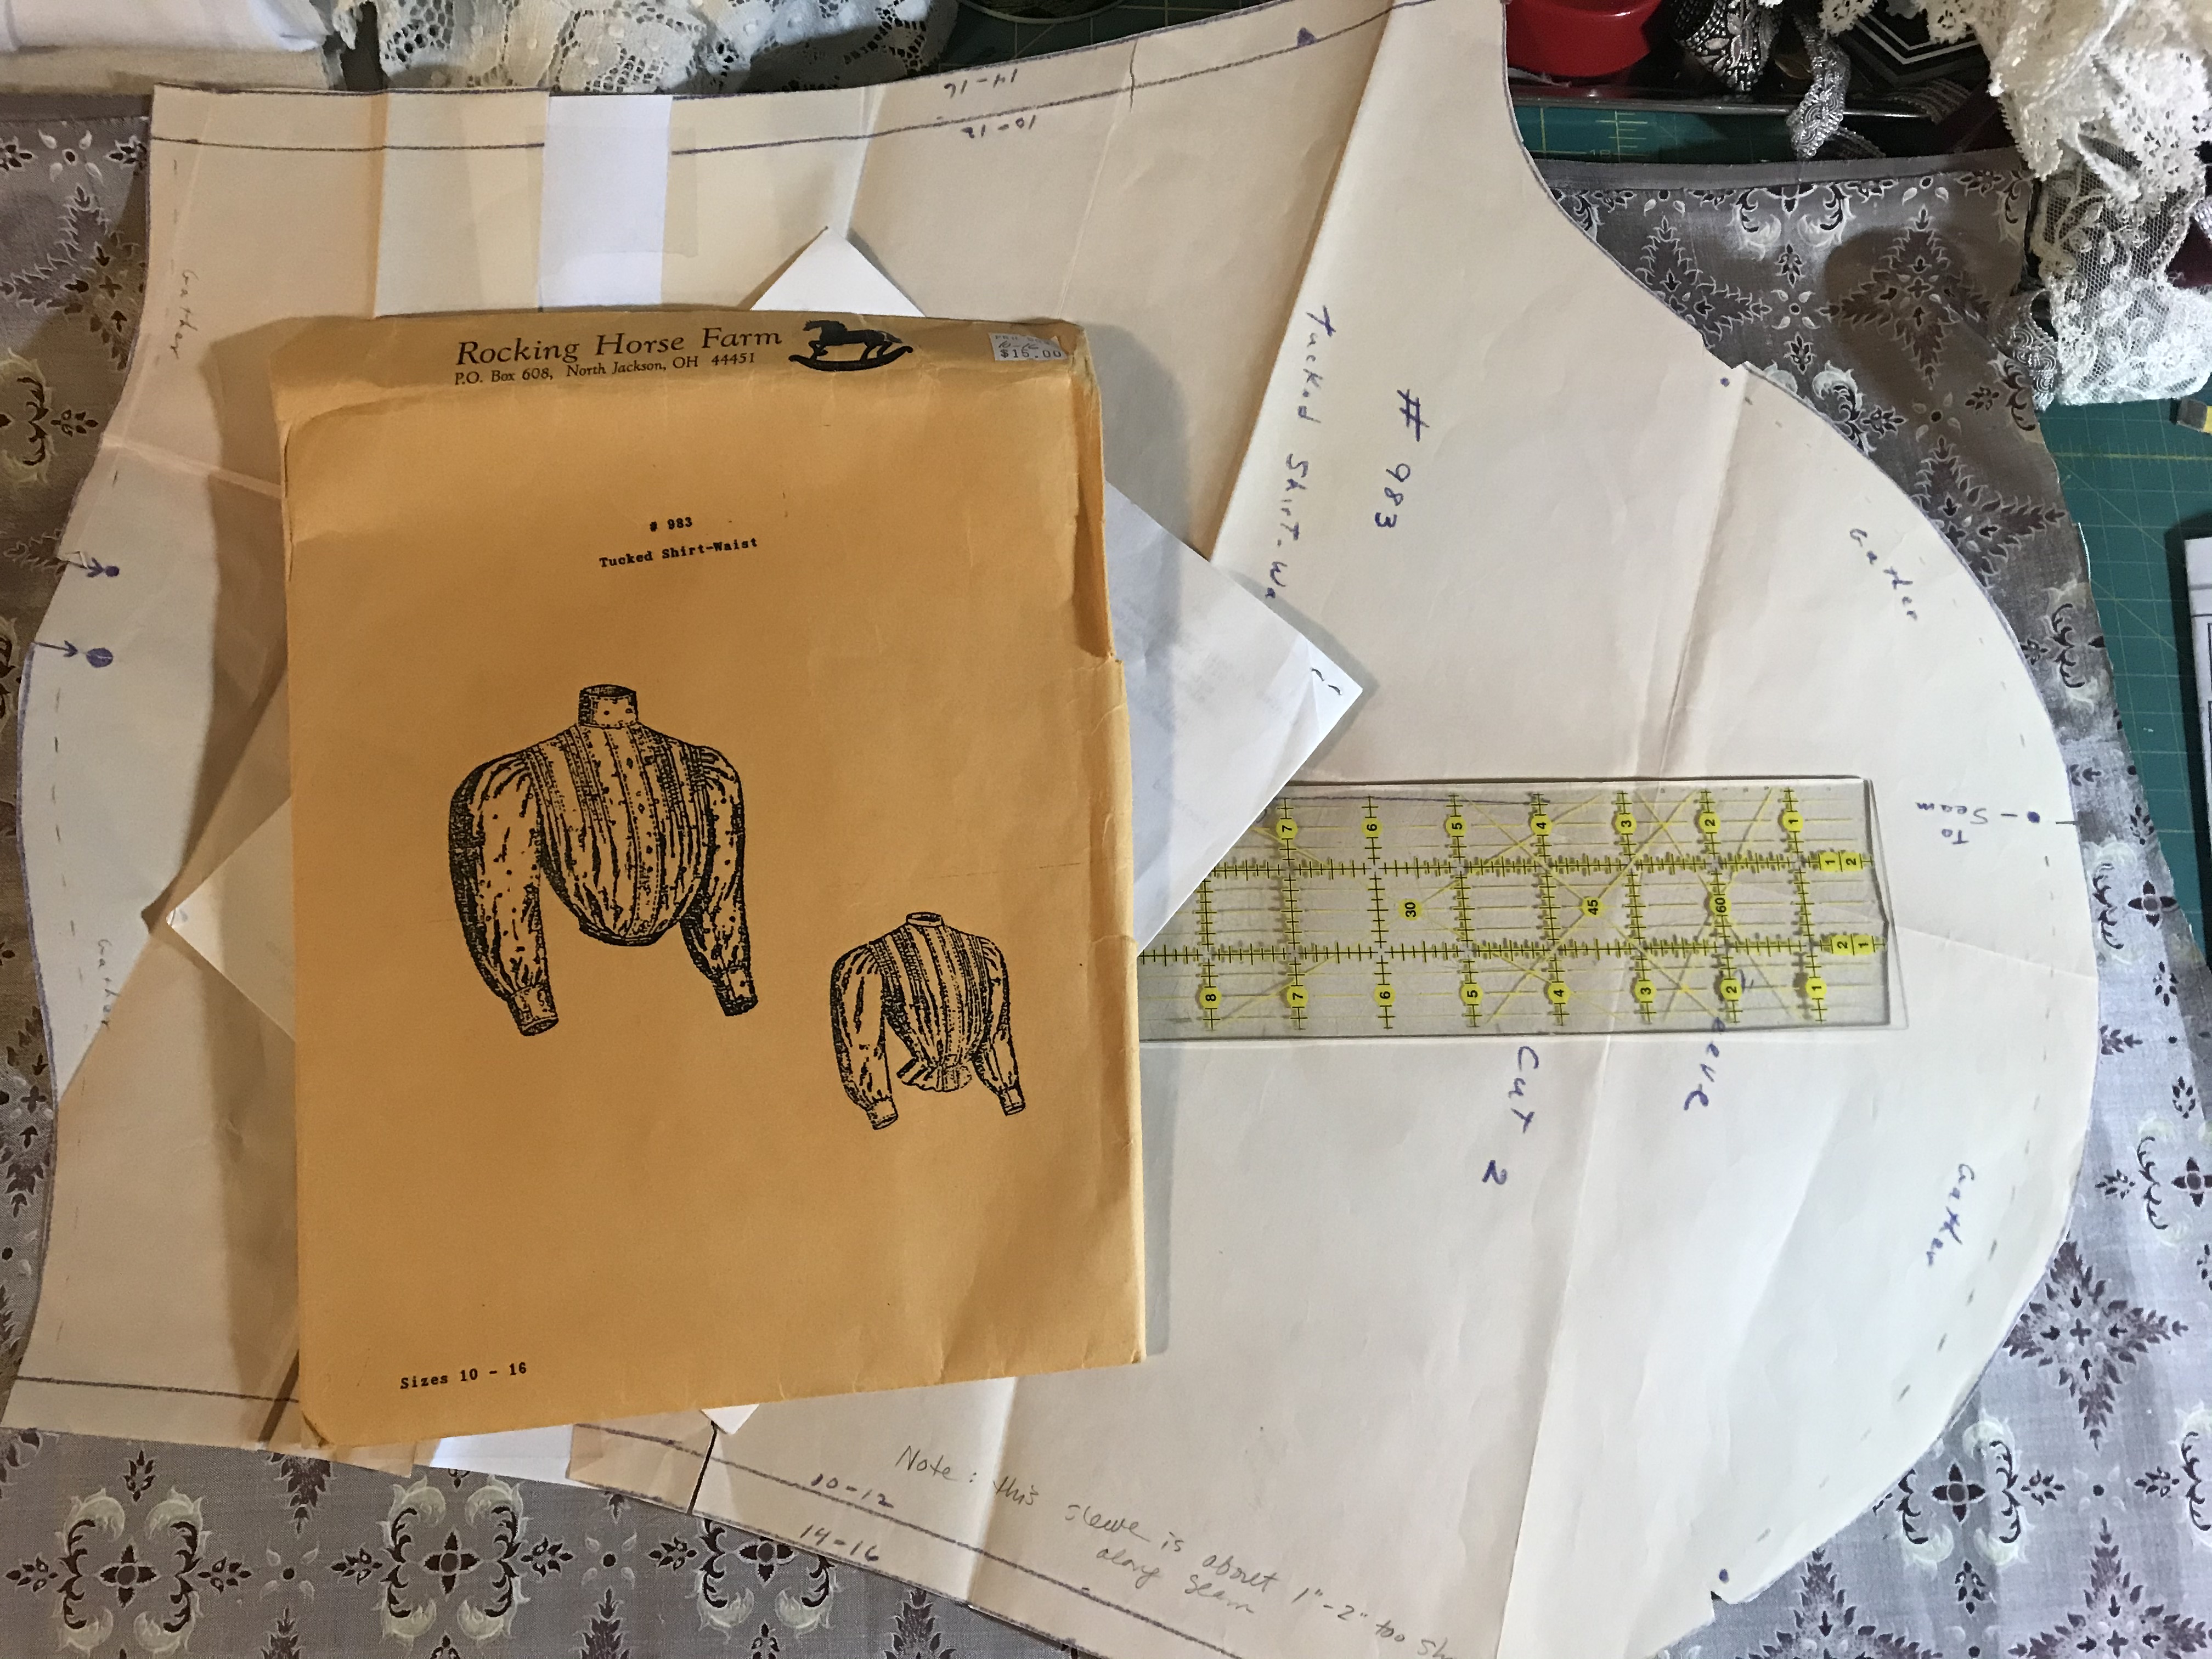
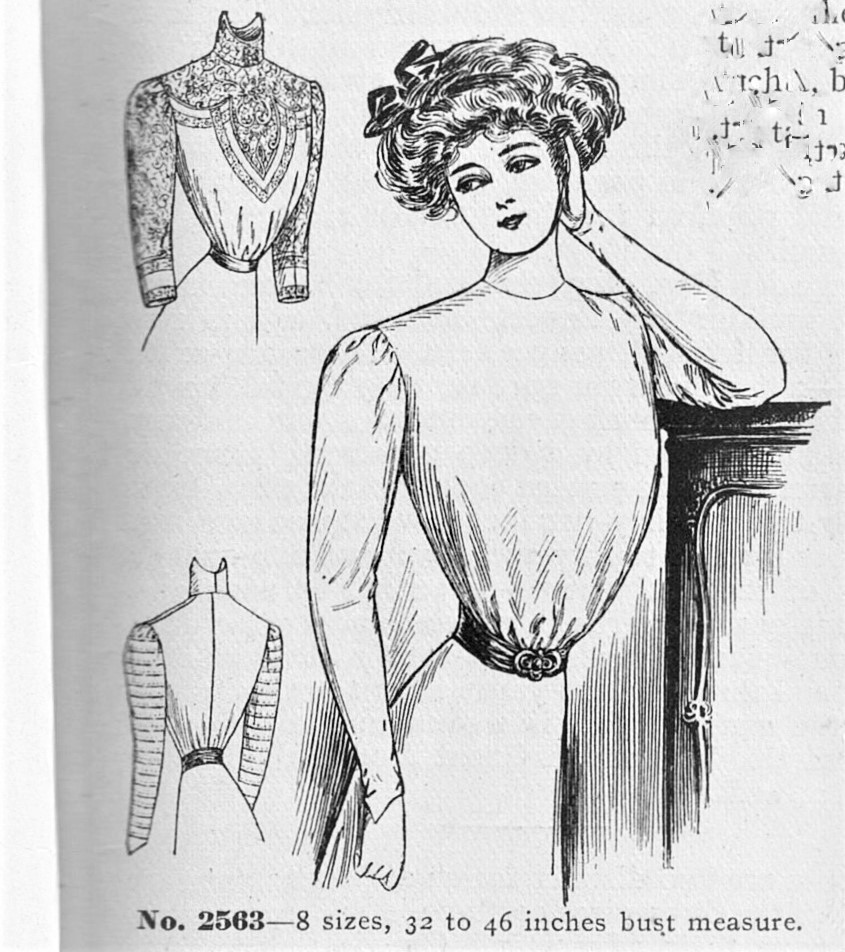
Patterning the Bodice

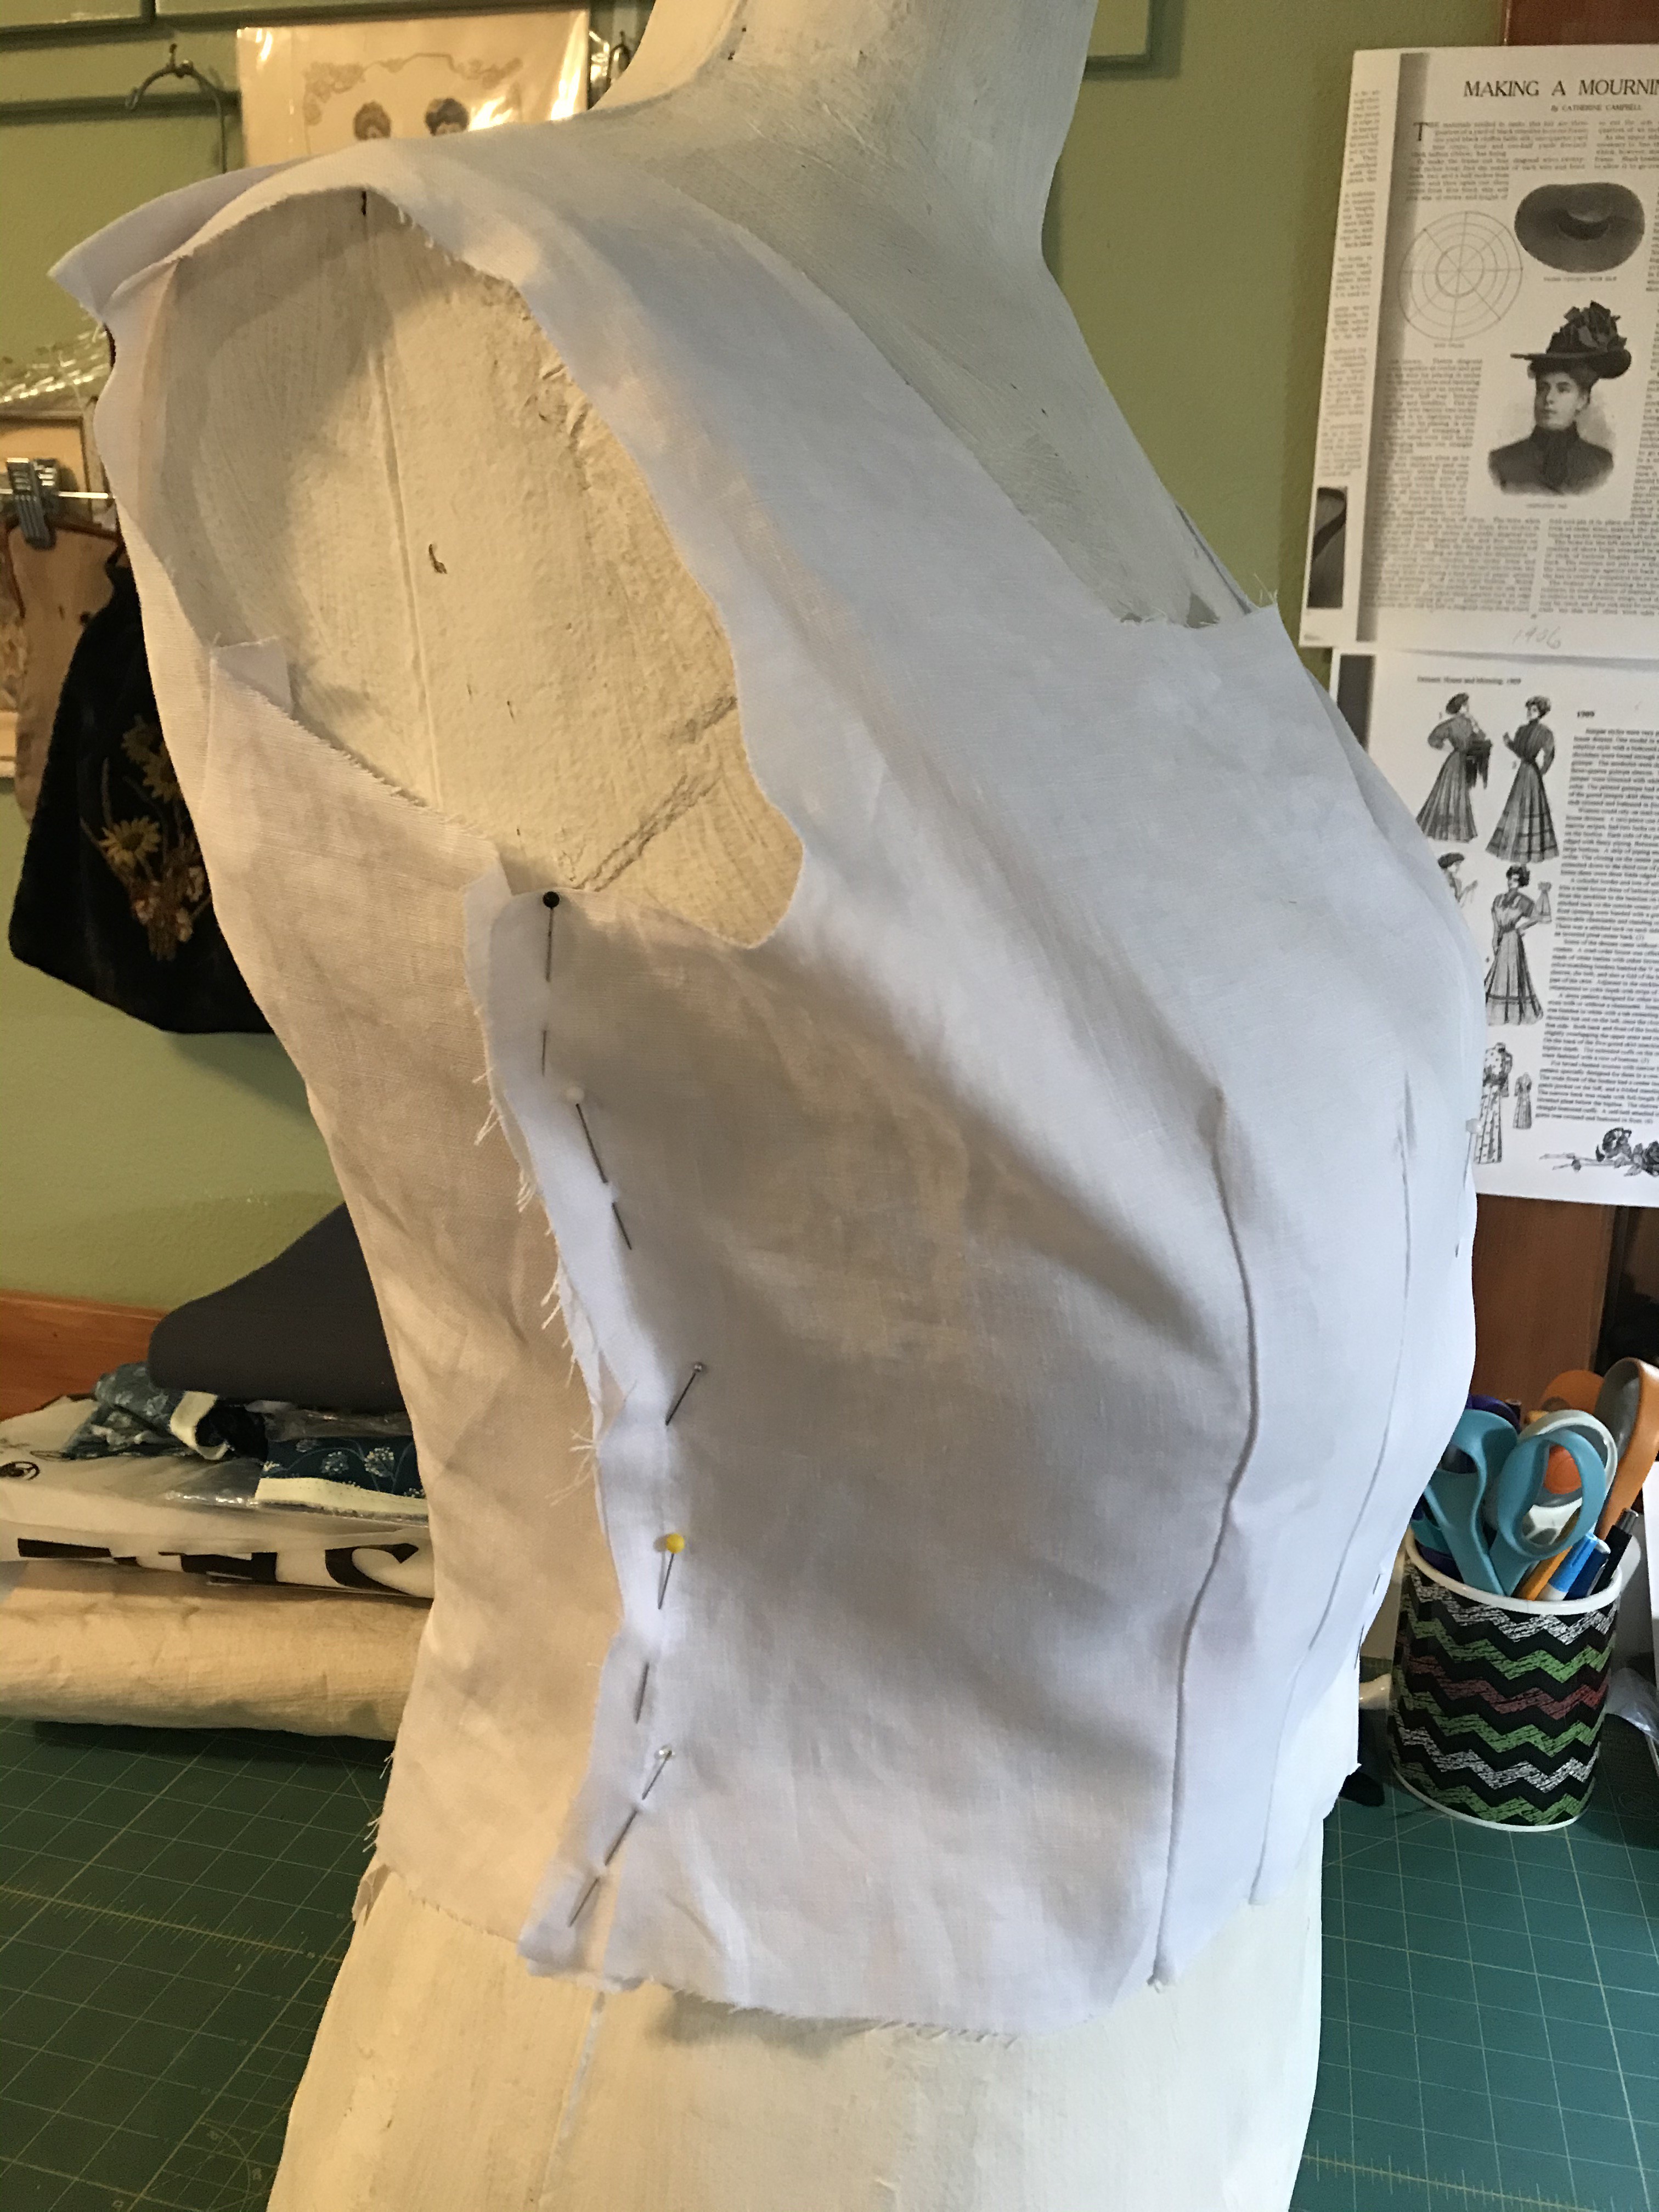
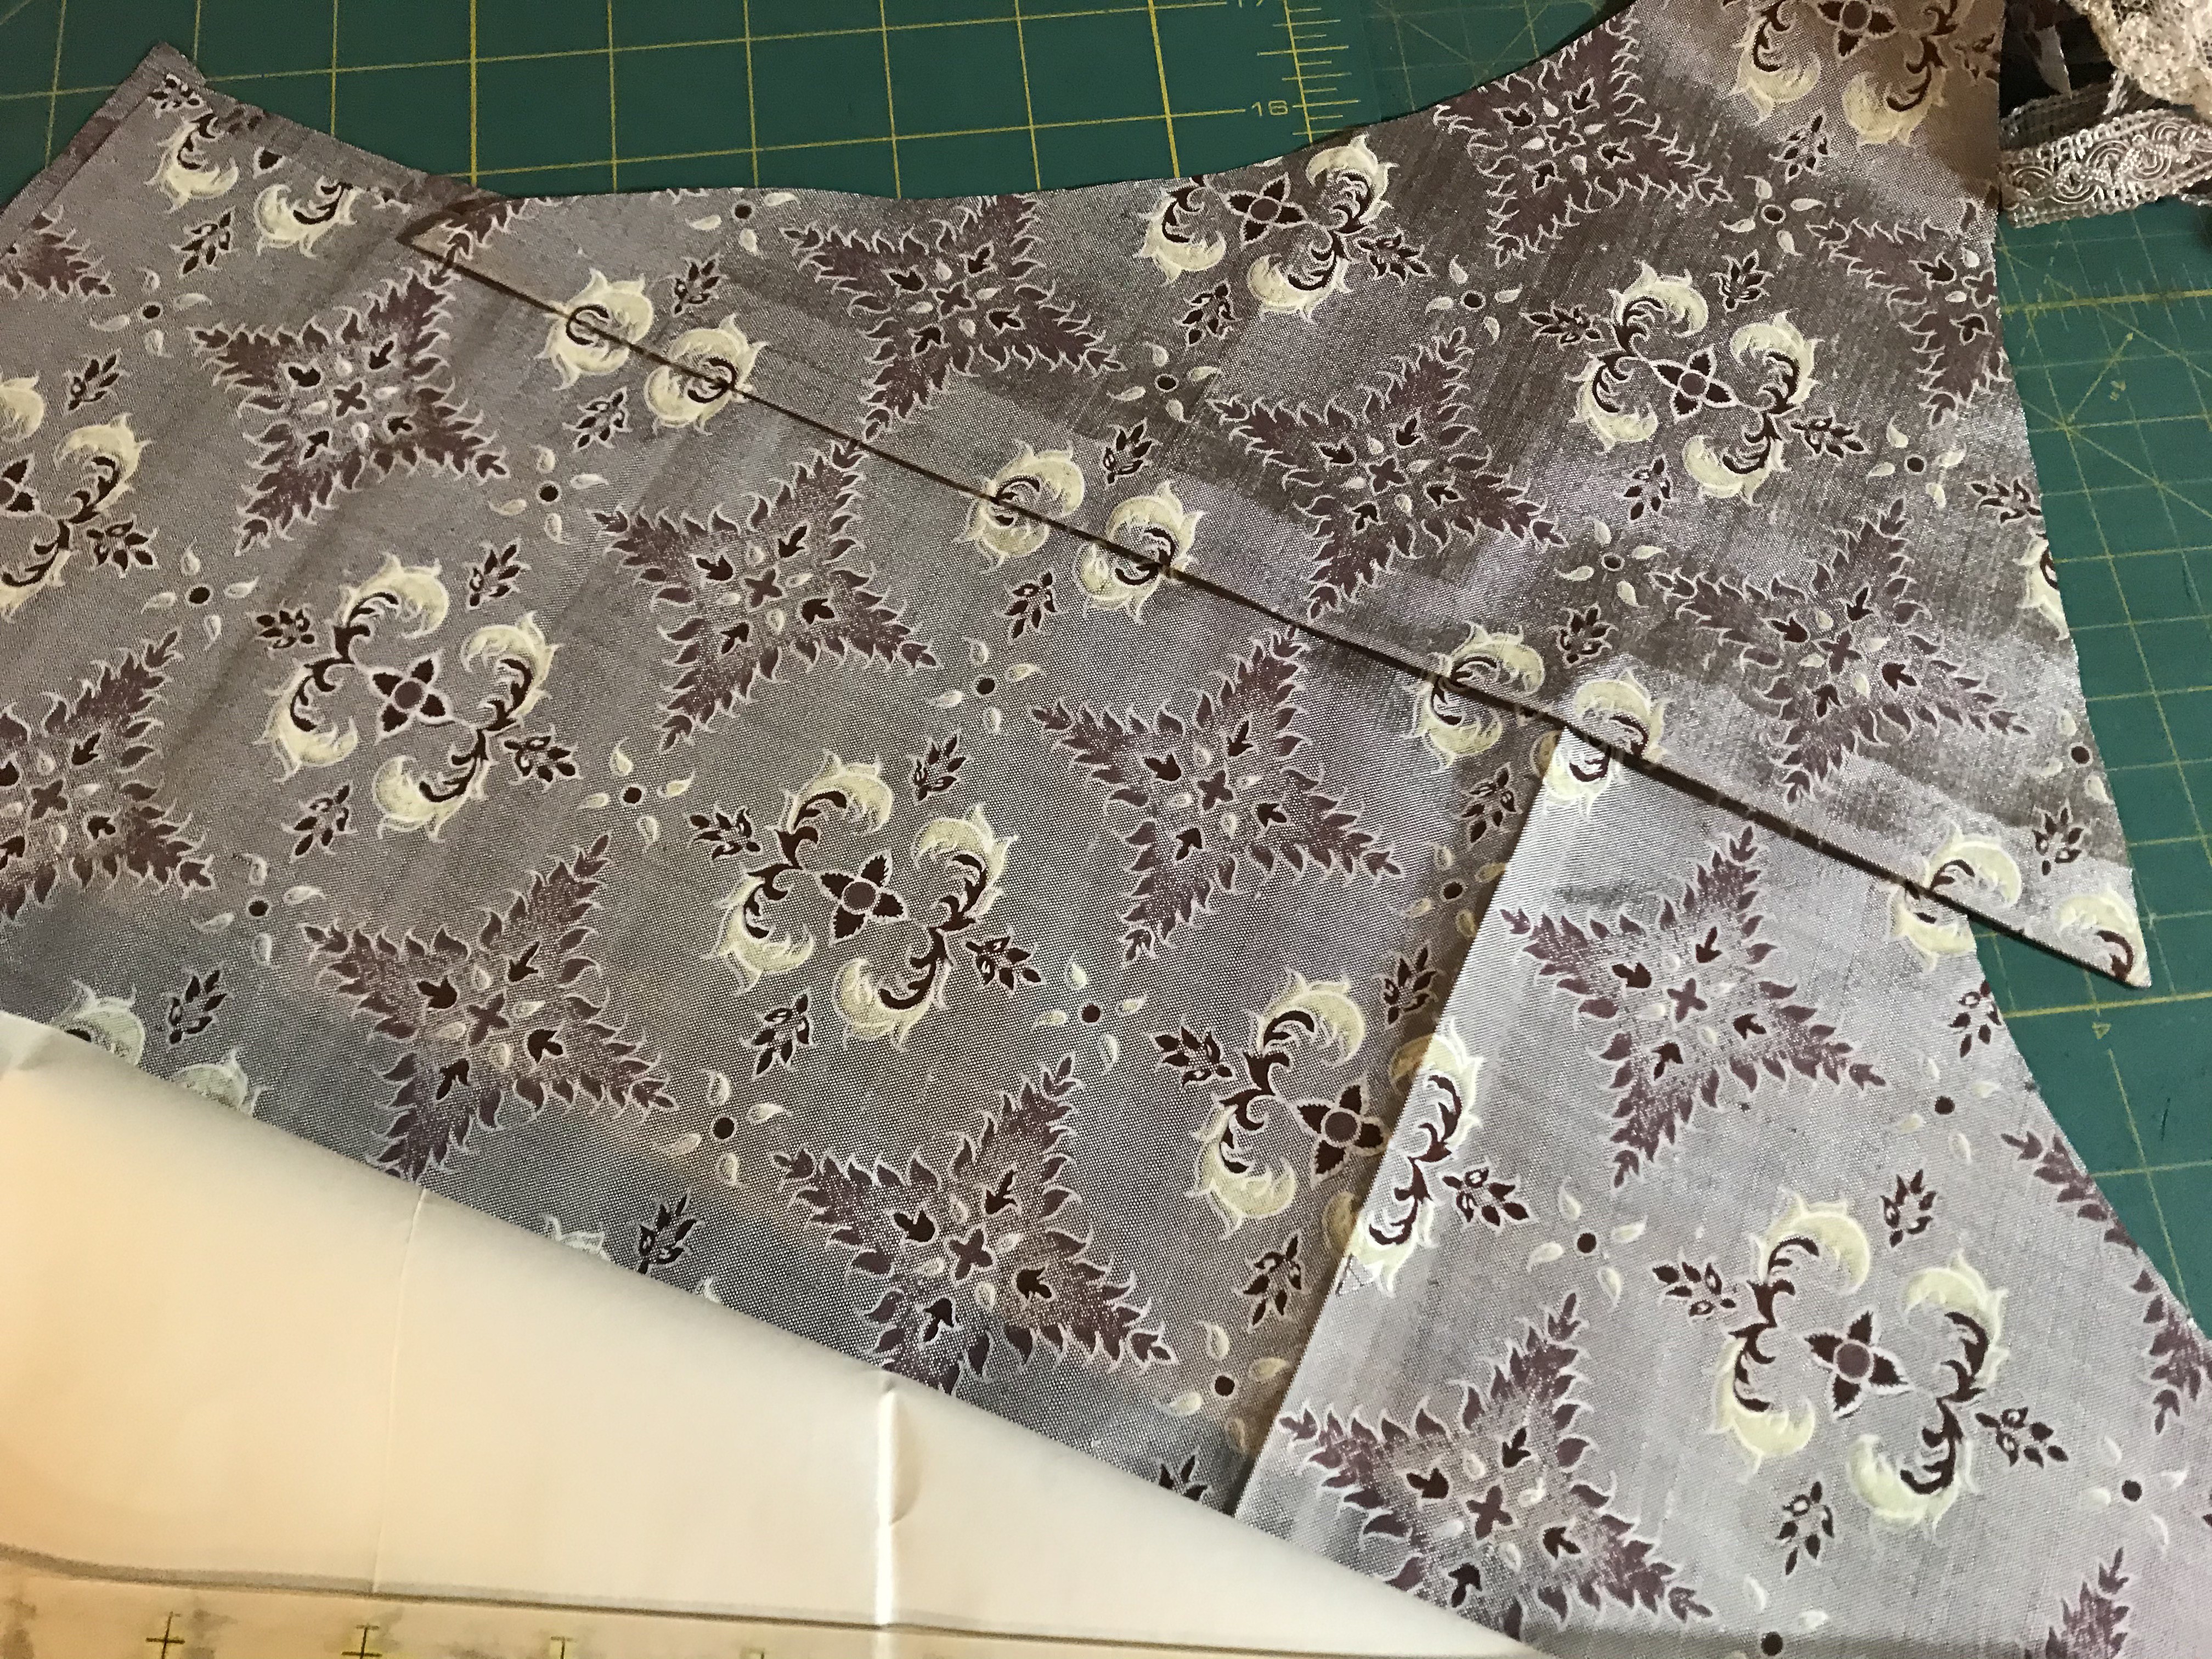
In 1909, McCall’s sold bodice and skirt patterns separately. The bodice was advertised as being suitable for a waist or the bodice of this dress, and the description didn’t mention a lining. This made me confident in choosing a waist pattern for this bodice. The closest commercial pattern I had on hand was the elegant Past Patterns number 406.  The PP design called for more tucks than I needed, and it didn’t allow for the decorative vertical seams. That was easily remedied when I folded those tucks out of the paper pattern before cutting and created the central section of horizontal bands.

Bodice pattern IMG_5593

Bodice IMG_5596

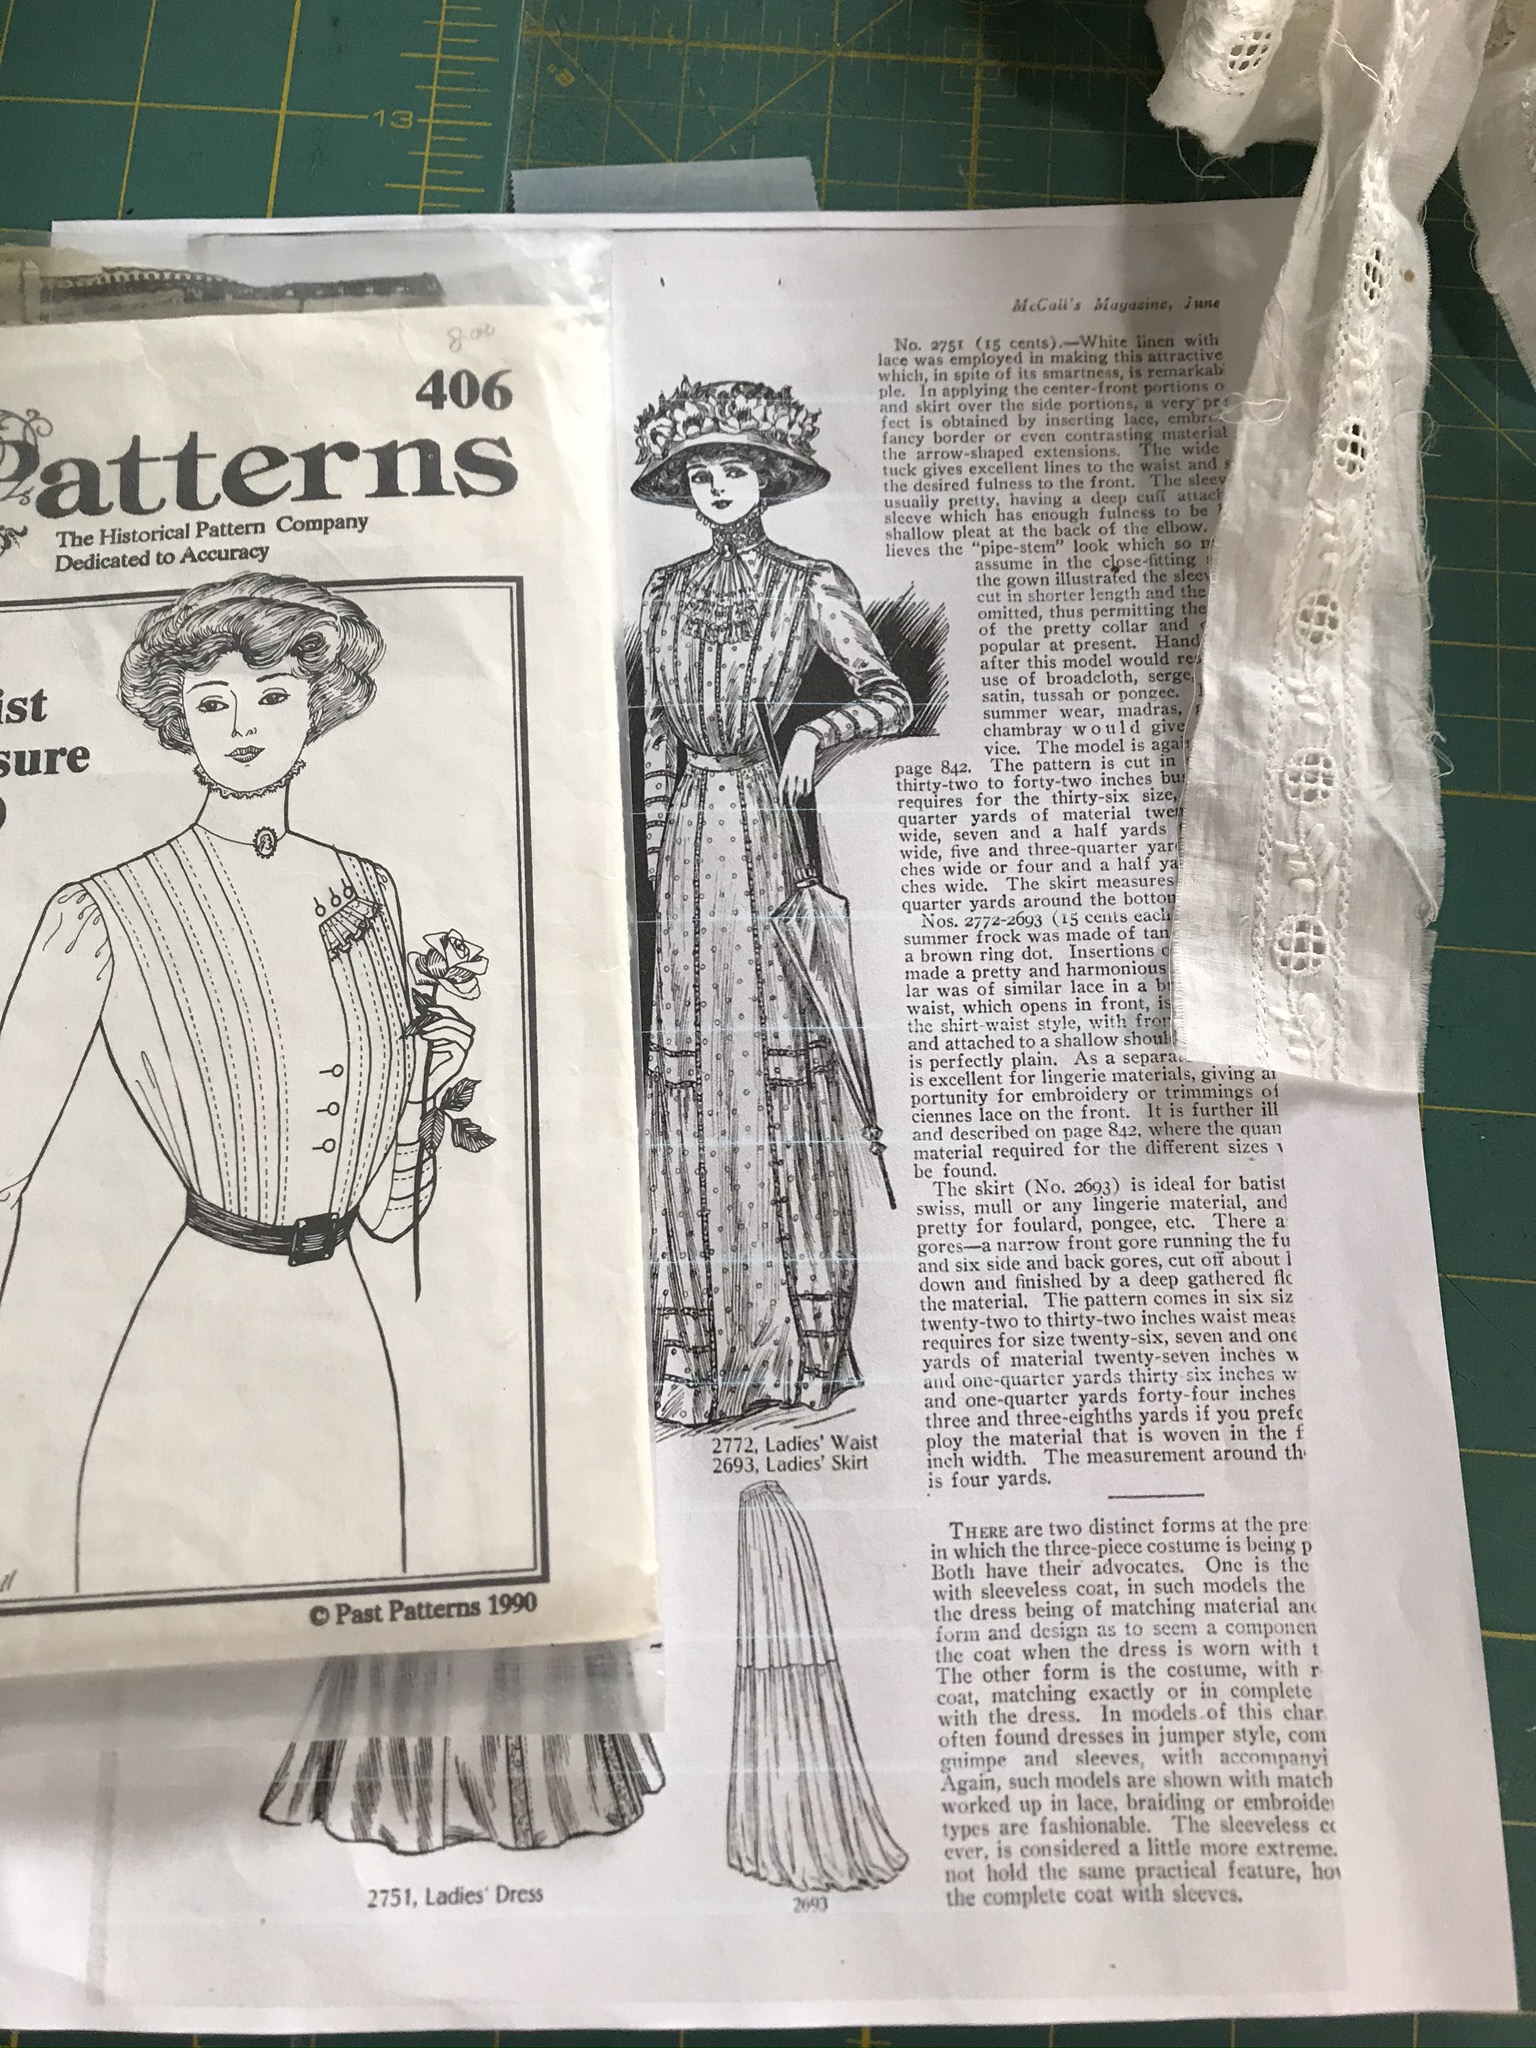
I took my time in laying out this pattern! I double checked my measurements and seam allowances before cutting. In fact, for several areas I used my marking pen to be sure of my center points. I shortened the height at the shoulder seam because I was copying the yoke detail from the original design.

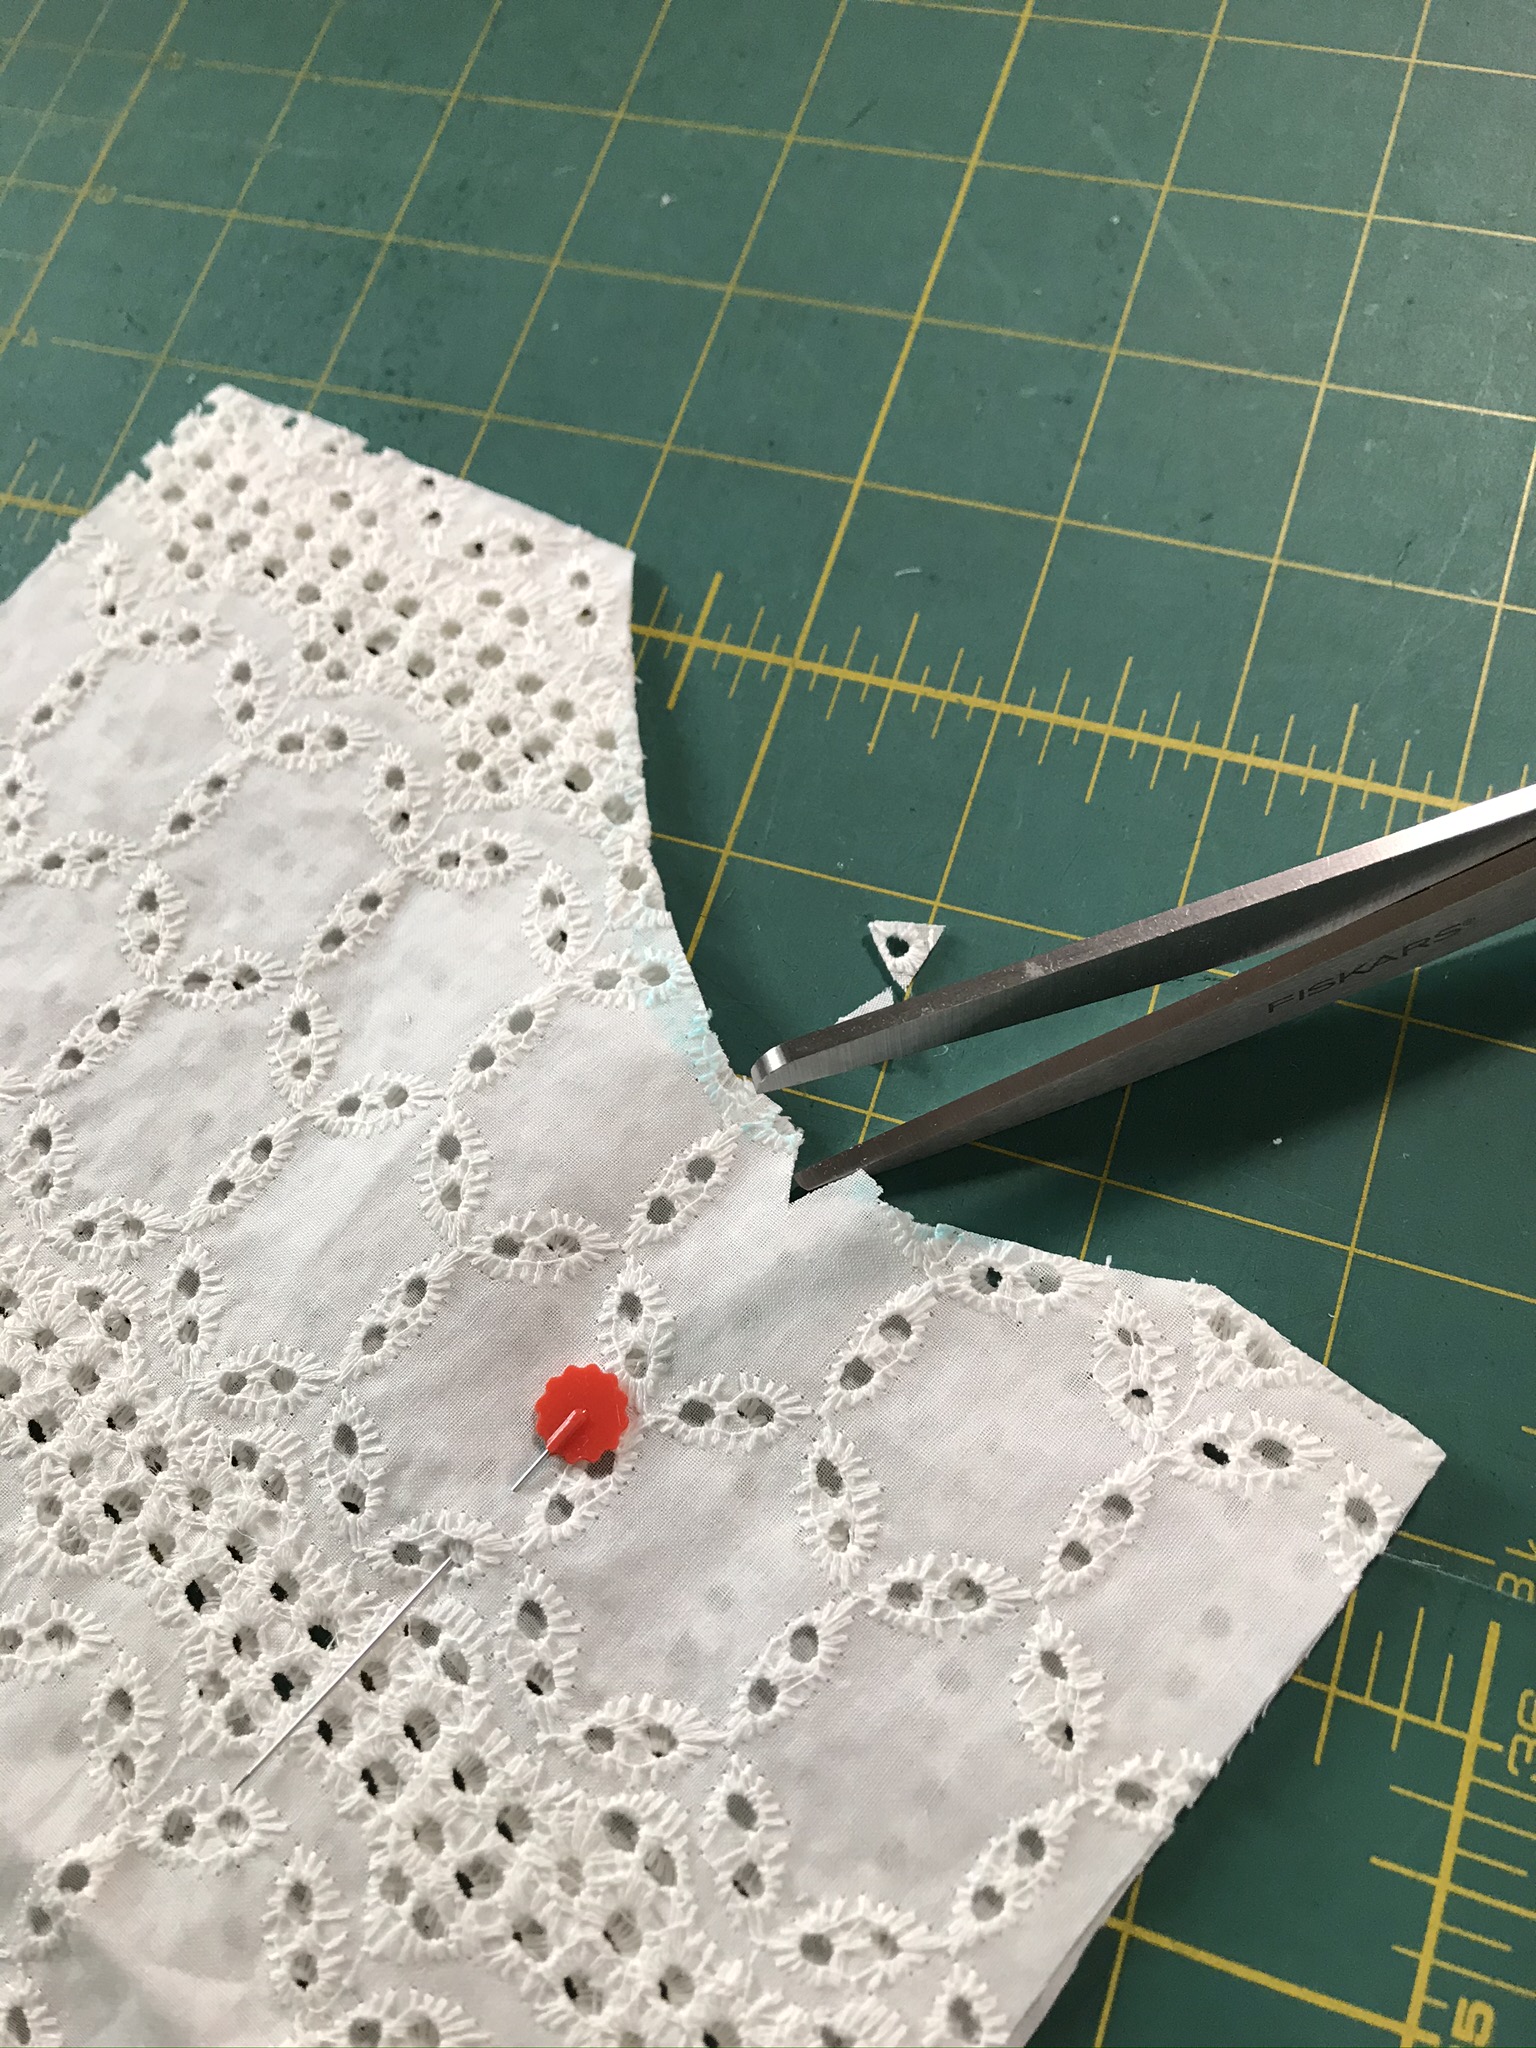
At the center front line, I did quite a bit of measuring and double-checking, to be sure that I would have enough fabric to turn under. I decided to create a buttonhole placket so I would have a smooth line at the center front; I cut that piece from the edge of my fashion fabric, where there was no embroidery.

Once I had my main bodice pieces cut, but before I removed the paper pattern pieces, I made sure to mark the tucks and the center front seam.

Bodice Center Front

I had cut out the entire gown in one evening. I folded everything carefully and set it aside for the next day. I was ready to sew!

Making the dress

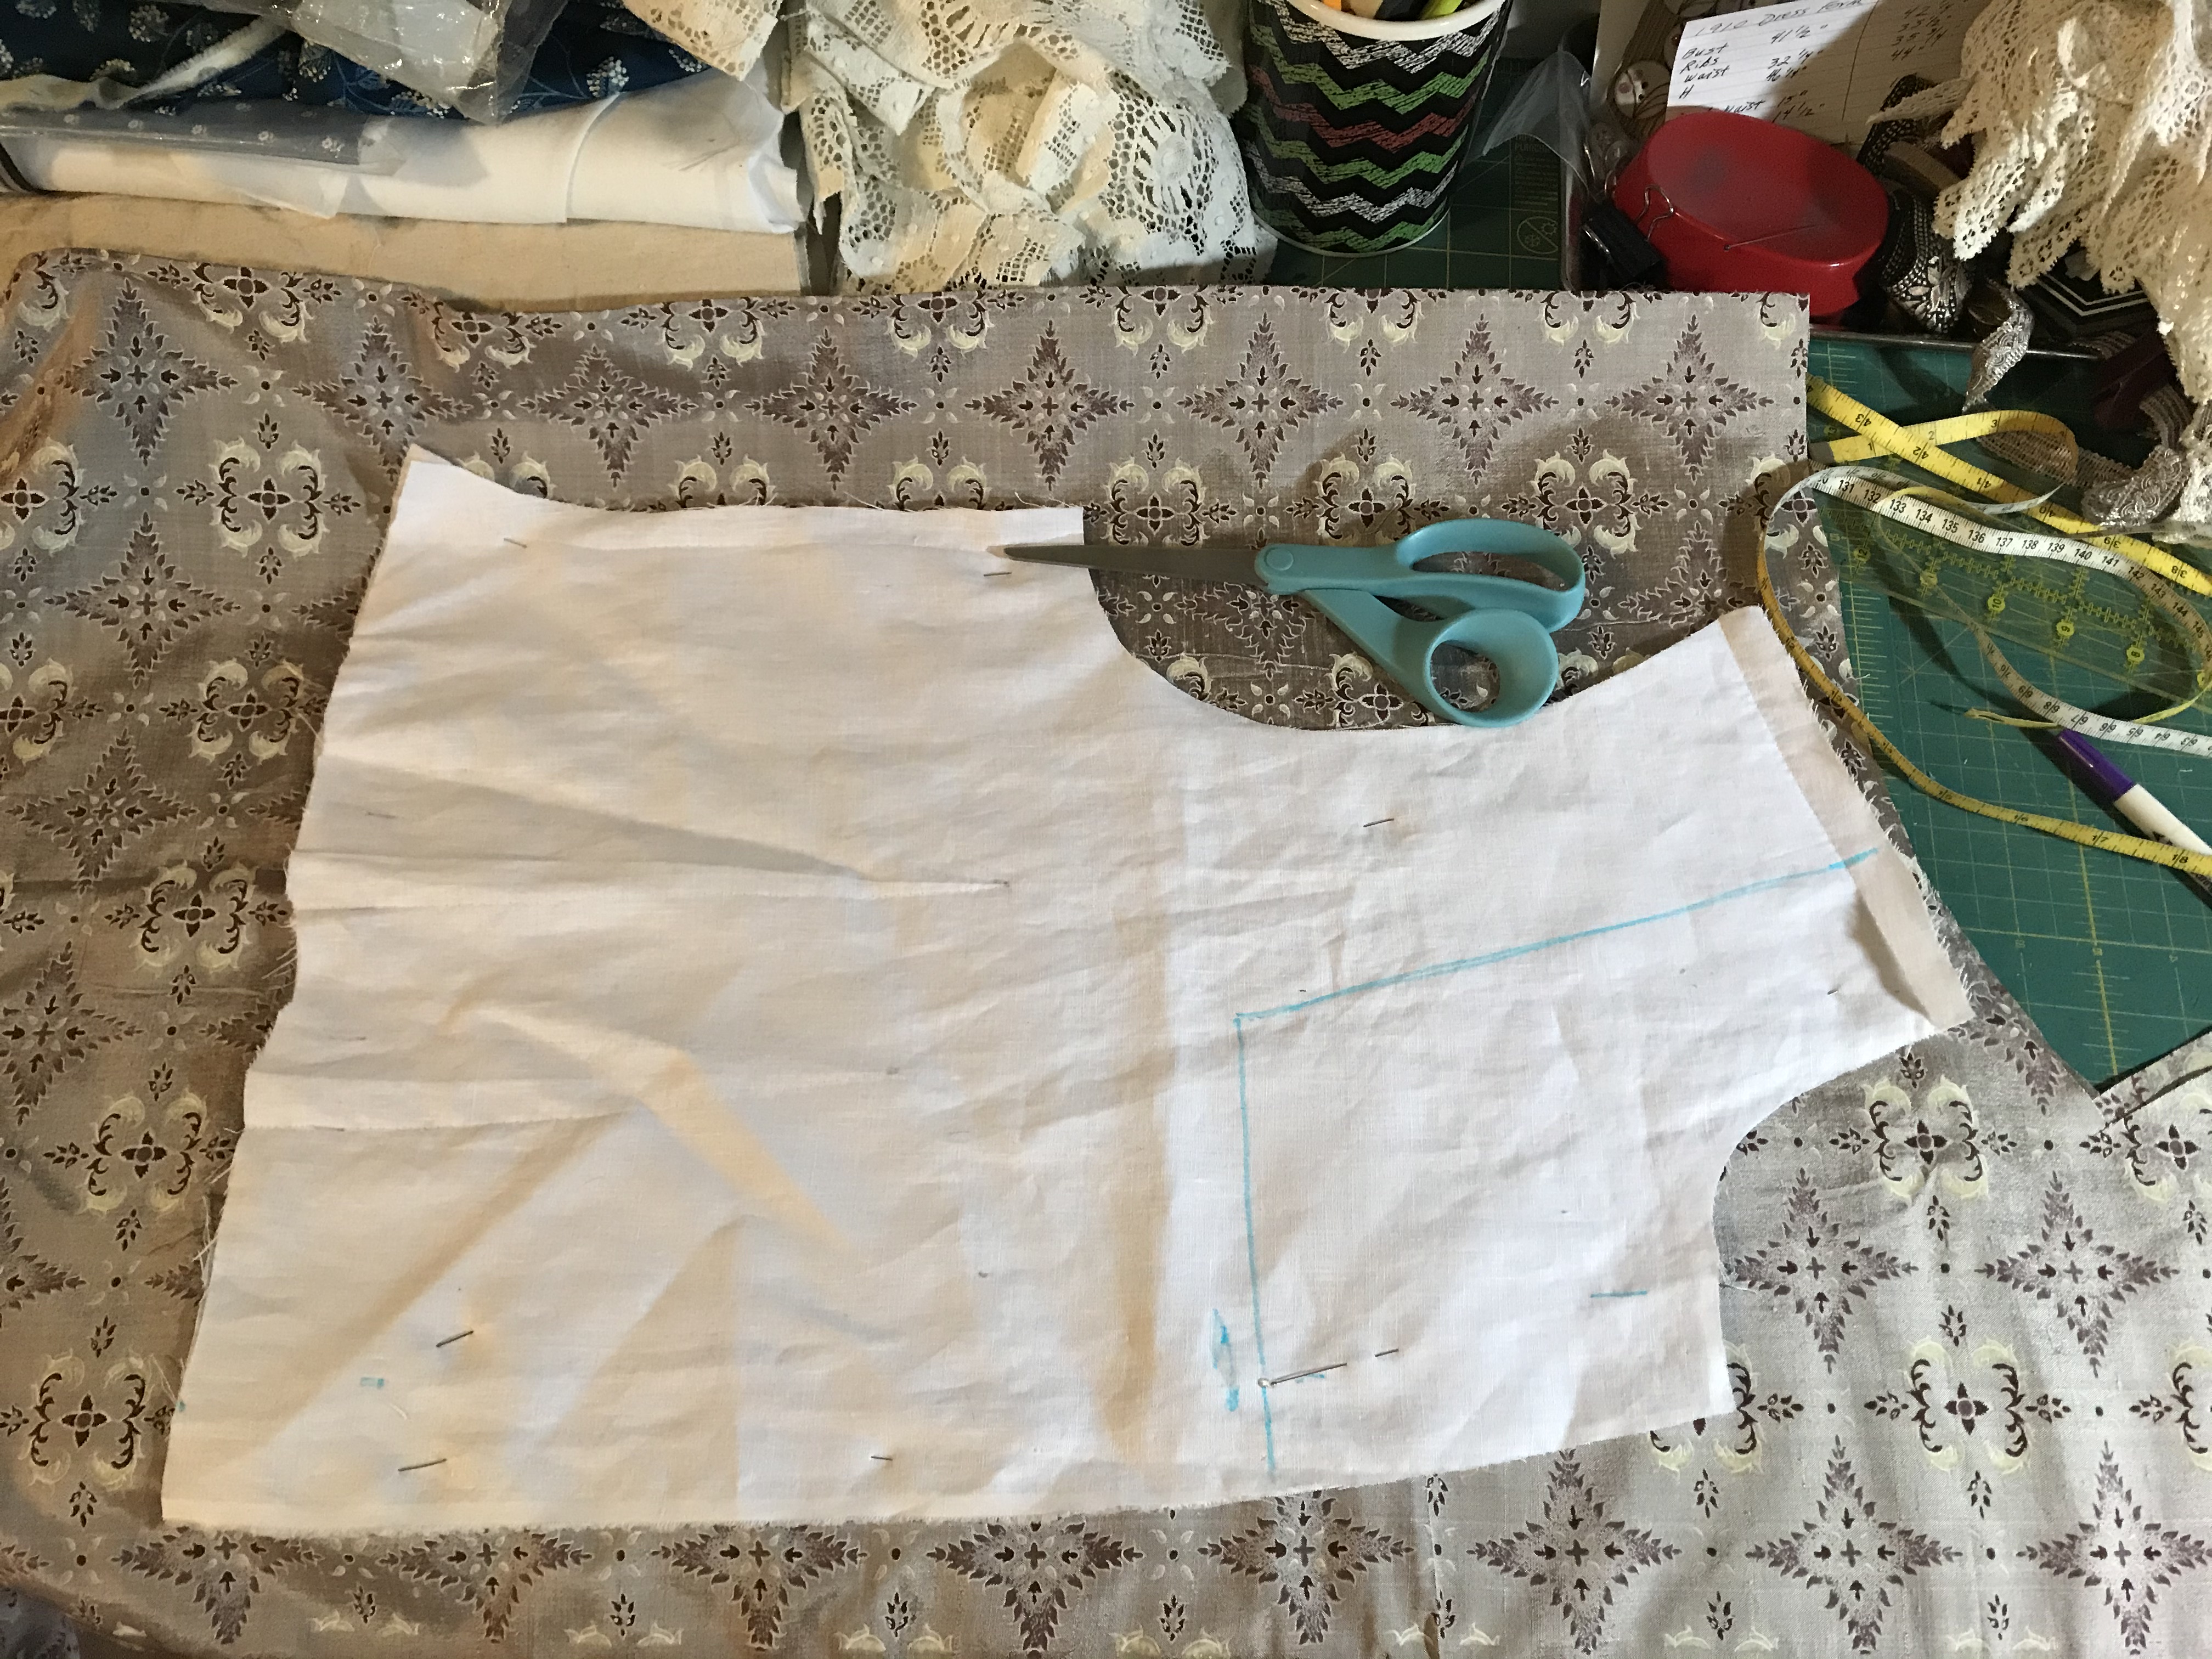
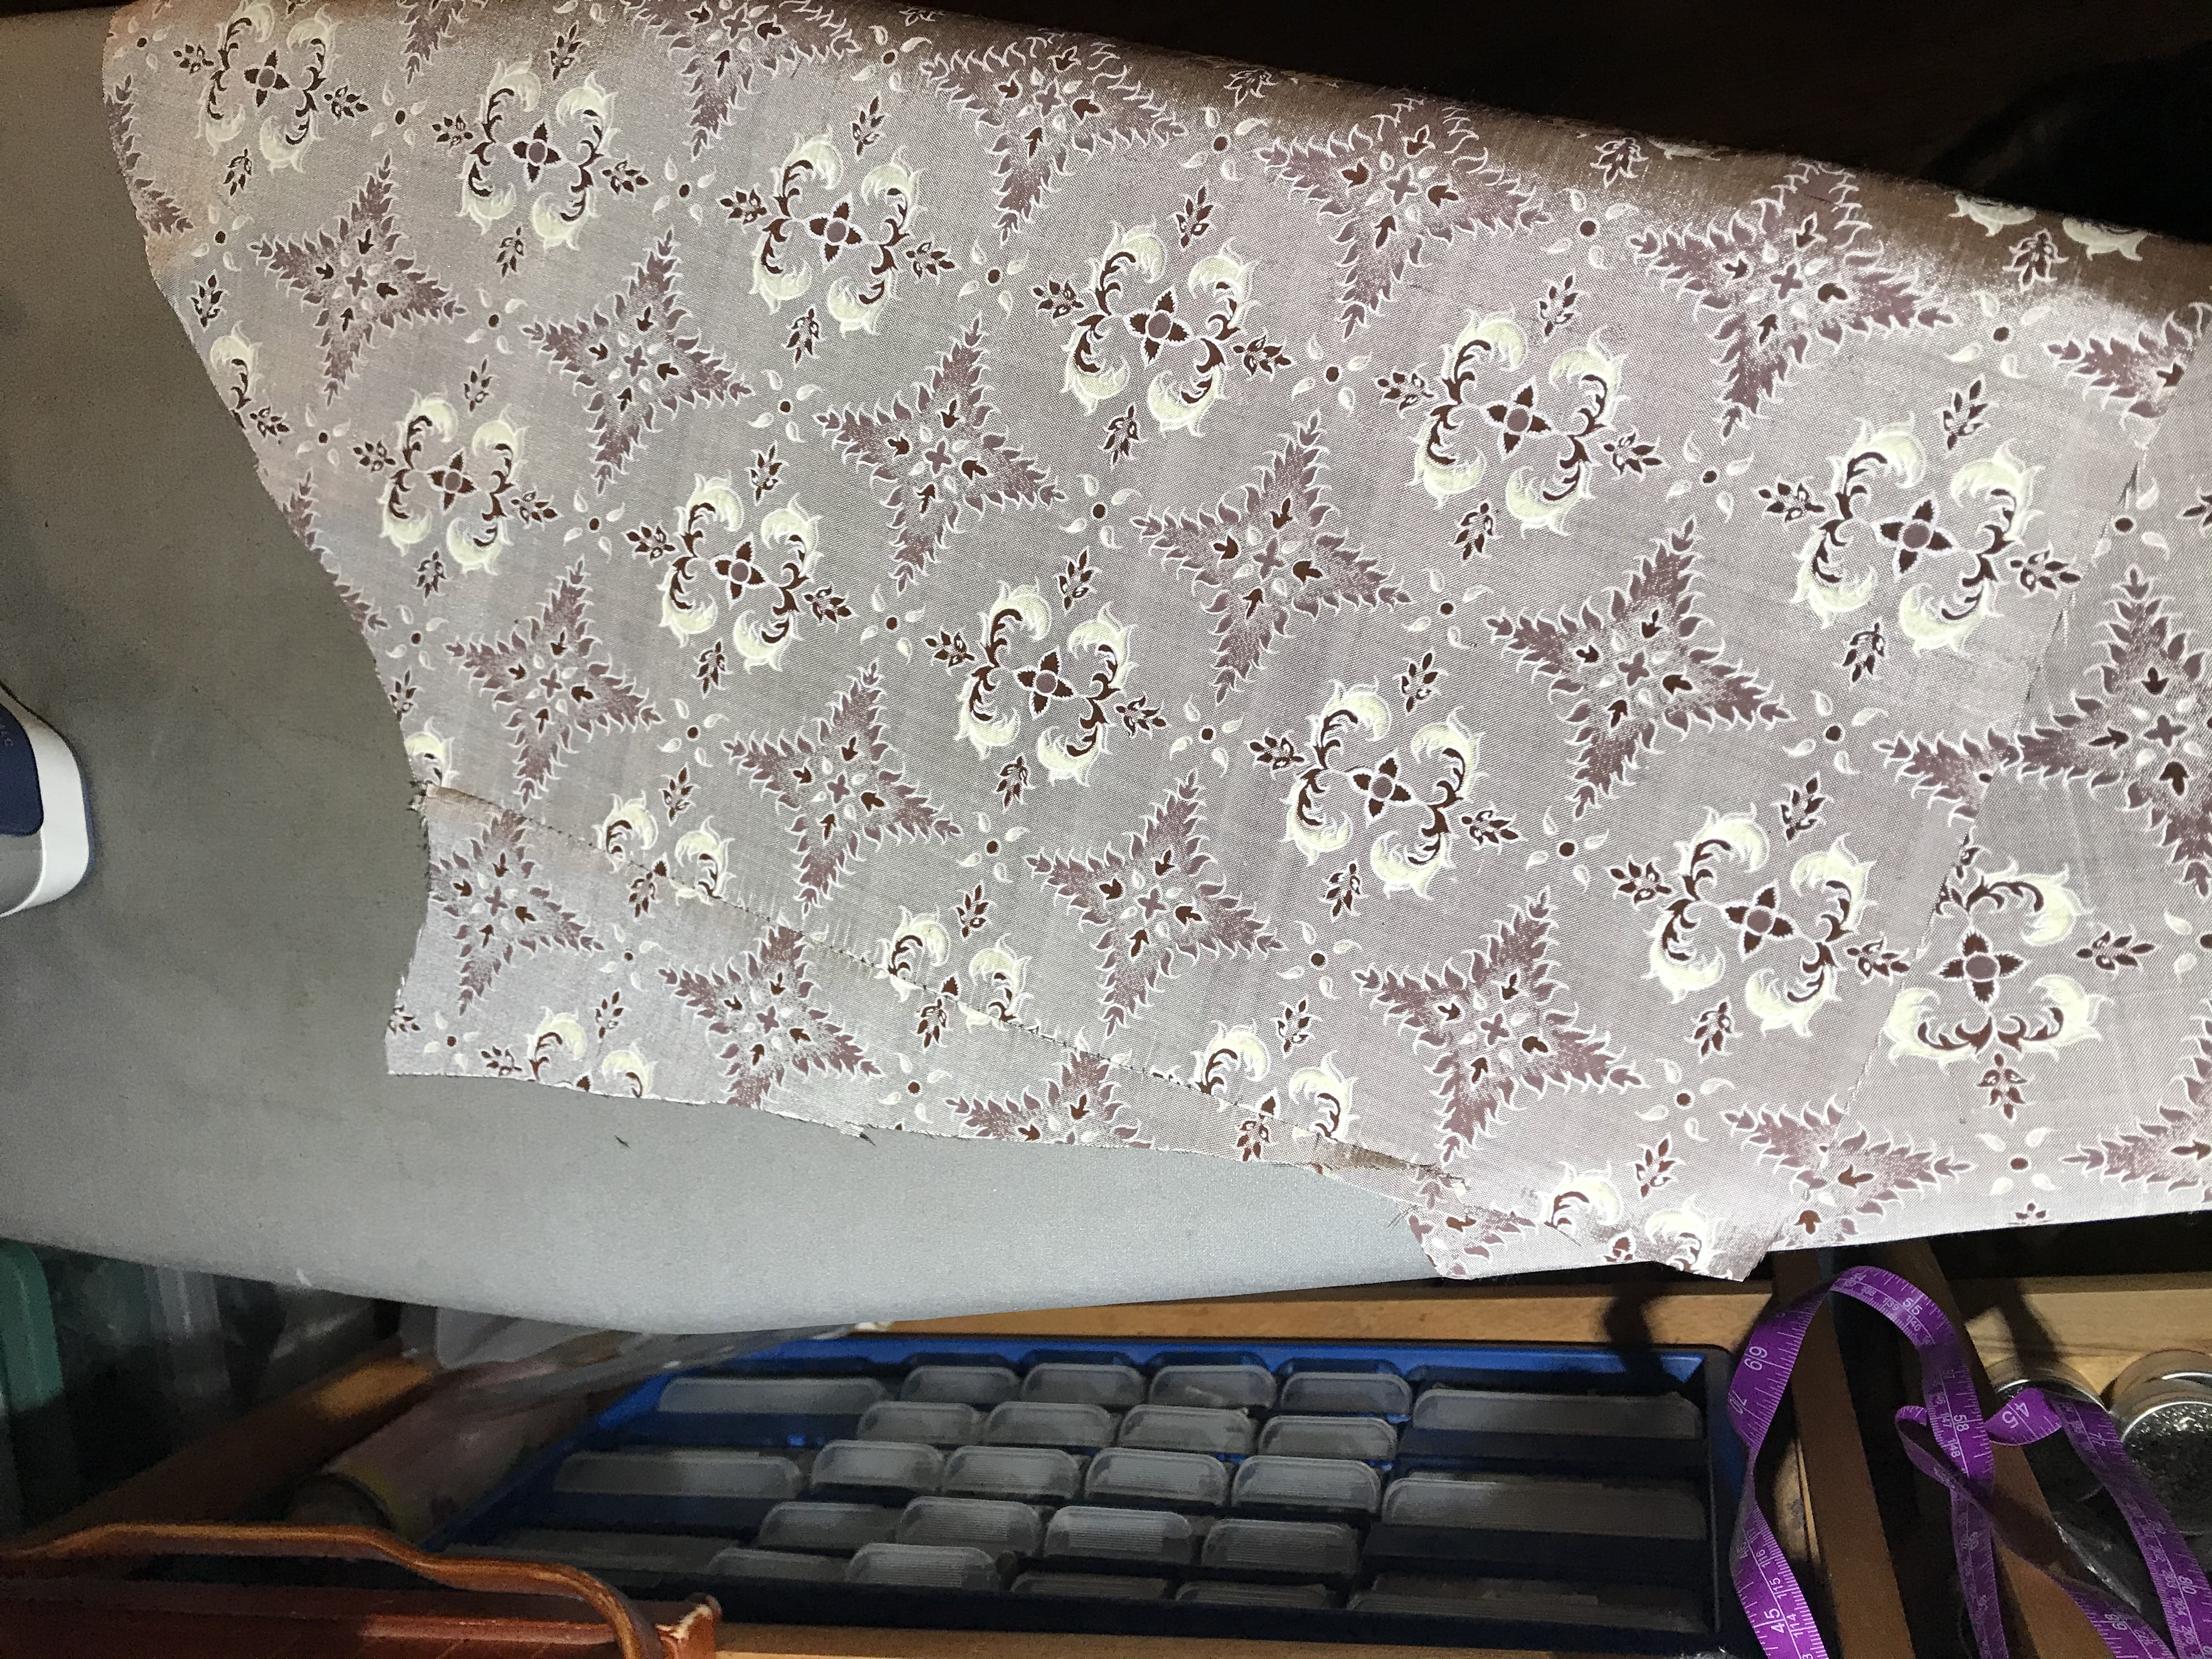
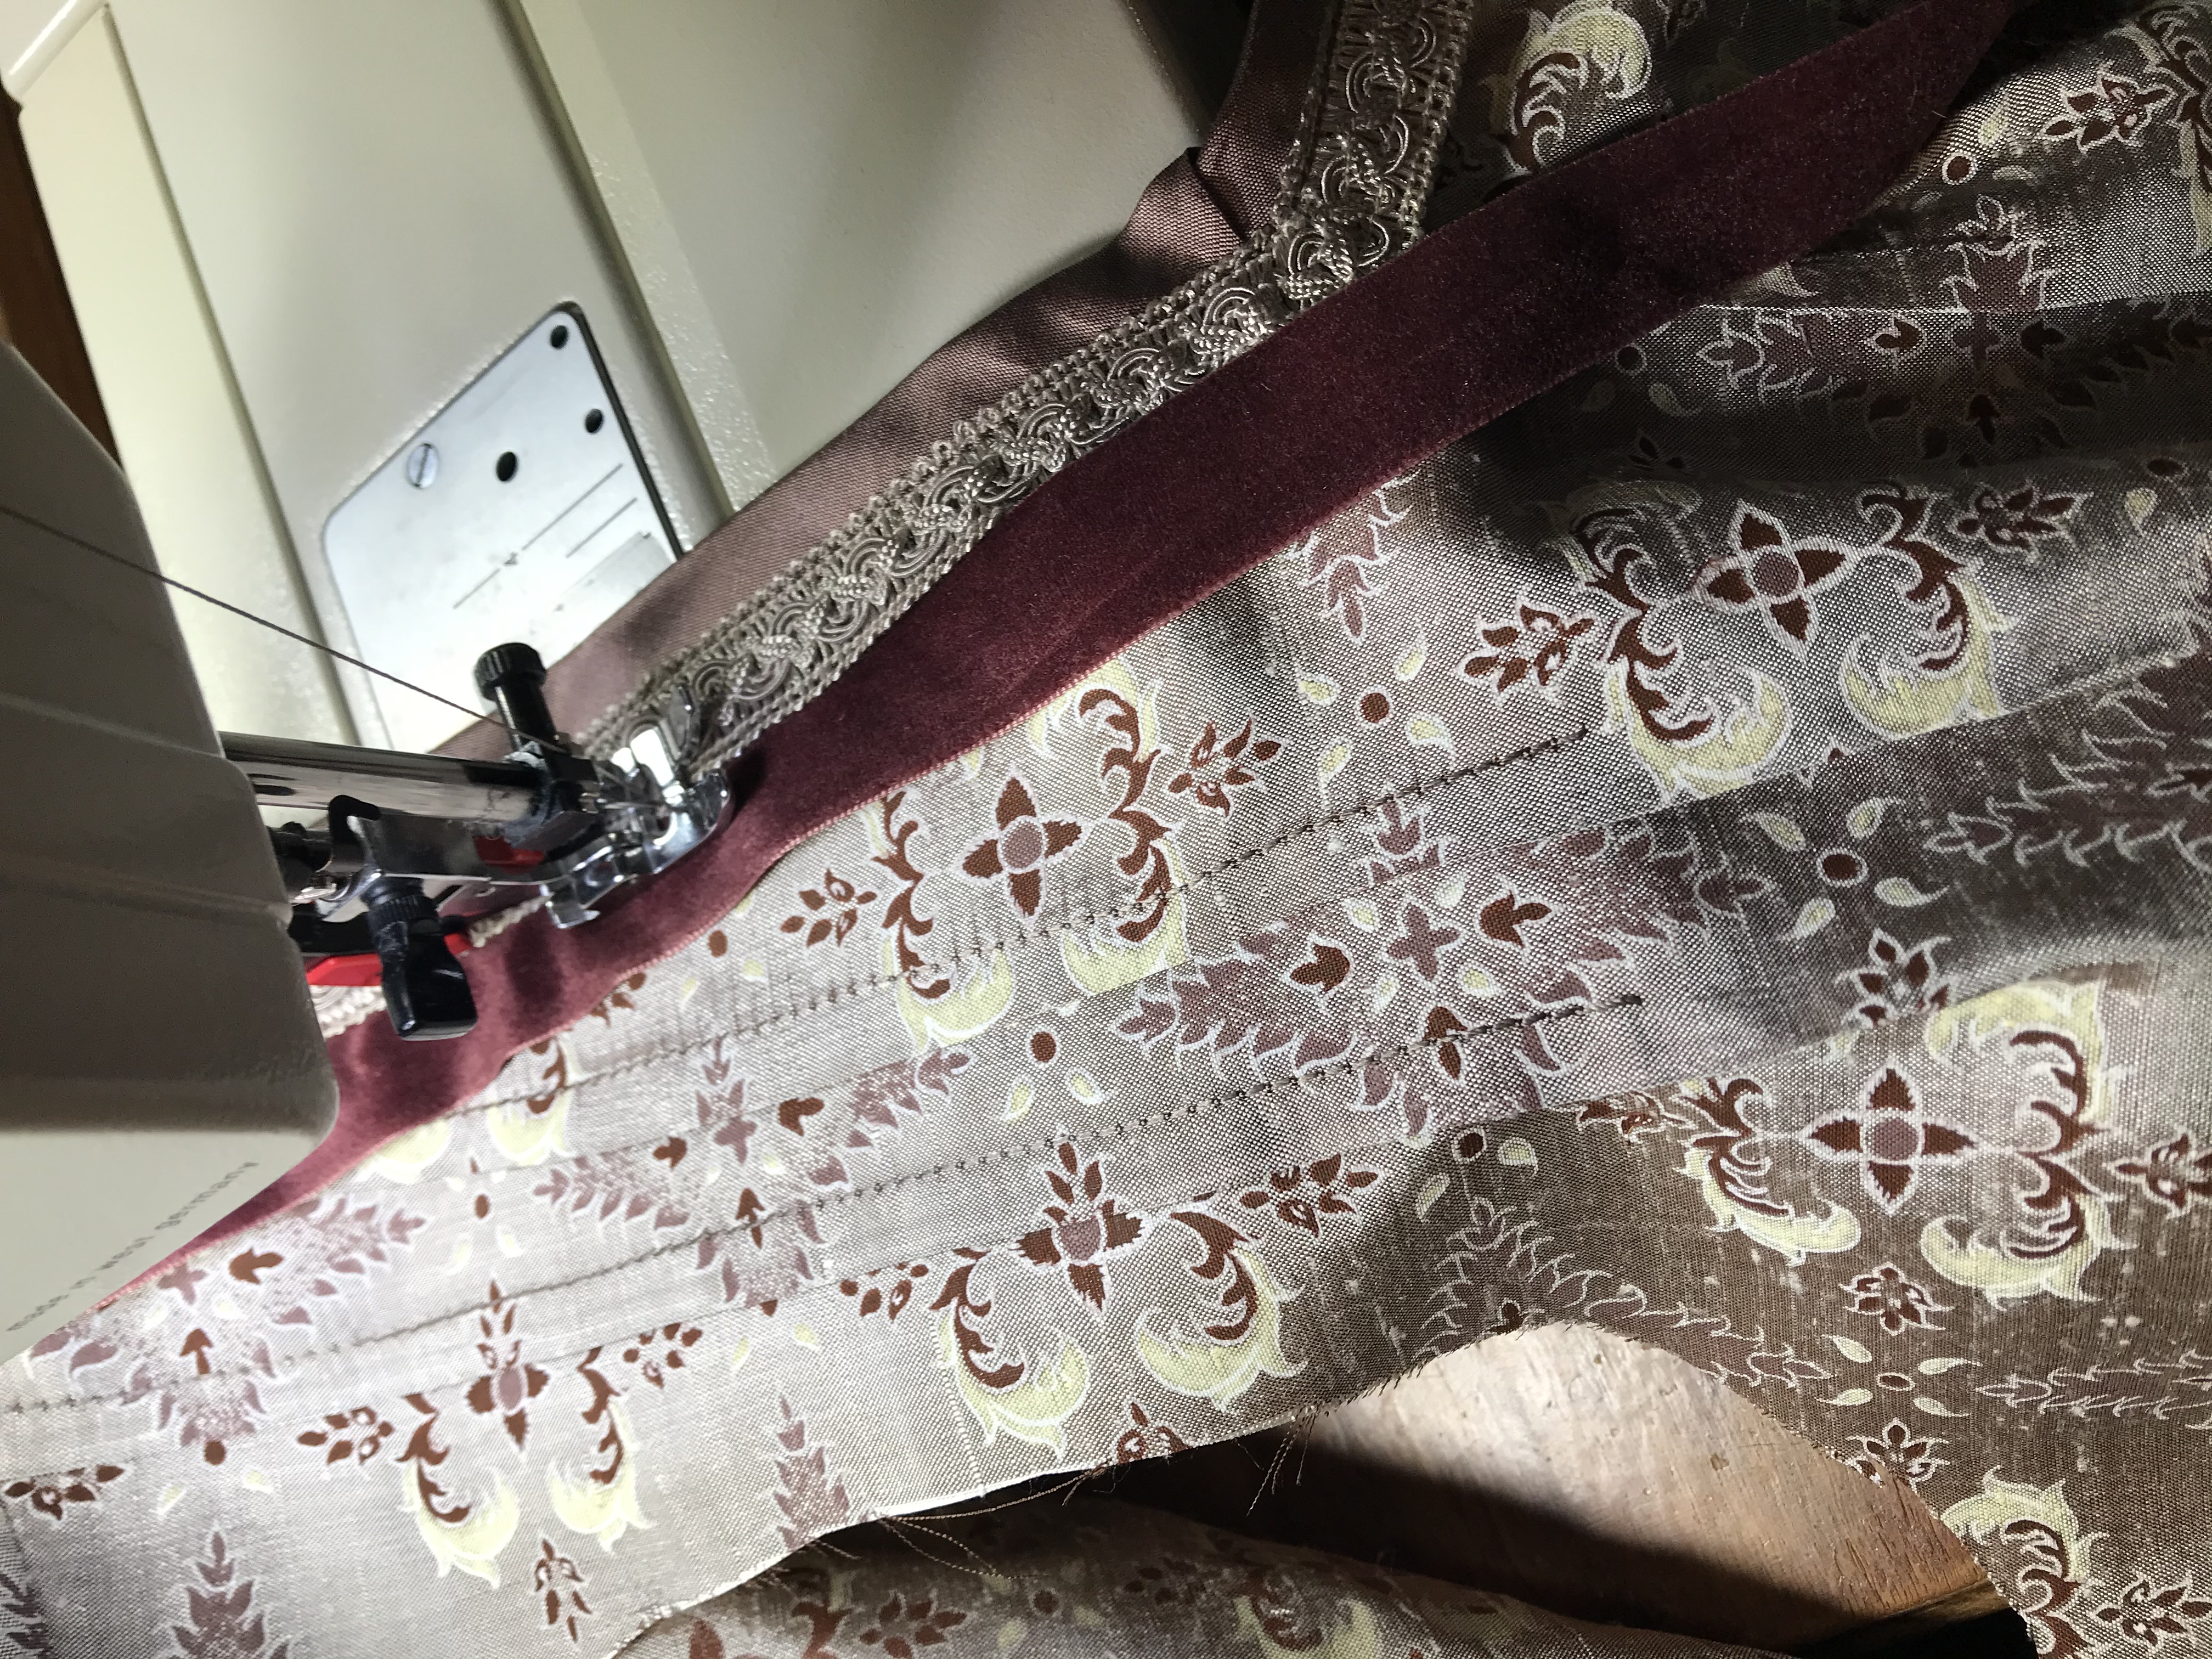
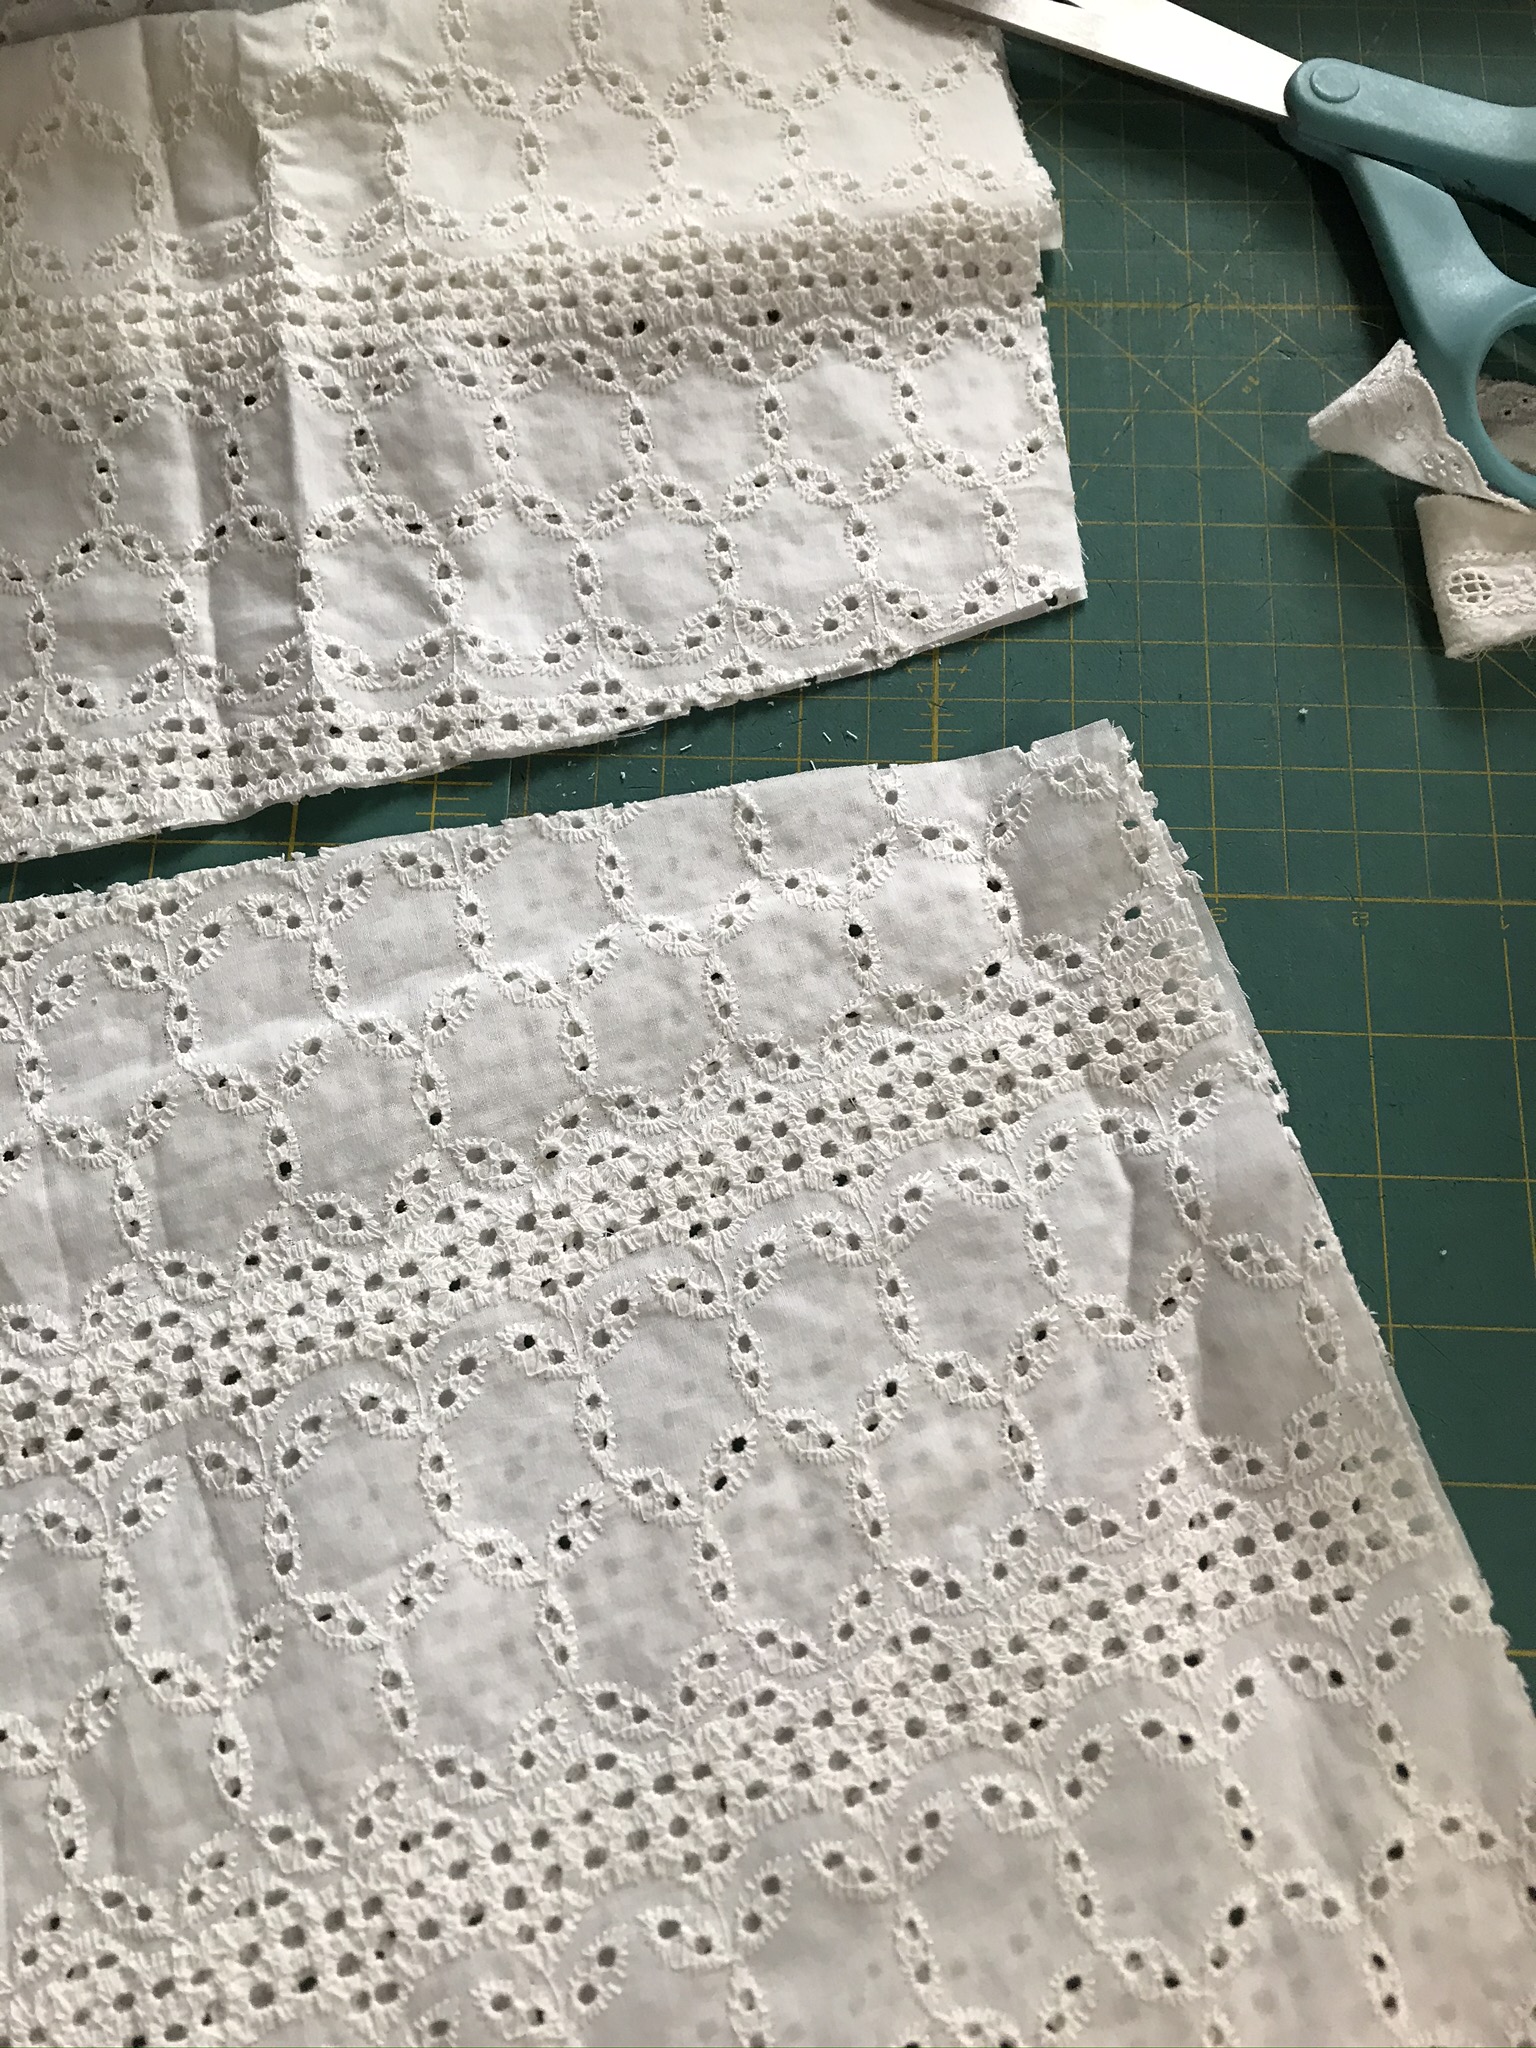
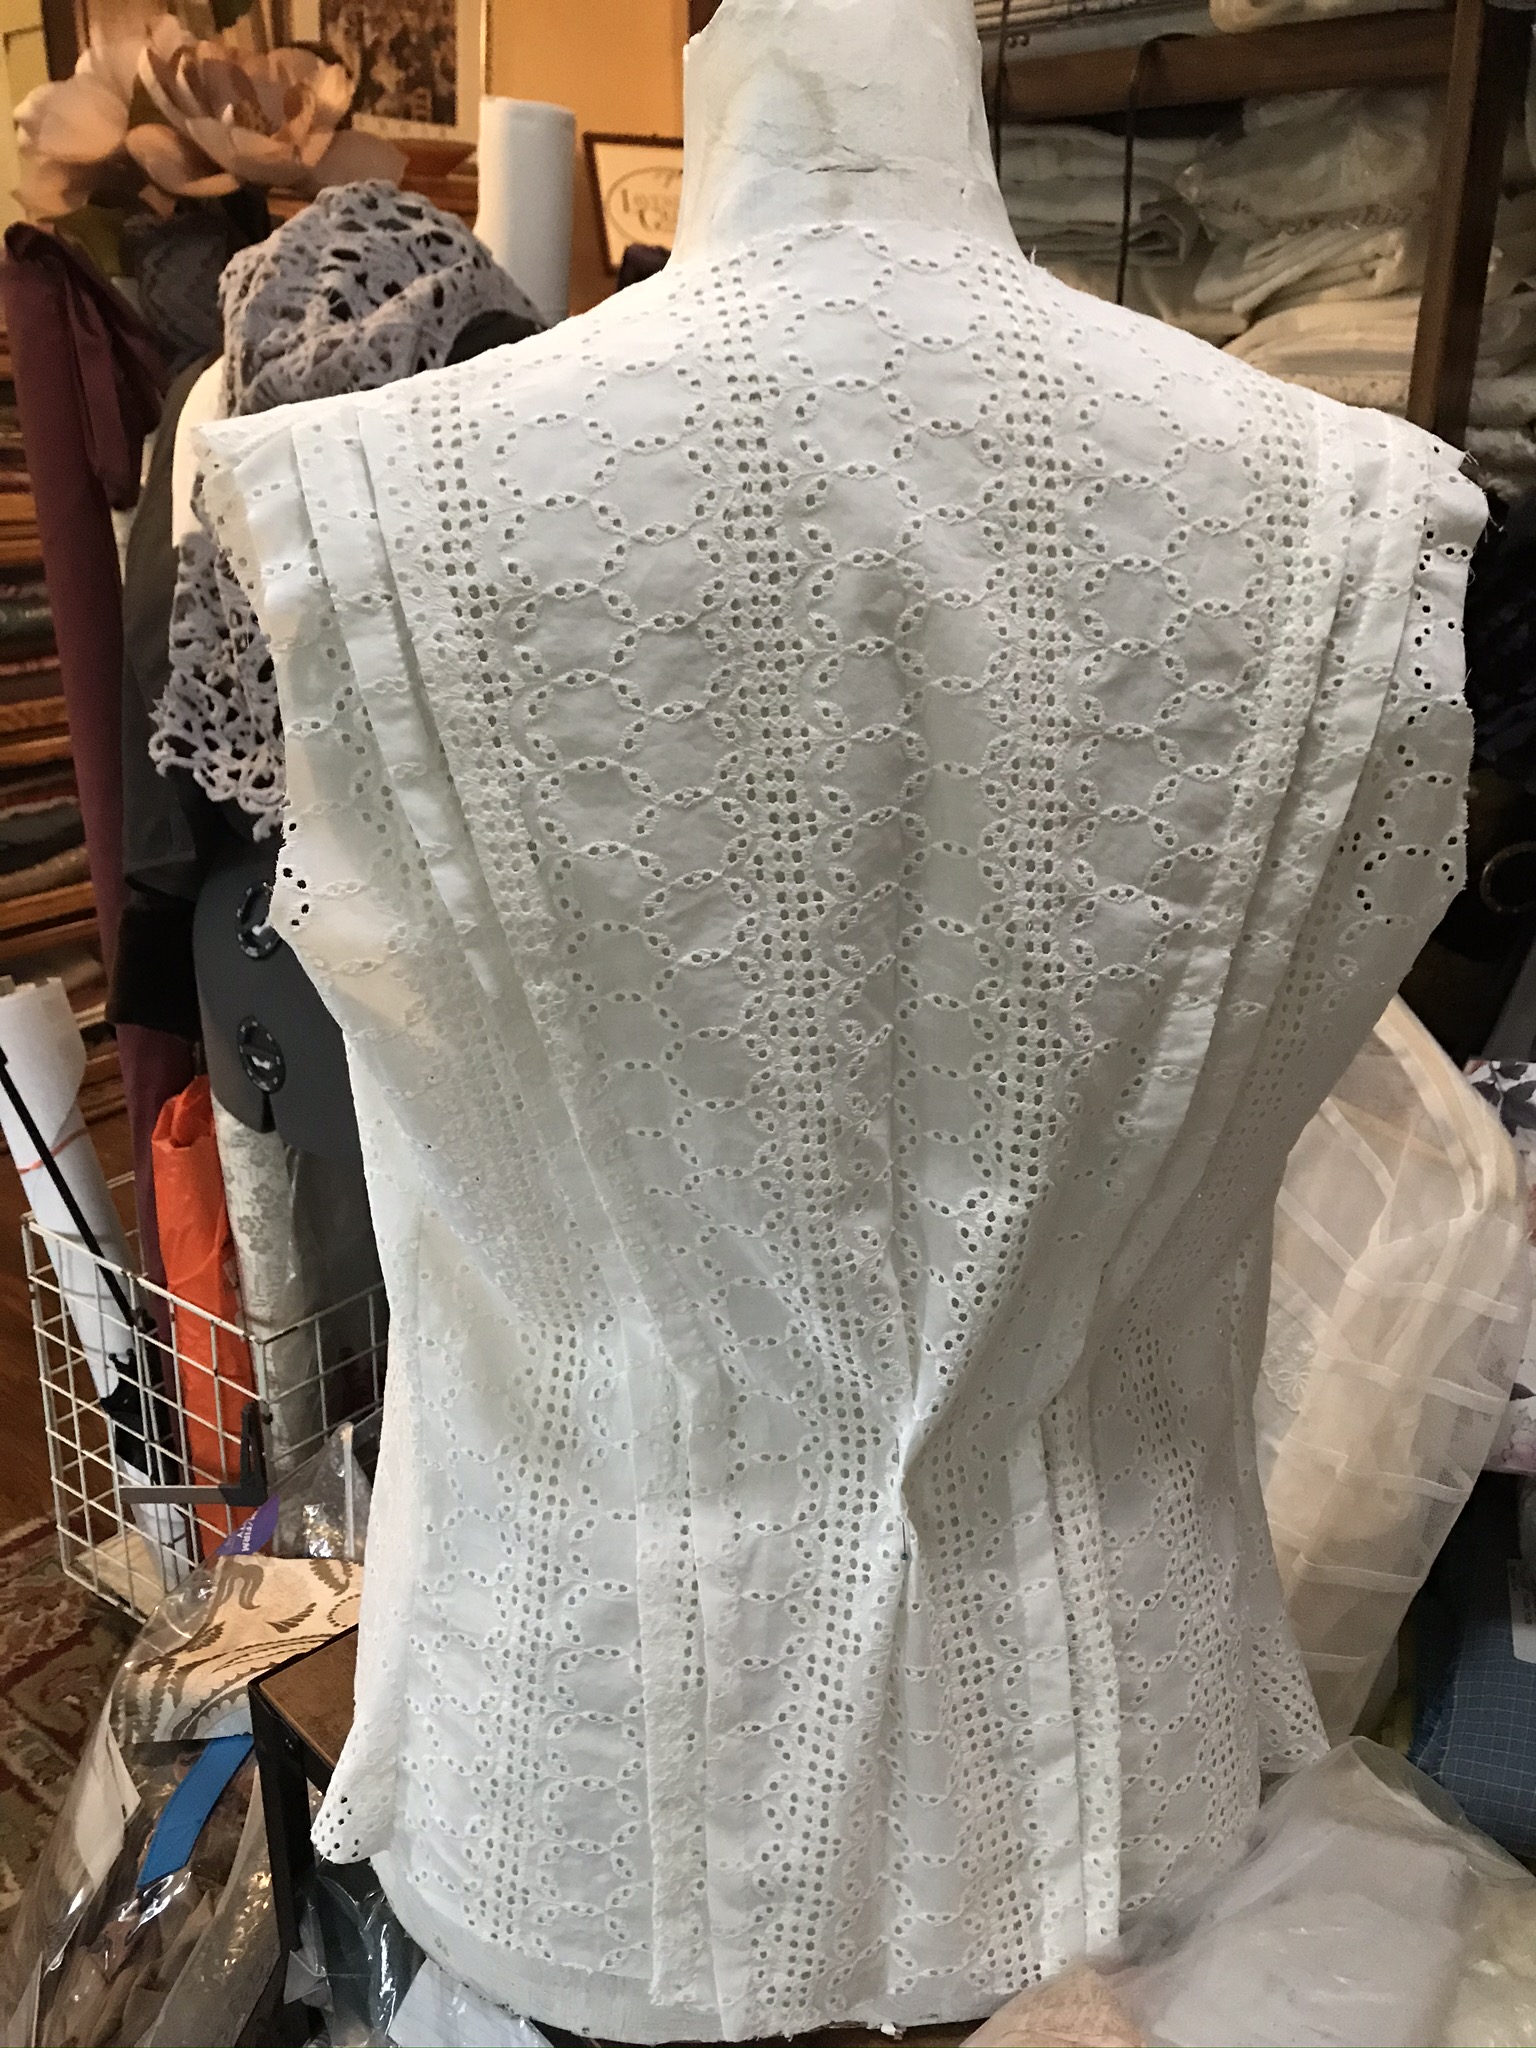
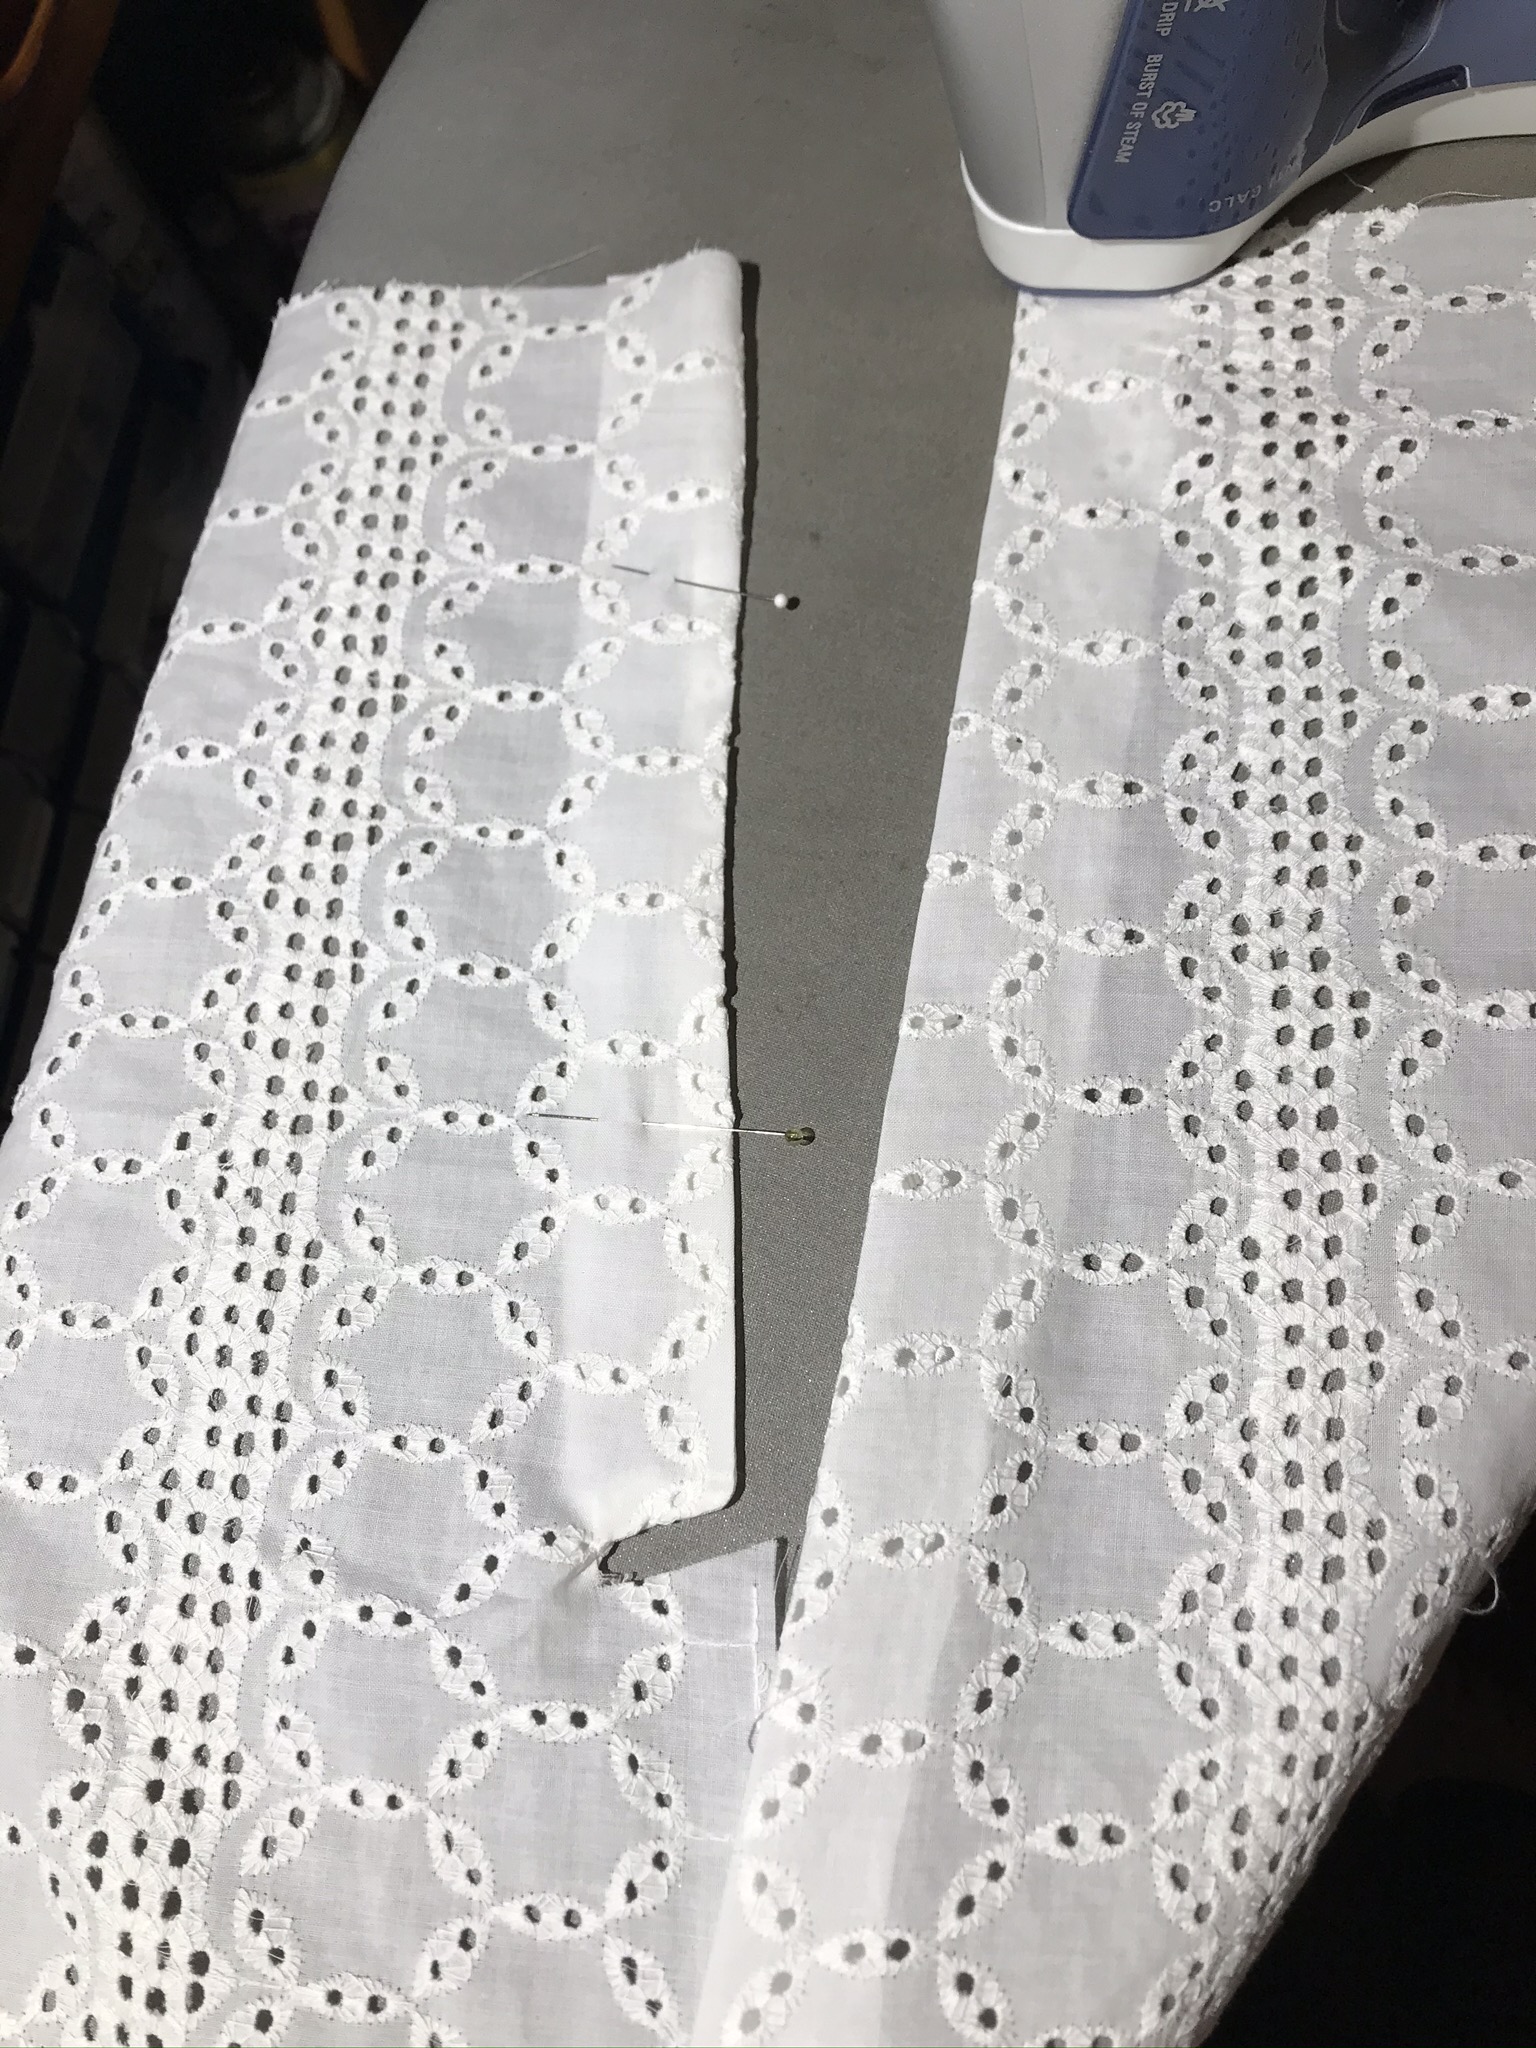
The first step on a gown like this is the fussy little details. I needed to sew the tucks in place before I could attach the sections. Here’s a picture of how I prepared the back section for those long, stylish tucks. The tops and bottom were marked in advance; the top of each tuck has a small snip in the seam allowance, while the bottoms were marked with my purple pen. The fabric was folded, right sides together, and then I pressed the entire length of each the tucks. After pressing the first side, I flipped the fabric section and pressed the other side for a perfect match. Then I was able to sew a ½” wide tuck on each side.

Bodice back pressing tucks IMG_5604

Bodice back IMG_5612

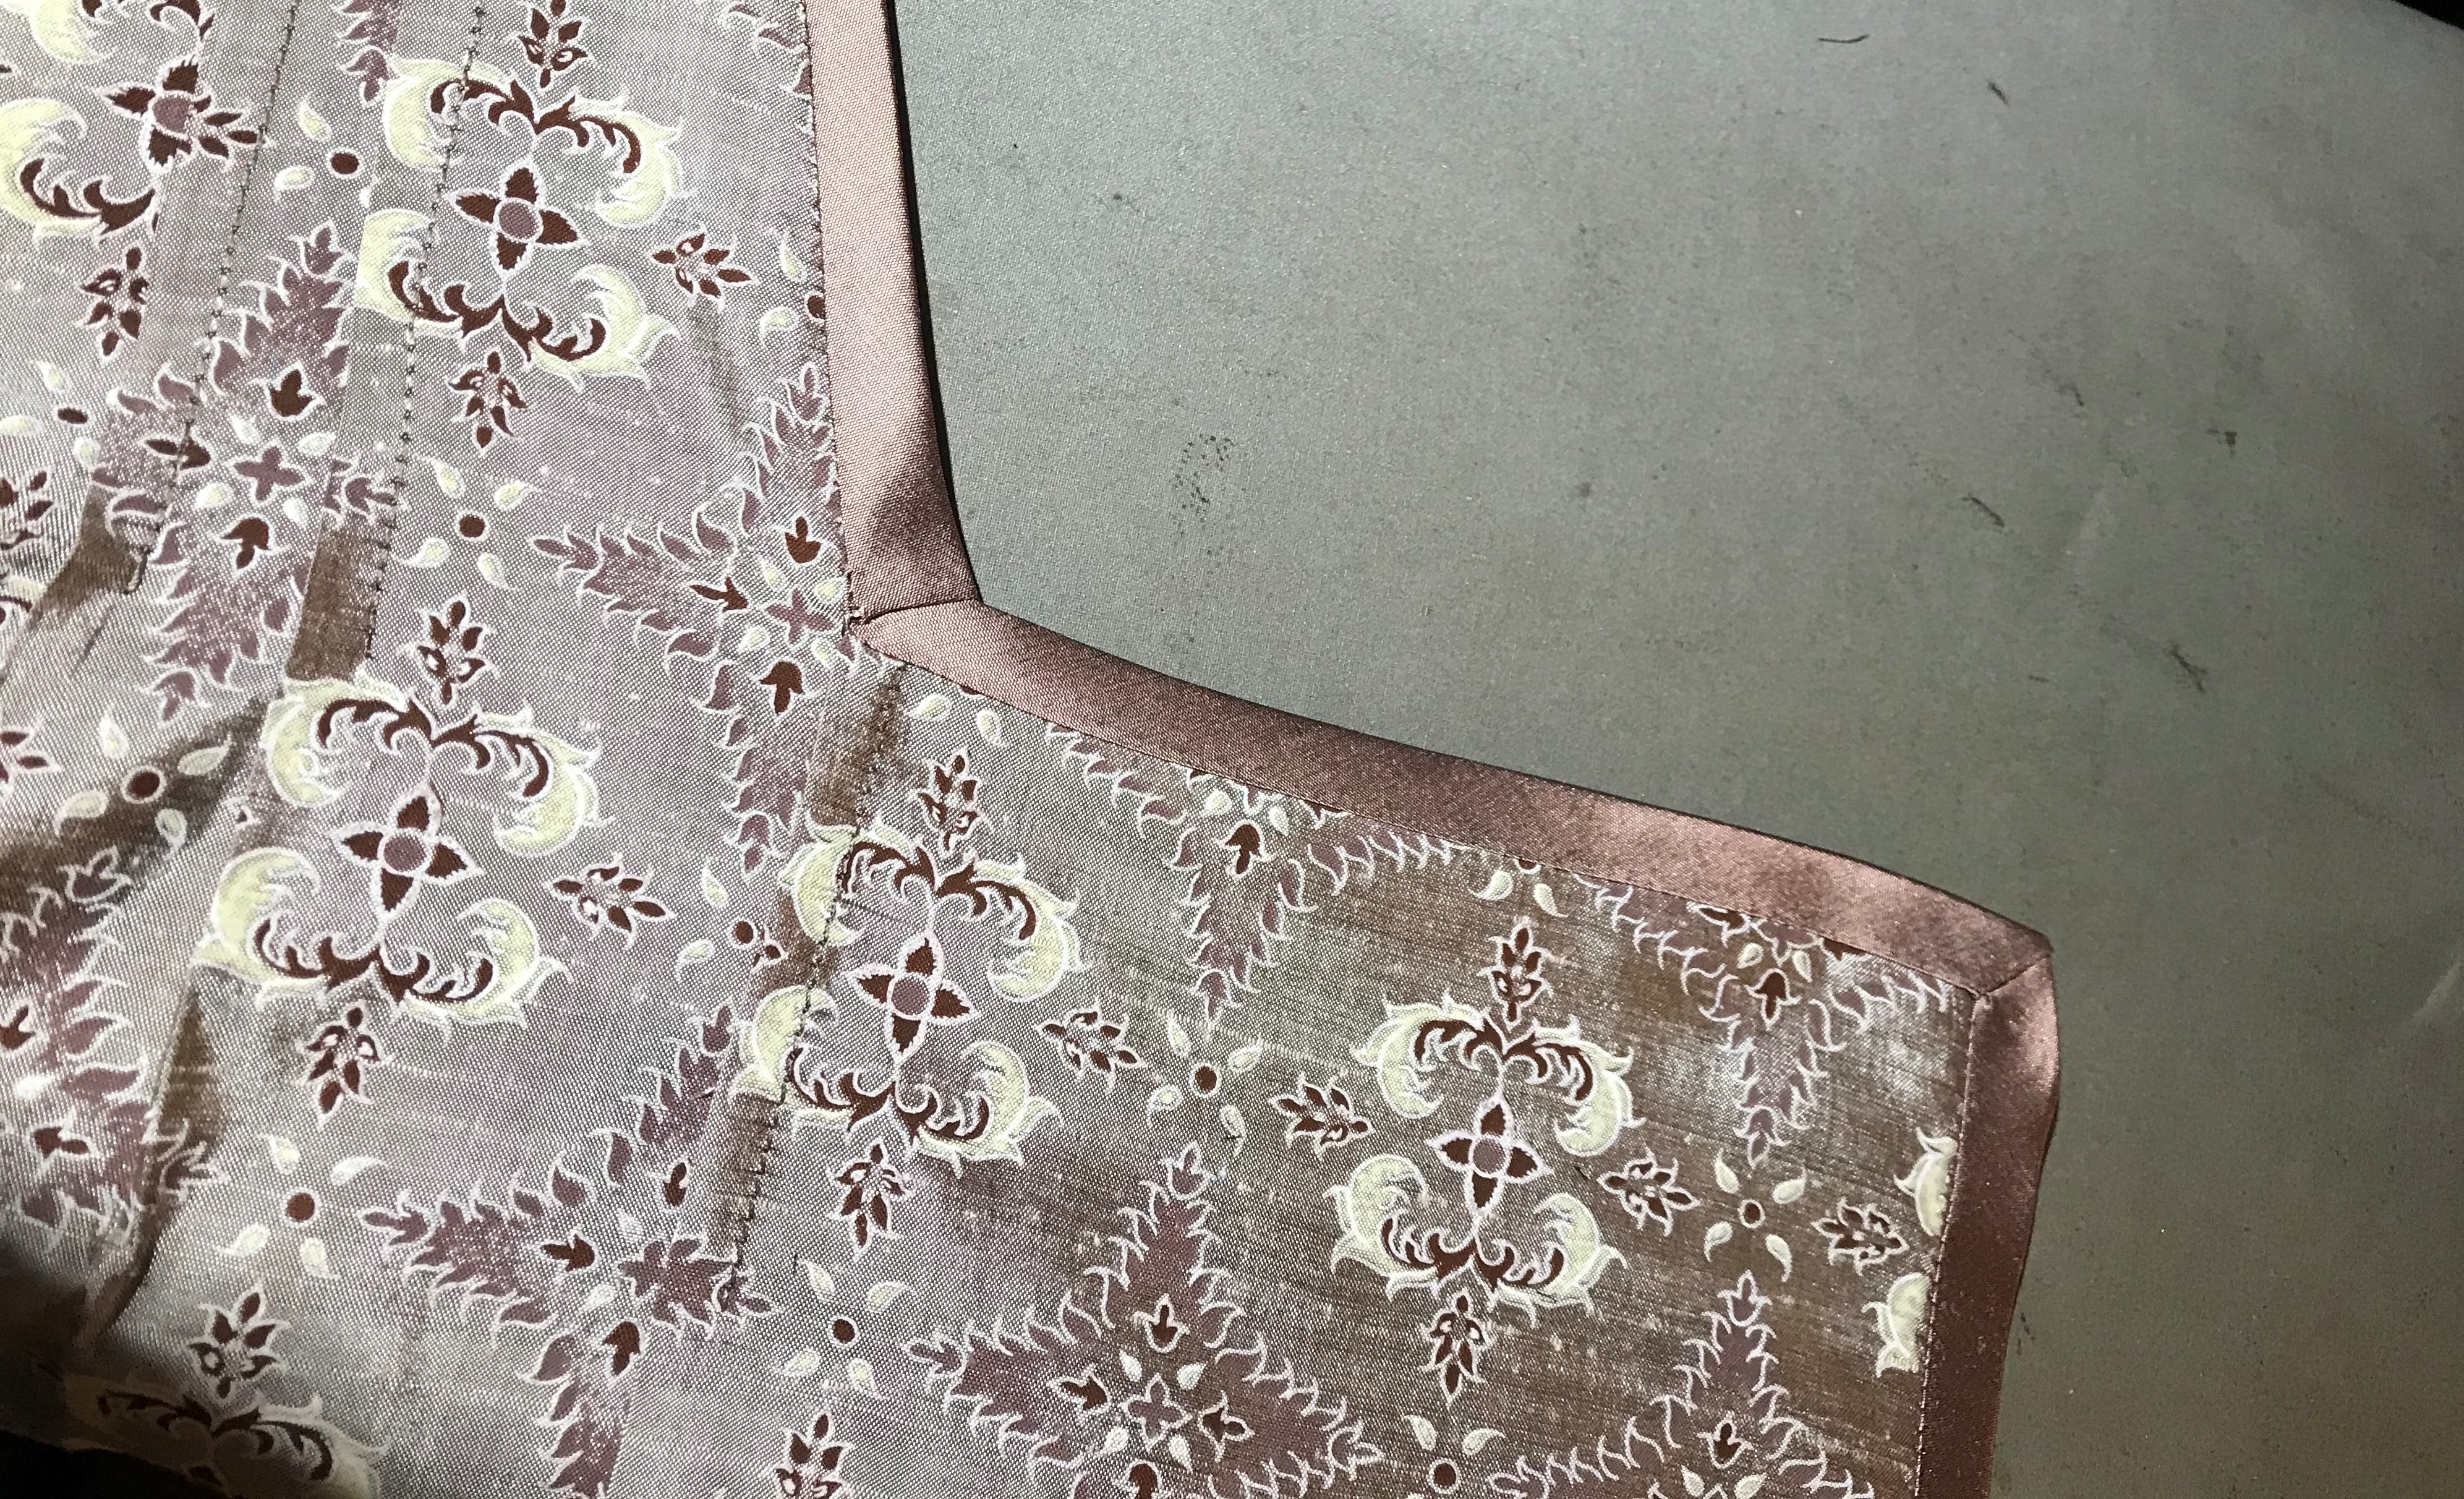
For the bodice front, I started by attaching the insertion along that vertical seam, first on one edge and then the other. I always work with the insertion on top, so I can be sure I am sewing close to the design. Once I had the insertion sewn into the seam, I pressed the seams with the insertion opened out.

Bodice front placket cropped IMG_5605

Here is where I took advantage of owning a serger. I let the machine trim the excess fabric and wrap the raw edges. This was so much faster than what our fictional lady would have done! She would trim by hand and then whip stitch those edge, or perhaps even roll the raw edges under and fell them down.

I made the front placket section by pressing the long, smooth fabric together (with cotton organdy, prewashed, inside for interfacing) and then making my buttonholes. After that it was simple to position the buttonhole placket and stitch it down.

Bodice front placket IMG_5605

I followed a similar process for the skirt: I sewed the insertion in place first, then pressed those sections and serged them for a clean finish. Once I had the four main gores assembled, I added the band of eyelet along the lower edge. (I did take a few very tiny tucks at the top edge of that band so that it would continue the flared lines of the skirt. Otherwise there might have been a “drop-off” at that area!) Before I added the front panel, I sewed the insertion along its outer edge. Finally, the skirt was mostly assembled, and I was able to create my center back closure. I took advantage of a very wide seam allowance (the part of the fabric that was plain) and turned it back to create the underlap for my placket. Then I was able to finish the two edges (one an extension and one turned back to the center back line). I sewed the center back seam up to that point and topstitched the placket into position across the bottom of the opening.

Skirt IMG_5616

Details

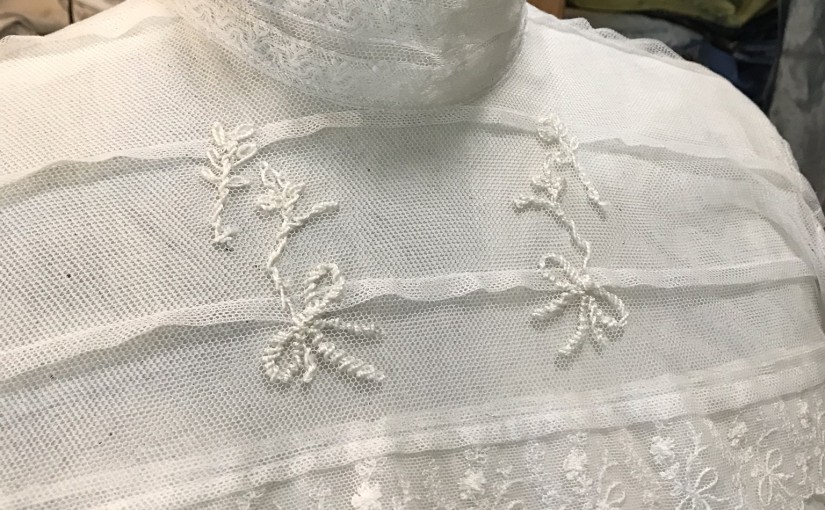
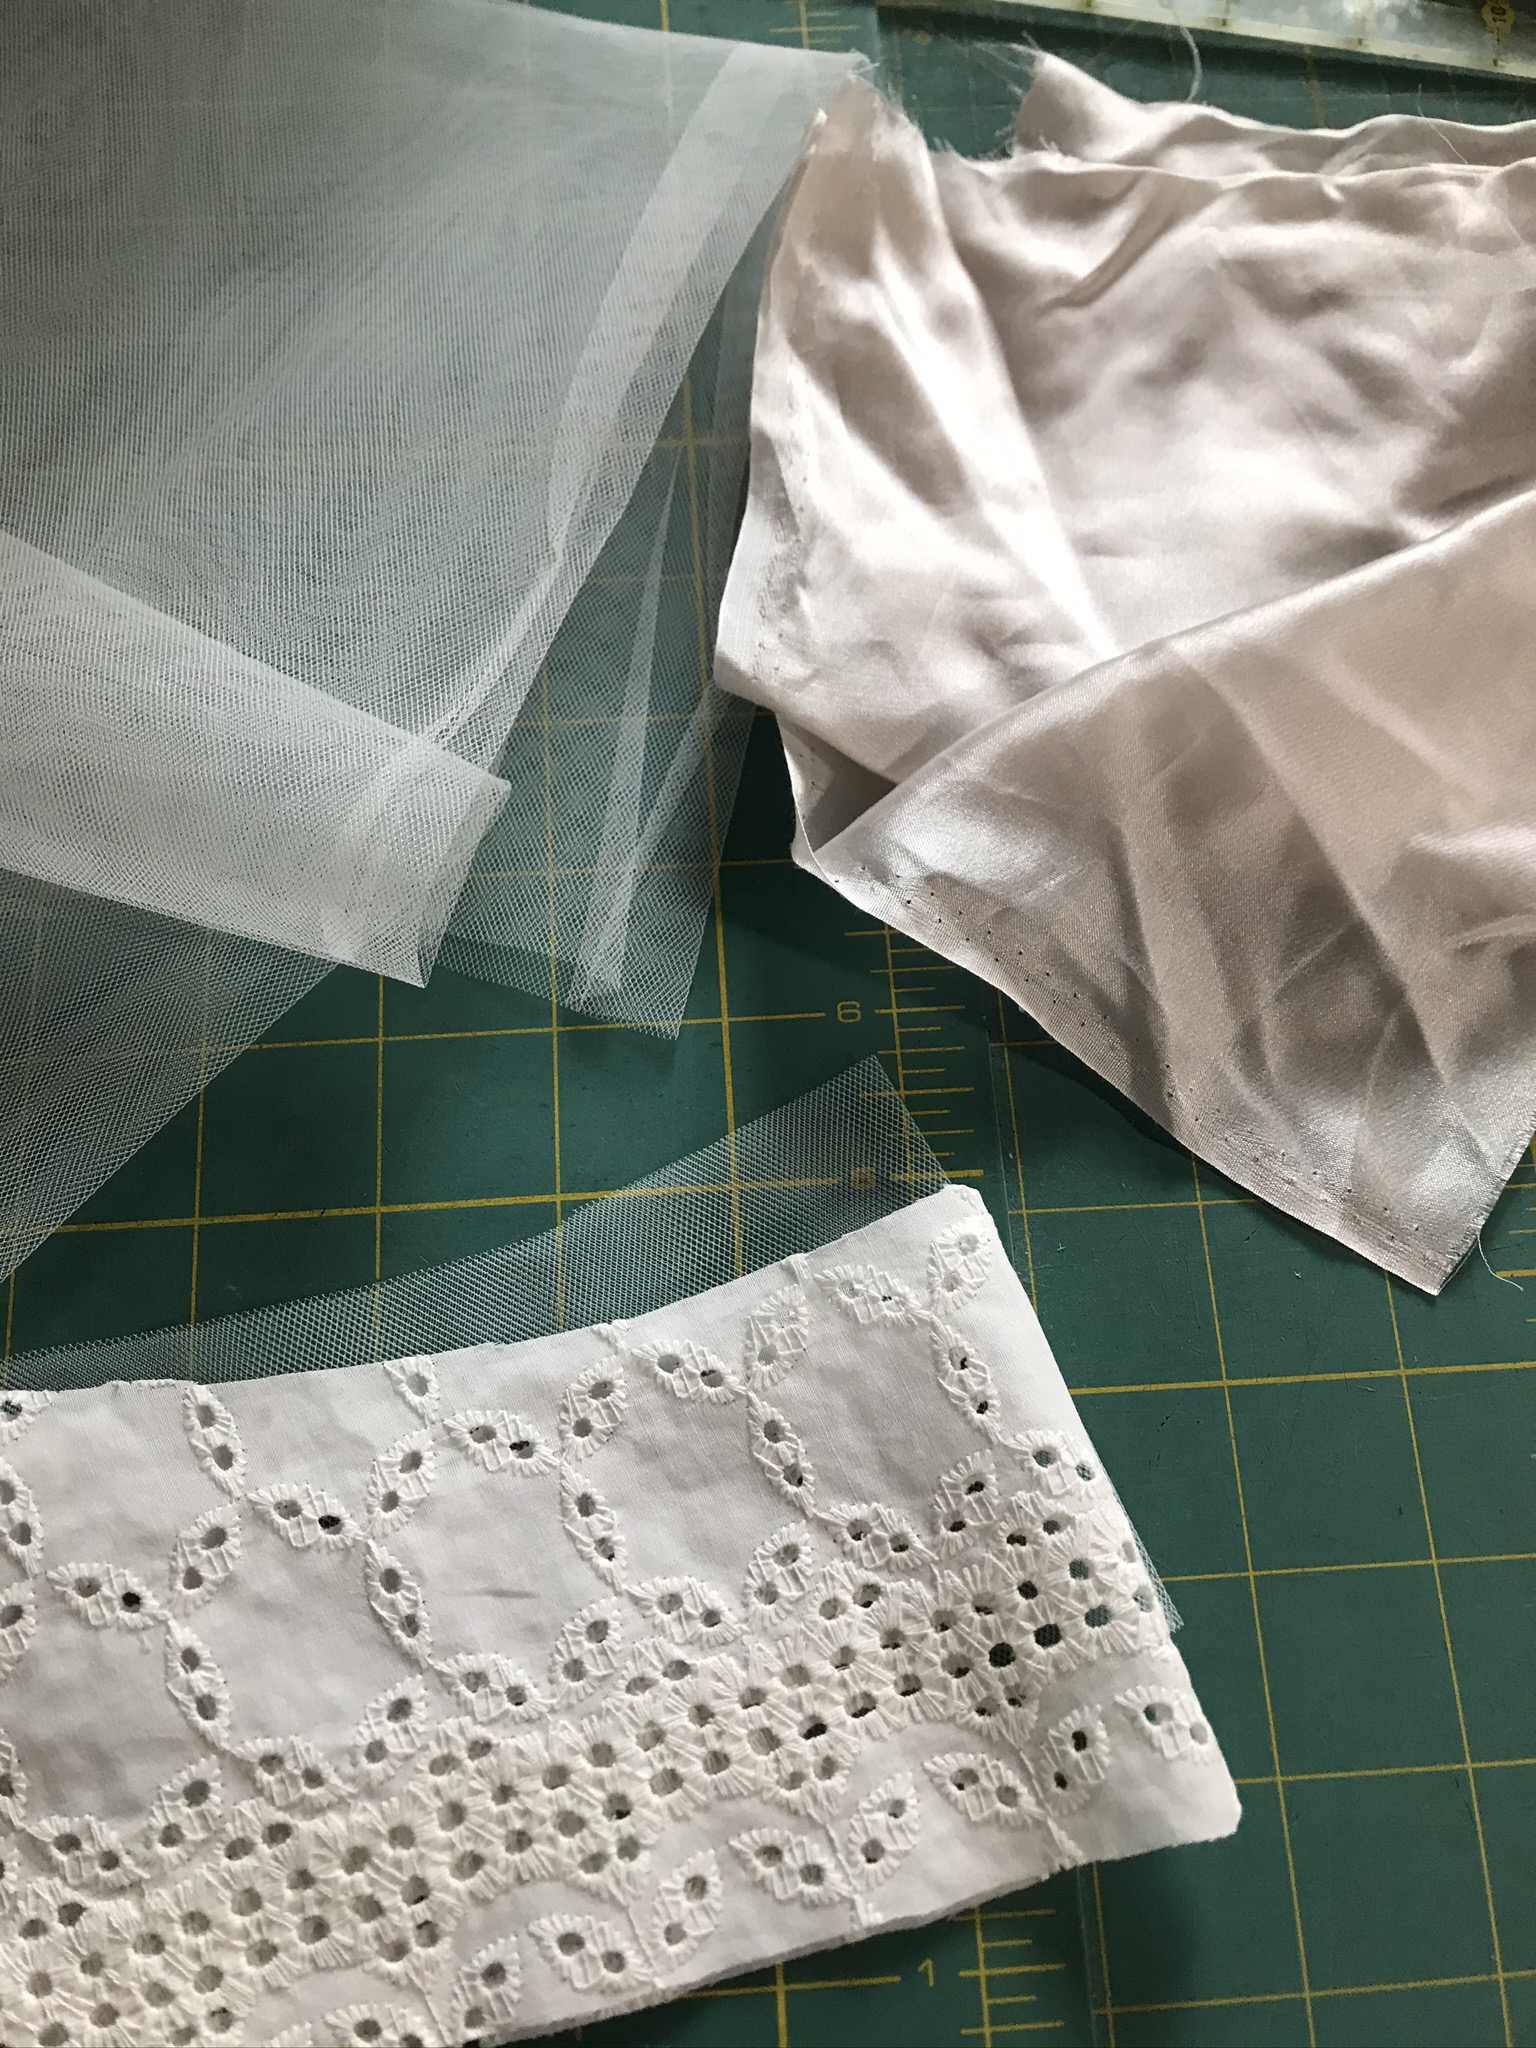
There were still a few details to finish before I could wear the gown! I used a bit of beige silk, cut on the bias, to bind the neck edge. This was a typical method of finishing in 1909.

Bodice neck IMG_5624


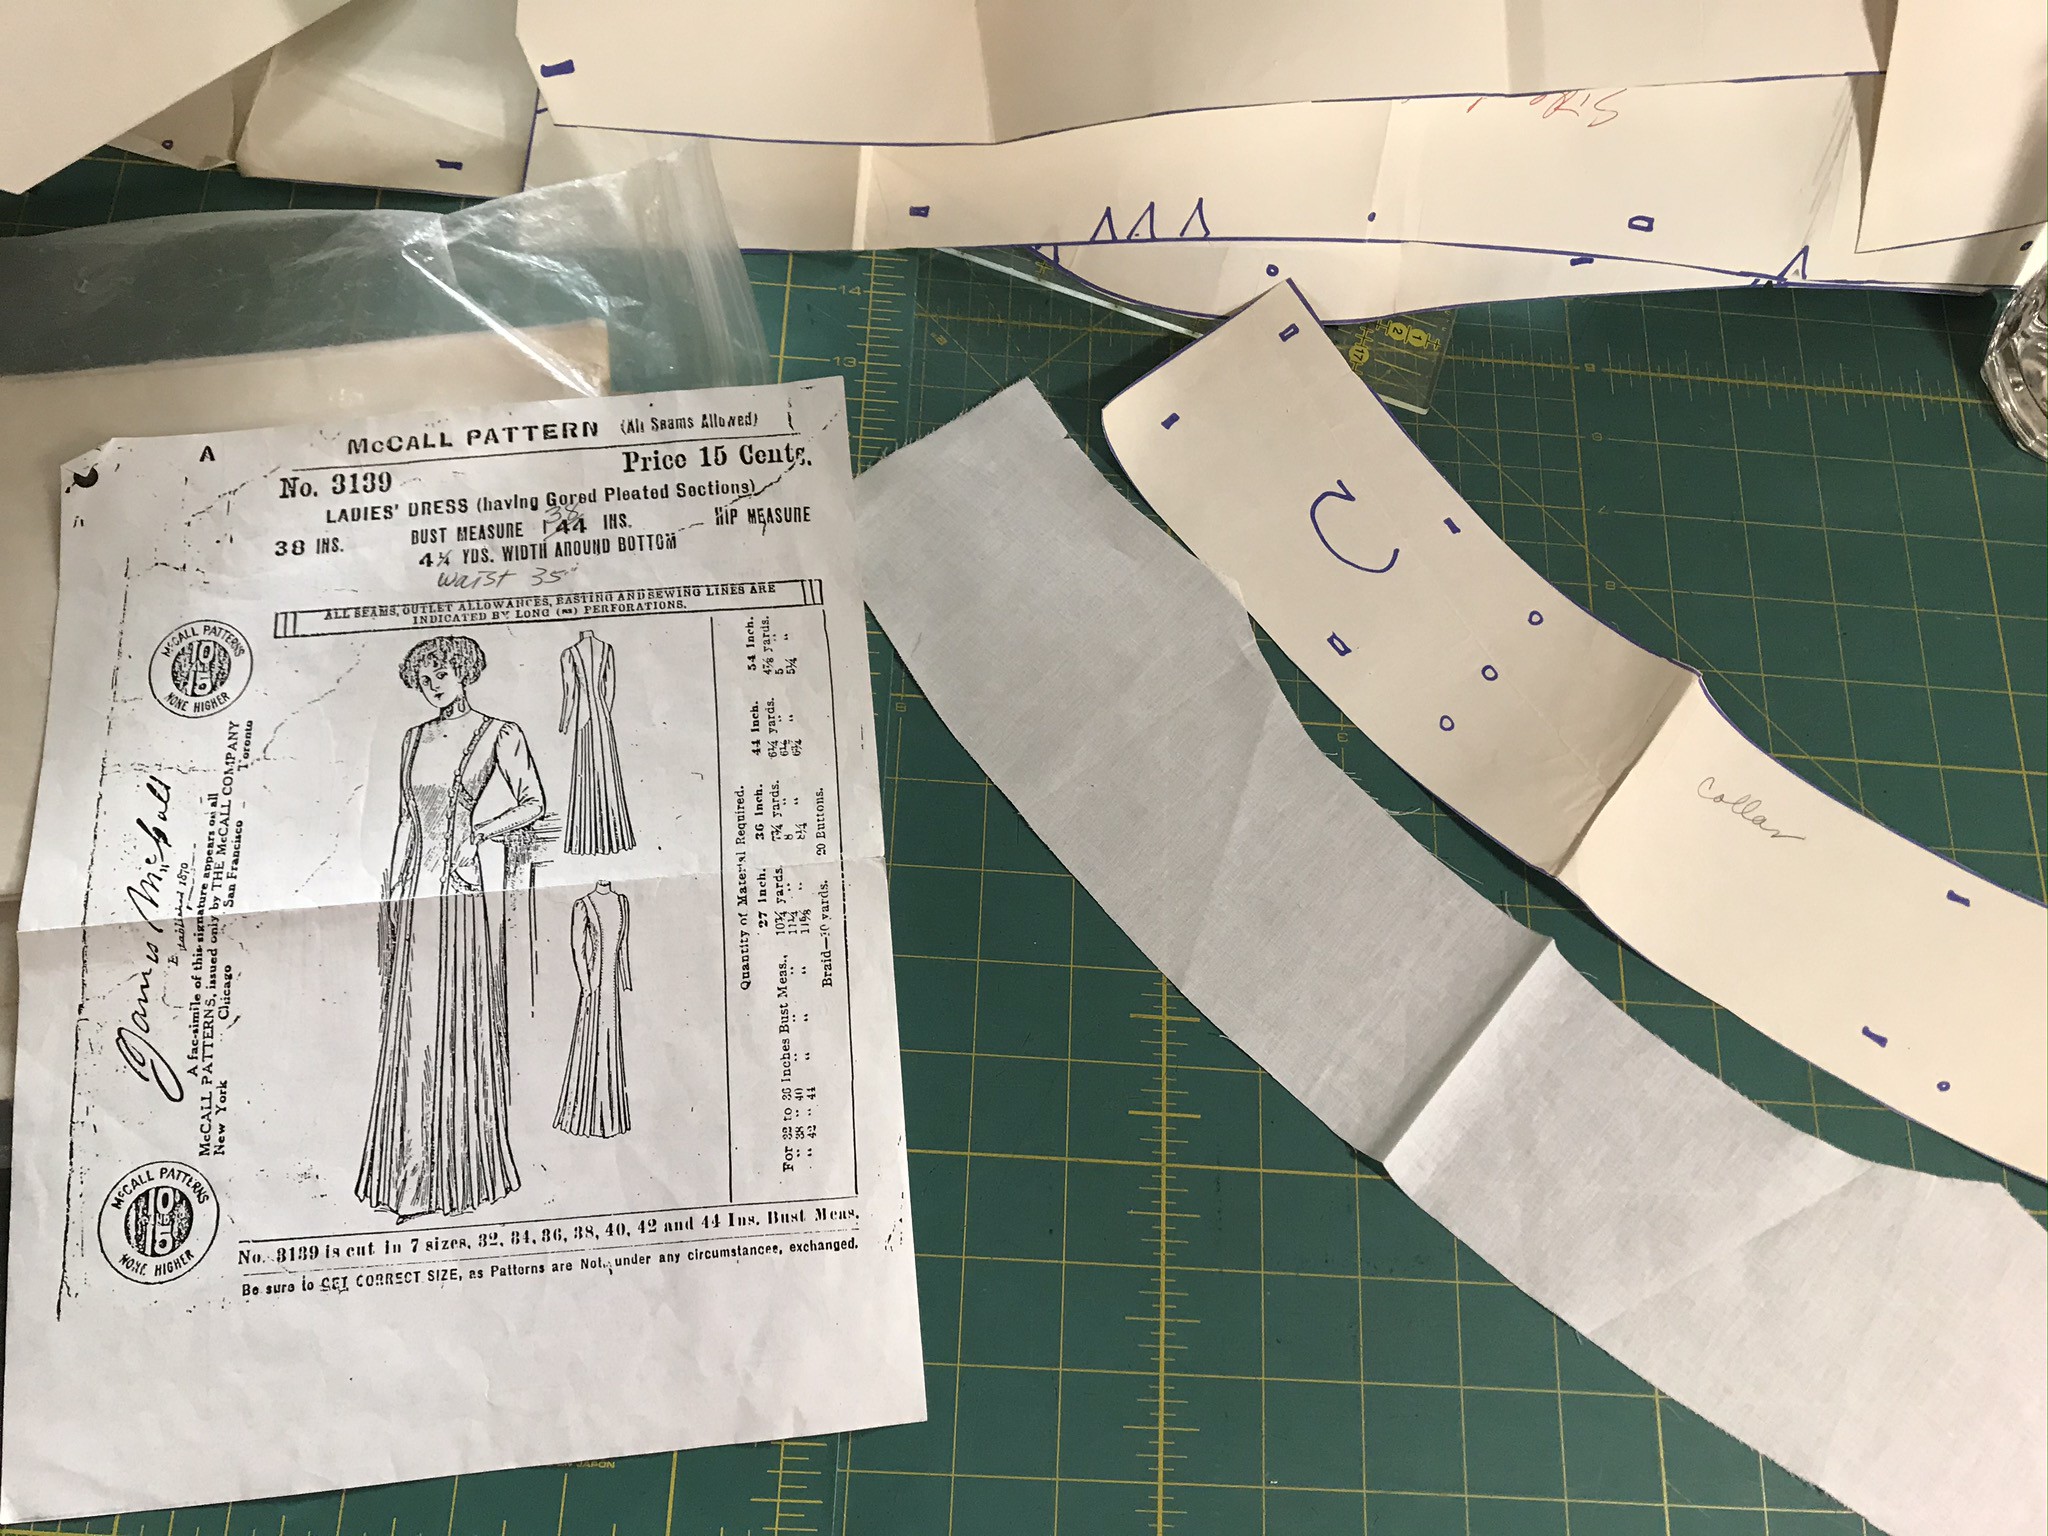
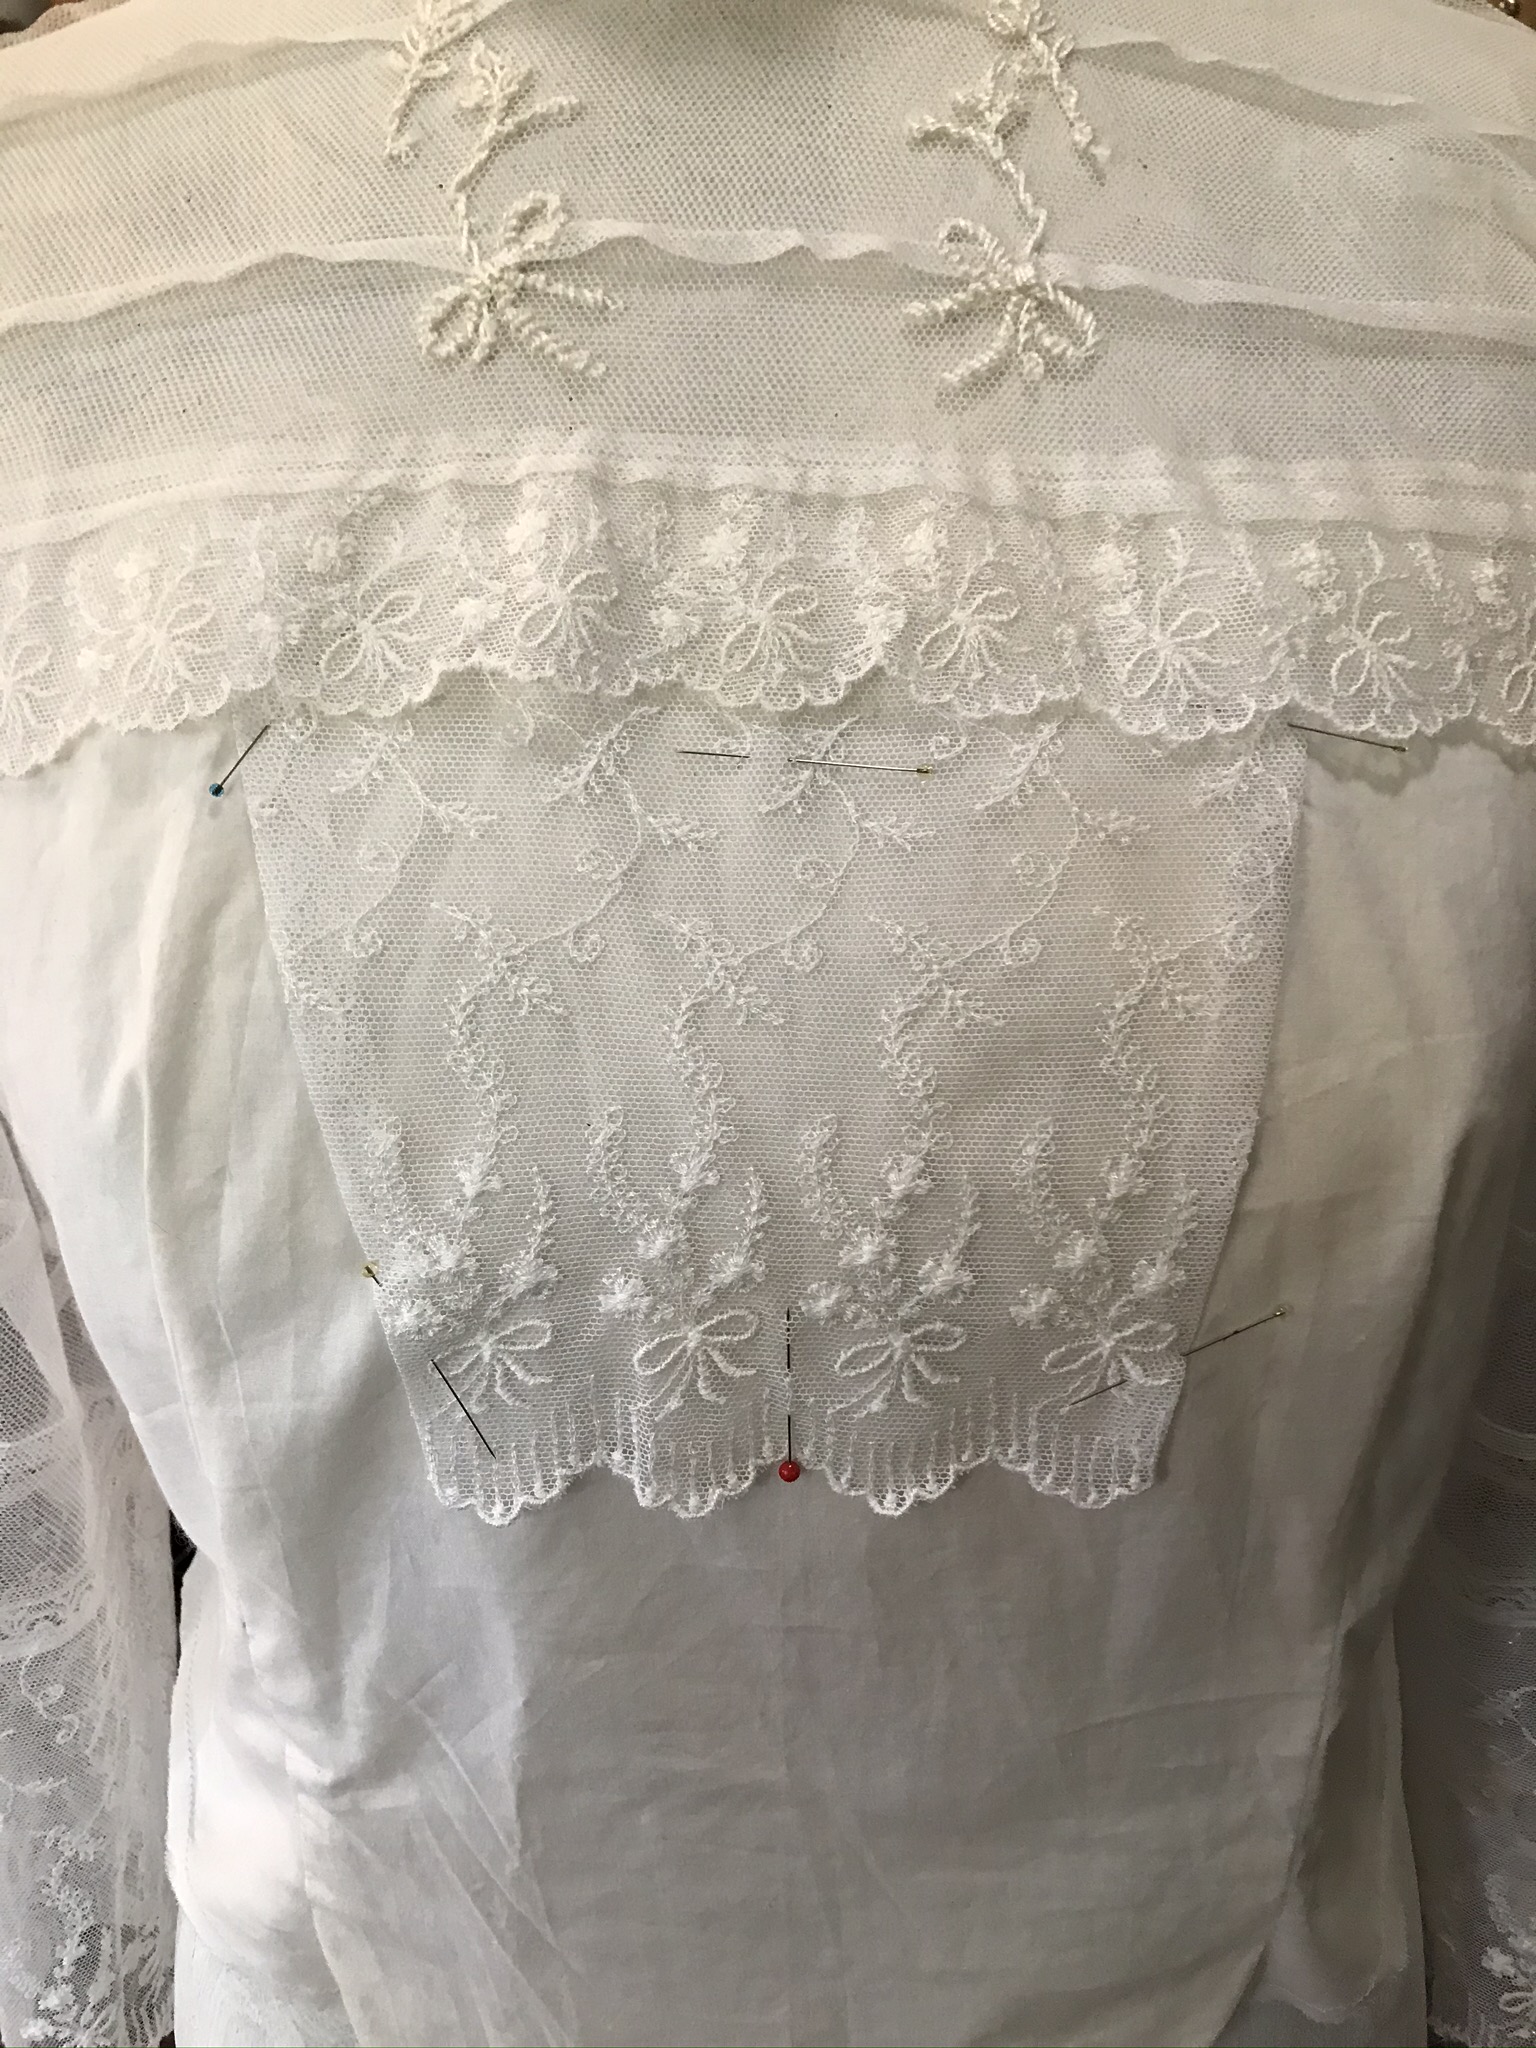
I made the collar from the fashion fabric, lined with the beige silk and interlined with a piece of tulle. I created small channels inside the silk where I inserted modern, clear collar stays. (It’s so unfashionable when your collar won’t stay up!)

Collar IMG_5601

I attached the collar to the bodice with hand stitches along the inside, with the closure at the center back.

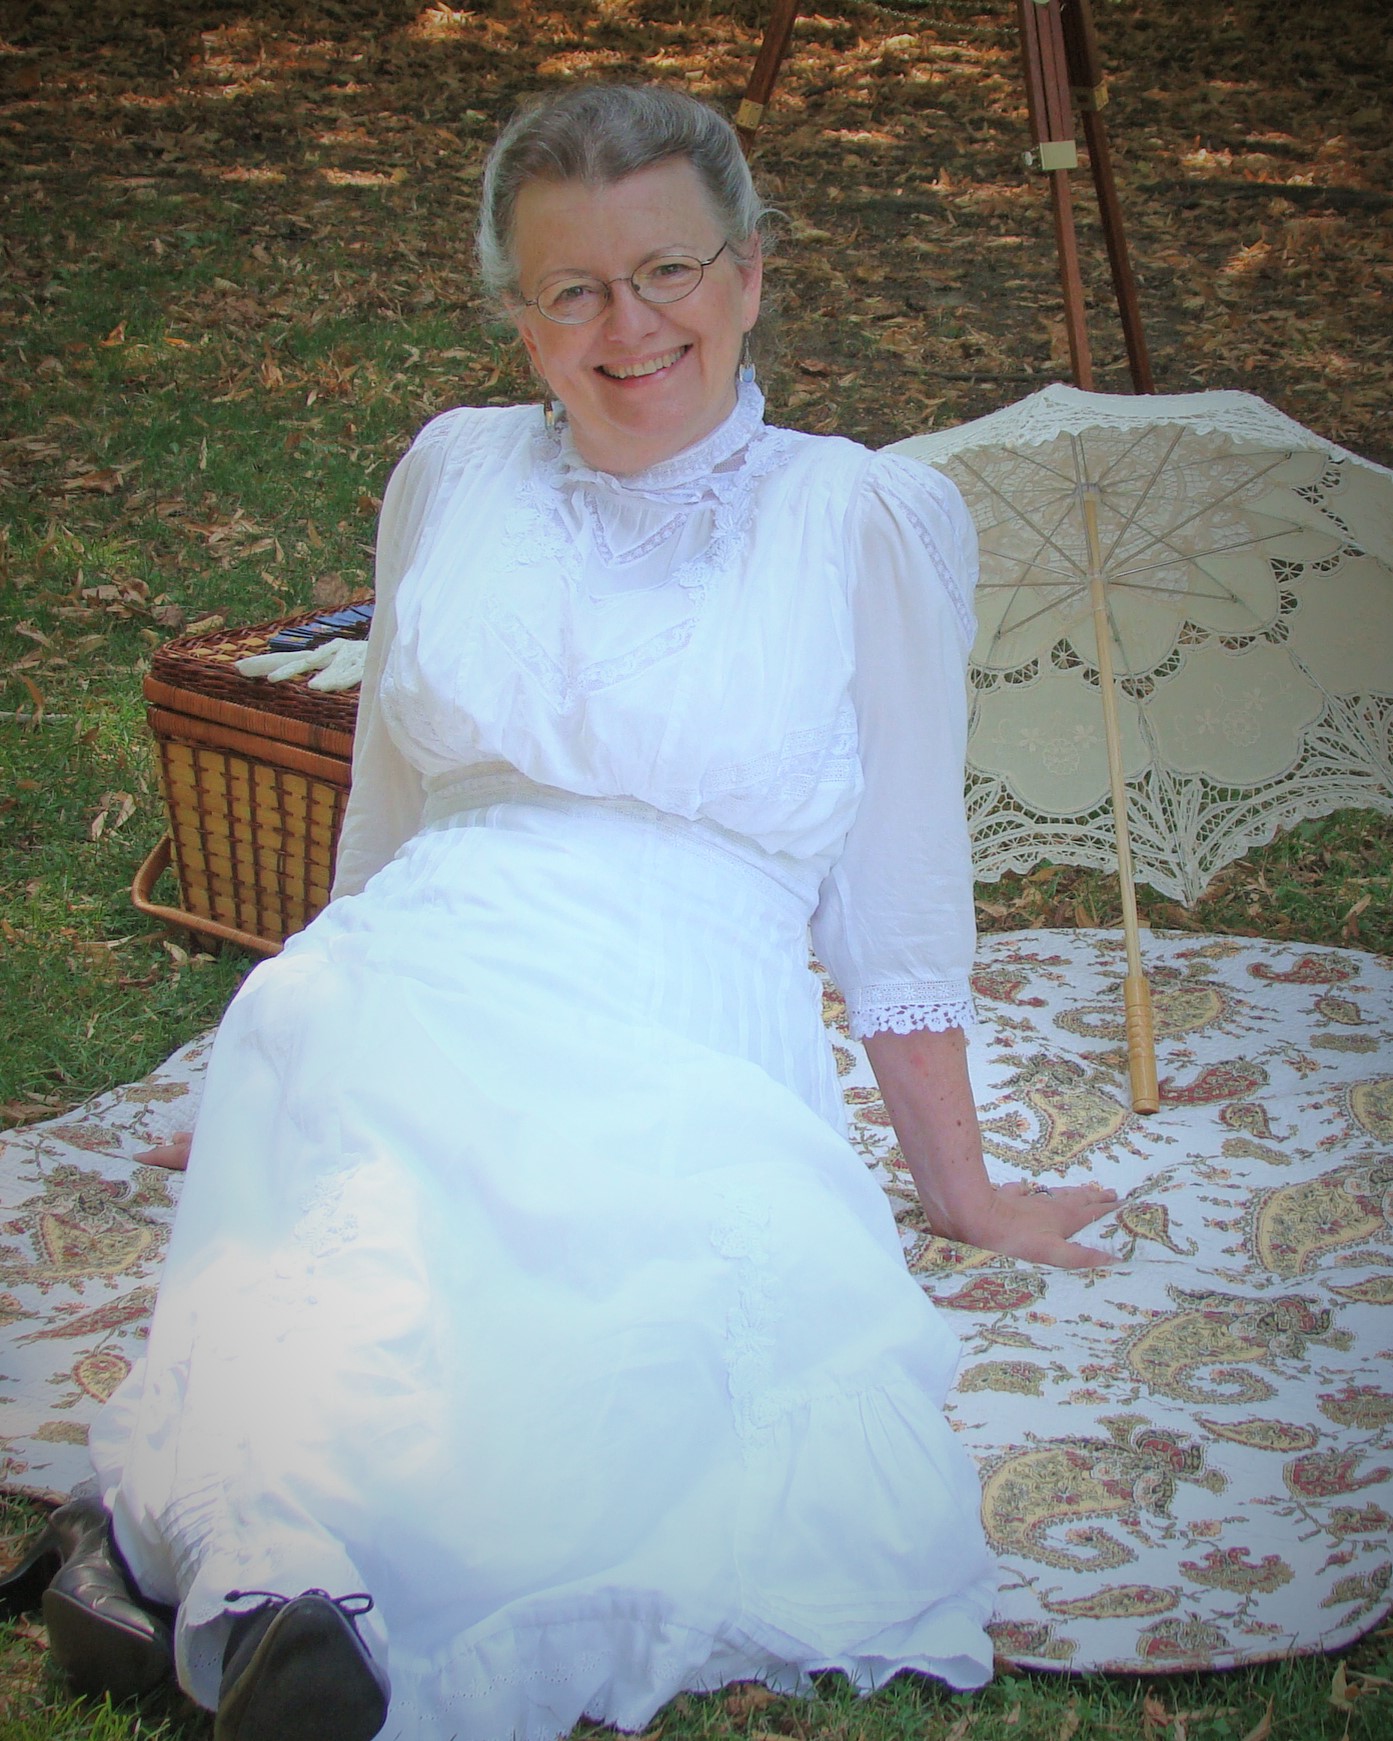
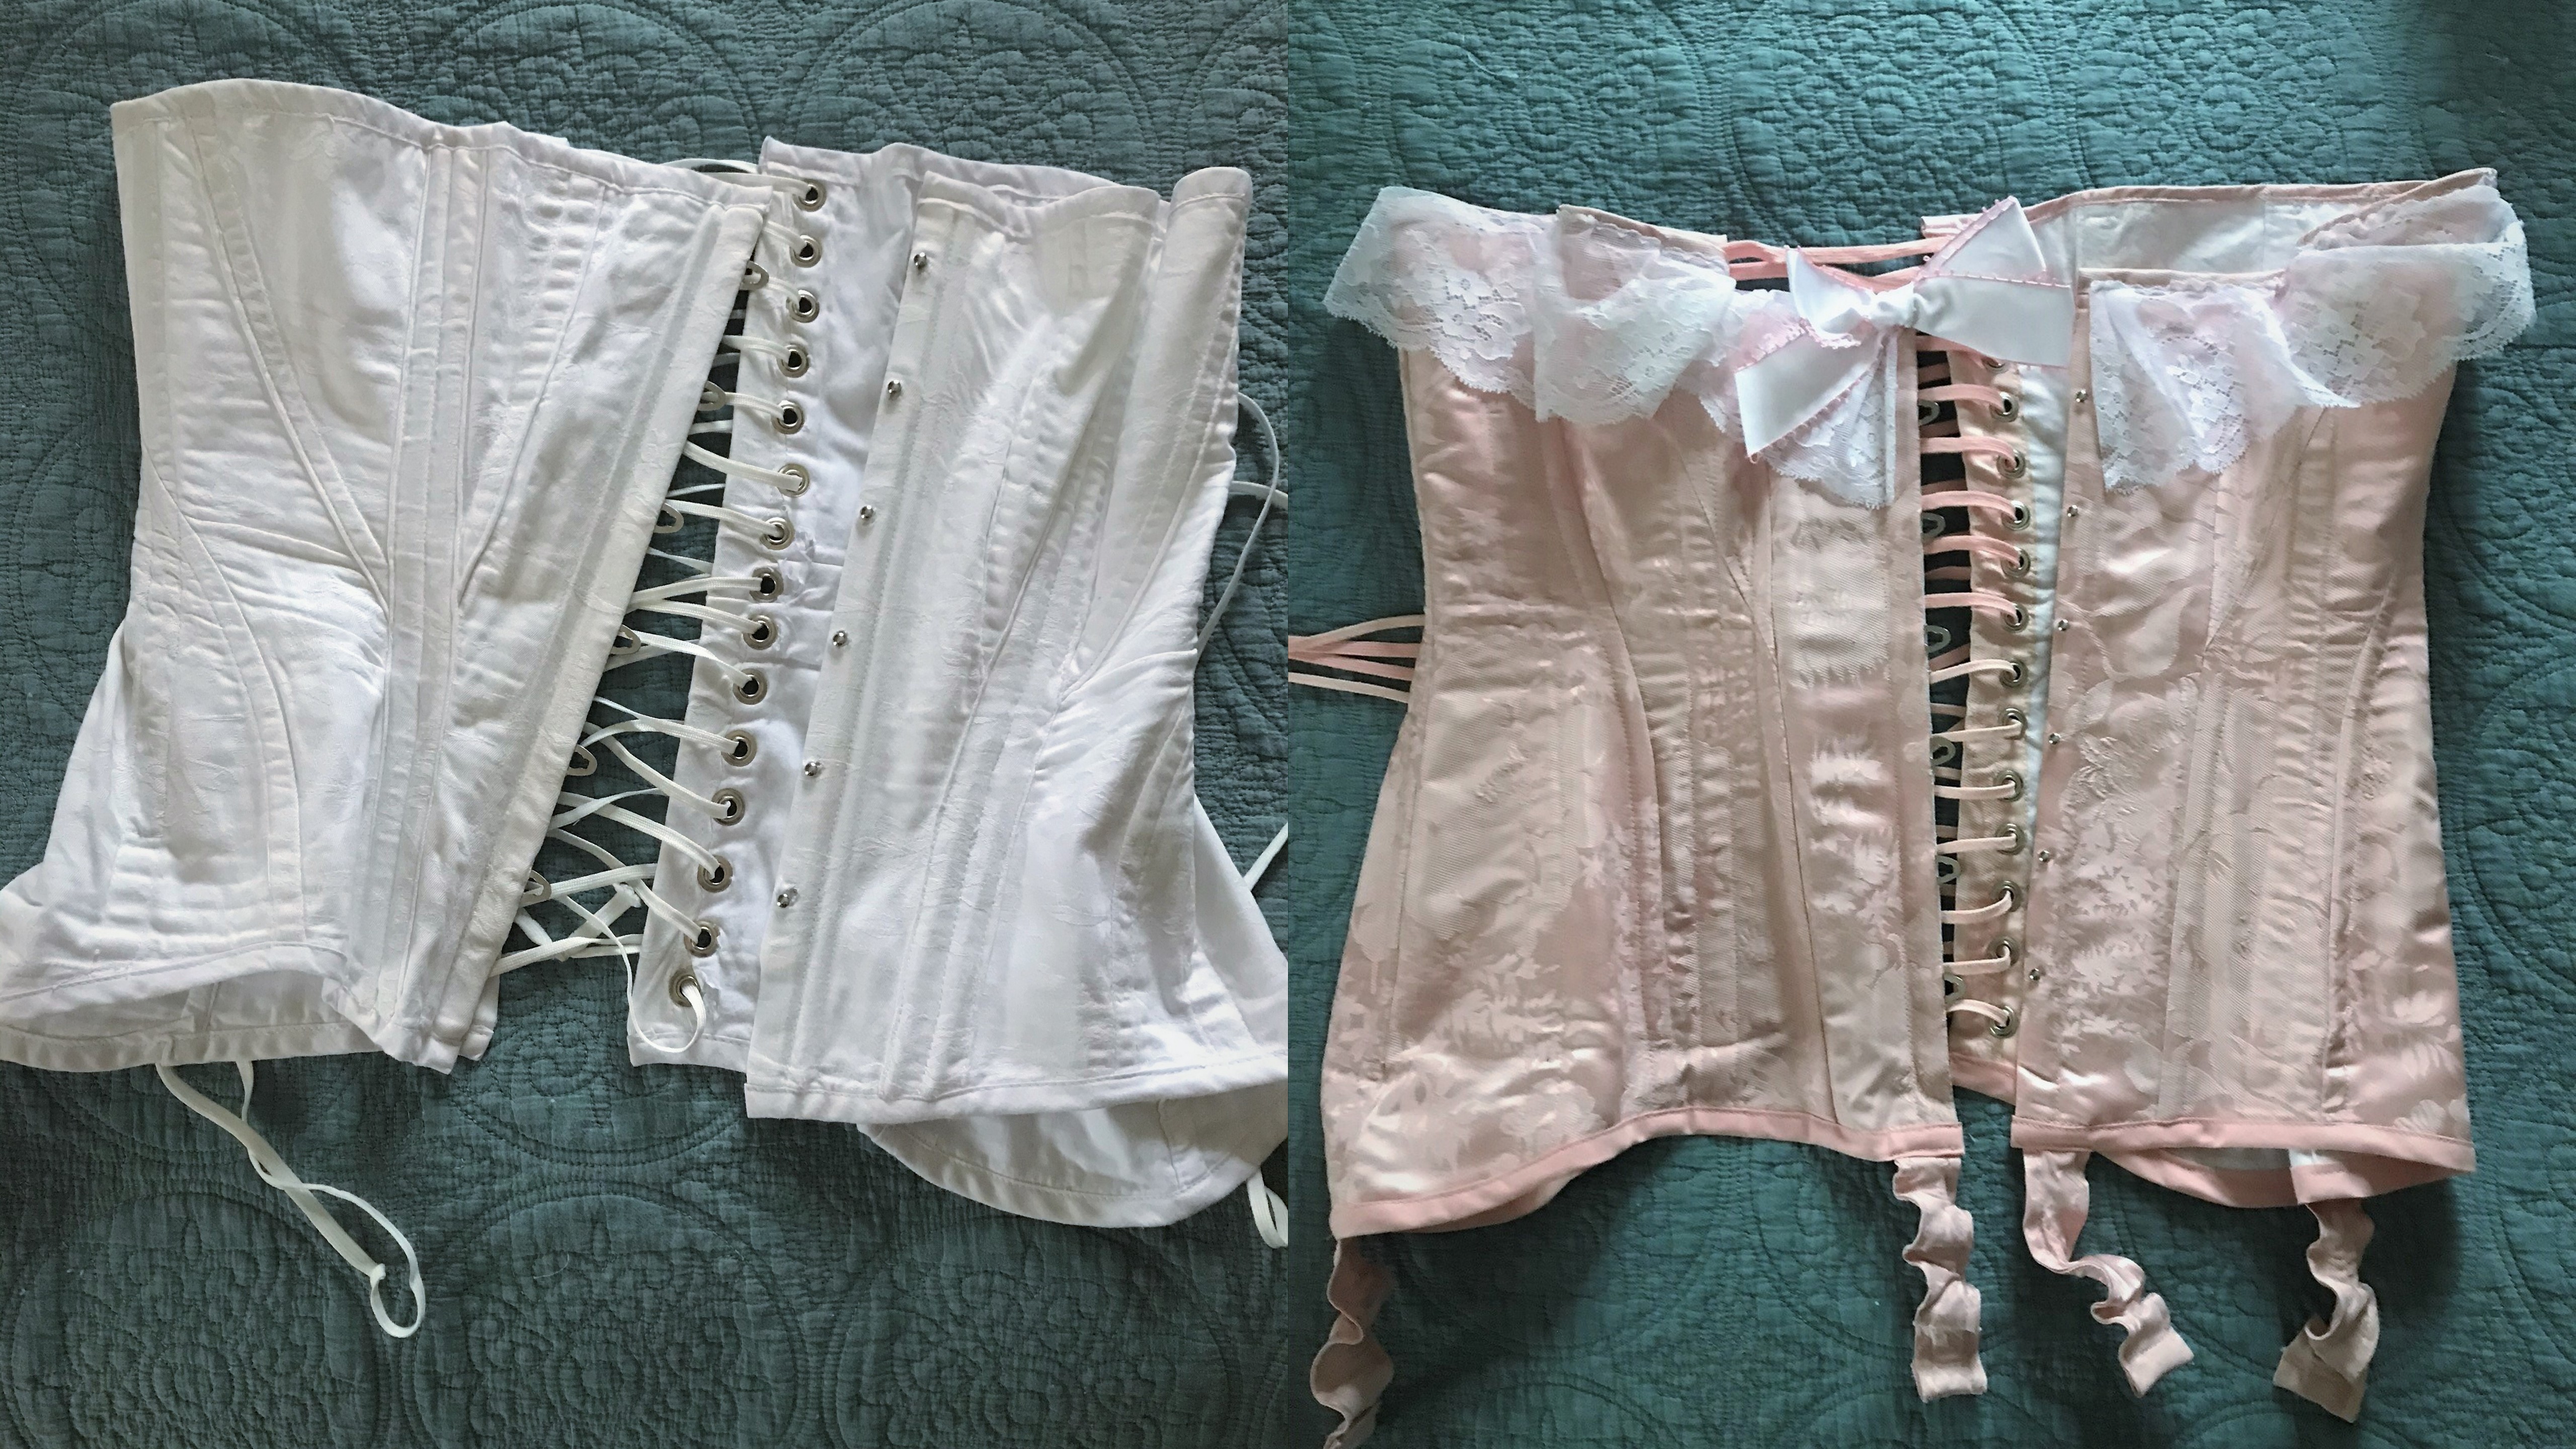
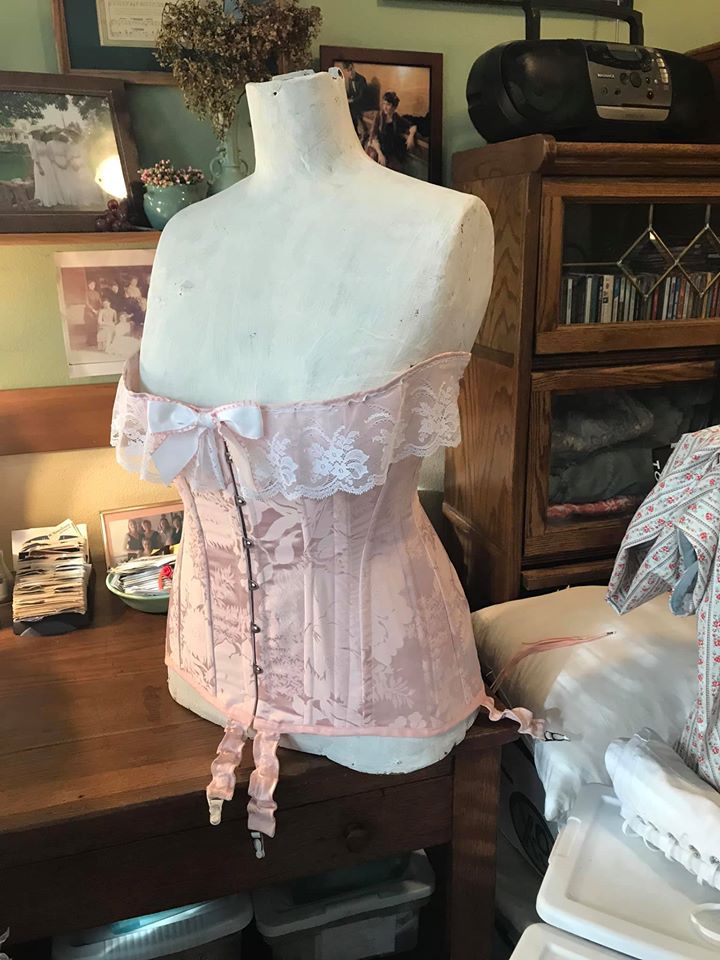
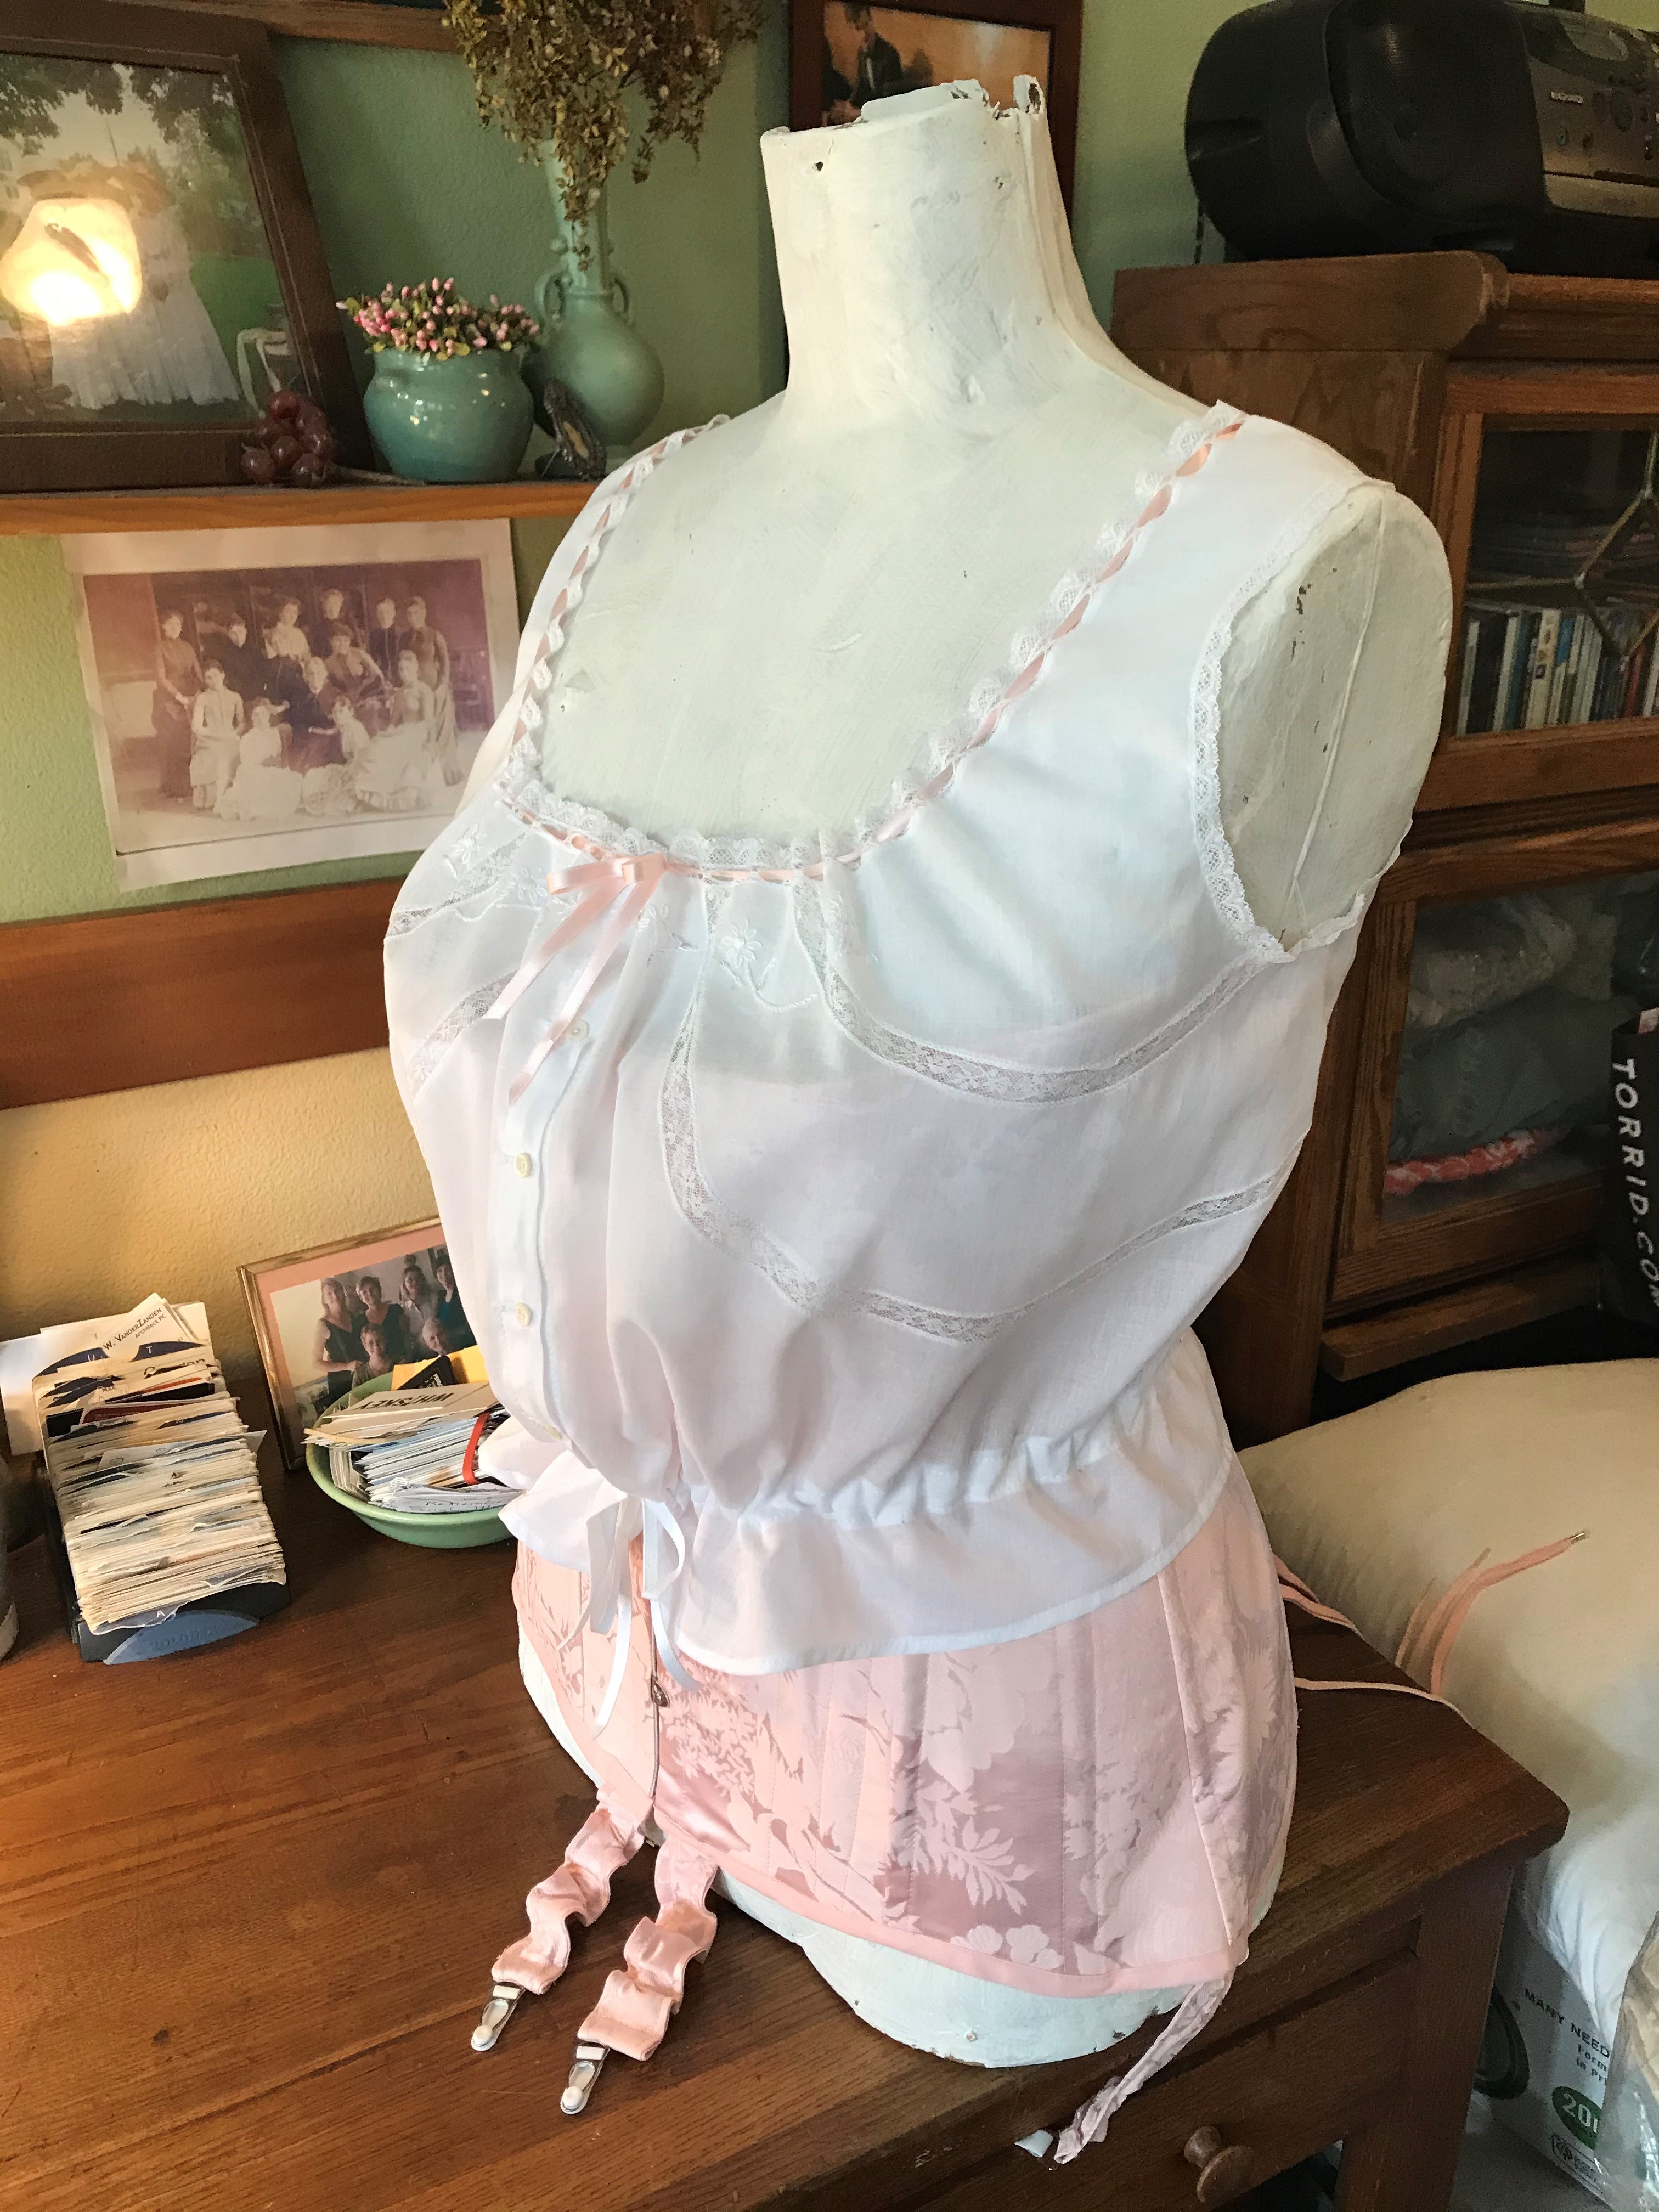
I saved the last few bits of sewing for Saturday morning. When I got dressed, I went ahead and put on my Edwardian underpinnings, in preparation for the new gown. Finally, after attaching the waistband, sewing on the buttons, and a few other details, the gown was ready!

Wearing the new gown

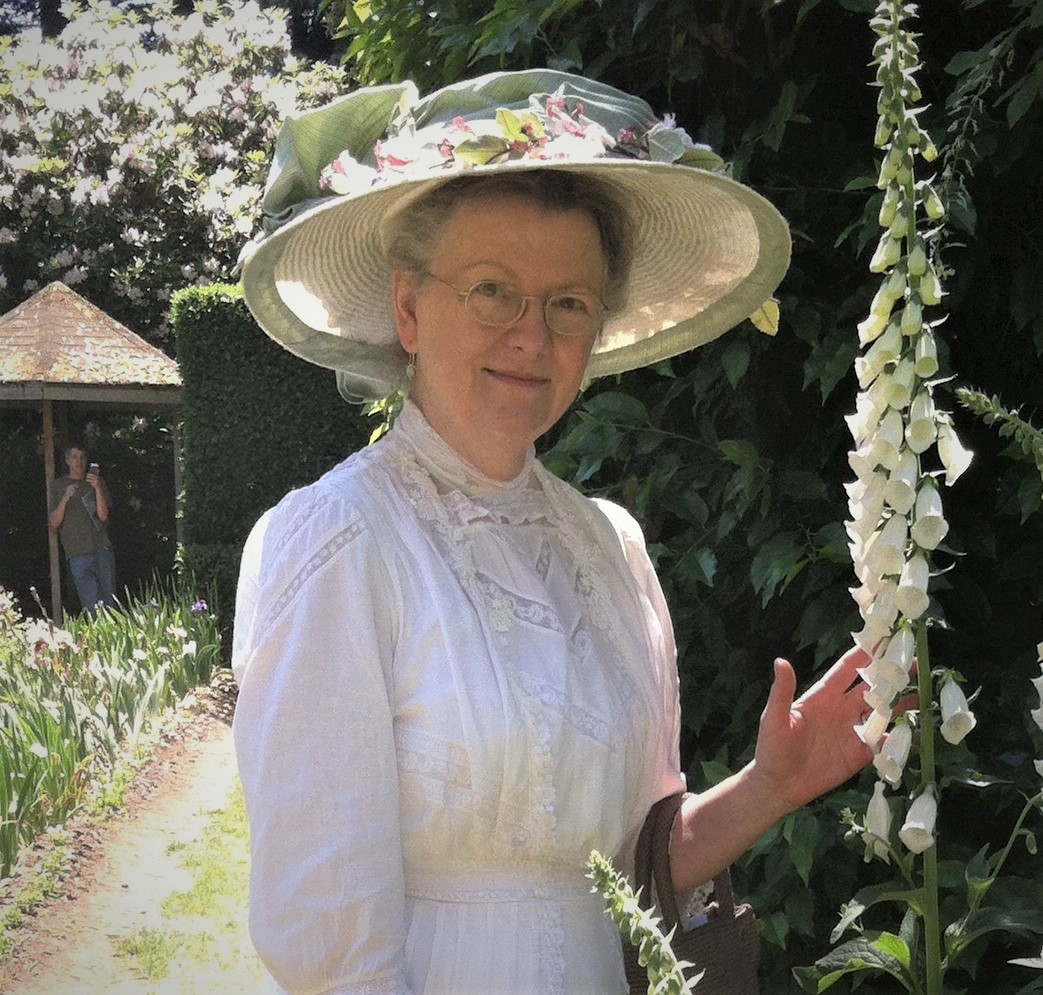
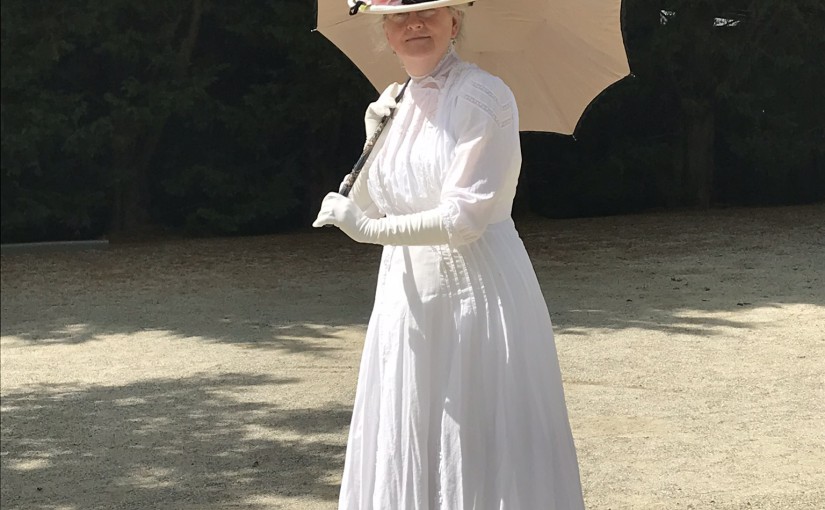
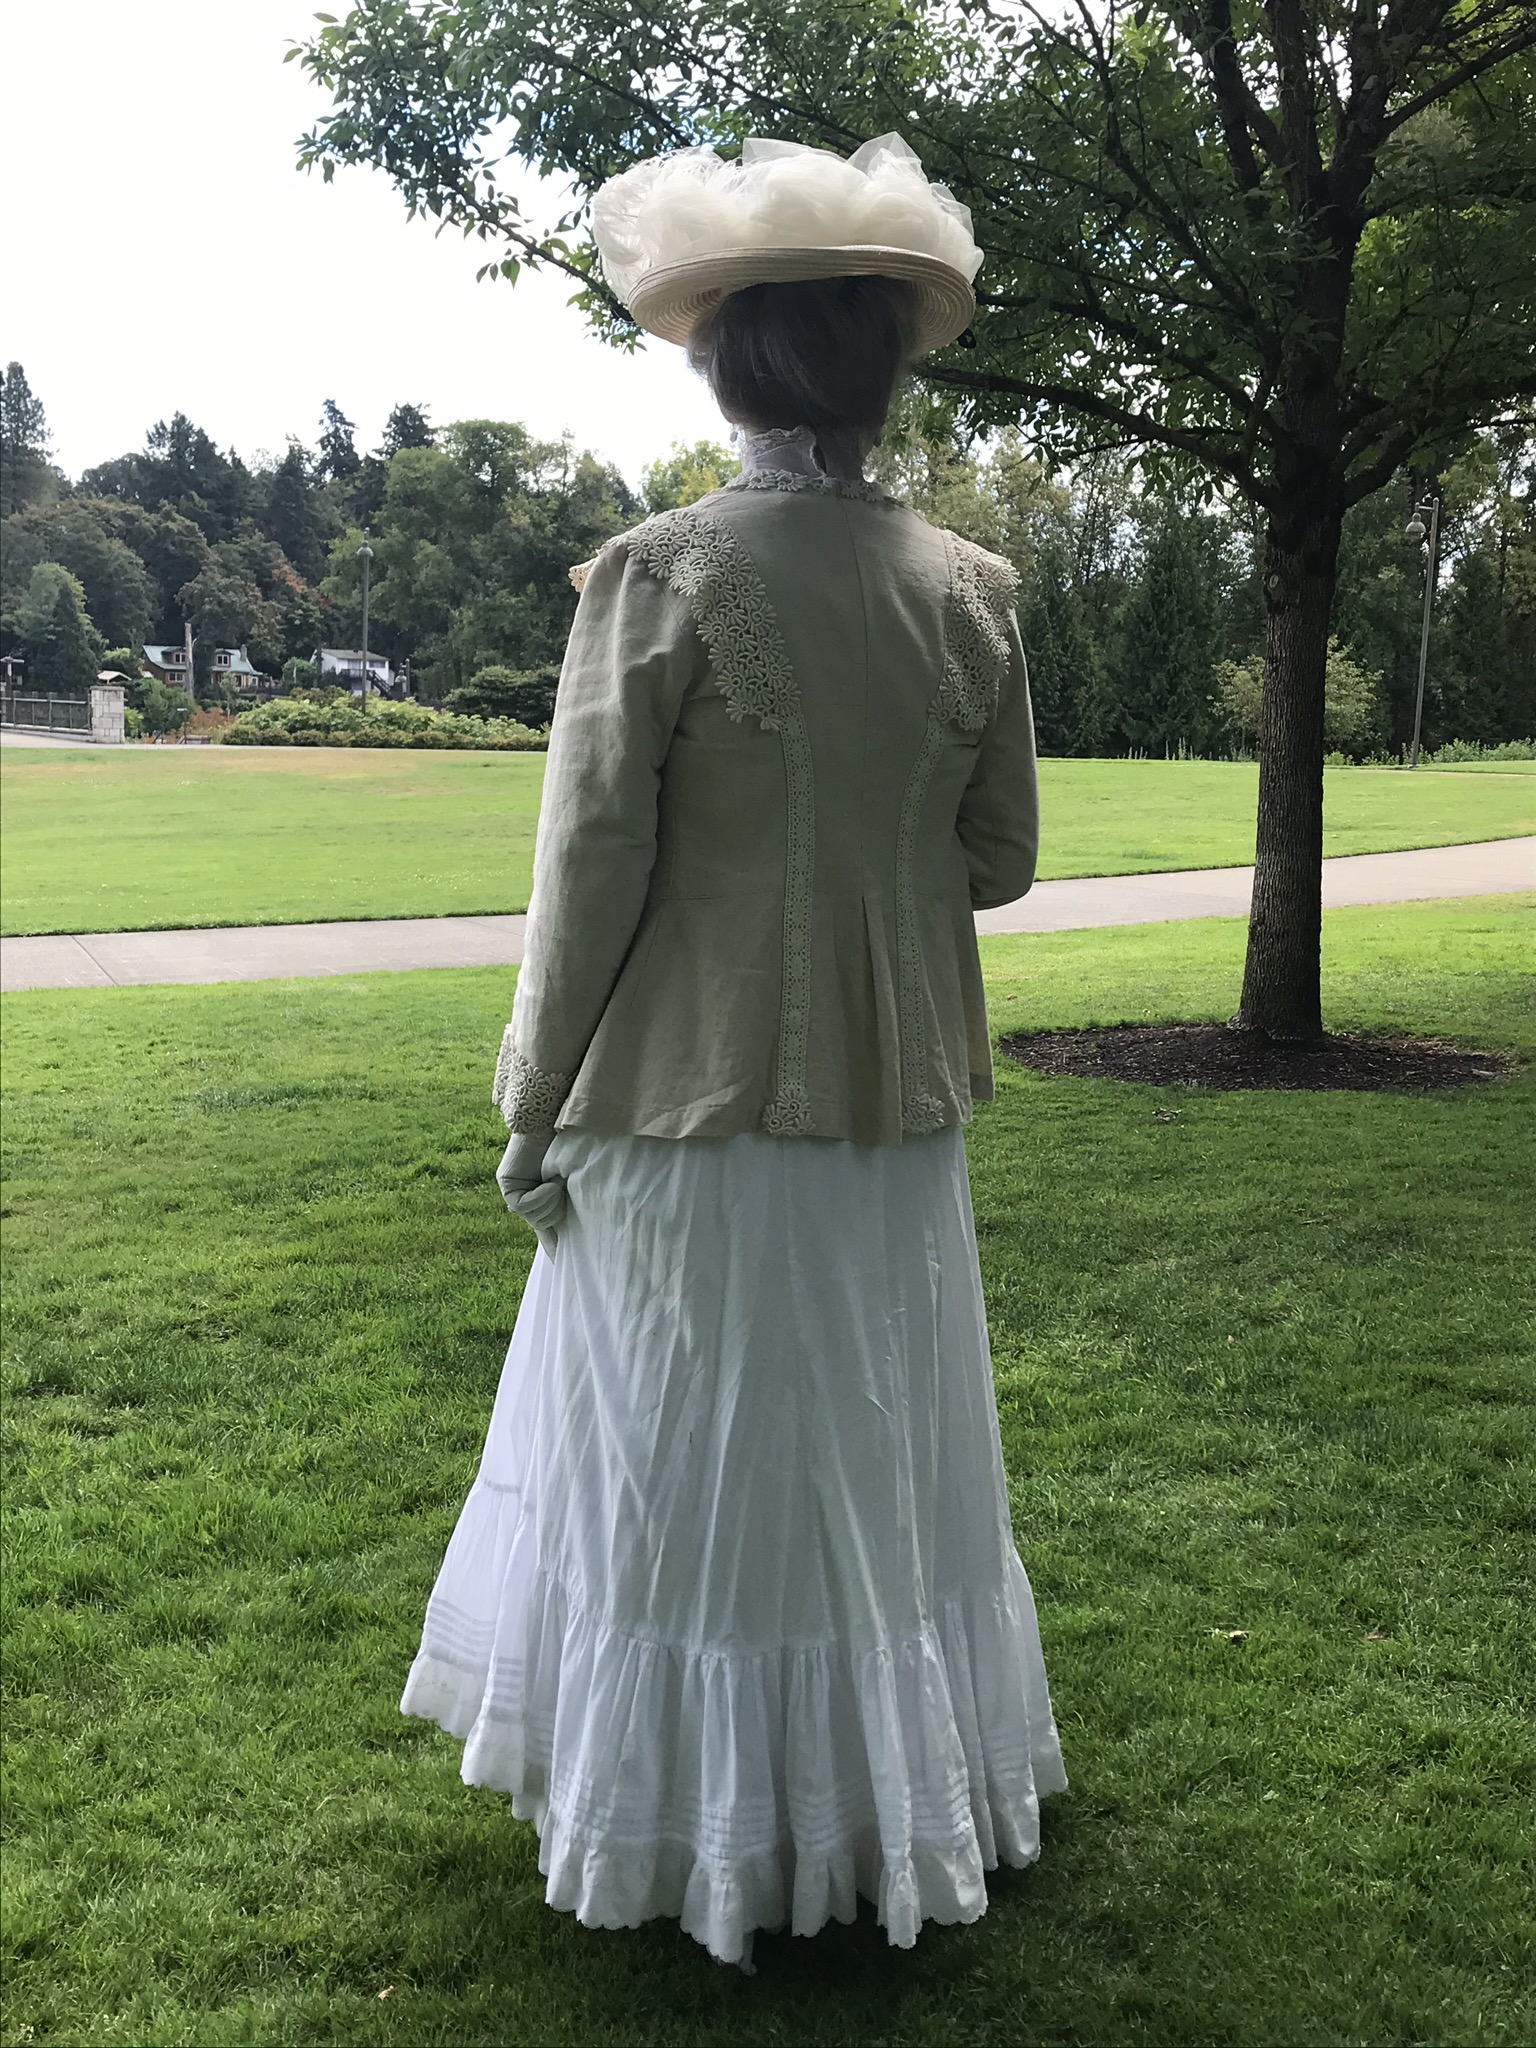
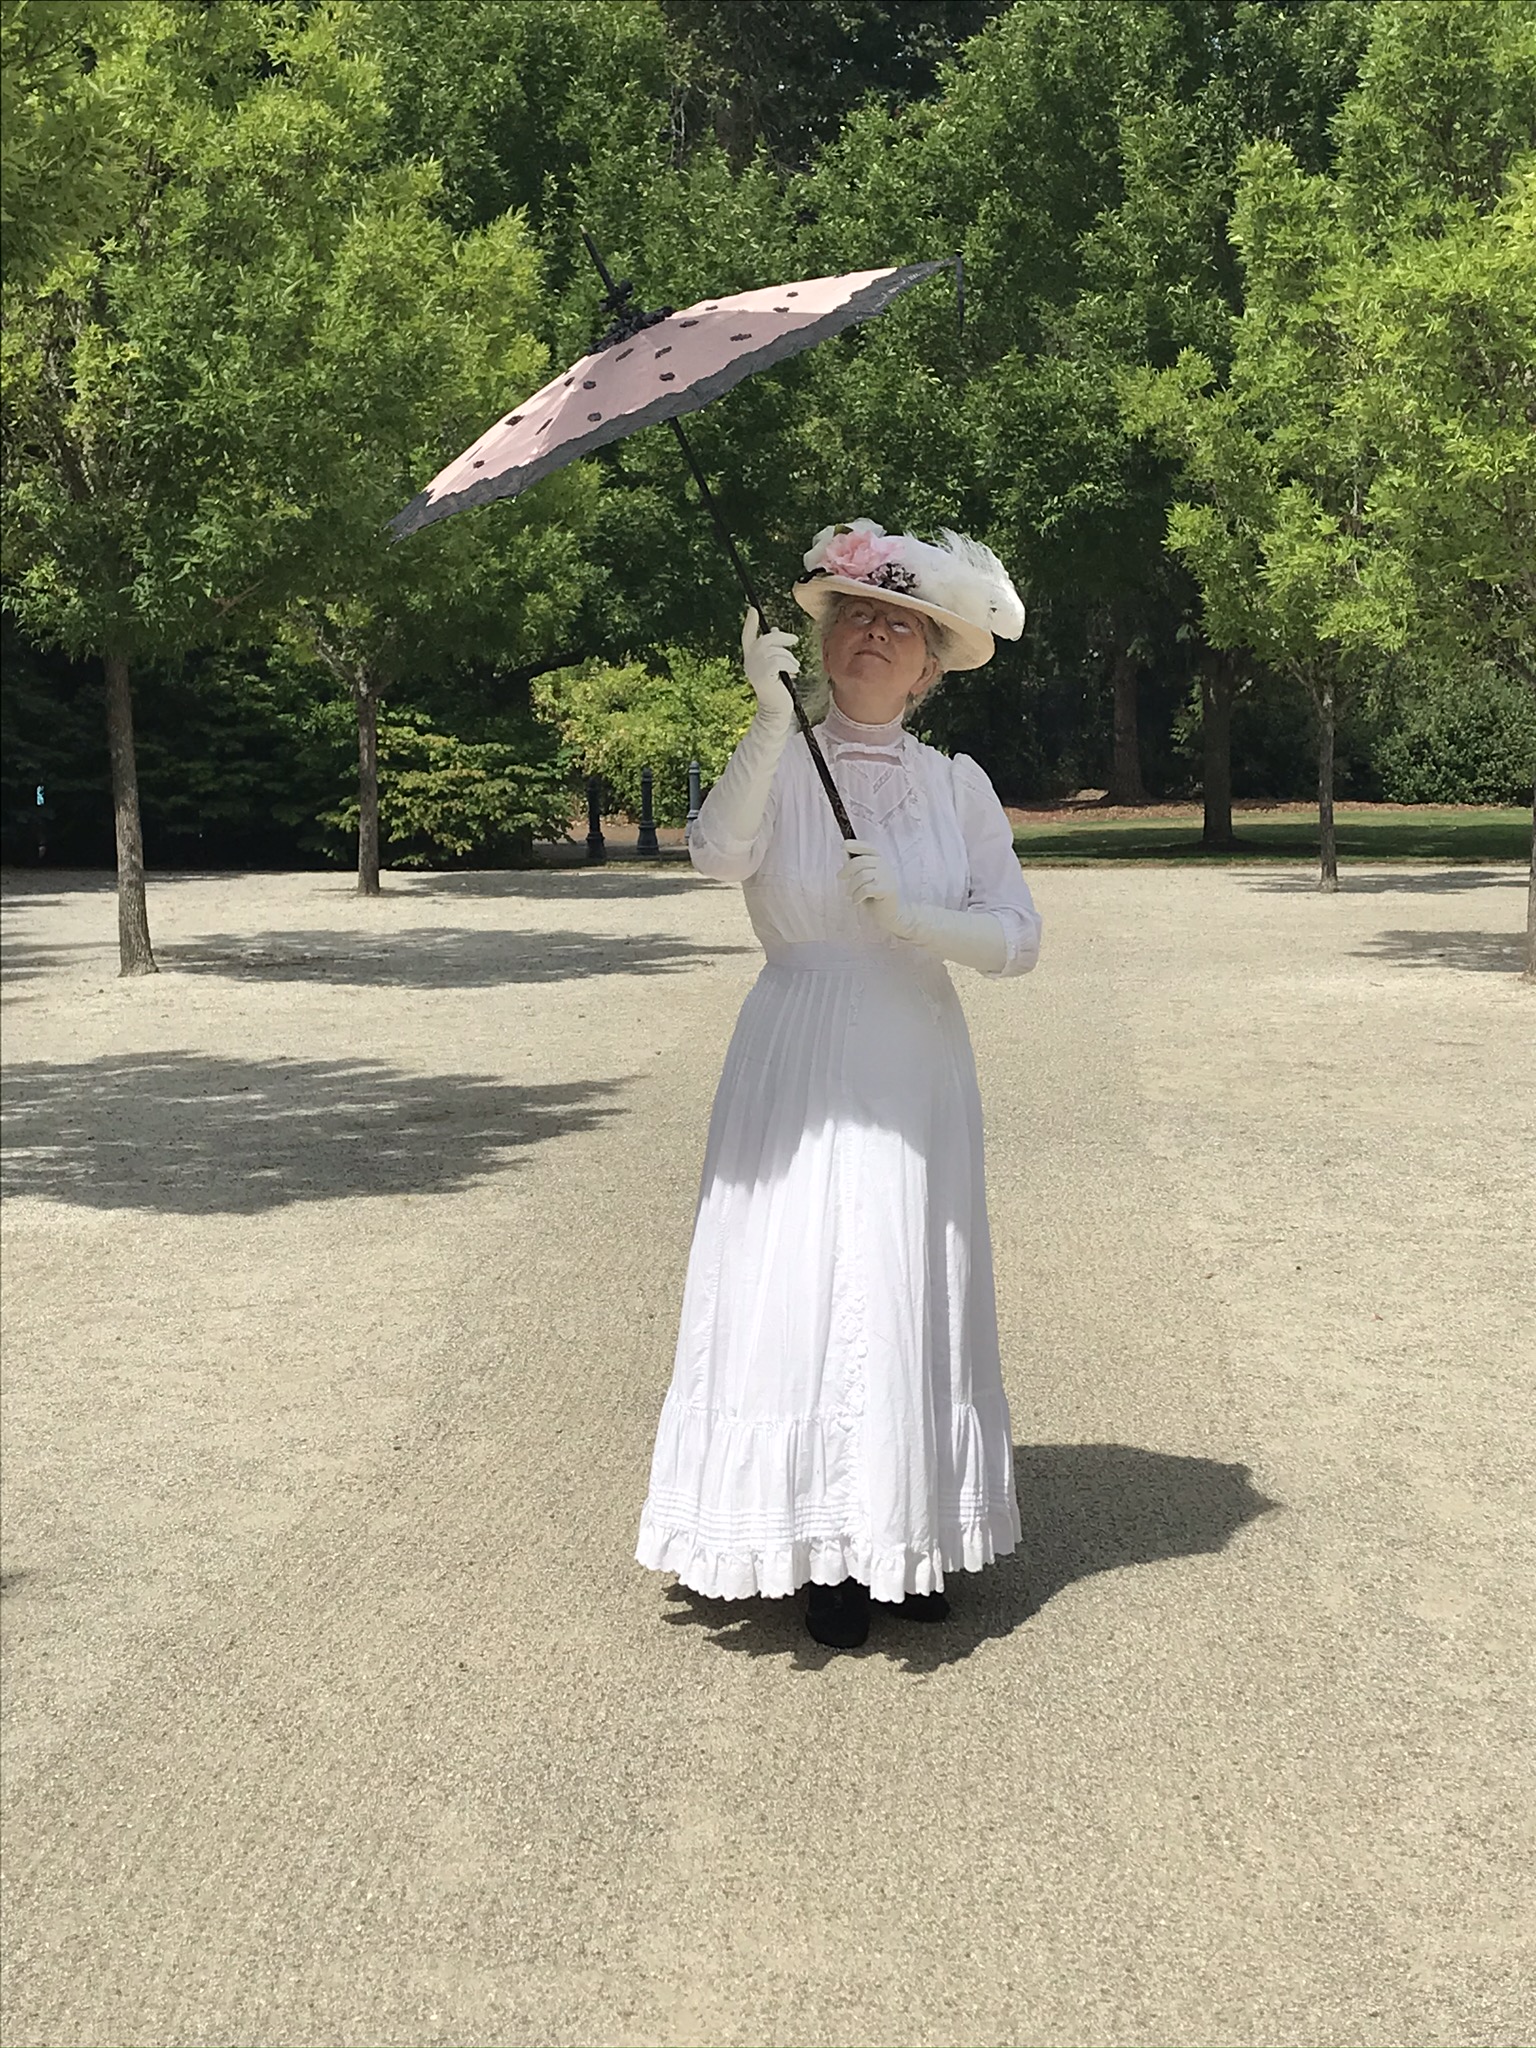
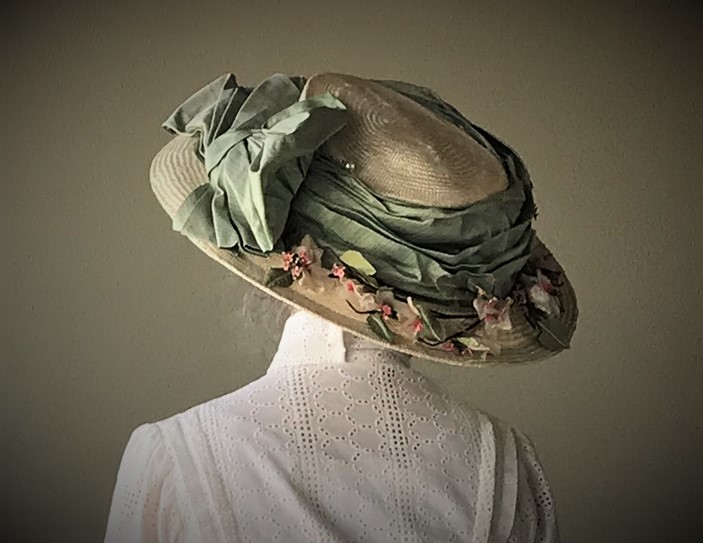
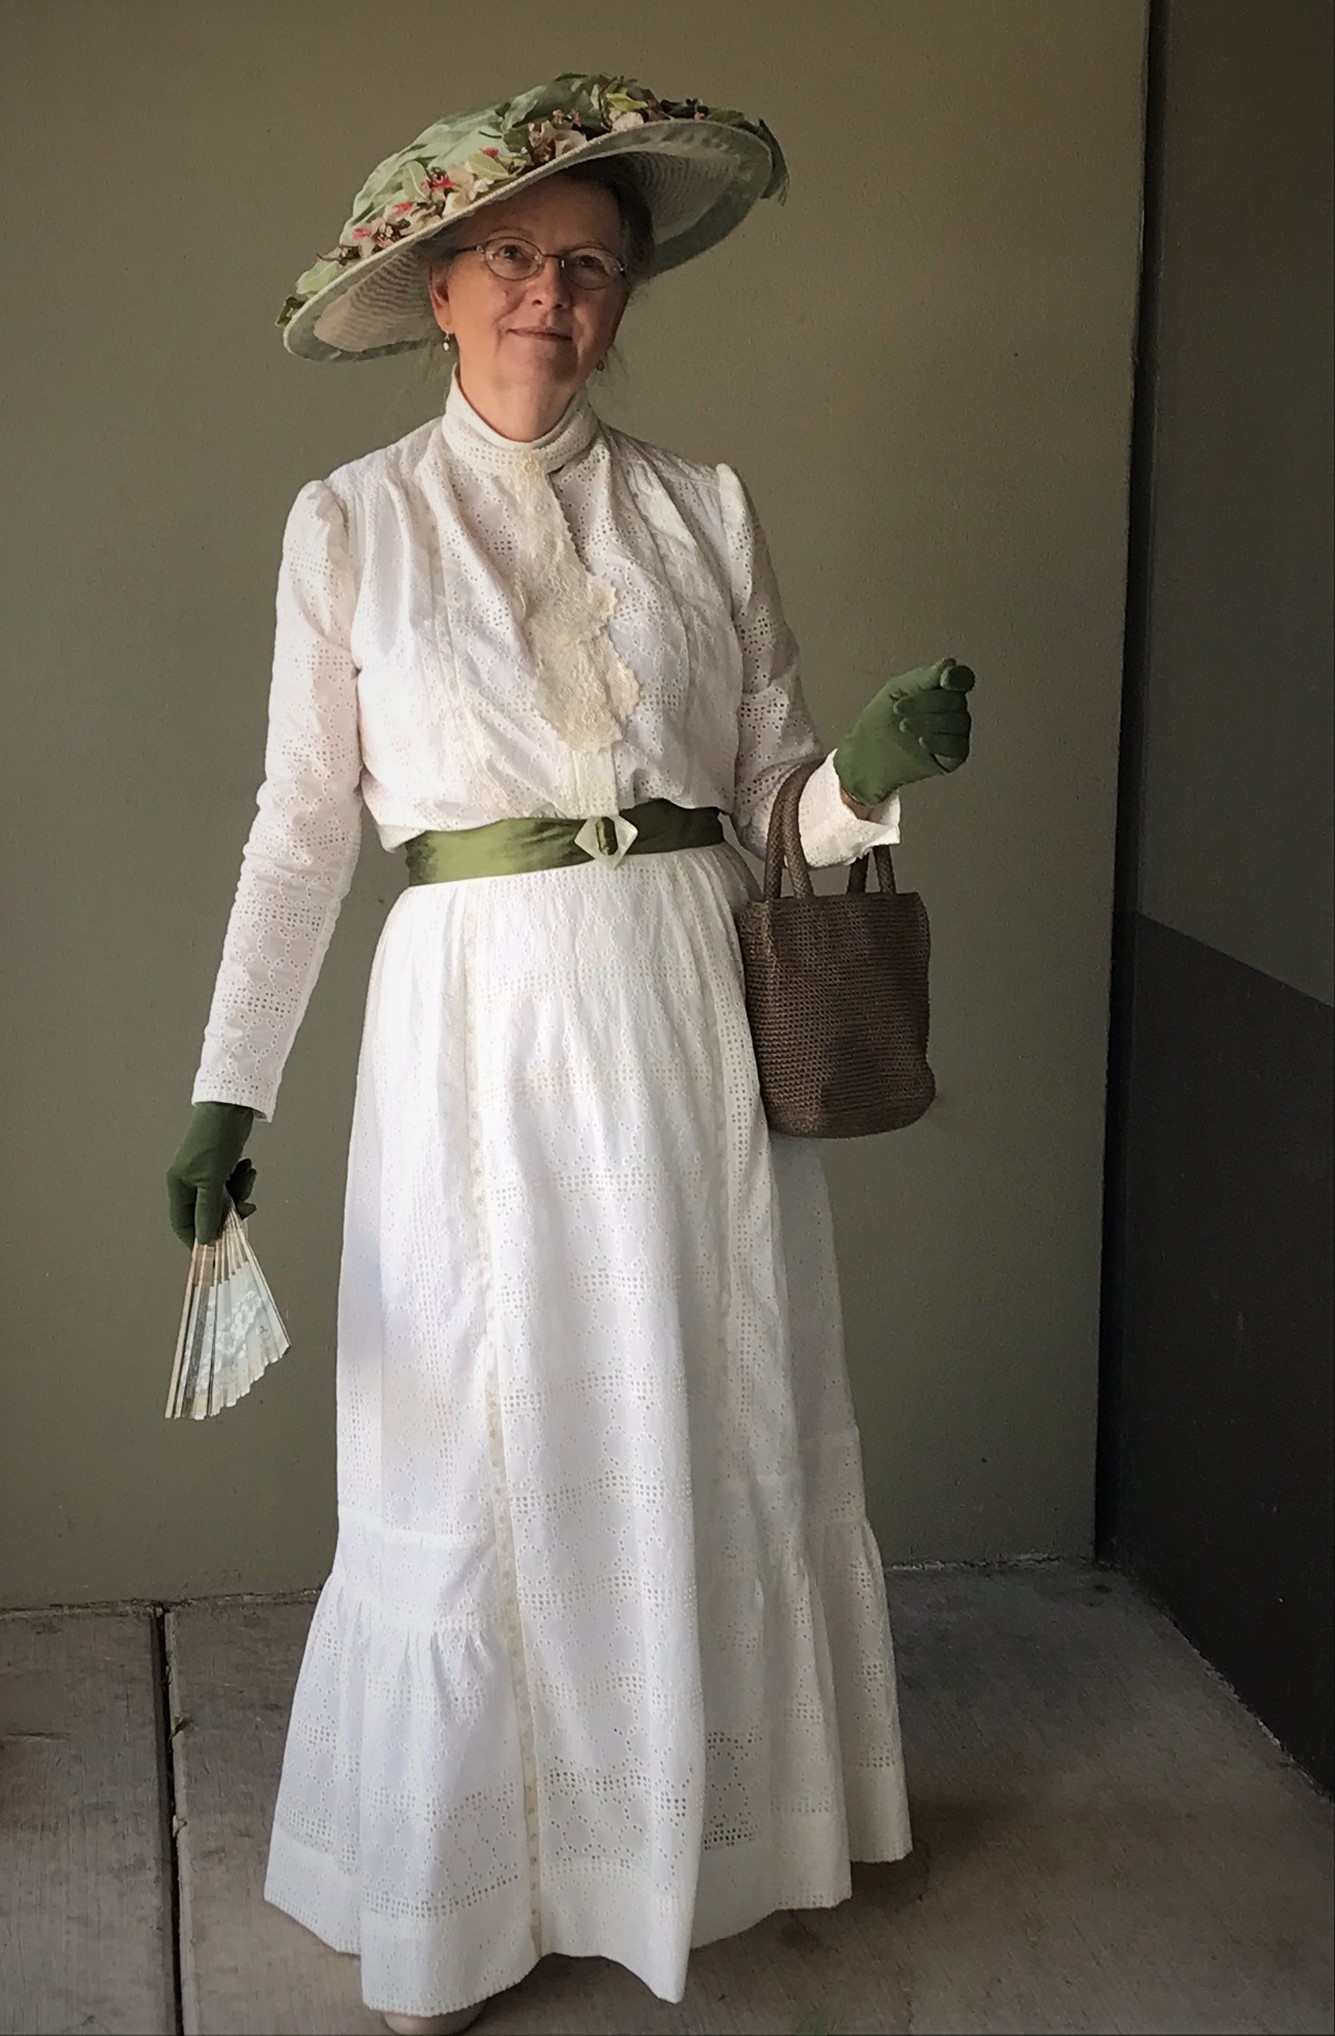
I had a marvelous, oversized Edwardian hat that I made two years ago. (This is a wonderful thing about making a period wardrobe; your clothing won’t go out of style!) I had trimmed it in a soft green silk that would go with most of my clothing, and I added a wreath of pink flowers with leaves in a similar green. The flowers can be removed later, if I decide to change my color scheme or use ostrich feathers instead.

Hat IMG_5656 close up

Because there was green in my hat, I chose green silk for a quick fabric sash. I used a vintage white mother of pearl buckle from my “stash”, and I whipped it up quickly on Saturday morning. Fortunately, I already had some green gloves to match and even a small antique fan in a soft green color, a gift from a friend. I added an antique lace neck trim. I chose modern beige shoes with a low heel and beige stockings to match. All in all, I felt quite stylish!

Front IMG_5644

The big day

The weather was beautiful; the antique store was spacious and friendly, with everyone wearing masks and staying somewhat distant. (There IS a pandemic, after all.) But shopping was a joy, and I found several treasures to bring home. Back view IMG_5659

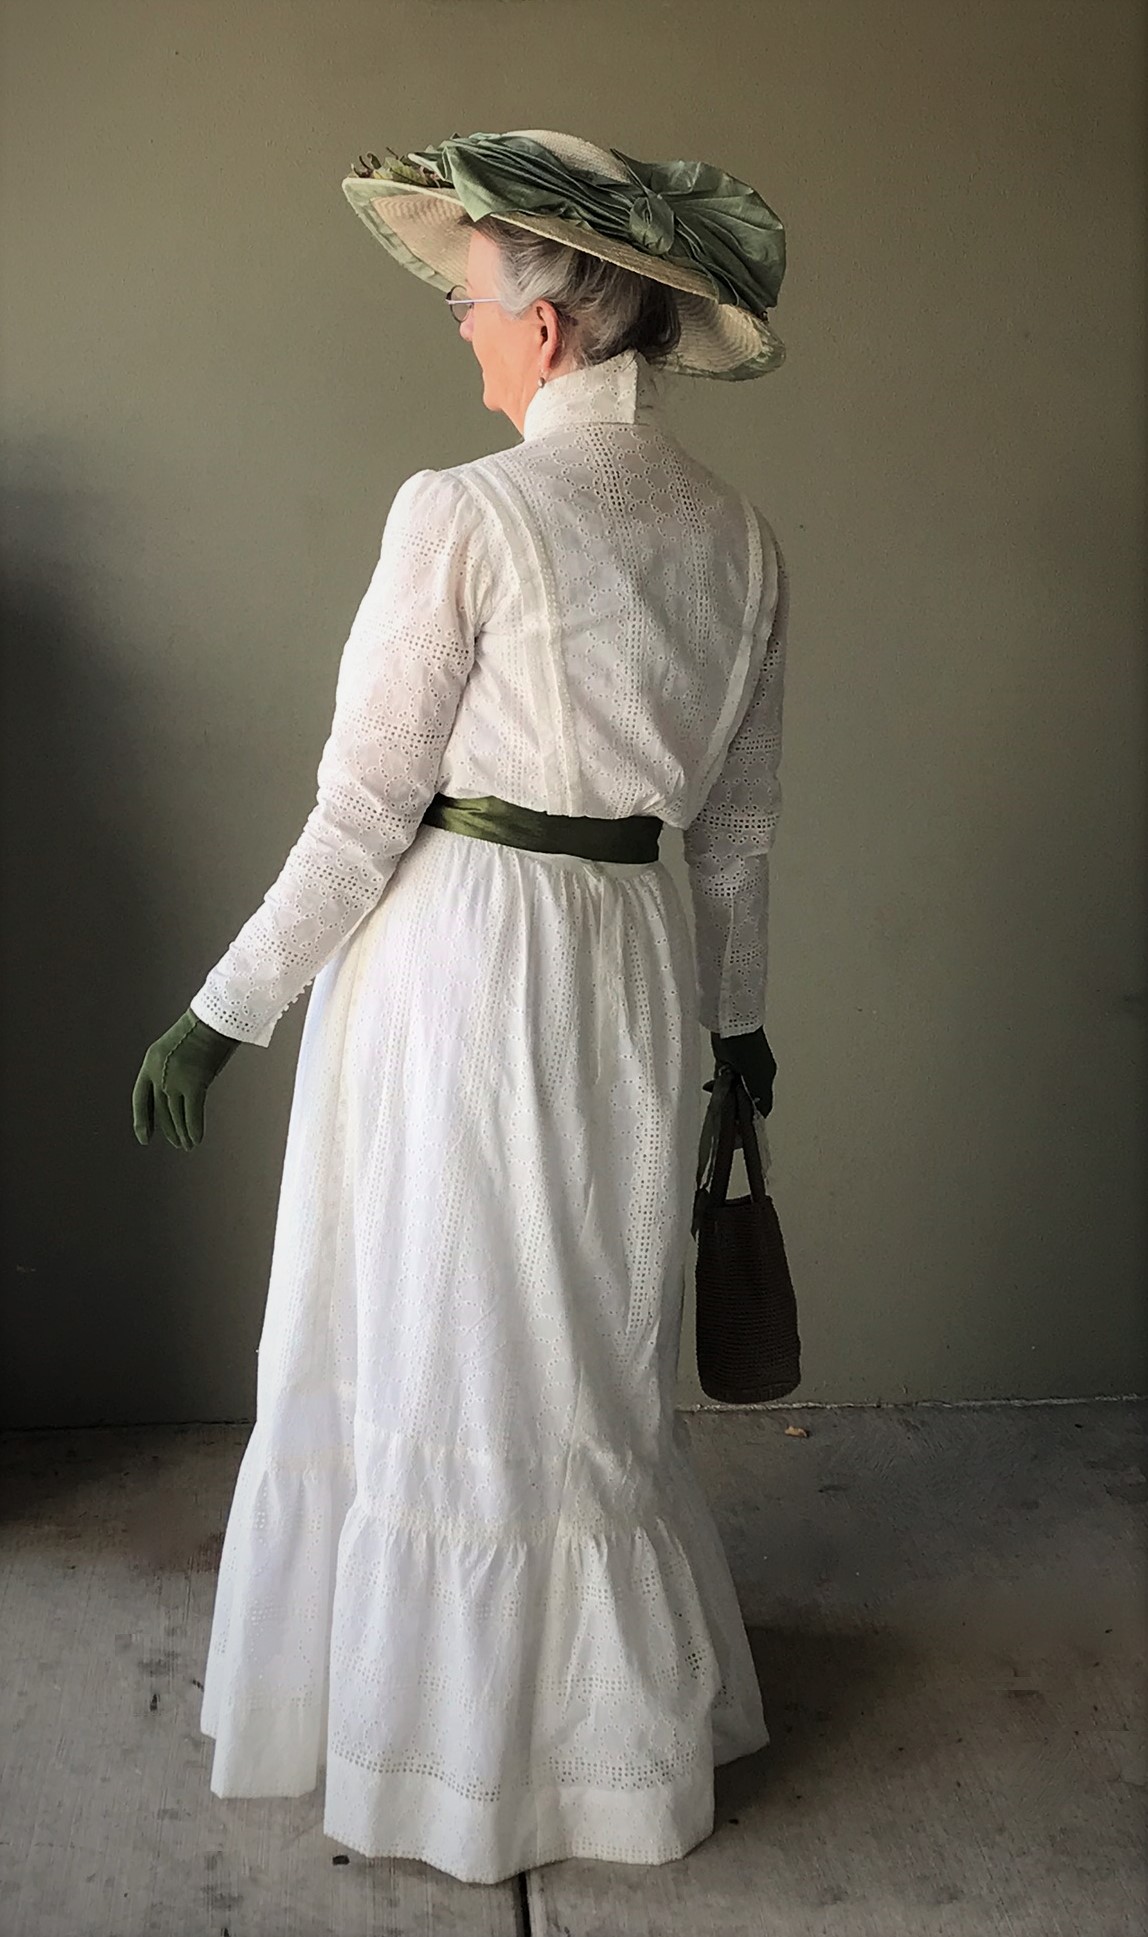
My dear friend Lisa took photos of me in my new ensemble. Our Mrs. Maggie Lynde would have been proud to appear before her friends in such a stylish 1909 gown!

Ice Cream IMG_5678

Ecru Eyelet Dress, Part I

The Invitation

Imagine that it’s 1909, summertime, and that you are tired of everything in your closet! Like our fictional character, Maggie Lynde, you have some very definite plans for your new wardrobe. You have come into a bit of money recently, and you have already begun shopping for new fabrics! Maggie has walked to all the shops in her little town, and even made a trip to Portland on the Red Electric Line in search of the exact colors for her fabrics and trims. She knows that she will need a new summer “costume” for church and shopping trips, and she has grand plans for a nice at-home dress and later, a silk gown. In the fall, she will want a wool dress in the new princess style, plus a lightweight woolen jacket to wear outdoors on cooler days.

summer 2020 cropped

Then, an invitation arrives; her friends will be meeting on Saturday for shopping and ice cream! How perfectly delightful! But what will she wear? She feels a bit shabby in her linen jacket, even with the new lace trims. She wore it recently to meet those same friends for a picnic in the park. The white “muslin” is lovely, of course, but she has worn it every summer since 1907. And oh, how she would love a new frock!

heavy lace collar detail

The linen jacket with its new lace collar

IMG_5210(1)

White dress with linen jacket

IMG_5259(1) IMG_5299

White dress alone

Maggie Lynde has always been interested in the new fashions, even when she had very little in the way of funds to buy them. She subscribes to McCall’s Magazine, which offers entertaining articles and new dress designs in every issue. So, she pulls out the June issue and begins a search. What new design could she make before Saturday, using fabrics that she already has on hand? She is particularly interested in using the ecru eyelet fabric. It is so cool and summery, and it will be easier to make up since the fabric is already embroidered.

eyelet

Here is a page showing Attractive Linen Frocks. The descriptions are so intriguing! That top one is described as a particular shade of violet linen, with soutache buttonholes in the same color. Even the buttons complete the scheme, being an amethyst crystal. She can imagine wearing this frock… but oh, dear! She doesn’t own any lavender linen; she doesn’t have time to search out the matching soutache braid or the buttons, or to make all those precise tucks – all before the shopping trip on Saturday! The other frock is shown in white linen, but somehow Maggie can’t imagine herself wearing a “one-sided effect” in drapery and tucks.

Attractive Linen Frocks

Attractive Linen Frocks

She studies a page showing New Designs in Princess Frocks. Those are quite lovely. She is sure that the long, flowing lines would be flattering on her matronly figure. But each of these would require many hours of applying trim. She would probably not be finished by Saturday, and then she would still be wearing her white lawn gown again! But here is something interesting: that grand hat! Since dress lines are slimmer this year, an overlarge hat seems to balance the figure somehow. Perhaps she should visit the milliner down the street to see what new styles might be found.

New Designs in Princess Costumes

New Designs in Princess Costumes

But then she takes a good look at Two Modish Summer Gowns. That first one, with its long front panel and sections of trim, plus the Gibson Tucks on the shoulders, would be very flattering. Perhaps she should purchase the pattern and keep it on hand. It isn’t exactly the thing for an ice cream outing, though. That choice would be the “attractive summer frock” with “insertions of entree-deux.” The description says that the original was a print of brown circles on tan-colored lawn, but it doesn’t take much imagination to picture it in Maggie’s ecru embroidered eyelet. Best of all, since her fabric has long, repeating bands of the eyelet motifs, Maggie will save some time and skip some of the insertion! Yes, this is the frock.

Two Modish Summer Gowns

Two Modish Summer Gowns

Maggie decides that she won’t need to buy this pattern. The design is remarkably like several others she has on hand. She will save the fifteen cents she would have paid and use it for that stylish princess frock pattern instead.

Part II will show you how I made Maggie’s new 1909 summer frock!


The Lady in My House

I live in a comfortable old house on a tree-lined street in Hillsboro, Oregon. When the house was built in 1909, the park across the street was still a cow pasture, and the village of Hillsboro had a population of about 2,000 people. The Commercial District, as the downtown was called, and the new residential additions were just beginning to modernize, with paved sidewalks instead of boardwalks, overhead wires carrying electricity, water and sewer service (instead of wells and septic systems), and even a telephone exchange!

Hillsboro Main Street (2)

Downtown Hillsboro, circa 1909

The house is built in the American Foursquare style. It has a roomy front porch and an open living room, with three bedrooms and a bathroom on the second floor (with the original claw foot tub). Over the years it has been remodeled; since we have lived here my husband and I have restored much of it to its 1909 appearance.

IMG_E9071 cropped

The house in 2020

The first owner of record was a local woman named Mary. She was born in 1846; she arrived in Oregon during Territorial days, traveling with her parents and siblings to live in this beautiful, fertile region of the world. In the course of her life she was a schoolteacher, a young wife, a mother of three, a woman of status, and then a woman abandoned by her husband when he was accused of embezzling. When he fled the country in 1886 in disgrace, she carried on. She took in boarders, went back to teaching, cared for her aging parents, and maintained her reputation in the community. By 1909 her parents and her estranged husband had passed on, and she and her son bought land in a developing neighborhood to have this modern home constructed. Within a few years she sold the house to live nearby with her adult daughter, so her time here was short. But I try to imagine her in these rooms as I go about my days.

I have always loved historic styles in art, furnishings, and clothing. Since I have lived in Mary’s house, I have grown a small business making historic replica clothing for reenactors and historic sites across the county. I have focused on the 19th and early 20th centuries, and I have gradually come to admire the Edwardian era more than any other. In fact, I have found several places and ways to wear Edwardian fashions; I dress for local historical society activities, and I co-founded The Edwardian Society of Oregon a few years ago. I enjoy “dressing” for our events and encouraging our members to do the same.

After 30 years here, I have approached the age that Mary was when she moved in! (How does this happen?) So, when I started dreaming of making a complete wardrobe, my 1909 house was the ideal setting. And a respectable middle-aged woman is my role model.

IMG_9329I know some of Mary’s story, but nothing about her taste in clothing or her personality. So, for my 1909 Wardrobe Project, I have chosen to create a fictional character, a contemporary of Mary’s. I will call her Maggie (my great-grandmother’s name), and I will give her a different backstory.

In the weeks and months to come, I plan to create this typical woman more fully, and I will provide her with a fashionable, functional wardrobe for her imaginary life in this fine old house.

1907 Edwardian House Dress

One of the best ways to learn about “what they wore” is to study a garment from the era. I am fortunate to own an antique cotton house dress, circa 1907 – 1909, judging by the style details. It’s a simple garment, with only a bit of trim on the yoke and collar. It has the silhouette of the era, with a flounce at the bottom and gathered sleeves.

edwardian house dress vintageLooking at the House Dress

The yoke is shaped in a “western” style. If you think about it, this dress pre-dates “western” movies and cowboy singers. This shape was a variation on the clothing of the 1890s through 1910s. It was only in the decades after that it became a symbol of the American cowboys.

edwardian house dress vintage & replica (25)

The lining is made of a thin, open-weave type of cotton. If you look inside, you can see that it’s a mixture of machine stitching and hand sewing. The darts are sewn by hand! And the area at the center front, at the button closure, plus the short plackets at the sleeve cuffs, are stitched by machine. The trim is sewn by machine, as well.

edwardian house dress vintage & replica (26)

The original dress was made for someone much shorter and smaller than I am, probably about 4’10” tall. I noticed that the original owner found it was too long in front; she took an internal tuck just above the flounce to shorten it.

edwardian house dress vintage & replica (28)

It’s quite possible that this dress was made for maternity wear. That tuck above the flounce and those hand stitched darts could have been added after the pregnancy, so the new mother could continue to wear the dress.

To make a copy for myself, I started with my own personal sloper for the bodice lining and a sleeve pattern from a 1907 blouse waist that I liked. I was able to draft the front and back by copying the angles and pleats of the original, but with my own measurements for skirt length and back waist. (I tend to be much longer in the waist than most patterns, so this is always an important measurement for me.)

The original bodice lining was attached in a different way than other garments I have seen: the lining pieces were sewn to the fashion fabrics so that the raw edges were enclosed. And yet, the lower edge of the lining was completely unfinished! More than 100 years after it was first worn, the lining is still holding up well.

edwardian house dress vintage & replica (27)


Making the House Dress

This was a fairly straightforward project. I used my personal sloper that I had already tested as the lining pattern. I drafted the yoke pattern freehand, based on the angles and proportions of the original. I allowed for pleats at center front and center back, just as the original seamstress had done. You’ll notice that I stitched the front of the dress to the lining before applying the yoke.

edwardian house dress vintage & replica (31)edwardian house dress vintage & replica (30)

edwardian house dress vintage & replica (29)


The original dress collar was made in two sections, with a seam at the center back. This apparently accommodated the unusual method of assembling it, with both lining sections sewn together over the back seam to cover the raw edges. I decided to adapt the pattern to my own sewing style, so the back seam is pressed open and the top collar piece is cut on the fold.

The original dress had a self-fabric facing sewn down along the front edge of the lining to carry the buttons and buttonholes. I copied this detail, which gives the dress a smooth fit over my undergarments  and prevents the white lining from peeking out. The outer layer is pleated into the yoke at center front, with a row of buttons. I copied these buttons, too.

The antique garment had several buttons at the lining closure, somewhat randomly spaced. I chose instead to space my buttons evenly. Here’s a helpful hint for positioning five buttons, evenly spaced, without using a measuring tape.

edwardian house dress vintage & replica (37)


First, locate the positions of the top and bottom buttonholes. Mark these with pins, perpendicular to the edge.

edwardian house dress vintage & replica (38)

Fold the edge in half, pinching a crease at the center point. Place a pin at the crease to mark this position. Finally, fold each of the other halves to find those centers, creasing and marking. Now all your buttonholes are evenly spaced!

edwardian house dress vintage & replica (39)


The sleeve pattern I used was from a design that I had already made and knew that I liked. The style is sometimes called a “bishop” sleeve: a full sleeve is gathered into a fitted cuff at the wrist. The original had a narrower bishop sleeve, while my copy had more fullness at the top.

Wearing the House Dress

This is a basic dress (sometimes called a wrapper or a “Mother Hubbard”) that a middle-class woman might have worn at home in the morning. I finished sewing on the last of the buttons at about 9:00 AM, and I wanted to wear it right away! I put it on over my basic Edwardian underpinnings: corset, petticoat, drawers. Under the corset I wore a modern white cotton tee shirt instead of my pretty white cotton chemise. (I was avoiding the work of laundering and ironing it.)

edwardian house dress vintage & replica (45)

The house dress was comfortable! I wore it the rest of the morning in my studio, and then through lunch and into the afternoon. It was perfect for a break on the porch swing with a ladies’ magazine (a “Modern Priscilla” from 1909). I finally changed out of it at about 4:00 PM.

edwardian house dress vintage & replica (44)

If it had been 1907, I might have put on something a bit nicer at noon to serve and eat dinner. Or, I might have changed into a street costume after dinner to go out and run errands or visit friends. As it was, I had a quiet day at home, and stayed comfortable all day long.


A Regency Picnic

We were dressed for a day in the country... in 1810!

We were dressed for a day in the country… in 1810!

One reason that I first became involved in making replica clothing was so that I could help create the romance and beauty of the past for people living today. Sometimes it all comes together in a perfect afternoon!

The food we brought traveled well: pickled vegetables, small meat pies, fresh cherries, and cool water.

Pittnick 2012-009

Pittnick 2012-005


It was a perfect day to be outdoors! I understand that our climate in the Pacific Northwest is similar to that of England. I like to imagine that Jane Austen’s contemporaries might have enjoyed a similar day wearing similar fashions.

There was more to this day than just our picnic! The event was coordinated by the Oregon Regency Society; our friends and companions were equally equipped for an afternoon of pleasure.

This picnic has become an annual tradition. We have come to expect a game of graces!

All of the dresses, bonnets and underpinnings for our little group of ladies were made by Lavender’s Green Historic Clothing. But it takes more than just the clothing to create a day like this. We were fortunate to be able to gather on the grounds of the lovely Pittock Mansion in Portland, Oregon. The Oregon Regency Society has members who, like us, appreciate the quality and style of authentic clothing, food, and manners. And of course, an Oregon summer afternoon gave us fresh air and balmy temperatures for our Regency picnic.